Table of Contents
Advertisement
Installation Guide
Installation Guide
Contents
Prior to installation . . . . . . . . . . . . . . . . . . . . . . . . . . . . . . . . . . . . . . . . . . . . . . . . . . . . . . . . . . . . . 2
Symbols used in the installation guide . . . . . . . . . . . . . . . . . . . . . . . . . . . . . . . . . . . . . . . . . . . . . . 2
Safety instructions . . . . . . . . . . . . . . . . . . . . . . . . . . . . . . . . . . . . . . . . . . . . . . . . . . . . . . . . . . . . . 3
Installation instructions . . . . . . . . . . . . . . . . . . . . . . . . . . . . . . . . . . . . . . . . . . . . . . . . . . . . . . . . . 4
Connection diagram for the navigation system . . . . . . . . . . . . . . . . . . . . . . . . . . . . . . . . . . . . . . . 5
Installation of the GPS antenna . . . . . . . . . . . . . . . . . . . . . . . . . . . . . . . . . . . . . . . . . . . . . . . . . . . 6
Connecting a GSM antenna . . . . . . . . . . . . . . . . . . . . . . . . . . . . . . . . . . . . . . . . . . . . . . . . . . . . . . 8
Installation of the microphone . . . . . . . . . . . . . . . . . . . . . . . . . . . . . . . . . . . . . . . . . . . . . . . . . . . . 9
Connection of the reverse signal . . . . . . . . . . . . . . . . . . . . . . . . . . . . . . . . . . . . . . . . . . . . . . . . . . 12
Connection of the speed signal (GAL) from the speedometer/ tachometer . . . . . . . . . . . . . . . . . . 13
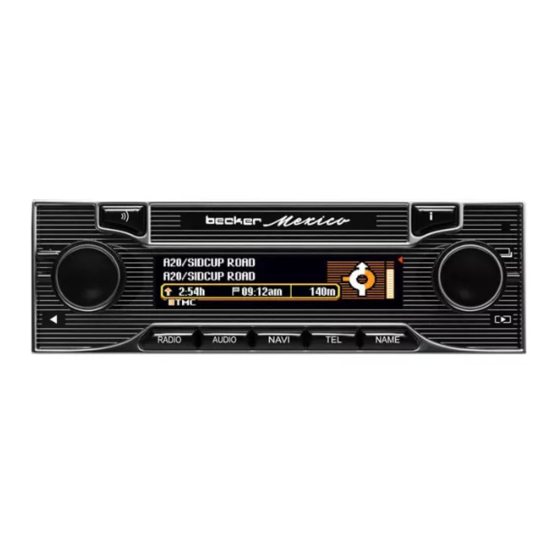
Installation/ Removal of the Mexico . . . . . . . . . . . . . . . . . . . . . . . . . . . . . . . . . . . . . . . . . . . . . . . 16
Commissioning and calibration . . . . . . . . . . . . . . . . . . . . . . . . . . . . . . . . . . . . . . . . . . . . . . . . . . . 17
Service mode . . . . . . . . . . . . . . . . . . . . . . . . . . . . . . . . . . . . . . . . . . . . . . . . . . . . . . . . . . . . . . . . . 20
Connections . . . . . . . . . . . . . . . . . . . . . . . . . . . . . . . . . . . . . . . . . . . . . . . . . . . . . . . . . . . . . . . . . . 24
Prior to installation
Before starting installation, please read this installation guide carefully. In particular, please pay attention to the safety and
installation instructions.
Symbols used in the installation guide
G
denotes instructions which are important for your safety and the safety of others.
denotes instructions which are important for the installation and function of the unit.
2
Advertisement
Table of Contents

Related Manuals for Becker Mexico 7948


Summary of Contents for Becker Mexico 7948
-
Page 1: Table Of Contents
Installation Guide Installation Guide Contents Prior to installation ............. 2 Symbols used in the installation guide . -
Page 2: Safety Instructions
Installation Guide Safety instructions Incorrect installation Incorrect installation may result in damage to the unit or to the vehicle. Specialist knowledge and skills are required to install the unit and its components. We strongly recommend that you have the unit installed by a specialist workshop. Risk of injury Installing the components incorrectly may lead to injuries in the event of a road traffic accident or render safety devices ineffective. -
Page 3: Installation Instructions
Installation Guide Installation instructions Damage due to polarity reversal or short-circuit Incorrect cable connections and short-circuits can seriously damage the unit. Disconnect the vehicle battery before installing the unit. In order to avoid short-circuits and malfunctions, install the cables so that they cannot be pinched, kinked, chafed or detached. -
Page 4: Connection Diagram For The Navigation System
Installation Guide Connection diagram for the navigation system Radio aerial Speedometer/speedometer cable signal GPS antenna Sound system/ loudspeaker GSM antenn Navigation unit Microphone Reverse signal Power supply Connection options are described in detail on Page 24. The connection for a GSM antenna is only provided in devices with a built-in telephone. The power supply must be protected separately by its own fuses. -
Page 5: Installation Of The Gps Antenna
Installation Guide Installation of the GPS antenna Risk of injury People with pacemakers should avoid proximity to the magnetic antenna and should not carry the antenna on their person, as this may affect the function of the pacemaker. Keep the magnetic antenna away from data storage media (disks, credit cards, magnetic cards etc.) and electronic and precision engineering equipment, as this may cause data to be deleted. - Page 6 Installation Guide • Inside the vehicle The GPS antenna is not suitable for installation in vehicles with anti-glare windows (metalised thermo-glass or metal foil (can be seen on the window label - SIGLA SOL, SIGLA CHROM, SIGLA, KOOL-OF, SUNGATE, etc.) and vehicles with fine-meshed heating wires in the windows. Information on installation position When selecting the installation position, ensure that the antenna has a clear view in all directions, and that it is not covered by the windscreen wipers.
-
Page 7: Connecting A Gsm Antenna
Installation Guide a. Secure the antenna to the base plate (1) with magnets. b. Remove protective strip from top of adhesive tape (2) and stick to the centre of the base plate underside. c. Remove protective strip from bottom of adhesive tape (2) and stick the antenna and base plate onto the vehicle console beneath the windscreen at the installation position. -
Page 8: Installation Of The Microphone
Installation Guide Installation of the microphone The microphone should be placed in the vehicle to allow optimal recognition of the speaker’s voice. Possible positions in the vehicle for the microphone can be seen in the following diagram. The installation position should be as far away from the loudspeakers, and as near to the speaker, as possible. If prob- lems occur, different positions should be tested. - Page 9 Installation Guide If the microphone is to be affixed to a rough or uneven surface, the screw-on plate F should be affixed first with the screw E. (To avoid risk of damage to any cables installed underneath or other vehicle components, please pay attention to screw length.) Subsequently, affix the microphone to the screw-on plate F with the adhesive strip D.
- Page 10 Installation Guide Connecting a microphone to the Mexico a. Connection without CD changer or without remote kit for an iPod™ For connecting the microphone to a device without CD changer or without a remote kit for an iPod™, the enc- losed blue socket must be connected as described below.
-
Page 11: Connection Of The Reverse Signal
Installation Guide Connection of the reverse signal Pick-up points for the reverse signal vary from vehicle to vehicle. If you are in any doubt, please contact your vehicle manufacturer or authorised specialist workshop. If the switch on the gearbox or shift linkage is accessible: •... -
Page 12: Connection Of The Speed Signal (Gal) From The Speedometer/ Tachometer
Installation Guide Connection of the speed signal (GAL) from the speedometer/ tachometer Accident hazard Incorrectly connected wiring may result in damage to or destruction of vehicle components and safety devices. If you are in any doubt, please contact your vehicle manufacturer or authorised specialist workshop. Electronic speedometer •... - Page 13 Installation Guide Mechanical speedometer with built-in speed sensor in the speedometer cable • Remove the signal from the speed sensor, extend and connect to socket A pin 1. GAL signal • Minimum requirement for the signal: 0 Hz - 4 kHz/square-wave signal (no inductive sensor) Low level <...
- Page 14 Installation Guide Installing the speed sensor directly on the gearbox • Release the speedometer cable and screw speed sensor onto gearbox. Screw released speedometer cable onto the speed sensor and connect the wires. Cable connections for the speed sensor Brown earth (terminal 31) Black power supply (terminal 15), 9 - 16V, 30 mA...
-
Page 15: Installation/ Removal Of The Mexico
Installation Guide Installation/ Removal of the Mexico • Installation: The Mexico features an integrated universal bracket for DIN installation slots. An installation frame is not required. The Mexico is inserted into the installation slot and secured with the slides supplied. To install, complete all electrical connections. -
Page 16: Commissioning And Calibration
Installation Guide Commissioning and calibration • For commissioning and calibration, you must switch on the vehicle ignition. Switch on the device and enter the code (see the operation guide for a detailed description). The vehicle must be parked outdoors, ensuring that it has a clear view in all directions (not in the immediate vicinity of buildings). - Page 17 Installation Guide Once sufficient GPS reception can be assured, the Mexico switches to the next display. • You are prompted to take a calibration journey. Carry out the calibration journey. 8004 During the journey, the speed signal (GAL) is automatically adapted to the vehicle-specific data and the gyro sensor is automatically adapted to the installation position of the unit.
- Page 18 Installation Guide • The Navigation menu appears to indicate that calibration has been completed successfully. version The navigation system is only ready for operation on completion of the calibration journey. Final precision is only achieved after a further journey. • For correct navigation on routes with time-dependent traffic guidance, the time should be set correctly as described in the operation guide under “Settings”...
-
Page 19: Service Mode
Installation Guide Service mode In Service mode, various functions can be checked in detail and the calibration can be modified. • Switch on the unit (see operation guide). Enter code (see operation guide). • Press at the same time. The Service menu appears. Turn the rotary control/push button to select one of the following options:... - Page 20 Installation Guide Calibration journey status - Calibration journey display Select in the Service menu. The calibration status (e.g. ), type of positioning (e.g. the road along which the vehicle is currently travelling (if available), 8006 the current geographical position, the height above sea level (if available) and the number of satellites received are displayed.
- Page 21 Installation Guide Sensors - Sensor function test Select in the Service menu. 8008 • Move the vehicle several metres forwards or backwards for the speed signal function test. The number value behind must increase (also at low speed). The number value behind should not increase when the vehicle is in neutral or when the accelerator is pressed while the vehicle is parked.
- Page 22 Installation Guide GPS information - GPS function test Select in the Service menu. 8009 When functionality and GPS reception are working correctly, the number of satellites received (e.g. ), the date and time and the type of positioning currently possible (e.g. ) are displayed.
-
Page 23: Connections
LineOut right front Illumination (Terminal 58) Subwoofer LineOut Switched positive (Terminal 15) Socket C2 Earth (Terminal 31) 7-12 Specific connection for Becker CD changer Socket B Socket C3 Loudspeaker right rear + Loudspeaker right rear - NF - Hands-free microphone...
Need help?
Do you have a question about the Mexico 7948 and is the answer not in the manual?
Questions and answers