Table of Contents
Advertisement
road safety
53
54
55
Manual FM tuning
56
Regionalisation
56
57
Turning frequency display on / off
57
Switching radio text on / off
58
Traffic programme (TP)
58
58
58
58
58
programming
59
59
59
Telephone muting
59
Switching on AM mode
59
Switching on AM menu mode
Selecting the AM waveband
60
Setting options for station selection
60
60
Scan search
60
Calling up/storing MW, LW,
60
SW stations
60
61
Autostore MW, LW
61
CD mode
62
62
62
63
skipping
63
64
64
64
65
65
65
66
Text display
66
67
67
MP3 mode
67
67
68
medium
68
68
68
68
68
69
69
69
Contents
70
70
70
71
71
71
71
72
72
72
72
73
73
73
74
74
74
75
76
77
77
77
78
78
78
51
Advertisement
Table of Contents

Related Manuals for Becker Mexico Pro 7930


Summary of Contents for Becker Mexico Pro 7930
-
Page 1: Table Of Contents
Contents Safety instructions Programme filtering for FM-DAS 61 CD mode Information regarding general Programme type selection (PTY) Notes on compact discs (CD) road safety Turning PTY display on / off Inserting / ejecting CDs Arrangement of controls Calling up / storing FM stations Forward / backward track Manual FM tuning skipping... - Page 2 Contents MP3 settings menu Service menu Number of folders/playlists/tracks Calling up / exiting service menu Displaying name of folder/playlist CD Changer reset Switching between track/ID3 tag Unit reset display Explanation CD changer mode RDS SYSTEM Operational readiness of DAS Seek Qual. level CD changer DAS Seek Name level Loading / ejecting the CD magazine...
-
Page 3: Safety Instructions
Safety instructions Operation of the unit is permitted only if traffic conditions are suitable and you are absolutely sure that you, your pas- sengers or other motorists are not endangered, obstructed or inconvenienced. The unit may only be used for its intended purpose. The volume of the radio should be adjusted so that external noise is still audible. -
Page 4: Information Regarding General Road Safety
Information regarding general road safety This car radio device is intended and approved for installation and operation in passenger cars, commercial vehicles and buses (vehicle classes M, N and O) whose electric system has a rated voltage of 12V. Installation and maintenance should only be carried out by specialists. Faulty installation or maintenance can result in the malfunctioning of the motor vehicle’s electronic systems. -
Page 5: Arrangement Of Controls
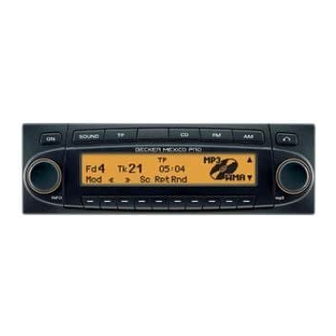
Arrangement of controls Arrangement of controls 1 Left rotary control (INFO) 7 FM selection ( 2 On / off switch ( 8 AM selection ( 3 Tone button ( 9 CD eject button ( 4 Road traffic announcement button ( 10 Right rotary control 5 LED 11 Multifunction buttons... -
Page 6: Anti-Theft Device
Anti-theft device Anti-theft device Entering the code number Note Attention: If the car radio is disconnected from the It is important to store the CODE The waiting time elapses only when the electrical supply source, the anti-theft CARD in a safe place outside of the ve- ignition and unit are switched on. -
Page 7: Removing The Portable Panel
Anti-theft device Removing the portable panel The volume is limited to a maximum Attaching the portable panel level after the display has been folded As an effective anti-theft device, the Insert the portable panel into the lower down. After 20 seconds, an audible sig- portable panel (A) may be removed from left catch and then engage it in the nal indicates that the control component... -
Page 8: General Operation
General operation General Operation Switching on/off Setting the volume Setting the bass Press the button and then the Press Turn the left-hand rotary control multifunction button. The volume increases or decreases. The unit can also be switched on/off via Activating the tone menu the vehicle ignition. -
Page 9: Fader
General operation Fader Linear adjustment Switching loudness on / off Press the button and then the The tone adjustments for the current sig- Press the button and then the multifunction button. nal source (i.e. FM) can be reset to a multifunction button. -
Page 10: Radio Mode
Radio mode Radio mode Switching on FM mode The last selected station and level are Dynamic autostore (FM-DAS) displayed. Request FM menu mode. Press By pressing repeatedly, you can choose The FM waveband will start up with the between the levels Seek Quality memory level and frequency that was... -
Page 11: Station Search Fm-Das
Radio mode Station search FM-DAS Programme filtering for FM- Turn the right-hand rotary control to the left or right. You have the option of filtering various stations from the FM-DAS station list. The radio displays the receivable and If a programme has previously been identified stations in descending/ascend- selected that belongs to the particular Request FM menu mode. -
Page 12: Programme Type Selection (Pty)
Radio mode Programme type selection Turning PTY display on / off Storing: 12 frequencies or programmes can be Select FM menu mode. (PTY) stored per waveband. Request FM menu mode. Find desired station. With the multifunction button, select either (PTY display on) or Press the multifunction button. - Page 13 Radio mode Manual FM tuning Regionalisation Select FM menu mode. The RDS diversity function is independ- Using the multifunction button ent of region. As a result, the RDS diver- select the Stations Fix level. sity function can lead to the radio Then select the desired regional sub- switching between various regional pro- grammes which may vary in terms of...
-
Page 14: Switching Regionalisation On / Off
Radio mode Switching regionalisation on / Switching radio text on / off Note Radio text cannot be displayed unless Warning Select FM menu mode. the selected station transmits radio text. Accident hazard Poor reception or interference may dis- Since information transmitted via radio tort the radio text or completely prevent text is constantly changing, we recom- it from being displayed. -
Page 15: Activating / Quitting The Tp Menu
Radio mode Traffic programme (TP) Direct programming enables a TP sta- Activating / quitting the TP tion to be programmed that is not the FM menu If an RDS diversity station broadcasts station being received. This means, for Activating: TP announcements, it is possible to in- example, that a particular FM station can Press the button (traffic an-... -
Page 16: Selecting Automatic Tracking
Radio mode Switching on: Selecting automatic tracking Selecting / cancelling direct Switch on TP menu. In all modes and wavebands, automatic programming tracking can be turned on by pressing Switch on TP menu. and holding the button for more than 2 seconds. -
Page 17: Interrupting Tp Announcements
Radio mode Switching mute on/off TP announcement volume Telephone muting After selection of a TP or EON Select TP menu. If a telephone is installed in the vehicle station, the mute function can be Press the multifunction button. and its mute control is linked to the car activated by pressing the button radio, the User menu (page 84) can be... -
Page 18: Station Search Mw, Lw, Sw
Radio mode Switching on AM mode The last selected waveband and station Scan search are set. In the desired waveband ( Press To select the Medium Wave press the right-hand rotary control ) and Long Wave Short Wave The last selected AM station and the cor- wavebands, repeatedly press the responding waveband are selected. -
Page 19: Calling Up/Storing Mw, Lw Sw Stations
Radio mode Calling up/storing MW, LW, Autostore MW, LW Manual MW, LW, SW tuning SW stations Select AM menu mode within the de- Select AM menu mode within the de- sired waveband. sired waveband. Storing: In each case up to 12 stations can be stored using the station buttons. -
Page 20: Notes On Compact Discs (Cd)
CD mode CD mode Notes on compact discs (CD) • Before playing the CD, it should be If there is already a CD in the slot, press cleaned with a special, commercially button. If CD-changer/AUX Sound interruptions may occur if the CD available cleaning cloth, wiping from mode was selected last, the unit must be is soiled. -
Page 21: Forward / Backward Track
CD mode Forward / backward track Scan search Fast forward / reverse terminates when the multifunction button skipping Pressing the multifunction but- is released. ton activates the scan search function. Turn right rotary control to right / left. Track repeat Through further turning of the right rota- “Track repeat”... -
Page 22: Random Play
CD mode Random play CD settings menu Switching between Track/CD Text display Pressing the multifunction but- Press the button in CD mode. You can set here whether in the CD ton activates the random play func- menu the track display is provided by tion. -
Page 23: Temperature Protection Circuit
CD mode Temperature protection circuit Notes on CD-R and CD-RWs Notes on copy-protected CDs To protect the laser diode from exces- You can play CD-Rs (writeable CDs) In some cases, problems may arise when sive heat, a temperature protection cir- and CD-RW (rewritable CDs) on this attempting to play copy-protected CDs, cuit is integrated into the unit. -
Page 24: General Notes On Mp3
MP3 mode MP3 mode General notes on MP3 Creating an MP3/WMA For WMA, WMA 9 with a bit rate of 64 - 320 kbit/s is supported. For creat- storage medium The music that can be played when your ing WMA, we recommend using Win- unit is in MP3 mode is generally copy- •... -
Page 25: Creating A Playlist
MP3 mode • You can play CD-Rs (writeable CDs) Creating a playlist We used the freeware WINAMP in our and CD-RWs (rewritable CDs) on this trials for creating playlists. Other pro- Due to the number of MP3 files that can unit, grams may also be used to create playl- be saved on an MP3 CD, the MP3 CD... -
Page 26: Inserting /Ejecting Mp3 Cds
MP3 mode Inserting /ejecting MP3 CDs If there is already an MP3 CD in the slot, Also refer to the following sections un- der CD mode (Page 70): press the button. If CD-changer/ Inserting CDs: AUX mode was selected last, the unit •... -
Page 27: Switching Between Folder/Playlist
MP3 mode Switching between folder/ Changing folder/playlist Note: playlist multifunction button is only Press the right rotary control displayed when playlists are saved on Turn the right rotary control to se- If playlists are stored on the inserted the inserted MP3 CD. lect the desired folder or the desired MP3 CD, it is possible to switch be- playlist. -
Page 28: Fast Forward / Reverse
MP3 mode Fast forward / reverse Pressing the multifunction but- MP3 settings menu ton again deactivates the “Random Fast forward (audible) is activated by Press the button whilst in MP3 Play” function. pressing the multifunction but- mode. ton and fast reverse (audible) is acti- Track repeat vated pressing... -
Page 29: Displaying Name Of Folder/Playlist
MP3 mode Switching between track/ID3 tag display Here you can set whether in the MP3 menu the track display is provided by the numerical track display or by dis- Press the multifunction button. playing the ID3 tag for the current track. The total number of playlists ( ), fold- Press the left-hand rotary control... -
Page 30: Cd Changer Mode
CD changer mode CD changer mode Operational readiness of CD Selecting CD changer mode Changing/selecting CDs changer Press Activating CD changer mode. If the CD Changer mode was selected Press the right rotary control If a CD changer is connected to the car last, or if there is no CD or Navigation radio, the CD changer is ready for oper- CD inserted into the CD player, the unit... -
Page 31: Cdc Settings Menu
CD changer mode For additional operating instructions, re- CDC settings menu Displaying number of tracks fer to CD mode (Page 70): and total playing time Press the button in CDC mode. • “Notes on compact discs (CD)” on Requesting CDC settings menu. page 70 •... -
Page 32: Naming A Cd
CD changer mode Naming a CD Assigning/changing names: Deleting saved names: Requesting CDC settings menu. Requesting CDC settings menu. It is possible to assign a name to the CD Press the multifunction button. currently playing, change a previously Using the right rotary control , se- assigned name and delete stored names. -
Page 33: Cd Filter Function
CD changer mode CD filter function Filtering tracks: Silverstone 7860 and 2660 CD chang- You can filter out individual tracks on a ers. CD. These tracks are then not included The tracks to be filtered out of the cur- when the CD is played. rent CD can be selected using the right Note: rotary control... -
Page 34: User Settings
User settings User settings Opening / quitting User Setting the GAL (Gal) Telephone mute function (Tel) The GAL is a car radio control circuit, If a telephone with hands-free operation Settings menu which automatically adjusts the car ra- is installed, the call may be routed After requesting the user settings, the dio volume according to vehicle speed. -
Page 35: Display Brightness (Lum)
User settings Display brightness (Lum) LED setting Setting reception optimisation With this function, the brightness of the This function can be used to switch the (M/S) display can be set. LED function (flashes when the unit is In order to suppress reception-related in- To set, call up user menu. -
Page 36: Aux Input (Aux)
User settings AUX input (Aux) Signal tone volume (BeV) This can be used to switch on the CD The volume of signal tones (e.g. storage changer AF connections if no CD chang- confirmation) can be set using this func- er is connected. An external unit (Disc- tion. -
Page 37: Service Menu
Service menu Service menu Calling up / exiting service The individual entries can be selected Unit reset by pressing multifunction buttons menu If a malfunction of the unit should occur, , or by turning the such that it becomes inoperable or defec- The following information can be called right-hand rotary control tive in some other way, a restart of the... -
Page 38: Installation And Removal Instructions
Installation and removal instructions Installation and removal instructions A universal bracket for DIN installation slots is integrated into this car radio. An installation frame is not required. The unit is inserted into the installation slot and secured with the slides supplied. To install, complete all electrical connections. - Page 39 Installation and removal instructions To remove the unit, it must first be unlocked. To do this, push in both slides to the second detent position as shown in Figure A. Subsequently, withdraw the unit using both slides (Figure C). Then remove the slides by pressing the springs on the right and left sides of the unit.
-
Page 40: Connection Instructions
Subwoofer LineOut Telephone mute / clearing function Permanent positive (Terminal 30) Socket C2 Control output for automatic antenna / amplifier 7-12 Specific connection for Becker CD changer Illumination (Terminal 58) Switched positive (Terminal 15) Socket C3 Earth (Terminal 31) AF – telephone input Earth –... -
Page 41: Explanation
Explanations Explanation RDS SYSTEM DAS Seek Name level Stations Fix level This car radio is capable of receiving At the level DAS Seek Name all re- At the level Stations Fix frequen- RDS signals (RDS = Radio Data Sys- ceivable and identifiable RDS pro- cies can be assigned to the station but- tem) on the VHF bands. - Page 42 Explanations EDUCATE Education LIGHT M Light music Radio plays and literature DRAMA Classical music CLASSICS Culture, church, society CULTURE EASY M Musical entertainment VARIED Light entertainment SPORT Sport OTHER M Special music programmes Weather report WEATHER FINANCE Financial information CHILDPRG Children’s programmes SOCIAL Social reports...
-
Page 43: Technical Terminology Glossary
Technical terminology glossary Technical terminology glossary Autostore Code number With this function, the stations with the A secret number that must be entered to Format for playlists supported by unit. strongest signals are stored in the auto- activate the unit. store memory, sorted by reception qual- ity. - Page 44 Technical terminology glossary (Radio Data System) (Traffic Programme) A process for transmission of inaudible Identification for traffic programme information on the VHF band. broadcasters. Regionalisation Regional identification contained in (Windows Media Audio) RDS. Station transmits regional pro- Special compression process developed ®...
-
Page 45: Index
Index Index Assigning CD names ... .82 DAS ......60 ID3 tag . - Page 46 Index Playlist ....75 Scan Temperature protection circuit ..73 M3U ..... .75 CD .
- Page 47 Index Treble ......58 Tuning steps ....69 Volume Signal tone .
-
Page 48: Technical Data
• Supply voltage: 12 Volt • Loudspeaker impedance: min. 4 • CD Connection: Becker Silverstone 2630, Silverstone • Line out: 2660 and Silverstone 7860 CD chang- 4 x analog Line Out (Va max 3Veff at ers can be connected. 10 k ) •... -
Page 49: Notice
Dear Listener, In conformance with current EC guidelines, any person may operate this radio receiver. This unit conforms to the current valid European or harmonised national standards. This designation is your guarantee that the unit conforms to the applicable specifications regarding electromagnetic compatibility.
Need help?
Do you have a question about the Mexico Pro 7930 and is the answer not in the manual?
Questions and answers
How do I find out the code number as I do not have a record of it ?
The code number for the Becker Mexico Pro 7930 can be found on the enclosed CODE CARD.
This answer is automatically generated
@Mr. Anderson