Table of Contents
Advertisement
Contents
general road safety
110
113
114
centre
115
116
116
117
destination road
117
Selecting intersection for
destination road
118
118
Storing a destination in the
118
destination memory
118
118
destination memory
118
119
119
119
119
119
stopover
120
120
120
122
123
123
124
124
125
126
127
TMC
128
129
130
guidance
130
131
131
132
133
133
133
133
133
133
134
134
134
134
134
135
135
135
137
138
138
139
140
140
141
141
141
142
143
143
145
147
147
148
148
149
149
150
150
150
151
151
152
Advertisement
Table of Contents

Related Manuals for Becker Indianapolis 7920


Summary of Contents for Becker Indianapolis 7920
-
Page 1: Table Of Contents
Contents Safety instructions Selecting destination via post code Dynamic route guidance with Entering the destination town Information regarding general road safety Entering the destination town What is dynamic route guidance? centre Arrangement of controls Dynamic route guidance Destination input via coordinates Displaying traffic information Anti-theft device Route menu... - Page 2 Contents Radio mode Switching mute on/off Switching between folder/ Interrupting TP announcements Switching on radio mode playlist TP Announcement volume Switching on Radio Menu Mode Forward / backward track skipping Switching TMC on/off Selecting the FM waveband Changing folder/playlist Selecting TMC station Selecting the AM waveband Scan search Settings for station selection...
- Page 3 Contents Display brightness (Lum) Installation Guide LED setting Prior to installation Setting reception optimisation Symbols used in the installation (M/S) guide Setting navigation announcements Safety instructions (Nav) Installation instructions AUX input (Aux) Connection diagram for the Display compass (Cmp) navigation system Signal tone volume (BeV) Installation of the GPS antenna Service menu...
-
Page 4: Safety Instructions
Safety instructions Operation of the unit is permitted only if the traffic conditions are suitable and you are absolutely sure that you, your passengers or other motorists are not endangered, obstructed or inconvenienced. In all cases, all applicable road traffic regulations must be obeyed. Destinations may only be entered when the vehicle is stationary. -
Page 5: Information Regarding General Road Safety
Information regarding general road safety This car radio device is intended and approved for installation and operation in passenger cars, commercial vehicles and buses (vehicle classes M, N and O) whose electric system has a rated voltage of 12V. Installation and maintenance should only be carried out by specialists. Faulty installation or maintenance can result in the malfunctioning of the motor vehicle’s electronic systems. -
Page 6: Arrangement Of Controls
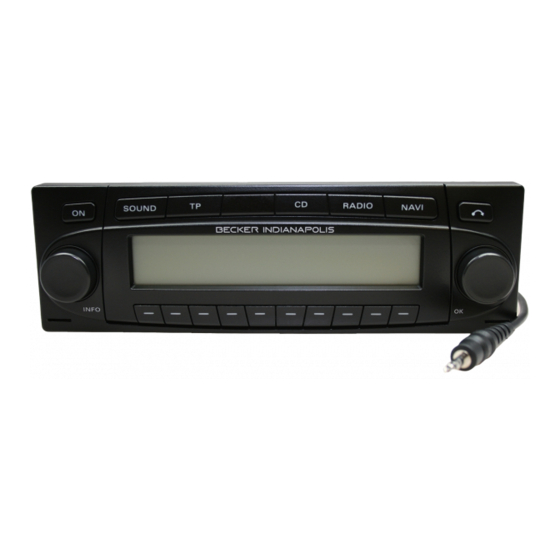
Arrangement of controls Arrangement of controls 1 Left rotary control (INFO) 7 Select radio mode ( 2 On / off switch ( 8 Select navigation ( 3 Tone button ( 9 CD eject button ( 4 Road traffic announcement button ( 10 Right rotary control (OK) 5 LED... -
Page 7: Anti-Theft Device
Anti-theft device Anti-theft device Entering the code number Note Attention: If the car radio is disconnected from the It is important to store the CODE The waiting time elapses only when the electrical supply source, the anti-theft CARD in a safe place outside of the ve- ignition and unit are switched on. -
Page 8: Removing The Portable Panel
Anti-theft device Removing the portable panel The volume is limited to a maximum Attaching the portable panel level after the display has been folded As an effective anti-theft device, the Insert the portable panel into the lower down. After 20 seconds, an audible sig- portable panel (A) may be removed from left catch and then engage it in the nal indicates that the control component... -
Page 9: General Operation
General operation General Operation Switching on/off Setting the volume Setting the bass Press the button and then the Press Turn the left-hand rotary control multifunction button. The volume increases or decreases. The unit can also be switched on/off via Activating the tone menu the vehicle ignition. -
Page 10: Fader
General operation Fader Linear adjustment Switching loudness on / off Press the button and then the The tone adjustments for the current sig- Press the button and then the multifunction button. nal source (i.e. FM) can be reset to a multifunction button. -
Page 11: Navigation Mode
We do not accept liability for errone- With the Becker Indianapolis, the loca- of Northern and Southern Europe are ous data provided by the navigation tion is determined via the GPS receiver available on the CDs. - Page 12 Navigation mode One way streets, pedestrian zones, turn Navigation with two European CDs For example, if you wish to navigate bans and other traffic regulations are from a town on the Southern Europe CD taken into account as far as possible. (D) to a town on the Northern Europe There may be discrepancies between the CD (B), enter your destination address...
-
Page 13: General Instructions
Navigation mode General instructions Letter, numbers and symbols can be • By briefly pressing the left rotary selected using the multifunction but- control , additional information can • During navigation mode, radio or CD tons . The individual be requested during route guidance or can still be heard. -
Page 14: Selecting Navigation
Navigation mode Selecting navigation Main navigation menu Note: Press The navigation CD must be loaded when starting navigation mode for the first time. If calibration of the navigation system Select from has not yet been completed, the system The main navigation menu appears after DESTINATION, will prompt you to take a drive for cali- this display. -
Page 15: Destination Entry
Navigation mode • LAST DESTINATIONS Destination entry Note: A list of the last 50 destinations is dis- In the Main Navigation Menu, select When selecting a distant destination, played. With right rotary DESTINATION with the right rotary we recommend selecting a stopover control , the desired destination can control... -
Page 16: Entering A Destination
Navigation mode Entering a destination The complete entry can be deleted by If the complete location name has been entered or completed automatically; i.e. pressing multifunction button the location entered exists only once in more than 2 seconds. the country of destination, the unit will switch automatically to either the place The last location entered is displayed. -
Page 17: Selecting Destination Via Post Code
Navigation mode If a definite entry is given, the system Selecting destination via post The display then shows either the desti- switches to the Road/ Centre Entry. If nation corresponding to the post code or, code there are no roads or only the centre is if the post code is shared among several The destination can also be selected via available for a particular town, the unit... -
Page 18: Entering The Destination Town
Navigation mode Entering the destination town Already entered letters are displayed in- The road name most similar to the entry versely. To help, the road name most appears in capital letters in the road se- similar to the entry so far is displayed. lection list. -
Page 19: Entering The Destination Town
Navigation mode Entering the destination town Select the letters one after another by To accept the entry, press and hold the turning the right rotary control right rotary control for more than centre press to confirm. The selected letter 2 seconds or select the small tick appears enlarged at the right of the dis- and briefly press the right rotary play. -
Page 20: Destination Input Via Coordinates
Navigation mode To confirm the entry, press and hold The navigation system then requests a Note: the right-hand rotary control name to be entered for the entered coor- By pressing the right rotary control more than 2 seconds. dinates. for more than 2 seconds without previ- Enter a name as described in “Storing ously entering a letter, a list of the pos- Select the small tick... -
Page 21: Route Menu
Navigation mode Route menu • HOUSE NUMBER Entering house number for The house number in the specified destination road destination road can be entered here. Select HOUSE NUMBER in the route This function is only possible if the in- menu with the right rotary control formation is contained on the Naviga- and press to confirm. -
Page 22: Selecting Intersection For Destination Road
Navigation mode Select ROUTE SETTINGS to choose Select ROUTE SETTINGS to choose • DYNAMIC ROUTE the route settings. the route settings. Dynamic route guidance is used to calculate the route, taking current traf- Select by turning the right rotary con- Select by turning the right rotary con- fic announcements into account. -
Page 23: Storing A Destination In The Destination Memory
Navigation mode • RESTRICTIONS Storing a destination in the If you do not wish to enter a name of Provides options for avoiding bridges, your choice, press and hold the right ro- destination memory ferries, tunnels or toll roads tary control for more than 2 seconds It is not mandatory for navigation to to store the previously entered destina-... -
Page 24: Deleting A Destination From The
Navigation mode Deleting a destination from the Route guidance calculation Stopover destination memory Stopover offers the possibility of enter- Select destination memory (see ing a stopover destination during the ac- page 143). tive route guidance. The message “Calculating route” indi- Entering a stopover cates that the distance is being calculat- ed;... -
Page 25: P.o.i
Navigation mode • P.O.I. Deleting a stopover Detour function (see page 143) enables the selection of This function allows you to block route special destinations as stopovers via sections ahead from the nearest junction LOCAL AREA, NEAR DESTINA- and to calculate a detour route when a TION and TOWN/COUNTRY, e.g. -
Page 26: Deleting Traffic Jam
Navigation mode Deleting traffic jam Cancelling route guidance Explanation of navigation Press After entering the destination (address), the system calculates the route and an- nounces: “Ready to drive off”. You will receive the navigation recom- Press the multifunction button. The route guidance is cancelled when mendations by voice messages and the right rotary control is pressed... - Page 27 Navigation mode • “Please turn right after 300 metres.” • “Prepare to turn left” or “Please merge Warning into left lane.” Accident hazard Road traffic regulations always take priority when a vehicle is being driven in traffic. The navigation system is only The arrow indicator points to the "...
-
Page 28: On/Off
Navigation mode • “Now drive straight ahead.” • “Keep right after 2 kilometres.” Dynamic route guidance with Note: Dynamic route guidance is not possible At this point, you must drive straight Keep right means that the road will in all countries. ahead. -
Page 29: What Is Dynamic Route Guidance
Navigation mode What is dynamic route Dynamic route guidance Note: guidance? In the Route menu, Dynamic Route If no TMC station can be found, the dis- Guidance can be started by selecting Dynamic route guidance is used to cal- play will show CURRENTLY TMC START-DYN. -
Page 30: Displaying Traffic Information
Navigation mode Displaying traffic information Note: Current traffic announcements can be If no other traffic information is availa- displayed in text form. There are several ble, NO TRAFFIC MESSAGES RE- options for requesting current traffic in- The scroll marks at the right edge of the CEIVED is displayed. -
Page 31: Information During Route
Navigation mode Information during route Requesting journey duration and kilometres travelled guidance Press the left rotary control Scroll marks on the right side of the dis- play indicate that more than 3 lines are required for the traffic information. Press the left rotary control Pressing the button returns to The destination, the distance and the es-... -
Page 32: Displaying Settings
Navigation mode Displaying settings Requesting current time Calling up current position During navigation, press the left rota- During navigation, press the left rota- During route guidance, the current posi- ry control ry control tion can be requested. Press the multifunction button. Press the multifunction button. -
Page 33: Calling Up Road List
Navigation mode With inactive route guidance, the infor- Calling up road list Note: mation menu can be requested by press- During route guidance, the list of roads After entering the destination, it will ing the left rotary control for the planned route can be called up. take some time until the route list is compiled. -
Page 34: Destination Memory
Navigation mode Destination memory P.O.I. Using the right rotary control select a category and press the con- In the Main Navigation Menu, select Menu for selecting points of interest trol to confirm. DEST. MEMORY with the right rota- from a predetermined list. Points of in- ry control and press the control to terest include petrol stations, airports or... - Page 35 Navigation mode By pressing the left rotary control Selection TOWN information on the selected destina- Points of interest in a specified town tion is listed (i.e. a hospital). can be selected. Enter the point of interest and con- firm. Confirm the point of interest in the Confirm selection with the right ro- Using the right rotary control displayed list by pressing the right...
-
Page 36: Points Of Interest (P.o.i.) Cd
Navigation mode Selection NATIONWIDE Points of interest (P.O.I.) CD The valid categories for the current points of interest CD are displayed. The following contains a general de- scription of the points of interest (or P.O.I.) CDs. Using the right rotary control The categories and points of interest There are two methods for selecting a select a category and press the con-... - Page 37 Navigation mode If the points of interest CD is inserted Then, turn the right rotary control If the point of interest was selected dur- during active navigation, the system re- to select the desired point of interest. ing active navigation, it will be treated as quests information on the location of the The point of interest is accepted by a stopover.
-
Page 38: Terms Of Licence
Language ukenglish Use of the data is only permitted in this • ANIMATION specific Becker system. It is forbidden to The Animation display can be turned Select from extract or make further use of significant on or off. -
Page 39: Setting Time
Navigation mode Setting time By pressing the right rotary control Saving position or multifunction button , the set In order to achieve correct navigation on time is accepted. routes with time-dependent traffic guid- ance, and to calculate the estimated time The program returns to the System Set- of arrival, it is necessary to set the GMT Set and confirm SAVE POSITION in... -
Page 40: Selecting A Game
Navigation mode The Destination Memory is then called Selecting a game Setting the language up automatically (see page 143). With the right rotary control , select the desired position in the Destination Set and confirm GAMES in the Sys- Set and confirm LANGUAGE* in the Memory and press to confirm. -
Page 41: Animation
Navigation mode Animation Switching announcement of Selecting the units of Whether ETA, the current time or the re- arrival time on /off measurement maining travel time should be displayed on the right side of the display during navigation, is a setting option here. Set and confirm ANNOUNCEMENT Set and confirm MEASURING UNIT ETA in the System Settings menu. -
Page 42: Influencing The Calculation Of Eta
Navigation mode Influencing the calculation of • LOW-RISK Switching the speed limits With this setting the unit adjusts for display on/off drivers who may take longer for the If the speed limits display is ON, the sys- planned journey. This setting could be tem will inform you of the maximum used, for example, in areas of dense permissible speed limit for the route... -
Page 43: Setting The Time Display
Navigation mode The distance to the next point at which Setting the time display for example a turn should be made is dis- played below the navigation arrow, which appears in reduced format. Set and confirm SPEEDLIMITS in the System Settings menu. Set and confirm TIME INFORMA- Note: TION in the System Settings menu. -
Page 44: Radio Mode
Radio mode Radio mode Switching on radio mode The last selected station and level are To select the MW (Medium Wave), displayed. LW (Long Wave) and SW (Short Press Wave) wavebands, repeatedly press By pressing repeatedly, you can choose multifunction button until the The last selected waveband is called up. -
Page 45: Dynamic Autostore (Fm-Das)
Radio mode Dynamic autostore (FM-DAS) Station search FM-DAS Requesting radio menu mode. Turn the right-hand rotary control to the left or right. The radio displays the receivable and If a programme has previously been se- identified stations in descending/ascend- lected that belongs to the particular sta- ing order. -
Page 46: Scan Search
Radio mode Scan search Programme filtering for FM Programme type selection On the desired waveband ( , MW, (PTY) LW, SW) press the right rotary You have the option of filtering various Requesting radio menu mode. control stations from the FM DAS station list. Requesting radio menu mode. -
Page 47: Turning Pty Display On / Off
Radio mode Turning PTY display on / off Storing: Calling up/storing MW, LW, 12 frequencies or programmes can be Selecting radio menu mode. SW stations stored per waveband. Storing: In each case up to 12 stations can be Find desired station. stored using the station buttons. -
Page 48: Autostore Mw, Lw
Radio mode Autostore MW, LW Manual FM tuning Manual Tuning MW, LW, KW Select radio menu mode within the de- Selecting radio menu mode. Select radio menu mode within the de- sired waveband. Using the multifunction button sired waveband. select the level Stations Fix. Press multifunction button Press the multifunction button... -
Page 49: Regionalisation
Radio mode Regionalisation Switching regionalisation on / The RDS diversity function is independ- Selecting radio menu mode. ent of region. As a result, the RDS diver- sity function can lead to the radio Afterward, select the desired regional switching between various regional pro- grammes which may vary in terms of sub-programme (i.e. -
Page 50: Switching Radio Text On / Off
Radio mode Switching radio text on / off Traffic programme (TP) Note Radio text cannot be displayed unless If an RDS Diversity station broadcasts Warning the selected station also transmits radio TP announcements, it is possible to in- Accident hazard text. -
Page 51: Activating / Quitting The Tp Menu
Radio mode Direct programming enables a TP sta- Activating / quitting the TP Switching on: tion to be programmed that is not the FM Switching on TP menu. menu station being received. This means, for Activating: example, that a particular FM station can Press the button (traffic an-... -
Page 52: Selecting Automatic Tracking
Radio mode Selecting automatic tracking Selecting / cancelling direct Switching mute on/off In all modes and wavebands, automatic programming After selection of a TP or EON sta- tracking can be turned on by pressing tion, the mute function can be activat- Switching on TP menu. -
Page 53: Tp Announcement Volume
Radio mode TP Announcement volume Switching TMC on/off Selecting TMC station Selecting TP Menu. To improve the reception of TMC traffic Note Press the multifunction button. announcements, you can select a station Further information on TMC can be that transmits the TMC data. found under “Dynamic route guidance with TMC”... -
Page 54: Display For Receivable Tmc
Radio mode Display for receivable TMC Telephone muting stations If a telephone is installed in the vehicle and its mute control is linked to the car radio, the User menu (Page 179) can be used to determine how it should behave. If Mute is selected, the radio is muted If the system is able to receive a TMC when a call is received. -
Page 55: Notes On Compact Discs (Cd)
CD mode CD mode Notes on compact discs (CD) • Before playing the CD, it should be If there is already a CD in the slot, press cleaned with a special, commercially button. If CD-changer/AUX Sound interruptions may occur if the CD available cleaning cloth, wiping from mode was selected last, the unit must be is soiled. - Page 56 CD mode Forward / backward track Scan search Fast forward / reverse terminates when the multifunction button skipping Pressing the multifunction but- is released. ton activates the scan search function. Turn right rotary control to right / left. Track repeat Through further turning of the right rota- “Track repeat”...
-
Page 57: Random Play
CD mode Random play CD settings menu Switching between Track/CD Text display Pressing the multifunction but- Press the button in CD mode. You can set here whether in the CD ton activates the random play func- menu the track display is provided by tion. -
Page 58: Temperature Protection Circuit
CD mode Temperature protection circuit After a cool down period, the CD mode Notes on copy-protected CDs may be called up again. If the tempera- To protect the laser diode from exces- In some cases, problems may arise when ture is still too high, the unit will once sive heat, a two-stage temperature pro- attempting to play copy-protected CDs, again switch back to the previously se-... -
Page 59: Mp3 Mode
MP3 mode MP3 mode General notes on MP3 Creating an MP3/WMA For WMA, WMA 9 with a bit rate of 64 - 320 kbit/s is supported. For creat- storage medium The music that can be played when your ing WMA, we recommend using Win- unit is in MP3 mode is generally copy- •... -
Page 60: Creating A Playlist
MP3 mode • You can play CD-Rs (writeable CDs) Creating a playlist We used the freeware WINAMP in our and CD-RWs (rewritable CDs) on this trials for creating playlists. Other pro- Due to the number of MP3 files that can unit, grams may also be used to create playl- be saved on an MP3 CD, the MP3 CD... -
Page 61: Inserting /Ejecting Mp3 Cds
MP3 mode Inserting /ejecting MP3 CDs If there is already an MP3 CD in the slot, Also refer to the following sections un- der CD mode (Page 164): press the button. If CD-changer/ Inserting CDs: AUX mode was selected last, the unit •... -
Page 62: Switching Between Folder
MP3 mode Switching between folder/ Changing folder/playlist Note: playlist multifunction button is only Press the right rotary control displayed when playlists are saved on Turn the right rotary control to se- If playlists are stored on the inserted the inserted MP3 CD. lect the desired folder or the desired MP3 CD, it is possible to switch be- playlist. -
Page 63: Track Repeat
MP3 mode Fast forward / reverse Pressing the multifunction but- MP3 settings menu ton again deactivates the “Random Fast forward (audible) is activated by Press the button whilst in MP3 Play” function. pressing the multifunction but- mode. ton and fast reverse (audible) is acti- Track repeat vated pressing... -
Page 64: Displaying Name Of Folder/Playlist
MP3 mode Switching between track/ID3 tag display Here you can set whether in the MP3 menu the track display is provided by the numerical track display or by dis- Press the multifunction button. playing the ID3 tag for the current track. The total number of playlists (Pl), fold- Requesting CD settings menu. -
Page 65: Cd Changer Mode
CD changer mode CD changer mode Operational readiness of CD Selecting CD changer mode Changing/selecting CDs changer Press Activating CD changer mode. If the CD Changer mode was selected Press the right rotary control If a CD changer is connected to the car last, or if there is no CD or Navigation radio, the CD changer is ready for oper- CD inserted into the CD player, the unit... -
Page 66: Cdc Settings Menu
CD changer mode For additional operating instructions, re- CDC settings menu Displaying number of tracks fer to CD mode (Page 164): and total playing time Press the button in CDC mode. • “Notes on compact discs (CD)” on Requesting CDC settings menu. page 164 •... - Page 67 CD changer mode Naming a CD Assigning/changing names: Deleting saved names: Requesting CDC settings menu. Requesting CDC settings menu. It is possible to assign a name to the CD Press the multifunction button. currently playing, change a previously Using the right rotary control , se- assigned name and delete stored names.
-
Page 68: Cd Filter Function
CD changer mode CD filter function Filtering tracks: Silverstone 7860 and 2660 CD chang- You can filter out individual tracks on a ers. CD. These tracks are then not included The tracks to be filtered out of the cur- when the CD is played. rent CD can be selected using the right Note: rotary control... -
Page 69: User Settings
User settings User settings Opening / quitting User The user menu is requested by press- The GAL setting can be used to specify ing the button for longer than 2 the starting point for the volume increase Settings menu seconds. according to vehicle speed. -
Page 70: Telephone Mute Function (Tel)
User settings Telephone mute function (Tel) Display brightness (Lum) LED setting If a telephone with hands-free operation With this function, the brightness of the This function can be used to switch the is installed, the call may be routed display can be set. LED function (flashes when the unit is through the speaker system. -
Page 71: Setting Reception Optimisation (M/S)
User settings Setting reception optimisation • Mono - Setting for reception condi- • independ - The current audio source tions in which reflections constantly and the navigation announcements (M/S) occur - i.e., the unit is constantly set to can be set to different levels. In order to suppress reception-related in- mono. -
Page 72: Aux Input (Aux)
User settings AUX input (Aux) Display compass (Cmp) Signal tone volume (BeV) This can be used to switch on the CD When the navigation is not active, it is The volume of signal tones (e.g. storage changer AF connections if no CD chang- possible to have a compass and the cur- confirmation) can be set using this func- er is connected. -
Page 73: Service Menu
Service menu Service menu Calling up / exiting service Unit reset menu If a malfunction of the unit should occur, such that it becomes inoperable or defec- The following information can be called tive in some other way, a restart of the up whilst in the Service menu: The individual entries can be selected internal unit software (reset) can be trig-... -
Page 74: Explanation
Explanations Explanation RDS SYSTEM DAS Seek Name level Stations Fix level This car radio is capable of receiving At the level DAS Seek Name all re- At the level Stations Fix frequen- RDS signals (RDS = Radio Data Sys- ceivable and identifiable RDS pro- cies can be assigned to the station but- tem) on the VHF bands. - Page 75 Explanations EDUCATE Education LIGHT M Light music Radio plays and literature DRAMA Classical music CLASSICS Culture, church, society CULTURE EASY M Musical entertainment VARIED Light entertainment SPORT Sport OTHER M Special music programmes Weather report WEATHER FINANCE Financial information CHILDPRG Children’s programmes SOCIAL Social reports...
-
Page 76: Technical Terminology Glossary
Technical terminology glossary Technical terminology glossary Autostore Code number ID3-Tag With this function, the stations with the A secret number that must be entered to “Contents” of an MP3 track. Contains strongest signals are stored in the auto- activate the unit. information such as track, artists, album, store memory, sorted by reception qual- year and genre. - Page 77 Technical terminology glossary Reset Format for playlists supported by unit. Reset the system to factory defaults. (Windows Media Audio) Special compression process developed ® by Microsoft for compressing audio PTY identification Scan search (Programme Type identification) Plays receivable radio stations or CD data (i.e.
-
Page 78: Index
Index Index Compass display ....181 Control component Animation ....150 Entering a town . - Page 79 Index Position Displaying ....141 GAL ......178 M3U .
- Page 80 Index Station memory TMC ......137 AM ..... .156 Displaying messages .
- Page 81 Index Traffic programme ... . .159 Announcement volume ..162 Interruption of announcement .161 Menu ....160 Mute .
-
Page 82: Technical Data
• Supply voltage: 12 Volt • Loudspeaker impedance: min. 4 • CD Connection: Becker Silverstone 2630, Silverstone • Line out: 2660 and Silverstone 7860 CD chang- 4 x analog Line Out (Va max 3Veff at ers can be connected. 10 k ) •... -
Page 83: Notice
Dear Listener, In conformance with current EC guidelines, any person may operate this radio receiver. This unit conforms to the current valid European or harmonised national standards. This designation is your guarantee that the unit conforms to the applicable specifications regarding electromagnetic compatibility. -
Page 84: Installation Guide
Installation Guide 1.Installation Guide Prior to installation Before starting installation, please read this installation guide carefully. In particular, please pay attention to the safety and installation instructions. Symbols used in the installation guide denotes instructions which are important for your safety and the safety of others. denotes instructions which are important for the installation and function of the unit. -
Page 85: Safety Instructions
Installation Guide Safety instructions Incorrect installation Incorrect installation may result in damage to the unit or to the vehicle. Specialist knowledge and skills are required to install the unit and its components. We strongly recommend that you have the unit installed by a specialist work- shop. -
Page 86: Installation Instructions
Installation Guide Installation instructions Damage due to reverse polarity or short-circuit Incorrect cable connections and short-circuits can seriously damage the unit. Disconnect the vehicle battery before installing the unit. In order to avoid short-circuits and malfunctions, install the cables so that they cannot be pinched, kinked, chafed or detached. -
Page 87: Connection Diagram For The Navigation System
Installation Guide Connection diagram for the navigation system Radio aerial Speedometer / speedometer cable signal Sound system / loudspeaker GPS antenna Indianapolis Reverse signal Power supply Note: Connection options are described in detail on Page 217. -
Page 88: Installation Of The Gps Antenna
Installation Guide Installation of the GPS antenna Risk of injury People with pacemakers should avoid physical contact with the magnetic antenna and should not carry the antenna on their person, as this may affect the function of the pacemaker. Keep the magnetic antenna away from data storage media (disks, credit cards, magnetic cards etc.) and electronic and precision engineering equipment, as this may cause data to be deleted. - Page 89 Installation Guide • Inside the vehicle The antenna can only be installed beneath a non-metallised windscreen. When selecting the installation position, ensure that the antenna has a clear view of all directions, and that it is not covered by the windscreen wipers. Obstructions caused by the bonnet, window crossbeams and roof should be avoided as far as possible.
-
Page 90: Connection Of The Reverse Signal
Installation Guide GPS reception can be affected by screens with screen antenna, windscreen heating or thermally insulated screens. Some thermally insulated screens are coated with titanium or silver oxide. Installation of the GPS antenna in the vehicle interior can considerably impair the function of the navigation system. Connection of the reverse signal The pick-up points for the reverse signal vary from vehicle to vehicle. -
Page 91: Connection Of The Speed Signal (Gal) From The Speedometer/Speedometer Cable
Installation Guide Connection of the speed signal (GAL) from the speedometer/speedometer cable Accident hazard Incorrectly connected wiring may result in damage to or destruction of vehicle components and safety devices. If you are in any doubt, please contact your vehicle manufacturer or authorised specialist workshop. Electronic speedometer •... - Page 92 Installation Guide Mechanical speedometer with built-in speed sensor in the speedometer cable • Remove the signal from the speed sensor, extend and connect to socket A pin 1. GAL signal • Minimum requirement for the signal: 0 Hz - 4 kHz / square-wave signal (no inductive sensor) Low - level <...
- Page 93 Installation Guide Installing the speed sensor directly on the gearbox • Release the speedometer cable and screw speed sensor onto gear- box. Screw released speedometer cable onto the speed sensor and connect the wires. Cable connections for the speed sensor Brown earth (terminal 31) Black...
-
Page 94: Installation/Removal Of The Unit
Installation Guide Installation/Removal of the unit • Installation: A universal bracket for DIN installation slots is integrated into this unit. An installation frame is not required. The unit is inserted into the installation slot and secured with the slides supplied. To install, complete all electrical connections. -
Page 95: Using Gps For The First Time, And Sensors
Installation Guide Using GPS for the first time, and sensors • Switch on the vehicle ignition to start using GPS for the first time and for the sensor test. Switching on the unit. Enter the code (see the operation guide for a detailed description). •... - Page 96 Installation Guide • When using the GPS for the first time, the vehicle must be parked outdoors, while ensuring that it has a clear view in all directions (not in the immediate vicinity of buildings). Information on the GPS reception is given in the right-hand part of the display.
-
Page 97: Installation Of The Navigation Software
Installation Guide Installation of the Navigation Software • Press • Insert the Navigation CD to install the software for the navigation system. • After the navigation software has been installed, the adjacent dis- play appears. The language selection is then requested. •... -
Page 98: Calibration
Installation Guide Calibration After commissioning, a calibration journey is required. During the jour- ney, the speed signal (GAL) is automatically adapted to the vehicle-spe- cific data and the gyro sensor is automatically adapted to the installation position of the unit. The distance to be covered depends on the type of vehicle and the local conditions. - Page 99 Installation Guide you should check the GPS reception conditions again (as under Serv- ice Mode in the Section Function test of the GPS antenna (GPS-INFO 210). As soon as the display with the request CALIBRATION RIDE CAN appears, the calibration journey can be started. START! A calibration journey can also be performed in a non-digitised area.
-
Page 100: Service Mode
Installation Guide • Calibration has been completed successfully if the main navigation menu is displayed. • For correct navigation on routes with time-dependent traffic guid- ance, the time should be set correctly as described under “System settings” in the operation guide. Service Mode In Service Mode, various functions can be checked in detail and the cal- ibration can be modified. - Page 101 Installation Guide The following functions can be selected in the Service Mode: • GPS-INFO - Test of GPS Function • - Function to delete the calibration or to enter a CALIBRATION new calibration • - Calibration Journey Display CALIBRATION RIDE •...
- Page 102 Installation Guide Changing the calibration ( CALIBRATION Deleting the calibration: If the navigation system is removed from one vehicle and installed in another, the calibration must be performed again. However, to do so, the current calibration data must be deleted. In the Service Mode, select CALIBRATION with the right rotary...
- Page 103 Installation Guide Unit rotation corresponds to horizontal rotation. A positive val- ue means rotation of the front of the unit towards the driver (LHD). The unit inclination can now be selected in degrees by turning the right rotary control and pressing to confirm. Unit inclination corresponds to vertical inclination.
- Page 104 Installation Guide Enter the correct tyre size using the right rotary control and confirm the entry by pressing for more than 2 seconds. The letter “R” cannot be entered. 3 numbers must be entered be- fore and after the slashes. Insert a “0” before any missing num- bers.
- Page 105 Installation Guide Status of the calibration journey ( CALIBRATION RIDE In the Service Mode, select CALIBRATION RIDE with the right rota- ry control and press to confirm. The calibration status (i.e. ) and the type of positioning STATUS: 2 (i.e. ) are displayed.
- Page 106 Installation Guide • Engage the reverse gear for the reverse signal function test. The number value after must jump from REV. • Drive round a bend to test the function of the internal sensors. The values after must change. In order to quit the sensor test, press the button.
- Page 107 Installation Guide Demo Mode ( DEMO The Demo Mode is intended for demonstration purposes. A fixed loca- tion is given to the unit (Hamburg Werderstaße). • In the Service Mode, select with the right rotary control DEMO and press to confirm. Select between by briefly pressing the right rotary control...
-
Page 108: Connections
LineOut right front Illumination (Terminal 58) Subwoofer LineOut Switched positive (Terminal 15) Socket C2 Earth (Terminal 31) 7-12 Specific connection for Becker CD changer Socket B Socket C3 Loudspeaker right rear + Loudspeaker right rear - AF – Telephone input Loudspeaker right front + Earth –...
Need help?
Do you have a question about the Indianapolis 7920 and is the answer not in the manual?
Questions and answers