Table of Contents
Advertisement
Advertisement
Table of Contents

Subscribe to Our Youtube Channel
Related Manuals for Acroprint ES700


Summary of Contents for Acroprint ES700
- Page 1 Time for Business. MODEL ES700 USER'S MANUAL...
- Page 2 Acroprint Time Recorder customers. Material in this manual is subject to change without notice and does not represent an obligation on the part of Acroprint Time Recorder. No part of this manual may be reproduced or transmitted in any form by any means without the express written permission of Acroprint Time Recorder.
- Page 3 PRECAUTIONS This user's manual is prepared for safe and proper use of the unit. Please follow all the instructions to avoid possible danger to yourself or others and damage to the unit. Signs Various warnings and cautions are provided throughout this manual along with signs. Remember each sign and its explanation listed below for your safety and proper operation of the unit.
- Page 4 If foreign matter should get in the unit (including a piece of metal, water, or liquid), disconnect the plug from the outlet immediately and contact your dealer for servicing. There is a danger that further use may cause a fire or electric shock. Do not plug or unplug the unit with a wet hand.
-
Page 5: Table Of Contents
CONTENTS Introduction & features ................Before using your time recorder ..............Quick easy setup ..................How to program the recorder ..............Setting the display format Setting the time ..................Setting the date ..................Setting the 12/24 hour display format ..........Setting the print order................. -
Page 6: Introduction & Features
INTRODUCTION & FEATURES NTRODUCTION: Thank you for purchasing an Acroprint Model ES700 Time Recorder. We are confident this time recorder will give you full satisfaction. Items such as the time and date are preset at the factory. After plugging in the AC power, the recorder may be used immediately. -
Page 7: Before Using Your Time Recorder
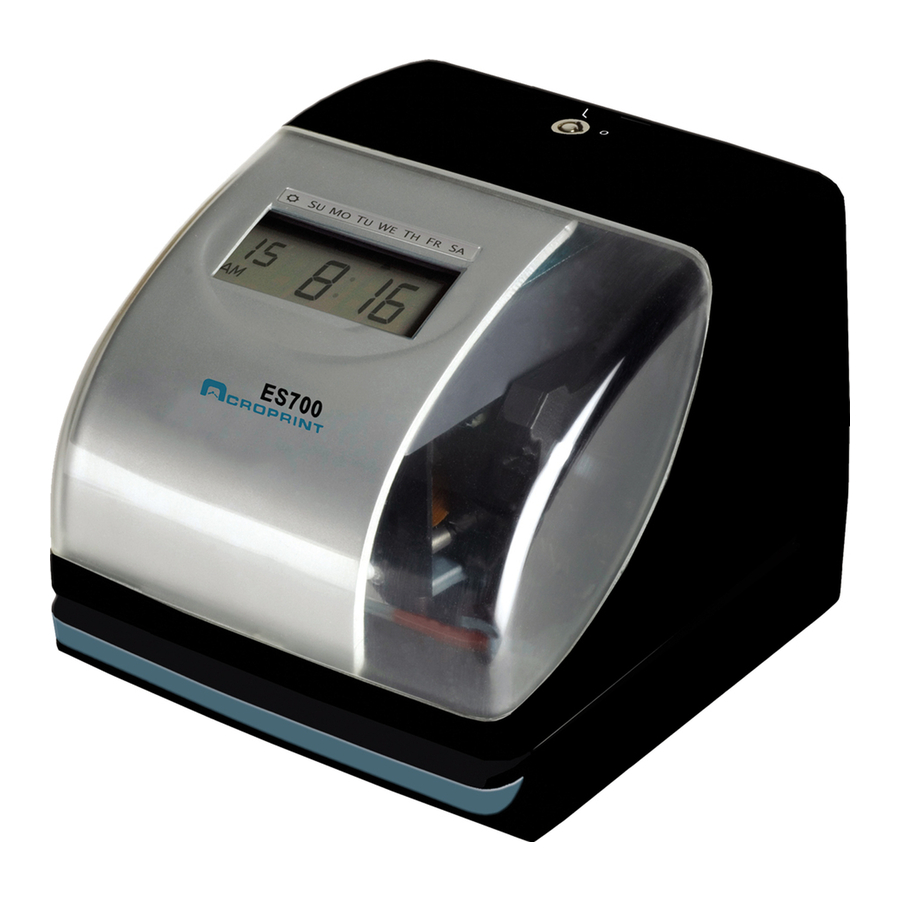
BEFORE USING YOUR TIME RECORDER Package Contents Unpack the time recorder and check its contents to ensure that the time recorder unit and all accessories as shown below are included. ACCESSORIES INCLUDED • Time recorder • User's Manual • Ribbon cassette <Front view>... -
Page 8: Quick Easy Setup
QUICK EASY SETUP Unlock the key and remove the top case. Plug the AC cord into the AC outlet. The recorder is now ready to be set. Remove the PROTECTION PAD. Plug the AC adapter into the time recorder. Replace the cover and lock. Insert a card. -
Page 9: How To Program The Recorder
HOW TO PROGRAM THE RECORDER To enter the program setting mode, one must plug the AC adapter into the AC outlet and remove the cover. Next press the SELECT button once. Then the recorder changes into the program mode showing the on the display positioned under the "TIME"... -
Page 10: Setting The Display Format
SETTING THE DISPLAY FORMAT SETTING THE TIME Ex: Set the time from 10:08 to 10:09. TIME Hour Minute Second TIME SELECT CHANGE Change the "Minute" SELECT CHANGE In this case, press the CHANGE button Press the SELECT button and position to set at "09". -
Page 11: Setting The Date
SETTING THE DISPLAY FORMAT SETTING THE DATE Ex: Change the date from October 20, 2006 to October 21, 2006. DATE Date Year Month DATE SELECT CHANGE SELECT CHANGE Change the "Date" Press the SELECT button, and position Press the CHANGE button to set at "21". under the "DATE". -
Page 12: Setting The 12/24 Hour Display Format
SETTING THE DISPLAY FORMAT SETTING THE 12/24 HOUR DISPLAY FORMAT Ex: Set the hour format to 24 hour. HOUR HOUR SELECT CHANGE SELECT CHANGE In case of the example, press the Press the SELECT button and position under the "HOUR" mark. CHANGE button to set at "2". -
Page 13: Setting The Print Order
SETTING THE PRINT ORDER Ex: Set the print order to "Month, Date, Year, Hour, Minute". PRINT PRINT ORDER ORDER SELECT CHANGE SELECT CHANGE In case of the example, press the Press the SELECT button and position CHANGE button to set at "3". under the "PRINT ORDER"... -
Page 14: Setting The Print Style
SETTING THE PRINT STYLE SETTING THE YEAR DIGIT Ex: Set the year imprint to 4 digits. YEAR YEAR DIGIT DIGIT SELECT CHANGE SELECT CHANGE In case of the example, press the Press the SELECT button and position CHANGE button to set at "2", and under the "YEAR DIGIT"... -
Page 15: Setting The Hour/Min
SETTING THE PRINT STYLE SETTING THE HOUR/MIN. Ex: Set the print style of the "Hour" and "Minute" to 24 hour and 1/100min. Type of Type of HOUR HOUR an hour Minute MIN. MIN. SELECT CHANGE SELECT CHANGE Press the SELECT button and position In case of the example, press the CHANGE button to set at 2. -
Page 16: Disabling The Leading Zero
SETTING THE PRINT STYLE DISABLING THE LEADING ZERO Ex. Set the leading zero to "Zero: Disabled". LEADING LEADING ZERO ZERO SELECT CHANGE SELECT CHANGE Press the SELECT button and position In case of the example, press the under "LEADING ZERO" mark. CHANGE button to set at "1". -
Page 17: Setting The Comment
SETTING THE PRINT STYLE SETTING THE COMMENT Ex: Set the comment to "SENT". COMMENT COMMENT SELECT CHANGE SELECT CHANGE Press the SELECT button and position In case of the example, press the under "COMMENT" mark. CHANGE button to set at "2". And At that moment, the flashing digit then press the SET button. -
Page 18: Setting The Language
SETTING THE PRINT STYLE SETTING THE LANGUAGE This setting is available if one selects "Month, "Day of the week" or "Comment" in previous "PRINT ORDER" Ex: Set the print language into French. LANGUAGE LANGUAGE SELECT CHANGE SELECT CHANGE Press the SELECT button and position In case of the example, press the next to "LANGUAGE"... -
Page 19: Setting The Print Method
SETTING THE PRINT METHOD Ex: Change the print direction to "Left" and the print activation to "Manual". Print Print direction activation PRINT DIRECTION PRINT DIRECTION PRINT ACTIVATION PRINT ACTIVATION SELECT CHANGE SELECT CHANGE Press the SELECT button and position In case of the example, press the over at the "PRINT DIRECTION;... - Page 20 SETTING THE PRINT STYLE In case of the example, press the CHANGE button to set at "3". And then press the SET button. PRINT DIRECTION PRINT ACTIVATION SELECT CHANGE Change the "Print Activation". Print Activation Options Automatic Semi-automatic Manual Automatic will allow the clock to print by simply inserting a card or form.
-
Page 21: Setting The Daylight Saving Time
SETTING THE DAYLIGHT SAVING TIME Ex: Start date Sunday, March 11, 2007. End date Sunday, November 4, 2007. If set as the above, the unit remembers the start date as the second Sunday of March and the end date as the first Sunday in November. Once set, the unit automatically updates the settings every year thereafter. -
Page 22: Setting The Ending Date Of Daylight Saving Time
SETTING THE DAYLIGHT SAVING TIME SETTING THE ENDING DATE OF DAYLIGHT SAVING TIME Ex: Daylight saving time ends on Sunday, November 4, 2007. Date Year Month Press the SELECT button and position over the "D.S.T. END". At that moment, the "Year" flashes. D.S.T. -
Page 23: Deleting The Daylight Saving Time Setting
SETTING THE DAYLIGHT SAVING TIME DELETING THE DAYLIGHT SAVING TIME SETTING To delete and cancel the daylight saving time, change the display of "Month" of the starting setting to " ". Ex: Change March 11, 2007 of "D.S.T START" and delete daylight saving time setting. Year Month Date... -
Page 24: Setting The Password
SETTING THE PASSWORD When the password is set, you will be required to enter the password. If the password you entered does not coincide with the setting, you cannot change the setting values. You may select any 4-digit number from 0001 to 9998 as your password. Note: "0000"... -
Page 25: Using The Password To Access Program
SETTING THE PASSWORD USING THE PASSWORD TO ACCESS PROGRAM If you want to change any program settings, you are required to enter the current password first. "9999" will be displayed when you press the SELECT button before entering. Ex: Password "1234" TIME Press the SELECT button. -
Page 26: Canceling The Password
SETTING THE PASSWORD CANCELING THE PASSWORD The code "0000" will cancel the password when entered. You may select a different 4-digit password from 0000 to 9998 using this same method. Ex: Cancel the password "1234". TIME Press the SELECT button, at that moment "9999"... - Page 27 SETTING THE PASSWORD Press the SELECT button and position mark at the "PASSWORD". At that moment, first two digits "12" flashes. Press the CHANGE button to set at PASSWORD SELECT CHANGE "00". And then press the SET button. At that moment, the flashing changes to last two digits "34".
-
Page 28: Resetting
RESETTING To return all settings to the factory defaults, push the reset switch with a pointed implement. NOTICE: All custom settings made by individuals will be deleted and will revert to the factory defaults when the reset switch is pushed. To make new settings, please refer to "Setting ··· ". Reset switch... -
Page 29: Wall Mounting
WALL MOUNTING Caution: The supplied screws are intended for use on a thick wooden wall or wooden column. Do not use any other materials. The time clock may come off if used on other materials. Install the supplied wall-mount screws Replace cover and lock. -
Page 30: Replacing The Ribbon Cassette
REPLACING THE RIBBON CASSETTE Turn the knob of the new cassette in the direction of the arrow(clockwise) to tighten the ribbon. Unlock the key and remove the cover. Hold the ribbon cassette by its tab and Place the cassette inside the time pull straight out to remove it. -
Page 31: Replacing The Ribbon Cassette
REPLACING THE RIBBON CASSETTE Print head Ribbon mask Ribbon NOTICE: Install the cassette so that the ribbon is between the print head and the ribbon mask. Printing will not come out properly if the ribbon is placed behind the ribbon mask. Replace the cover and lock. -
Page 32: Troubleshooting
Error Error contents Action E-00 CPU error Call the servicing dealer from whom you purchased your ES700 or call Acroprint at E-01 The remaining life of lithium battery for (800)-344-7190 (in USA). memory back-up is short. E-05 The card is not inserted in the clock properly. -
Page 33: Specifications
SPECIFICATIONS Clock accuracy Monthly accuracy ±15sec. (at ordinary temperatures) Year up to 2099. Automatically adjusted to leap years, 31-day months Calendar and months with thirty or fewer days, and the days of the week. Printing system Dot matrix imprint Power failure Five years of cumulative power failure hours after the date of shipment. - Page 34 Time for Business. 5640 Departure Drive Raleigh, North Carolina 27616 USA (919) 872-5800 In USA (800) 334-7190 Fax: (919) 850-0720 www.acroprint.com Q7152-6120-1 P/N 06-0293-000 Rev. B...
Need help?
Do you have a question about the ES700 and is the answer not in the manual?
Questions and answers