
Related Manuals for Elation 70


Summary of Contents for Elation 70
- Page 1 Design Brick 70 Elation Professional™ 6122 S. Eastern Ave. Los Angeles, Ca 90040 www.elationlighting.com Rev. 12/18/2009 – visage Software Ver. 1.2...
-
Page 2: Table Of Contents
DMX Traits…………………………………………………………………………………20 10. Lens Replacement……… ……………………………………………………………… 22 11. Cleaning and Maintenance……………………………………………………………… 23 12. Warranty…………………………………………………………………………………... 24 13. Photometric Data………………………………………………………………………… 26 14. Dimensional Drawings………………………………………………….……………….. 27 15. Circuit Schematic………...………………………………………………………………. 28 16. Technical Specifications…………………………………………...………….………… 29 ©Elation Professional, Los Angeles Ca. TABLE OF CONTENS www.ElationLighting.com... -
Page 3: General Information
INTRODUCTION: Congratulations, you have just purchased one of the most innovative and reliable LED fixtures on the market today! The Design LED Brick 70,™ has been designed to perform reliably for years when the guidelines in this booklet are followed. Please read and understand the instructions in this manual carefully and thoroughly before attempting to operate this unit. - Page 4 Please do not discard the shipping carton in the trash. Please recycle whenever possible. WARRANTY REGISTRATION: The Design LED Brick 70™ carries a two year (730 days) limited warranty. Please fill out the enclosed warranty card to validate your purchase. All returned service items whether under warranty or not, must be freight pre-paid and accompany a return authorization (R.A.) number.
-
Page 5: Safety Instructions
4. For safe operation, follow the Installation guide described in chapter two of this manual. Operating the Design LED Brick 70™ without suited safety aids such as safety cables or clamps can increase the risk of damage and/or personal injury. - Page 6 15. Please be aware that damages caused by modifications to the device are not subject to warranty. Important Notice: Damages resulting from the disregard of safety and general user instructions found in this user manual are not subject to any warranty claims. ©Elation Professional, Los Angeles Ca. www.ElationLighting.com...
-
Page 7: Features
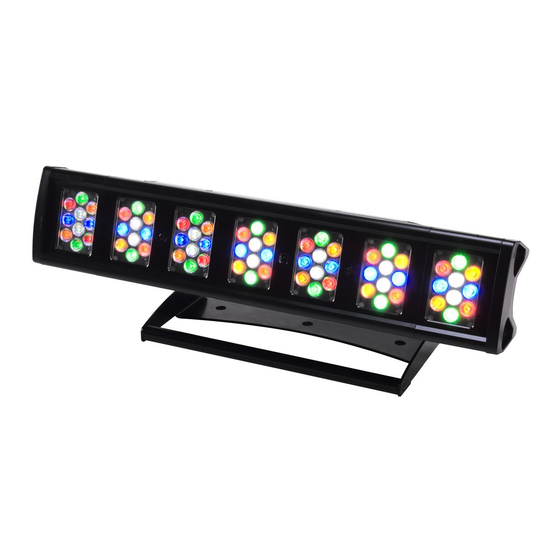
Maintenance free operation • 5 Color Additive Color Mixing System (Red, Green, Blue, White, Amber) • 70 3-Watt LEDs (14 x red, 14 x green, 14 x blue, 14 x white, 14 x amber) • 100,000 hours rated LED life •... -
Page 8: General Guidelines
Most damages are the result of improper operation. Please use the original packaging to transport the fixture in for service. For your own safety, please read this user manual carefully before installing the device. ©Elation Professional, Los Angeles Ca. www.ElationLighting.com... -
Page 9: Fixture Overview
1. Housing Cover – This cover holds the lens assemblies in place and protects the internal electronics, never remove this cover. 2. LED Lens Assembly – The lens assembly may be user replaced in the event repair is needed or a different beam angle is required. ©Elation Professional, Los Angeles Ca. www.ElationLighting.com... - Page 10 13. Enter Button – The enter button is used to enter in to a certain menu function or to lock a menu setting in to memory. 14. LED Display – 4-segment menu display. Used to display the DMX address as well ©Elation Professional, Los Angeles Ca. www.ElationLighting.com...
- Page 11 17. 3-pin DMX Out Jack – This jack is used to send an incoming DMX signal to the next fixture in the DMX chain via a female, 3-pin XLR jack. 18. 3-Pin DMX In Jack – This jack accepts an incoming DMX signal via a male, 3-pin XLR jack. ©Elation Professional, Los Angeles Ca. www.ElationLighting.com...
-
Page 12: Mounting And Installation
To avoid injury, never stand directly below the device when mounting, removing, or servicing the fixture. Refer to regulations BGV C1 (formerly VBG 70) and DIN VDE0711-217 for proper installation in Europe To ensure proper installation, only qualified staff should attempt installation. -
Page 13: Clamp Mounting
Clamp Mounting The Design Brick 70™ provides a unique mounting bracket assembly that allows the unit to stand on flat surface, hang on truss via a clamp, or be used in cluster allow multiple units to rigged together (see the illustration below). Regardless of the mounting option you choose please refer to the safety guidelines in this manual to avoid damage to the unit and/or injury to persons. -
Page 14: Securing
See illustrations below. Securing the Design Brick 70™ Always be sure to secure your fixture with a safety cable when suspending the unit from truss or other means. The fixture provides a built-in rigging point for a safety cable as illustrated above. -
Page 15: Understanding Dmx
The Design Brick 70™ can be controlled via DMX-512 protocol. The Design Brick 70™ is a fixture that can operate in five different DMX modes; 4, 5, 8, 11, or 35 channels (see page 20 for the different DMX operations). The DMX address is set electronically using the controls on the LED menu. -
Page 16: Dmx Terminator
“Y” your DMX connections unless you are using an approved DMX splitter such as the Elation Opto Branch 4™ or DMX Branch/4™. DMX-512 connection with DMX terminator A DMX terminator should be used in all DMX lines especially in longer runs. The use of a ©Elation Professional, Los Angeles Ca. www.ElationLighting.com... -
Page 17: Fixture Dmx Addressing
This digital starting address is the channel number from which the fixture starts to “listen” to the digital control information sent out from the DMX controller. The allocation of this starting DMX address is achieved by ©Elation Professional, Los Angeles Ca. www.ElationLighting.com... - Page 18 In the case of the Design Brick 70™, which is up to a 35 channel fixture, you should set the starting DMX address of the first unit to 1, the second unit to 36 (35 + 1), the third unit to 71 (35 + 36), and so on.
-
Page 19: Fixture Menu
Temperature Reset Default User Mode Pixel grouping Select Programs Part 1 Part 2 Part 3 Edit Program Edit Scenes ©Elation Professional, Los Angeles Ca. A001~AXXX Red…… Slave1,Slave2,Slave3 Master / Alone Current Time XXXX(Hours) Total Life Hours XXXX(Hours) Last Run Hours... - Page 20 “Set to Slave” - Slave setting for Master/Slave Operation With this function, you can define the device as slave for operation in Master/Slave mode. Each slave setting will have a different function for a dynamic lightshow without a ©Elation Professional, Los Angeles Ca. Edit Time--...
- Page 21 Last Run Hours This function tracks the number of hours the fixture was operating on it’s previous cycle. Where “XXXX” represents the number of hours. This counter is automatically reset after every power down. ©Elation Professional, Los Angeles Ca. www.ElationLighting.com...
- Page 22 • Press the Mode/Esc-button to return to the main menu. 8.3 Personality: 8.3.1 Status setting Address via DMX - This function allows the DMX address to remotely be adjusted from a DMX console. This setting requires special settings for both the controller and ©Elation Professional, Los Angeles Ca. www.ElationLighting.com...
- Page 23 Celsius or Fahrenheit. Celsius is set as default. 8.3.5 Restore Default – This function is used to restore the factory settings of the device. All settings will be set back to the default values (shaded). Any edited scenes will be lost. ©Elation Professional, Los Angeles Ca. www.ElationLighting.com...
- Page 24 8.6.4 Rec Controller - The Design Brick 70 Pre-programmed scenes can be transmitted to the fixture via any DMX compliant controller. This function allows those scenes to be stored in to the fixture’s built-in memory and then subsequently used to create the user-defined programs.
-
Page 25: Dmx Addressing
4. “Address via DMX” is the function that turns the RDMX function on and off. 5. Press the UP button to display “ON” to activate this function, or “OFF” to deactivate this function. 6. Press ENTER to confirm. ©Elation Professional, Los Angeles Ca. www.ElationLighting.com... -
Page 26: Controller Settings
420, set channel 1 to a value of “7,” channel 2 to "8" and channel 3 to "164" (256+164=420). 4. Wait for approximately 20 seconds for the unit to complete the address reset function. ©Elation Professional, Los Angeles Ca. www.ElationLighting.com... -
Page 27: Operation
10. OPERATION Operating Modes: The Design LED Brick 70™ can operate in six different modes. This next section will detail the differences in the operating modes. • Auto Program Mode (Master) - The fixture will chase through the built-in programs, sending a DMX control signal to all other fixtures connect via DMX cables instruction for a synchronized light show. -
Page 28: Dmx Traits
(strobe), and all other DMX traits. A DMX controller allows you to create unique programs tailored to your individual needs. The Design LED Brick 70 page 32 for detailed description of the DMX traits. To control your fixture in DMX mode, follow the set-up procedures on pages 11-17 as well as the set-up specifications that are included with your DMX controller. - Page 29 Be sure to use a terminator on the last fixture, especially for longer cable runs (more than a 100 feet). For help operating in DMX mode be sure to consult the manual that was included with your DMX controller. ©Elation Professional, Los Angeles Ca. www.ElationLighting.com...
-
Page 30: Working With Built-In Programs
“ENTER” button once again to automatically lock the value into the scenes memory. You can repeat the procedure for all functions listed below: “Auto Program” – Allows access to all 15 of the channel’s DMX traits. ©Elation Professional, Los Angeles Ca. www.ElationLighting.com... - Page 31 Follow the next section to build a program with your scenes. Step 2 – Editing Programs. The control will store a maximum of 10 programs. A program can store one or a maximum of ©Elation Professional, Los Angeles Ca. www.ElationLighting.com...
- Page 32 Operation” on page 36 for proper set-up instructions. Select “Alone” when running a single fixture or when multiple fixtures in stand-alone mode. See section 11.1 “Stand-Alone Operation” on page 34 for proper set-up instructions. ©Elation Professional, Los Angeles Ca. www.ElationLighting.com...
-
Page 33: Dmx Channel Traits
DMX CHANNEL TRAITS The chart below outlines the different DMX traits for the 5 different DMX modes. Mode/Channel 35CH 11CH 8CH 5CH ©Elation Professional, Los Angeles Ca. Value 0-255 Red (0-Black, 255-100% Red) 0-255... - Page 34 1-35 ©Elation Professional, Los Angeles Ca. 0-10 No function 11-40 Internal program 1 41-70 Internal program 2 71-100 Internal program 3 101-130 Internal program 4 131-160 Internal program 5 161-190 Internal program 6 191-220 Internal program 7 221-255 Internal program 8...
-
Page 35: Lens Replacement
DESIGN Brick 70™ 13. LENS REPLACEMENT The Design Brick 70 comes with a removable front cover that allows lens assembly to be changed out to achieve different beam angles. The lens cover is held in place by two ¼ turn locking fasteners. To remove the cover; 1) Turn the locking fasteners in a counter-clockwise direction. -
Page 36: Cleaning And Maintenance
There are no user serviceable parts inside this fixture, please refer all other service issues to an authorized Elation service technician. Should you need any spare parts, please order genuine parts from your local dealer. ©Elation Professional, Los Angeles Ca. www.ElationLighting.com... -
Page 37: Warranty
B. For warranty service, send the product only to the Elation Professional shipping charges must be pre-paid. If the requested repairs or service (including parts replacement) are within the terms of this warranty, Elation Professional shipping charges only to a designated point within the United States. - Page 38 The consumer’s and or Dealer’s sole remedy shall be such repair or replacement as is expressly provided above; and under no circumstances shall Elation Professional® be liable for any loss or damage, direct or consequential, arising out of the use of, or inability to use, this product.
-
Page 39: Photometric Data
DESIGN Brick 70™ PHOTOMETRIC DATA ©Elation Professional, Los Angeles Ca. www.ElationLighting.com... -
Page 40: Dimensional Drawings
DESIGN Brick 70™ DIMENSIONAL DRAWINGS ©Elation Professional, Los Angeles Ca. www.ElationLighting.com... -
Page 41: Circuit Schematic
DESIGN Brick 70™ CIRCUIT SCHEMATIC ©Elation Professional, Los Angeles Ca. www.ElationLighting.com... -
Page 42: Technical Specifications
©Elation Professional, Los Angeles Ca. 100v~240v / 50Hz~60Hz AC MAXIMUM 250 watts 70 3Watt DIP (by SSC) 14 x (red, green, blue, white, amber) IP20 7.2 Kgs / 16 Lbs 35, 11, 8, 5, or 4 Channel mode Standard DMX-512, 3 pole XLR;... - Page 43 DESIGN Brick 70™ ©Elation Professional, Los Angeles Ca. www.ElationLighting.com...
- Page 44 Elation Professional 6122 S. Eastern Ave. Los Angeles, CA. 90040 323-582-3322 / 323-832-9142 fax www.ElationLighting.com / Info@ElationLighitng.com Rev. 12/18/2009 – visage Software Ver. 1.2...
Need help?
Do you have a question about the 70 and is the answer not in the manual?
Questions and answers