
Related Manuals for Yamaha DTX400K


Summary of Contents for Yamaha DTX400K
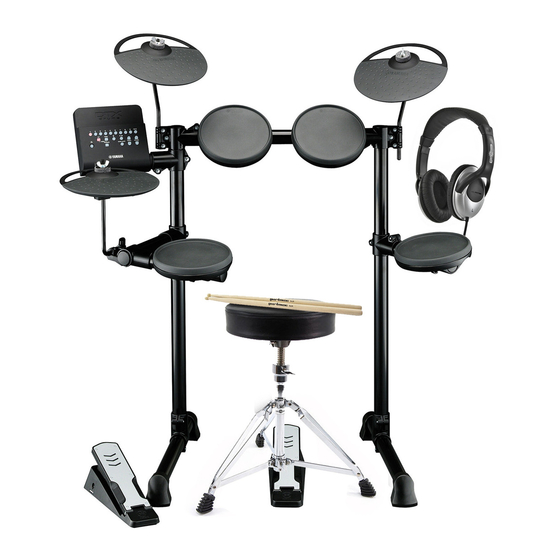
- Page 1 ELECTRONIC DRUM KIT DTX400K DTX430K DTX450K Owner’s Manual DTX400K/DTX430K/DTX450K Owner’s Manual...
-
Page 2: Table Of Contents
Training Settings ......... 49 m Other Settings..........53 Basic Techniques Integrating Separately Sold Accessories .. 56 For DTX400K Owners ........56 Selecting & Playing a Kit ......23 For DTX430K & DTX450K Owners ....56 Selecting a Kit ..........23 Connecting to a Computer...... -
Page 3: Special Message Section
This product should be used only with the components supplied or; a never mix different types of batteries. Batteries MUST be installed cor- cart, rack, or stand that is recommended by Yamaha. If a cart, etc., is rectly. Mismatches or incorrect installation may result in overheating and used, please observe all safety markings and instructions that accom- battery case rupture. -
Page 4: Precautions
AC is printed on the name plate of the instrument. outlet. Then have the instrument inspected by qualified Yamaha service personnel. • Use the specified adaptor (page 64) only. Using the wrong adaptor can result in •... -
Page 5: About Copyrights
Yamaha cannot be held responsible for damage caused by improper use or modifications to the instrument, or data that is lost or destroyed. Always turn the power off when the instrument is not in use. -
Page 6: Welcome
Using PDF Manuals The Reference Manual for your DTX400K, DTX430K, or DTX450K is made available in digital format as a PDF document. As such, a computer and suitable software will be required in order to read it. We recommend that Adobe®... -
Page 7: Setup
• Basic techniques used when operating and playing the electronic drum kit are described in the Basic Techniques section (pages 23 to 39). • More complex methods are described in the Advanced Tech- niques section (pages 40 to 55). DTX400K/DTX430K/DTX450K Owner’s Manual... -
Page 8: Package Contents
• Parts !0 and !1 are contained in Box 2. • The DTX400K does not have any parts numbered u, o, or !3 . • Parts !4 and !5 are almost identical in appearance but are actually different. They can be told apart by the sticker on the base sec- tion. - Page 9 !6 Nine-channel snake cable (x1) !7 Tuning key (x1) !8 Cable bands (x3) !9 Power adaptor (x1) @0 Owner’s Manual (this booklet) * May not be included depending on your particular area. Please check with your Yamaha dealer. DTX400K/DTX430K/DTX450K Owner’s Manual...
- Page 10 !6 Nine-channel snake cable (x1) !7 Tuning key (x1) !8 Cable bands (x3) !9 Power adaptor (x1) @0 Owner’s Manual (this booklet) * May not be included depending on your particular area. Please check with your Yamaha dealer. DTX400K/DTX430K/DTX450K Owner’s Manual...
-
Page 11: Assembly Guide
Viewing from the front as shown in the figure, place the After completing this step, lay the assembly down base supports (q) at the left and right approximately 50 safely to prevent it from falling over. cm apart. Repeat to assemble the right upright bar. DTX400K/DTX430K/DTX450K Owner’s Manual... - Page 12 Left vertical support Right vertical support The joint shown in the figure is not part of the DTX400K. IMPORTANT Take the left arm (r) from the package, and using the The third tom part (e) and the snare part (i) from the tuning key, securely tighten the s key bolt.
- Page 13 Step 12 The tom pads will be rotated into place in The details of Step 7 are different for the DTX400K, DTX430K, and DTX450K. For DTX400K Owners Loosen the key bolt located on the back of the snare Step 7 Attaching the snare pad (i), and rotate the pad 180°, turning it over.
- Page 14 Assembly Guide The details of Step 7 are different for the DTX400K, DTX430K, and DTX450K. For DTX430K Owners For DTX450K Owners Step 7 Step 7 Attaching the snare Attaching the snare Loosen the wing bolt on the joint on Loosen the wing bolt on the joint on...
- Page 15 Assembly Guide The details of Step 8 are different for the DTX400K, DTX430K, and DTX450K. For DTX400K and DTX430K Owners For DTX450K Owners Step 8 Step 8 Attaching the hi-hat Attaching the hi-hat holder holder Left arm Snare pad Joint ...
- Page 16 This figure shows the hi-hat holder correctly inserted in Remove the wing nut and the upper felt pad from the the DTX450K. It is inserted from the front in the DTX400K cymbal holder. (Do not remove the lower felt pad.)
- Page 17 Assembly Guide Step 13 is only required for the DTX430K and DTX450K. Owners of the DTX400K should skip to Step 14 Step 13 Assembling the kick pad Turn the foot pedal’s T-bolt counter-clockwise to loosen Take the kick pad (!3 ) from the pack-...
- Page 18 TOM3 KICK KICK Nine-channel snake cable DTX400K KICK Insert the mini plugs* at one end of the nine-channel Wrap the cables for the snare pad, the tom pads, and the snake cable (!6 ) into the correct trigger input jacks...
-
Page 19: Setting Up For Sound
• When all connections have been made, use each device’s vol- module. ume controller to balance its output with that of the drum mod- ule. 1/8” stereo-mini to stereo-mini cable Standard 1/4” stereo-audio jack Portable music player, etc. Standard 1/4” mono-audio jack Headphones Powered speakers DTX400K/DTX430K/DTX450K Owner’s Manual... -
Page 20: Turning On The Drum Module
The drum module’s lights will flash and the Factory Set function will wait before turning off the drum module. For will be restored. details, see the description of the Auto Power-Off Time parameter from Menu Mode (page 53). DTX400K/DTX430K/DTX450K Owner’s Manual... -
Page 21: Component Names & Functions
⁄0 [VOLUME] buttons (page 19) These buttons are used to adjust the overall volume of the drum module. Press the [VOLUME+] button to increase it and the [VOLUME–] button to decrease it. DTX400K/DTX430K/DTX450K Owner’s Manual... -
Page 22: Left Side
⁄4 Cord clip (page 19) Wrap the power adaptor cord around this clip to prevent accidental unplugging during use. ⁄5 [ ] connector (page 19) Use this connector for the power adaptor that came with your drum module. DTX400K/DTX430K/DTX450K Owner’s Manual... -
Page 23: Basic Techniques
• You can set a different sensitivity for each of the drum module’s ten kits. • If you wish to set sensitivities on an individual pad basis, see the descriptions of the Trigger Settings parameters from Menu Mode (page 46). DTX400K/DTX430K/DTX450K Owner’s Manual... -
Page 24: Playing Techniques
Hitting the main surface of the pad produces a head shot sound. Open rim shots Hitting the open-rim zone produces an open rim-shot sound. Closed rim shots (cross sticking) Hitting the closed-rim zone produces a closed rim-shot sound. DTX400K/DTX430K/DTX450K Owner’s Manual... -
Page 25: Performing With A Song
Quick select from Kit Mode or Training Mode In order to select a song quickly without having to leave Kit Mode or Training Mode, press and hold the [SONG] button, and then press the number button ([1] to [10/0]) for the desired song. Hold DTX400K/DTX430K/DTX450K Owner’s Manual... -
Page 26: Adjusting The Volume Of Muted Drum Parts
• After an automatic lead-in (to help guide you into the phrase), the range from Point A to Point B is played back repeatedly. By pressing the [DRUM MUTE] button once again, you can unmute the drum parts and restore their normal vol- umes. DTX400K/DTX430K/DTX450K Owner’s Manual... -
Page 27: Using The Metronome
Each time you press the [VOLUME–] button, you decrease the metronome volume by one. Press and hold the [ ] button. You will hear the current tempo spoken (in English), and the number button lights will flash as described above. DTX400K/DTX430K/DTX450K Owner’s Manual... -
Page 28: Adjusting The Tempo
Settings parameter group from Menu Mode (page 41). Example: Setting a tempo of 138 BPM • Metronome pattern Press the number buttons in the sequence • [1][3][8]. Metronome length in beats • Metronome sound • Number-button lighting pattern when using the metro- nome DTX400K/DTX430K/DTX450K Owner’s Manual... -
Page 29: Practicing In Training Mode
• The buttons that flash at this time depend on the type of training selected. • Both the [ ] and [ ] buttons will flash with certain types of training. Press the flashing [ ] or [ ] button to start train- ing. DTX400K/DTX430K/DTX450K Owner’s Manual... -
Page 30: Groove Check
Timing of current above. strike (flashes) The drum module will display your score using number buttons [1] to [10/0] and will also speak it to you (in English). For more details regarding scoring, see Scor- ing function (page 29). DTX400K/DTX430K/DTX450K Owner’s Manual... -
Page 31: Rhythm Gate
No sound produced for pads No sound produced for pads to [10/0] and will also be spoken to you (in English). struck outside the gate width. struck outside the gate width. For more details regarding scoring, see Scoring function (page 29). DTX400K/DTX430K/DTX450K Owner’s Manual... -
Page 32: Measure Break
To do so, press and hold the corresponding number button ([2] to [10/0]) until the displayed sequence length changes. For example, to set the sequence length to eight measures, press and hold number button [8]. DTX400K/DTX430K/DTX450K Owner’s Manual... -
Page 33: Tempo Up/Down
• This training can be set either to mute pads when they are not played in time or to play pads whenever they are struck. For details, see the description of the Ignore Timing param- eter from Menu Mode (page 50). DTX400K/DTX430K/DTX450K Owner’s Manual... -
Page 34: Change Up
Fully-lit: Rhythm Half-lit: Rhythm not included in practice included in practice session session (i.e., skipped) DTX400K/DTX430K/DTX450K Owner’s Manual... -
Page 35: Easy Session
[SONG] button and press the corresponding num- ber button ([1] to [10/0]). To end training, press the [ ] button once again. NOTE The [DRUM MUTE] button is not used with this type of train- ing. DTX400K/DTX430K/DTX450K Owner’s Manual... -
Page 36: Groove Tracker
To manually unmute all drum parts, press the parameter from Menu Mode (page 51). [DRUM MUTE] button once again and verify that it turns off. NOTE The [ ] button is not used with this type of training. DTX400K/DTX430K/DTX450K Owner’s Manual... -
Page 37: Pad Gate
• You can set which groups of pads the drum module should con- sider when deciding whether or not you are playing the correct pattern. For details, see the description of the Pad Gate Group parameter from Menu Mode (page 52). DTX400K/DTX430K/DTX450K Owner’s Manual... -
Page 38: Part Mute
[DRUM MUTE] button once again and verify that its light goes out. NOTE If the pad(s) corresponding to a muted drum part are not struck for certain period of time, the part will be automati- cally unmuted and the number button’s light will go out. DTX400K/DTX430K/DTX450K Owner’s Manual... -
Page 39: Fast Blast
Specifically, the half-lit number button lights will successively go out from right to left, and the training session will end when they are all turned off. Lights go out. DTX400K/DTX430K/DTX450K Owner’s Manual... -
Page 40: Advanced Techniques
7-3. Auto Power-Off Time........Page 53 7-4. Stereo/Mono........... Page 53 7-5. Initialize Kit ............. Page 54 7-6. Initialize Song ..........Page 54 7-7. Revert to Last Power On ......... Page 55 7-8. Factory Set ............. Page 55 DTX400K/DTX430K/DTX450K Owner’s Manual... -
Page 41: Metronome Settings
Press number button [3] to select the Sound parameter. Select a new metronome sound using the corresponding number button ([1] to [6]). The available settings are as follows. Number button Setting Metronome click 1 Metronome click 2 Cowbell Drumsticks Spoken count 1 Spoken count 2 DTX400K/DTX430K/DTX450K Owner’s Manual... -
Page 42: Kit Settings
Press number button [2] to select the Kit Settings parameter group. Press number button [2] to select the Pad Volume parameter. Strike a pad to select it. Enter a new volume using number buttons [1] to [10/0]. Setting 0 to 127 DTX400K/DTX430K/DTX450K Owner’s Manual... -
Page 43: Pad Panning
Setting NOTE While the Double Bass Drum function is enabled, you will be unable to use the hi-hat controller plugged into the [HI-HAT CON- TROL] trigger input jack to simulate opening and closing of the hi- hat. DTX400K/DTX430K/DTX450K Owner’s Manual... -
Page 44: Midi Settings
• The drum module’s internal tone generator will continue to respond to received MIDI data when Local Control is turned off. • The drum module will continue to output drum performances as MIDI data when Local Control is turned off. DTX400K/DTX430K/DTX450K Owner’s Manual... -
Page 45: Hi-Hat Settings
Menu Mode. using the hi-hat controller that comes with the Press number button [4] to select the Hi-hat Settings DTX400K. parameter group. Press number button [2] to select the Splash Sensitivity While holding the [KIT] button, press the [SONG] but- parameter. -
Page 46: Trigger Settings
This parameter only has an effect when you are using the hi-hat controller that comes with the While holding the [KIT] button, press the [SONG] but- DTX400K. ton to activate Menu Mode. Press number button [5] to select the Trigger Settings While holding the [KIT] button, press the [SONG] but- parameter group. -
Page 47: Crosstalk
Enter a new setting (%) using number buttons [1] to [10/0]. Larger values are more effective in preventing crosstalk; however, they can also make it difficult to Trigger input level play pads simultaneously during light drumming. Setting 0 to 99 Trigger input level DTX400K/DTX430K/DTX450K Owner’s Manual... -
Page 48: Snare Pad Type
Number button Setting Automatic identification Setting Number TP70S button Hi-hat controller Kick pedal Snare pad that comes with DTX400K Automatic identification XP-series pad HH65 KP65 TP70S reversed Hi-hat controller pedal that comes with KU100 XP-series pad reversed... -
Page 49: Training Settings
Press number button [6] to select the Minimum Level • Pad Gate parameter. Other types of training are not affected. Strike a pad to select it. Enter a new setting (%) using number buttons [1] to [10/0]. Setting 0 to 99 (%) DTX400K/DTX430K/DTX450K Owner’s Manual... -
Page 50: Difficulty Level
Other types of training are not affected. While holding the [KIT] button, press the [SONG] but- ton to activate Menu Mode. Press number button [6] to select the Training Settings parameter group. Press number button [3] to select the Ignore Timing parameter. DTX400K/DTX430K/DTX450K Owner’s Manual... -
Page 51: Groove Tracker Control Pad(S)
• When this parameter is set to [6], the [DRUM MUTE] button can- drum module will flash a number button between [2] and [5] to not be used to mute the practice drum pattern. indicate the result of automatic identification. DTX400K/DTX430K/DTX450K Owner’s Manual... -
Page 52: Pad Gate Group
NOTE • The evaluation method set using this parameter applies only to Pad Gate training. Other types of training are not affected. • The higher the setting, the more difficult the training. DTX400K/DTX430K/DTX450K Owner’s Manual... -
Page 53: Other Settings
Setting parameter. 1 to 10 Set the parameter using number button [1] or [2]. The available settings are as follows. NOTE Setting this parameter to [1] turns off the Voice Guidance function. Number button Setting Stereo Mono DTX400K/DTX430K/DTX450K Owner’s Manual... -
Page 54: Initialize Kit
If you do not wish to proceed with initialization, press the [KIT] button now to exit Menu Mode. the [KIT] button now to exit Menu Mode. Press number button [1]. Press number button [1]. • • The kit will be initialized. The song will be initialized. DTX400K/DTX430K/DTX450K Owner’s Manual... -
Page 55: Revert To Last Power On
• The parameters will be initialized. NOTE You can also restore the Factory Set by turning on the drum mod- ule with the [VOLUME+] button and the [VOLUME–] button held down. See page 20 for more details. DTX400K/DTX430K/DTX450K Owner’s Manual... -
Page 56: Integrating Separately Sold Accessories
By upgrading the KU100 Kick Unit and/or the hi-hat con- Turn off the drum module. troller included as part of the DTX400K, you can make your The HH65 Hi-hat Controller must be connected with electronic drum kit feel much closer to the real thing. -
Page 57: Connecting To A Computer
In addition, turning on the drum module. there is no need to install the Yamaha USB-MIDI driver when • Be sure to always perform the following steps before turning the using one of the above operating systems. -
Page 58: Reference
• Ensure that the amplifier and/or speakers connected to the drum module are turned on and are not set to the low- est possible volume. • Ensure that the cables for the hi-hat controller and the kick unit are not connected to each other’s jacks. (DTX400K only; see page 17.) •... - Page 59 How do I have the drum module choose the best drum kit for each song? • Disable the Kit Lock function. (See page 53) What should I do if I can’t hear the voice guidance? • Adjust the Voice Guidance Volume parameter from Menu Mode. (See page 53) DTX400K/DTX430K/DTX450K Owner’s Manual...
-
Page 60: Data List
CRASH Splash 10 8beat Funk Funk tune based on an eight-beat rhythm. HI-HAT Percussion 2 Slow Blues Bluesy song with a laid back tempo. KICK Vintage 18 4beat Jazz Mid-tempo jazz tune with a four-beat rhythm. Trash DTX400K/DTX430K/DTX450K Owner’s Manual... -
Page 61: Voice List
119 Percussion 1 39 HipHop 1 169 AnalogClaves 40 HipHop 2 120 Percussion 2 41 HipHop 3 121 T8-1 42 R&B 122 T8-2 123 T9-1 43 Break 44 DnB 124 T9-2 125 Analog 126 R&B 127 DnB DTX400K/DTX430K/DTX450K Owner’s Manual... -
Page 62: Drum Score
Advance Step : w Hard Rock Control Pads : Cymbal + hi-hat 1 Advance Step : e Electro Pop Control Pad : Kick Advance Step : r Rock Shuffle Control Pads : Cymbal + hi-hat 1 Advance Step : DTX400K/DTX430K/DTX450K Owner’s Manual... - Page 63 Advance Step : i 8beat Funk Control Pads : Cymbal + hi-hat 1 Advance Step : o Slow Blues Control Pads : Cymbal + hi-hat 1 Advance Step : !0 4beat Jazz Control Pad : Kick Advance Step : DTX400K/DTX430K/DTX450K Owner’s Manual...
-
Page 64: Specifications
240 x 188 x 68 mm, 0.5kg * Specifications and descriptions in this owner’s manual are for information purposes only. Yamaha Corporation reserves the right to modify products or specifications at any time without prior notice. Since specifications, equipment, and options may not be the same in every locale, please check with your Yamaha dealer. -
Page 65: Index
Other Settings ......... 53 Foot closed........24 Wing bolt........... 8 FP6110A ........9, 10 Package Contents....8, 9, 10 Work on your rhythm ...... 29 Pad Gate......... 37 Gain..........49 Pad Gate Group......52 Groove Check .........30 Pad Panning ........43 DTX400K/DTX430K/DTX450K Owner’s Manual... - Page 66 DTX400K/DTX430K/DTX450K Owner’s Manual...
- Page 67 You should note this serial number in the space provided below and retain this manual as a perma- nent record of your purchase to aid identification in the event of theft. Model No. Serial No. (bottom) DTX400K/DTX430K/DTX450K Owner’s Manual...
- Page 68 Niederlassung und bei Yamaha Vertragshändlern in den jeweiligen Bestimmungsländern erhältlich. Pour plus de détails sur les produits, veuillez-vous adresser à Yamaha ou au distributeur le plus proche de vous figurant dans la liste suivante. Para detalles sobre productos, contacte su tienda Yamaha más cercana o el distribuidor autorizado que se lista debajo.
Need help?
Do you have a question about the DTX400K and is the answer not in the manual?
Questions and answers