Table of Contents
Advertisement
Advertisement
Table of Contents

Related Manuals for Yamaha DTX500


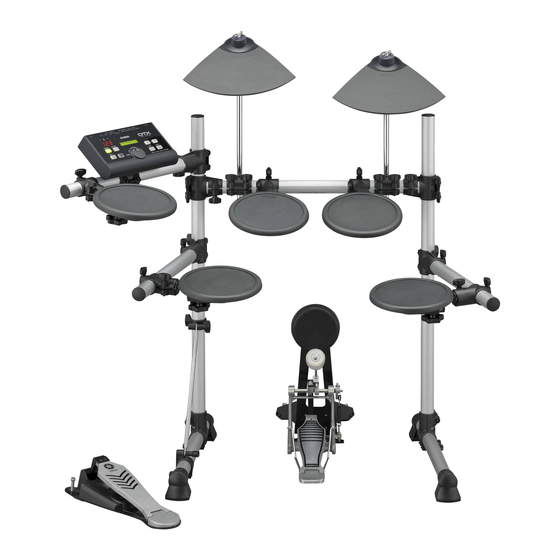
Summary of Contents for Yamaha DTX500
- Page 1 Owner’s Manual...
-
Page 2: Special Message Section
This product should be used only with the components supplied When installing batteries, do not mix batteries with new, or with or; a cart, rack, or stand that is recommended by Yamaha. If a cart, batteries of a different type. Batteries MUST be installed correctly. -
Page 3: Introduction
■ About the pads This Owner’s Manual described the model names of the drum pads which can be connected to the DTX500. Note that these were the latest models at the time this Owner’s Manual was produced. For details about more recently released models, refer to the following website. - Page 4 Then and have it inspected by qualified Yamaha service personnel. have the device inspected by Yamaha service personnel. • The power cord or plug becomes frayed or damaged.
-
Page 5: Saving Data
Yamaha cannot be held responsible for damage caused by improper use or modifications to the instrument, or data that is lost or destroyed. Always turn the power off when the instrument is not in use. Even when the power switch is in the “STANDBY” position, electricity is still flowing to the instrument at the minimum level. When you are not using the instrument for a long time, make sure you unplug the power cord from the wall AC outlet. -
Page 6: Main Features
With this, you can set up your own original drum kits using the various drum voices. * The word “trigger” refers to the means by which hitting a pad sends a signal to the DTX500 as to what sound to play on the built-in tone generator and how loud the sound should be played. -
Page 7: Table Of Contents
Preset Drum Kit List ..........46 Preset Song List ............ 46 Tap Tempo Function ..........19 Specifications............47 LED Display Setting ..........19 MIDI Data Format ........... 47 4 Playing Along With a Song ......20 Pad Function Settings ..........21 DTX500 Owner’s Manual... -
Page 8: Controls And Functions
> > > > • Hold the [SHIFT] button and press the [SONG ] button to enable recording standby mode for the DTX500. o LED display • Press this button to start/stop song playback or recording. For indicating the tempo, the number selected in the current page, r Shift button (SHIFT) or the click timer depending on the setting made. -
Page 9: Rear Panel
For sending data from the DTX500 to an external MIDI device. For connecting the DTX500 to an external amplifier, mixer, etc. With this jack, you can use the DTX500 as a control device to For mono playback use the L/MONO jack. For stereo playback trigger voices from an external tone generator, or synchronize connect both L and R jacks. -
Page 10: Connections
(p. 10) → 4 Turning the Power On (p. 11) → 5 Selecting the Trigger Setup (p. 12) !! IMPORTANT !! You’ll need to change the Trigger Settings of the DTX500 according to the type of drum set you are using. If the setting is not appropriate, problems may occur—such as improper sound, or inappropriate volume balance among the pads. -
Page 11: Turning The Power On
CAUTION ● Connecting a Mixer or MIDI Devices • Do not use the DTX500 at a high volume level for a long Make sure that all volume settings are turned down all the way to period of time, or your hearing may be damaged. -
Page 12: Selecting The Trigger Setup
Also, if the KP125W/125/65 kick pad is connected to the you need to solve any crosstalk problems, the operation “Trigger DTX500’s input jack 9 with a stereo cable, the external pad Setup Edit” on page 34 describes how to make a detailed setting input jack on the KP125W/125/65 can be used as the input for each pad after the above setting is done. -
Page 13: Time To Play
Time to Play Now that your DTX500 is properly connected, it’s time to make some music! Play the DTX500 Change the Volume for Each Pad While hitting the pads, turn the VOLUME knob on the rear Change the volume for each pad and adjust the overall bal- panel to raise the overall volume to a comfortable level. -
Page 14: Adjusting The Hi-Hat
Change the Output Sound Quality Use the Master Equalizer found on Utility Page 5 to change UTIL1~Hi-hat the output sound quality. Overall settings for the DTX500 are HHofs=~~0~T=~~5‚ set in the Utility pages. First, press the [SHIFT] + [SAVE/ENTER] buttons to view 2. -
Page 15: Pad Controller Settings
1. Connect the XP100SD with trigger input 1SNARE on the DTX500. 1. Press the [DRUM KIT] button to enter the Drum Kit * The other trigger input jacks other than the 1SNARE are Select display. -
Page 16: Playing Along With The Click
Playing Along With the Click Play the DTX500 along with the click (metronome). The DTX500 is equipped with a high-performance metronome that gives you a comprehensive variety of settings and allows you to create complex rhythms. Start the Click (Metronome) Use this display to select the desired Click Set, and then set the beat, tempo, timer, and the click sound’s overall volume. - Page 17 Agogo, Stick, Pulse, UserClick the display and set the tuning value in semitones (-24.0 to 0 to With the “UserClick” setting you can use the CLK5 and + 24.0). CLK6 pages to fine-tune the click sound settings. DTX500 Owner’s Manual...
-
Page 18: Click Out Select
30 to their original factory condition. However, below. please proceed with caution because carrying out this opera- tion will rewrite the DTX500’s entire contents (all Click Sets, NOTICE User Trigger Setups 8–11, User Drum Kits 51–70, User • Any changes made to the data will be lost if another Click Songs 64–83, Utility settings) with the data that was set in the... -
Page 19: Tap Tempo Function
[SHIFT] button and rotating the jog dial. • When operating a pad controller (p. 15) whose function is set to “tempo.” • When hitting a specific pad whose pad function (p. 21) is set to “inc tempo” or “dec tempo.” DTX500 Owner’s Manual... -
Page 20: Playing Along With A Song
The DTX500 conveniently lets you mute the drum part of a song and have only the bass part sound during playback, so you can play the drum part yourself. -
Page 21: Pad Function Settings
The useful Bass Solo function lets you isolate just the bass part during playback and play along with it. Since this func- The DTX500 conveniently lets you execute important tion mutes the other accompaniment parts, it lets you concen- operations by hitting a specific pad—without having to trate on mastering the important technique of ‘locking in’... -
Page 22: Using The Groove Check Function
Using the Groove Check Function Another highly useful feature of the DTX500 is the Groove Check function. As you play along with a song or the click, Groove Check compares your timing with the song or click playback and lets you know how accurate your playing is. - Page 23 ] button to call up the GRV3 page, then rotate the jog dial to select the pad (Trigger Input Source) that you want to check. The “ALL” setting selects all pads. [Range] ƒsnare, ™tom1, ... ƒ™pad12, all GRV3 ”~Input=ƒsnare~‚ Pad (Trigger Input Source) DTX500 Owner’s Manual...
-
Page 24: Record Your Performance
Record Your Performance In this section, you’ll learn how to record your performance to the DTX500’s built-in sequencer. In the song data you record, you can switch Drum Kits, change the tempo and playback in the same way as with Preset Songs. -
Page 25: Clearing A User Song
A User Song name can con- the DTX500 (all Click Sets, User Trigger Setups 8–11, User tain a maximum of eight characters, and these can be Drum Kits 51–70, Utility data) with the data that was set in... -
Page 26: Create Your Own Original Drum Kit
Create Your Own Original Drum Kit The DTX500 lets you create your own original Drum Kit by assigning your favorite Drum Voice to each pad and setting its tuning, pan, decay, reverb, etc. * Drum Voice: Mainly individual percussion/drum sounds that are assigned to each of the pads. - Page 27 field according to the setting. • When Drum Voices are not assigned for either layer 1 or 2 (“NoAssign”), “---” will be shown in the KIT3 to KIT18 displays and the settings cannot be made. KIT5*~~äkick~~~˙ ”~~~~Pan=L~5~~~‚ DTX500 Owner’s Manual...
- Page 28 ” or “ use) ” is shown in the lower half of the display. > Use the [ ] button to call up the KIT12 page, then rotate the jog dial to set the Hold Mode. KIT12*~äkick ”~HoldMode=off~‚ DTX500 Owner’s Manual...
- Page 29 ....One voice can be delivered at one time, and the previous voice will be muted (cancelled). However, even if the maximum number of 32 notes is exceeded, the note number selected here will not be muted. DTX500 Owner’s Manual...
- Page 30 ” is shown and the setting in the UTIL7 takes priority. (p. 21) * When multiple pad songs are assigned and played back in combination, the voices within the songs may change unex- pectedly or sound different than intended. DTX500 Owner’s Manual...
- Page 31 Drum Kit. This also applies to pads not having a pad controller. By setting the level, you can adjust the reverb effect for the overall DTX500 system. ˙/¶ * The indication is not shown in the upper right corner of the display.
- Page 32 To save the Drum Voice you created, use the Store operation on ....Transmits. described below and save it to the DTX500’s memory. Origi- nal kits can be saved as a Drum Kit to the User Drum Kit off....Does not transmit.
-
Page 33: Factory Set
A Drum Kit name can contain a This operation returns all of the DTX500’s internal set- maximum of 12 characters, and these can be selected tings back to their original factory defaults. -
Page 34: Trigger Setup Edit
DTX500 for best operation and response to these signals. If you are using drum triggers attached to acoustic drums, or pads other than those that came with the DTX500 set, you’ll need to adjust the sensitivity. This section also has settings that help prevent crosstalk* and double triggering*. -
Page 35: Explanations Of Each Display Page
PCY155/150S/135 *1 CY-2 PCY155/150S/135 *1 CY-3 PCY155/150S/135 *1 CY-4 PCY130SC CY-5 PCY130S/130 CY-6 PCY65S HH-1 RHH135 HH-2 RHH130 DT Snare DT series drum trigger (for a snare drum) DT HiTom DT series drum trigger (for a small toms) DTX500 Owner’s Manual... - Page 36 Larger values require a is set in [TRG2 Type (Pad Type)]. Some fine-tuning of the greater input level in order to produce a trigger event. value will be necessary. DTX500 Owner’s Manual...
- Page 37 1. Hit a pad to select the copy source (input jack) from which the data will be copied. Rotate the jog dial and assign the copy destination (input jack). Copy source (input jack) TRG8~ ƒsnare ”CopyToInput=~2‚ Copy destination (input jack) DTX500 Owner’s Manual...
-
Page 38: Error Messages
Error Messages The DTX500 displays error messages when incorrect settings have been made or invalid opera- tions have been detected, or when any abnormal operation or malfunction occurs. If an error message appears, check the list below and make the appropriate corrections. - Page 39 ● Lower the rejection setting of the pad (trigger input) that is not instrument. ● Use the Factory Set function (p. 33) to reset the DTX500 inter- producing sound. (p. 36: [TRG6 RejLvlAll (Rejection Level)]) nal settings to the initial factory settings.
-
Page 40: Index
........37 Drum kit ....13 26 MVI ........36 Standby/On switch ..9 Drum kit list ....46 Stereo pad ...... 9 Drum kit name ....33 Stereo plug ..... 9 Drum voice ....26 Numeric display mode ...22 DTX500 Owner’s Manual... -
Page 41: Appendix
”GateTime=0.3s ‚ (Page 28) KIT23 ” Snares=32 ‚ (Page 31) KIT11 ƒsnare ”KeyOff=disable‚ (Page 28) KIT24 PC Ch1=on ”PC001 M000L001‚ (Page 32) KIT12 ƒsnare ” HoldMode=off ‚ (Page 28) KIT25 CC Ch1=on ”vol=127 Pan= 64 (Page 32) DTX500 Owner’s Manual... -
Page 42: Song Recording
Groove Check Function Are you sure ? (Page 18) GRV1 --æ√æ’æææ-- ⁄=130 Gr=-2œ0.0‚ (Page 22) Challenge Mode GRV1 --æ√æ’æææ-- 80Hits/ 16%(DÀ)‚ (Page 22) GRV2 RhythmGate ”Mode=challenge‚ (Page 23) GRV3 ” Input=ƒsnare ‚ (Page 23) GRV4 ” Note=⁄(4) (Page 23) DTX500 Owner’s Manual... - Page 43 ƒsnare ” Factory Set ”CopyToInput= 1 (Page 33) (Page 37) Tap Tempo Function TRG save to 8 :[XP Med (Page 34) TRG save to 8 TAP TEMPO Are you sure ? (Page 35) ¤=123 ≠ªªªª (Page 19) DTX500 Owner’s Manual...
-
Page 44: Midi Implementation Chart
MIDI Implementation Chart YAMAHA [ DRUM TRIGGER MODULE ] Date :7-Dec-2009 Model DTX500 MIDI Implementation Chart Version : 1.0 Transmitted Recognized Remarks Function ... Basic Default 1 - 16 memorized Channel Changed 1 - 16 Default Mode Messages Altered **************... -
Page 45: Drum Voice List
12 Studio L 19 PandieroSl 18 BeechOffCR 95 AnaShaker1 13 RockAmb H 36 Trash 2 20 Tambarin1 19 Metal 96 AnaShaker2 37 T8 Crash 14 RockAmb M 21 Tambarin2 20 MetalOpRim 15 RockAmb L 38 T9 Crash 22 Tambarin3 DTX500 Owner’s Manual... -
Page 46: Preset Drum Kit List
Blues 1 Latin Latin 1 Elec5/4A Blues 2 Latin 2 Elec5/4B Hip Hop HipHop 1 Reggae Reggae Elec5/4C HipHop 2 Soul Soul Backb Ld R&B R&B 1 Ballad Ballad 1 Backb St R&B 2 Ballad 2 Backb Pf DTX500 Owner’s Manual... -
Page 47: Specifications
898 g (2 lbs.) * Specifications and descriptions in this owner’s manual are for information purposes only. Yamaha Corp. reserves the right to change or mod- ify products or specifications at any time without prior notice. Since specifications, equipment or options may not be the same in every locale, please check with your Yamaha dealer. - Page 48 U.R.G., Pro Audio & Digital Musical Instrument Division, Yamaha Corporation © 2010 Yamaha Corporation 003PO***.*-01B0 Printed in Vietnam WU53720...
Need help?
Do you have a question about the DTX500 and is the answer not in the manual?
Questions and answers
When I click on the power button on the panel of the DTX500 there is a slight burst of light/power but there are no other indicators on the display screen. I did try to reset but nothing happens when I press down both arrow keys and then the power button. Please let me know if there are any other possible solutions.
The Yamaha DTX500 manual provides troubleshooting steps for issues related to power and display. Here are possible steps to check:
1. Ensure the power cable and adapter are properly connected.
2. Verify that the power adapter matches the required specifications.
3. Check for any visible damage on the power cable or adapter.
4. Try using a different power outlet.
5. If the issue persists, contact a Yamaha Service Center or the dealer for further assistance.
If the device shows a slight burst of light but no display indicators, it may indicate a power or internal component issue requiring professional inspection.
This answer is automatically generated