Table of Contents

Subscribe to Our Youtube Channel
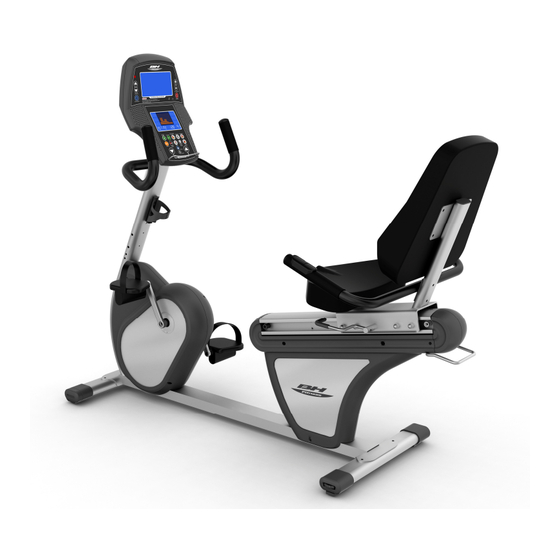
Related Manuals for BH FITNESS R9


Summary of Contents for BH FITNESS R9
- Page 1 BH FITNESS R9 RECUMBENT CYCLE OWNER S MANUAL BH FITNESS 20155 Ellipse, Foothill Ranch, CA 92610 Phone: 949-206-0330 , 866-325-2339 (USA & Canada) Fax: 949-206-0013 Email: fitness@bhnorthamerica.com Web: www.bhnorthamerica.com www.bhfitness.com Issued: 7/2/08 (v1)
-
Page 2: Before You Begin
INTRODUCTION ongratulations for selecting the R9 Recumbent Cycle as a fitness resource. The BH Fitness R9 offers many exercise programs that benefit users of all levels and ages. The R9 is designed to make your workouts more effective and enjoyable. -
Page 3: Table Of Contents
R9 RECUMBENT CYCLE TABLE OF CONTENTS SECTION PAGE 1. IMPORTANT SAFETY INSTRUCTIONS ............3 2. ASSEMBLY INSTRUCTIONS ............... 5 3. PARTS LIST....................19 4. EXPLODED VIEW ..................22 5. COMPUTER CONSOLE................23 6. COMPUTER OPERATION ................26 7. HEART RATE CALCULATION..............39 8. -
Page 4: Important Safety Instructions
12. Connect this unit to a properly grounded 110-120V, 15 or 20 Amp dedicated outlet only. 13. Call your service center or BH Fitness with your concerns before taking your unit in for repair. 14. Do not place sharp objects near the unit. Never drop or insert any object into any opening. - Page 5 Please save these Instructions ELECTRICAL POWER CONNECTOR Your R9 Recumbent Cycle has a two prong external electrical power connector for use on a nominal 110-120 volt circuit. Use only the electrical power connector provided with your R9 Recumbent Cycle. If you misplace the electrical connector, please contact BH Fitness for an original replacement.
-
Page 6: Assembly Instructions
R9 RECUMBENT CYCLE SECTION 2 - ASSEMBLY INSTRUCTIONS Small Parts... - Page 7 R9 RECUMBENT CYCLE ASSEMBLY INSTRUCTIONS CONTINUED Assembly Parts...
- Page 8 R9 RECUMBENT CYCLE ASSEMBLY INSTRUCTIONS CONTINUED STEP 1. Assembling the Front Stabilizer Spring Washer M8x2.0t—2PCS (112) Washer 20x9x2.0t—2PCS (113) M8 Acorn Nut—2PCS (110) Screw M8x56—2PCS (109) Refer to the drawing to the right. Attach the Front Stabilizer (66) to the Frame...
- Page 9 R9 RECUMBENT CYCLE ASSEMBLY INSTRUCTIONS CONTINUED STEP 2. Assembling the Rear Stabilizer Spring Washer M8x2.0t—2PCS (112) Washer 20x9x2.0t—2PCS (113) M8 Acorn Nut—2PCS (110) Screw M8x56—2PC (109) There are wheels on the outside edges of the rear stabilizer. Each wheel can be independently...
- Page 10 R9 RECUMBENT CYCLE ASSEMBLY INSTRUCTIONS CONTINUED STEP 3. Assembling the Upright Washer 18x9x2.0t—6PCS (5) Allen Screw M8x15-6PCS (108) Step A: 1. Connect the Hand Pulse Wires (17), (83) between the Frame and the Upright, and then connect the Hand Pulse Wires (105), (122).
- Page 11 R9 RECUMBENT CYCLE ASSEMBLY INSTRUCTIONS CONTINUED STEP 4. Assembling Computer Console Step A: Unfasten the Screws (100) from the Computer (97/101) with Open Spanner (117). Step B: Connect the out wires from the Computer, connect (98) to (83) (two pairs) and (99) to (122).
- Page 12 R9 RECUMBENT CYCLE ASSEMBLY INSTRUCTIONS CONTINUED STEP 5. Assembling the Seat, Handrails, Seat Sliding Base, Spacers and Rear Covers Self Tapping Screw ST4.0x25-4PCS (41) Screw M6x35 – 2 PCS (91) Washer 18x9x2.0t-6PCS (5) Screw M8x15-4PCS (108) Screw M8x45-2PCS (114) M8 Nut-2PCS (143) Spring Washer M8x2.0t -2PCS (142)
- Page 13 R9 RECUMBENT CYCLE ASSEMBLY INSTRUCTIONS CONTINUED Step B: Assemble the Handrail (59) and Seat Sliding Base with Washers (5), (142), Allen Screw (114), and Acorn Nuts (143). Tighten with Open Spanner (117) and 6mm Allen Wrench (118). Step C: Turn the Handle (93) of the...
- Page 14 R9 RECUMBENT CYCLE ASSEMBLY INSTRUCTIONS CONTINUED Step E: Assemble Rear Covers (48), (49) to the Frame with Open Spanner (117) and Self Tapping Screw (41). STEP 6. Assembling the Backrest Washer 18x9x2.0t—4PCS (5) Screw M8x15—4PCS (108) Assembled Appearance...
- Page 15 R9 RECUMBENT CYCLE ASSEMBLY INSTRUCTIONS CONTINUED Assemble the Backrest (103) and the Seat Sliding Base with Washers (5), Screw (108) and 6mm Allen Wrench (118). 7. Assembling the Handrail Washer 18x9x2.0t - 2PCS (5) Screw M8x15 - 2PCS (108) Assembled...
- Page 16 R9 RECUMBENT CYCLE ASSEMBLY INSTRUCTIONS CONTINUED 8. Assembling the Bottle Holder Assembled Step A: Unfasten the Screw (82) from the Upright (80) with Open Spanner (117). Step B: 1. Attach the Bottle Holder (107) to the Upright (80) with Screw (82) using Open Spanner (117).
- Page 17 R9 RECUMBENT CYCLE ASSEMBLY INSTRUCTIONS CONTINUED 9. Assembling the Pedals Assembled Step A: Attach the Pedal Belt to each Pedal. Step B: Install the Pedal by hand. Turn the attachment on the right Pedal clockwise by hand. See the arrows direction in Figure B.
- Page 18 R9 RECUMBENT CYCLE ASSEMBLY INSTRUCTIONS CONTINUED 10. Assembling the Book Shelf Insert the Book Shelf (104) into the Computer (97). 11. Attaching the Transformer Step A: Plug the AC-AC Transformer (127) into the Frame (1) Electrical Jack.
- Page 19 ASSEMBLY INSTRUCTIONS CONTINUED Note: Before plugging into the wall outlet, verify that you are using the correct AC-AC Electrical Transformer (127) that came with the R9. Step B: Plug the other end of the AC-AC Electrical Transformer (127) into the wall outlet.
-
Page 20: Parts List
R9 RECUMBENT CYCLE SECTION 3 – PARTS LIST ITEM # DESCRIPTION ITEM # DESCRIPTION Frame Front Stabilizer Inner Bushing (R) Bearing 6203ZZ Front Stabilizer Outer Bushing (R) Power Cord Rear Stabilizer Rear Stabilizer Outer Bushing Lower Control Connecting Inductance Wire Chromic Washer 18x9x2.0t... - Page 21 R9 RECUMBENT CYCLE ITEM # DESCRIPTION ITEM # DESCRIPTION Sleeve Book Shelf Bearing 6000ZZ Lower Control Wires Left Front Chain Guard/Cover Bottle Right Front Chain Guard/Cover Bottle Holder Screw (M4x12) Allen Screw (M8x15) Self Tapping Screw (ST4x25) Screw (M8x56) Plastic Cushion...
- Page 22 R9 RECUMBENT CYCLE ITEM # DESCRIPTION ITEM # DESCRIPTION Screw (M4x15) TV Power Cord Flat Head Hex Screws SAG3515 Nylon Nut M8 Screw Cap (PCZ18175)
-
Page 23: Exploded View
R9 RECUMBENT CYCLE SECTION 4 – EXPLODED VIEW... -
Page 24: Computer Console
R9 RECUMBENT CYCLE SECTION 5 – COMPUTER CONSOLE... - Page 25 R9 RECUMBENT CYCLE COMPUTER CONSOLE CONTINUED Parameters Display Area Instructions for the middle display area Y-axis : LEVEL (32 levels) X-axis : Time Information Display Area Time for each level=total preset tie/10 Range Setting Default value Time: 00:00~99:59 00:00~99:00 (±1 min) 20:00...
-
Page 26: Button Functions
R9 RECUMBENT CYCLE COMPUTER CONSOLE CONTINUED Button Functions Figures of Buttons Function Instructions QUICK START KEY: None of the values need to be set. All of the values will count up from 0. Level starts with 1, execution time for program is 20 min. -
Page 27: Computer Operation
R9 RECUMBENT CYCLE SECTION 6 – COMPUTER OPERATION Power On 1. Plug in the power supply and the console will start automatically. The Program LCD will light completely and the console will Beep twice. 2. Then the Start/Ready display will be shown and it will alert the User to select the... - Page 28 R9 RECUMBENT CYCLE COMPUTER OPERATION CONTINUED Quick Start POWER ON Start display No parameters need to be set; all values will count up from 0. Levels start with 1 (press keys to adjust). The preset execution time for program is 20 min. After the program ends, each value will stop counting and the values will be displayed in the corresponding windows.
- Page 29 R9 RECUMBENT CYCLE COMPUTER OPERATION CONTINUED Manual Program continued MODE “CALORIES” will blink. Press Increase or decrease CALORIES value. MODE ”PULSE” will blink. Increase or decrease PULSE value and parameter settings are finished. MODE Begins to count down for 3 seconds and then the program starts.
- Page 30 R9 RECUMBENT CYCLE COMPUTER OPERATION CONTINUED Custom Program continued ”TIME” will blink. Press MODE Increase or decrease TIME value. MODE ”DISTANCE” will blink. Increase or decrease DISTANCE value. MODE ”CALORIES” will blink. Increase or decrease CALORIES value. MODE ”PULSE” will blink.
- Page 31 R9 RECUMBENT CYCLE COMPUTER OPERATION CONTINUED Interval Program The interval program distinguishes itself by strongly varying load phases and recovery phases that are repeated in a mode that is always the same. The interval program has an increased straining effect on the cardio-vascular system and ought to be applied only by persons that have already completed several exercising sessions.
- Page 32 R9 RECUMBENT CYCLE COMPUTER OPERATION CONTINUED Interval Program continued Increase or decrease PULSE value and the parameter settings are finished. MODE Begins to count down for 3 seconds and the program starts...
- Page 33 R9 RECUMBENT CYCLE COMPUTER OPERATION CONTINUED Watts Control Program The watts control program will automatically adjust the resistance to keep the WATTS in a certain range according to the RPM/SPEED. The procedure is shown below. POWER ON Start Display Begins to count down for 3 seconds and the program starts (preset Enter “WATT”...
- Page 34 R9 RECUMBENT CYCLE COMPUTER OPERATION CONTINUED HRC Program (Use with Included Chest Strap) The Target Heart Rate workout allows the user to maintain a specified desired heart pulse rate throughout the workout. The software may adjust resistance levels to maintain the target HR.
- Page 35 R9 RECUMBENT CYCLE COMPUTER OPERATION CONTINUED HRC Program continued Increase or decrease CALORIES value. MODE ”PULSE” will blink. Increase or decrease PULSE value, and the parameter settings are finished. This is your Target Heart Rate. See page 36 for more information.
- Page 36 R9 RECUMBENT CYCLE COMPUTER OPERATION CONTINUED Test Program In this program, only GENDER, WEIGHT and AGE can be set. When this program starts to run, it will begin to count down for 12 minutes to test the physical force of the user. When it counts down to 0, it will display F1-F6, F1 is the best and F6 is the worst.
- Page 37 R9 RECUMBENT CYCLE COMPUTER OPERATION CONTINUED BMI-FAT-BMR Program Explanation of the concept: • BMI (Body Mass Index) - The BMI serves as a standard of evaluation for assessing weight. • The procedure is shown below. • Body fat - The function is intended to help you to classify your body fat value.
- Page 38 R9 RECUMBENT CYCLE COMPUTER OPERATION CONTINUED Hill Climb Program This program starts with a slight, stepwise increase of the PEDALING RESISTANCE. After an average pedaling resistance has been reached and maintained for a short period of time, the pedaling resistance is subsequently increased again by one level that is also to be maintained for a short period of time.
- Page 39 R9 RECUMBENT CYCLE COMPUTER OPERATION CONTINUED Hill Climb Program continued Increase or decrease PULSE value, and the parameter settings are finished. MODE Begins to count down for 3 seconds and the program starts. Recovery Pulse This function will evaluate the health index based on the pulse change in one minute. If the pulse has no change then the index will be F6, if the pulse recovers (decreases) more, then the index will be smaller, that is to say you are healthier.
-
Page 40: Heart Rate Calculation
R9 RECUMBENT CYCLE SECTION 7 – CALCULATING YOUR TARGET HEART RATE Heart Rate (HR) training has become one of the most popular forms of monitoring your workouts. Nothing tells you how your body is feeling like your own heart. By using your heart rate to tell you how hard to train, you can maximize your workout results. -
Page 41: Tv User's Guide
R9 RECUMBENT CYCLE SECTION 8 - TV USER’S GUIDE Key Functions:... - Page 42 R9 RECUMBENT CYCLE TV USER’S GUIDE CONTINUED BUTTON NO. FUNCTION DESCRIPTION IR RECEIVER Remote Control Receiver. Some Models do not have a Remote Control. VOL ▲ 1. In TV/AV mode, press this key to increase the volume. 2. In MENU mode, press this key to highlight (select) the MENU item (see next page).
- Page 43 R9 RECUMBENT CYCLE TV USER’S GUIDE CONTINUED MENU ITEM SETTING INSTRUCTIONS 1. If you hold the AV/TV/MP3 key for 3 or 4 seconds, it will enter MENU display. 2. Select the desired item by using 3. Adjust the preset value by using...
-
Page 44: Warranty
FRAME – Lifetime (Home Warranty), Lifetime (Light Commercial Warranty) BH Fitness warrants the Frame against defects in workmanship and materials for Lifetime, as long as it remains in the possession of the original owner. - Page 45 LABOR – 1 Year (Home Warranty), 1 Year (Light Commercial Warranty) BH Fitness shall cover the labor cost for the repair of the device for a period of one year from the date of original purchase, as long as the device remains in the possession of the original owner. Labor Warranty does not include the travel time and or expense that may result from the unit being outside of the seller or repair technician’s normal...
Need help?
Do you have a question about the R9 and is the answer not in the manual?
Questions and answers