
Subscribe to Our Youtube Channel
Related Manuals for BH FITNESS R8


Summary of Contents for BH FITNESS R8
- Page 1 BH FITNESS R8 RECUMBENT CYCLE OWNER’S MANUAL BH FITNESS 20155 Ellipse Foothill Ranch, CA 92610 Phone: 949-206-8152 Fax: 949-206-0013 Email: fitness@bhnorthamerica.com Web: www.bhnorthamerica.com Revised: 9/19/07...
-
Page 2: Before You Begin
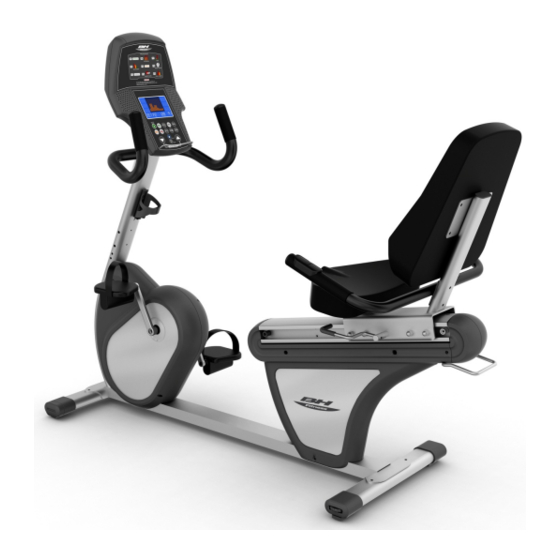
The R8 is designed to make your workouts more effective and enjoyable. Please read this manual carefully before using the R8. This will allow you to get a full understanding of all the features the BH Fitness Recumbent Cycle provides. If you have questions or concerns, please contact BH FITNESS or any authorized BH FITNESS distributors in your area. -
Page 3: Table Of Contents
R8 RECUMBENT CYCLE TABLE OF CONTENTS SECTION PAGE 1. IMPORTANT SAFETY INSTRUCTIONS ............3 2. ASSEMBLY INSTRUCTIONS ..............4 3. COMPUTER CONSOLE ................17 4. CONSOLE OPERATION ................18 5. WARRANTY ....................25... -
Page 4: Important Safety Instructions
R8 RECUMBENT CYCLE SECTION 1 IMPORTANT SAFETY INSTRUCTIONS Read all instructions before using the Recumbent Cycle. Notice: Before using this or any other exercise equipment consult your family physician or health care professional to develop a well planned exercise program to fit your health needs. -
Page 5: Assembly Instructions
R8 RECUMBENT CYCLE SECTION 2 - ASSEMBLY INSTRUCTIONS Screws Bag... - Page 6 R8 RECUMBENT CYCLE ASSEMBLY INSTRUCTIONS CONTINUED Assembly Parts...
- Page 7 R8 RECUMBENT CYCLE ASSEMBLY INSTRUCTIONS CONTINUED STEP 1. Assembling the Front Stabilizer Spring Washer M8×2.0t - 2PCS (112) Washer 20×9×2.0 - 2PCS (113) M8 Nut - 2PCS (110) Screw M8×56 - 2PCS (109) Refer to the drawing to the right.
- Page 8 R8 RECUMBENT CYCLE ASSEMBLY INSTRUCTIONS CONTINUED STEP 2. Assembling the Rear Stabilizer Spring Washer M8×2.0t - 2PCS (112) Washer 20×9×2.0t - 2PCS(113) M8 Nut - 2PCS (110) Screw M8×56 - 2PCS (109) Refer to the drawing to the right. Attach the Rear Stabilizer (74) to...
- Page 9 R8 RECUMBENT CYCLE ASSEMBLY INSTRUCTIONS CONTINUED STEP 3. Assembling the Upright Washer 18×9×2.0t - 6PCS (5) Allen Bolt M8×15—6PCS (108) 1. Connect the Handrail Pulse Wire (17) and the Handrail Pulse (upright section) (83). Connect the Control Wire (L) (105) and the Control Wire (M) (122).
- Page 10 R8 RECUMBENT CYCLE ASSEMBLY INSTRUCTIONS CONTINUED STEP 4. Assembling Computer Console Step A: Unfasten the Screws (100) from the Computer with Open Spanner (117). Step B: Connect the wires from the Computer. Connect (98) to (83) and (99) to (122).
- Page 11 R8 RECUMBENT CYCLE ASSEMBLY INSTRUCTIONS CONTINUED STEP 5. Assembling the Seat, Handrails, Seat Sliding Base, Spacers and Rear Covers Self Tapping Screw ST4.0×25 - 4PCS (41) Allen Bolt M635 - 2PCS (91) Washer18×9×2.0t - 6PCS (5) Allen Bolt M8×15 - 4PCS (108) Allen Bolt M8×45 - 2PCS (114)
- Page 12 R8 RECUMBENT CYCLE ASSEMBLY INSTRUCTIONS CONTINUED Step B: Assemble the Handrail (59) and Seat Sliding Base with Allen Bolts (114), Washers (5), (142) and Acorn Nuts (143). Tighten with Open Spanner (117) and 6mm Allen Wrench (118). Step C: Turn the Handle (93) of the Seat Sliding Base (51) in the direction shown in the drawing to the right.
- Page 13 R8 RECUMBENT CYCLE ASSEMBLY INSTRUCTIONS CONTINUED Step E: Assemble Rear Covers (48), (49) to the Frame with Self Tapping Screws (41) and Open Spanner (117). STEP 6. Assembling the Backrest Washer 18x9x2.0t - 4PCS (5) Bolt M8x15 - 4PCS (108)
- Page 14 R8 RECUMBENT CYCLE ASSEMBLY INSTRUCTIONS CONTINUED Assemble the Backrest (103) and the Seat Sliding Base with Bolts (108), Washers (5) and 6mm Allen Wrench (118). 7. Assembling the Handrail Washer 18x9x2.0t - 2PCS (5) Bolt M8x15 - 2PCS (108) Assemble the Handrail (96) and Frame (1) with Bolts (108), Washers (5) and 6mm Allen Wrench (118).
- Page 15 R8 RECUMBENT CYCLE ASSEMBLY INSTRUCTIONS CONTINUED 8. Assembling the Bottle Holder Step A: Unfasten the Bolt (82) from the Upright (80) with Open Spanner (117). Step B: 1. Attach the Bottle Holder (107) to the Upright (80) with Bolt (82) and Open Spanner (117).
- Page 16 R8 RECUMBENT CYCLE ASSEMBLY INSTRUCTIONS CONTINUED 9. Assembling the Pedals Step A: Attach the Pedal Belt to the Pedal. Step B: Tighten the Pedal in the arrow’s direction in Picture B with Open Spanner (117). Step C: If needed, disassemble the Pedal in the arrow’s direction in Picture C with Open...
- Page 17 R8 RECUMBENT CYCLE ASSEMBLY INSTRUCTIONS CONTINUED 10. Assembling the Book Shelf Insert the Book Shelf (104) into the Computer (97).
-
Page 18: Computer Console
R8 RECUMBENT CYCLE SECTION 3 – COMPUTER CONSOLE Function Keys... -
Page 19: Console Operation
R8 RECUMBENT CYCLE SECTION 4 – CONSOLE OPERATION 1. Console Display a. LEVEL: Shows the resistance steps. b. WATTS: Shows the WATTS (power) consumed. c. RPM: Shows the rolling speed. d. CALORIES: Shows the calories consumed. e. PULSE: Shows the heartbeat in beats per minute. - Page 20 R8 RECUMBENT CYCLE CONSOLE OPERATION CONTINUED 4. Choosing Users This console has U1, U2 for the users to choose from. When step on the foot pedals and enter the start mode, the computer will provide U1, U2 for you to choose from. At –...
- Page 21 R8 RECUMBENT CYCLE CONSOLE OPERATION CONTINUED c. PEAK: The rolling caption will show PEAK. d. PLATEAU: The rolling caption will show PLATEAU. e. MOUNTAIN CLIMB: The rolling caption will show MOUNTAIN CLIMB.
- Page 22 R8 RECUMBENT CYCLE CONSOLE OPERATION CONTINUED HILL INTERVAL: the rolling caption will show HILL INTERVAL. g. STRENGTH INTERVAL: The rolling caption will show STRENGTH INTERVAL. The resistance will change based on the variations of the exercise profile. You can also –...
- Page 23 R8 RECUMBENT CYCLE CONSOLE OPERATION CONTINUED CUSTOM: The rolling caption shows CUSTOM. When you choose this exercise, you can set the resistance yourself. You can set the resistance in different steps by – + pressing the buttons, then press ENTER to go to the next step. If you press and hold ENTER, it will exit the setting of the CUSTOM resistance and go to the next setting.
- Page 24 R8 RECUMBENT CYCLE CONSOLE OPERATION CONTINUED In the 60 second recovery pulse test, if the PULSE shows 0, the computer will return to the exercise mode after 60 seconds. During the 60 second recovery pulse test, the user can repress the RECOVERY key to stop the recovery pulse test and return to the exercise mode.
- Page 25 R8 RECUMBENT CYCLE CONSOLE OPERATION CONTINUED 11. Batteries The console has 4 rechargeable batteries in it. When you exercise, the generator automatically charges the batteries. When you stop exercising the batteries will take over to power the display. CAUTION: Use only rechargeable batteries of the same type and voltage as those supplied with your bike.
-
Page 26: Warranty
LABOR – 1 Year BH Fitness shall cover the labor cost for the repair of the device for a period of one year from the date of original purchase, as long as the device remains in the possession of the original owner.
Need help?
Do you have a question about the R8 and is the answer not in the manual?
Questions and answers