Table of Contents
Advertisement
Advertisement
Table of Contents

Related Manuals for BH FITNESS RS2i


Summary of Contents for BH FITNESS RS2i
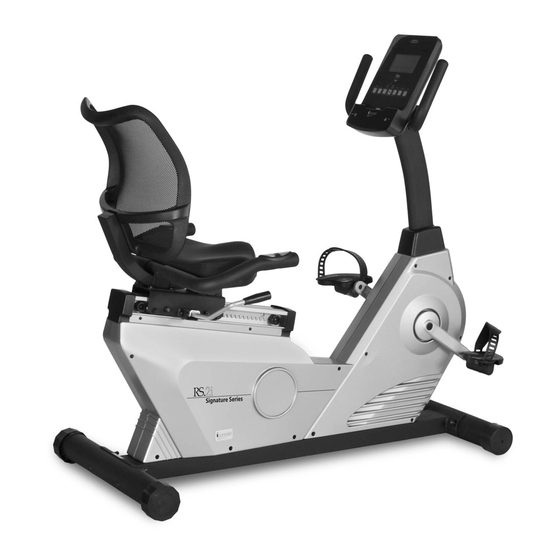
- Page 1 RS2i OWNER’S MANUAL Important: Read all instructions carefully before using this product. Retain this owner’s manual for future reference. BH North America | 20155 Ellipse, Foothill Ranch, California 92610 | p.949.206.0330 | f.949.206.0013 | www.BHFitnessUSA.com...
-
Page 2: Table Of Contents
TABLE OF CONTENTS Title Page Introduction Safety Information Exercise Instruction Training Guidelines Suggested Stretches Assembly Instructions Console Operations Maintenance and Cleaning Exploded View Drawing Parts List Warranty... -
Page 3: Introduction
Introduction Congratulations on your purchase of BH Fitness equipment. We hope you appreciate the style, quality, and value that exercisers around the world have come to expect from BH Fitness. If you have any questions, concerns or product issues please call our Customer Service Team at 1-866-325-2339 or email us at CustomerSupport@BHNorthAmerica.com. -
Page 4: Safety Information
6. This machine must only be used for the purposes described in this manual. DO NOT use accessories that are not recommended by BH Fitness. Read manual prior to use and follow all warnings and instructions. 7. Do not place sharp objects near the machine. -
Page 5: Exercise Instruction
NOTE: This equipment has been tested and found to comply with the limits for Class B digital device, pursuant to part 15 of the FCC Rules. These limits are designed to provide a reasonable protection against harmful interference in a residential installation. This equipment generates, uses and can radiate radio frequency energy and, if not installed and used in accordance with the instructions, may cause harmful interference to radio or television reception, which can be determined by turning the equipment off and on, the user is encouraged to try to correct the interference by one or more of the... -
Page 6: Training Guidelines
TRAINING GUIDELINES Exercise is one of the most important factors in the overall health of an individual. Listed among its benefits are: • Increased capacity for physical work (strength endurance) • Increased cardiovascular (heart and arteries/veins) and respiratory efficiency • Decreased risk of coronary heart disease • Changes in body metabolism, e.g. losing weight • Delaying the physiological effects of age • Reduction in stress, increase in self-confidence, etc. There are several components of physical fitness and each is defined below. STRENGTH The capacity of a muscle to exert a force against resistance. - Page 7 OXYGEN UPTAKE The effort that you can exert over a prolonged period of time is limited by your ability to deliver oxygen to the working muscles. Regular vigorous exercise produces a training effect that can increase your aerobic capacity by as much as 20 to 30%. An increased VO2 Max indicates an increased ability of the heart to pump blood, of the lungs to ventilate oxygen, and of the muscles to take up oxygen.
- Page 8 HEART RATE As you exercise, your heart beat increases. This is often used as a measure of the required intensity of an exercise. You need to exercise hard enough to condition your circulatory system, and increase your pulse rate, but not enough to strain your heart. Your initial level of fitness is important when developing an exercise program for you.
- Page 9 MUSCLE SORENESS For the first week or so, muscle soreness may be the only indication you have that you are on an exercise program. This, of course, does depend on your overall fitness level. A confirmation that you are on the correct program is a very slight soreness in most major muscle groups. This is quite normal and will disappear in a matter of days.
-
Page 10: Suggested Stretches
SUGGESTED STRETCHES Head Rolls Rotate your head to the right for one count while feeling the stretch up the left side of your neck. Next, rotate your head back for one count, stretching your chin to the ceiling. Rotate your head to the left for one count, and finally, drop your head to your chest for one count. - Page 11 SUGGESTED STRETCHES Inner Thigh Stretch Sit with the soles of your feet together with your knees pointing outward. Pull your feet as close into your groin as possible. Gently push your knees towards the floor. Hold for 15 counts. Toe Touches Slowly bend forward from your waist, letting your back and shoulders relax as you stretch toward your toes.
-
Page 12: Assembly Instructions
ASSEMBLY INSTRUCTIONS AND WARNING LABELS... - Page 13 STEP 1 Connect Front and Rear Foot Tubes (4 &5) to Main Frame (1) using: Qty 4 – (53) M8 Carriage Bolt. Qty 4 – (80) M8 Washer Qty 4 –(73) M8 Nut Cap Make sure that the Front Foot Tube (4) with Transportation Wheels (43) and Rear Foot Tube (5) with Foot Caps(44) are assembled onto the front and rear of the Main Frame (1) respectively.
- Page 14 STEP 2 Attach Pulse Handlebar (2) to Seat Carriage Assembly (8) using four Washers (78) and four Screws (64) . Connect the Hand Pulse Wires (35) which are out from the Pulse Handlebar(2) to the Pulse Extension Lower Wires(33) which are from the Seat Carriage Assembly (8) (as show on the diagram below) Insert the Seat Adjustment Handle (12) into the Handle Bracket (50) , then fix them together with two Screws (54).
- Page 15 STEP 3 Attach Seat Cushion (86) to Seat Carriage Assembly (8) using four Washers (76) and four Screws (55). Attach Mesh Back Rest (87) to Seat Carriage Assembly (8) using four Washers (80) and four Screws (65).
- Page 16 STEP 4 Thread the Right Pedal (88) into the right crank (28) area of Main Frame (1). Secure in place by turning it clockwise to tighten. Note: Right Pedal (88) is marked with an “R”. Thread the Left Pedal (89) into the left crank (29) area of Main Frame (1). Secure in place by turning it counter-clockwise to tighten.
- Page 17 STEP 5 Slide the Console Tube (72) get through the Console Tube Collar (42). Connect the Pulse Extension Upper Wire(34) to the Pulse Extension Lower Wire (33), then connect the Extension Wire (93) to Gear Box Wire (94) as shown in the diagram. Slide the Console Tube (72) onto the Main Frame (1) and secure using five Screws (64) and five Washers ( 80 &...
- Page 18 STEP 6 Attach the Front Handlebar (3) to Console Tube (72) using two Flat Washers (80), one Curve Washer (77), three Screws (67 & 64) and two Nylon Nuts(71).
- Page 19 STEP 7 Connect the Extension Wire (93) and Pulse Extension Upper Wire (34) to the Cables which are out from the back of Monitor (36). Note: The four Screws (37) are already installed into the back of Monitor (36) when you remove it from the box.
- Page 20 The monitor must be powered by using the AC adaptor input. Please make sure the AC adapter has already been pluged into the adapter jack on the bottom housing. (as showed on the drawing)
-
Page 21: Console Operations
CONSOLE OPERATIONS... - Page 22 SPECIFICATIONS: ENTER To confirm all setting values RESET To reset all parameters to default value START/STOP To start or stop training To make upward setting change DOWN To make downward setting change RECOVERY In stop or start mode, pressing this button will start Heart Rate recovery status measurement.
- Page 23 1. MANUAL MODE User may preset their own resistance level from 1 to 24 by pressing the UP/DOWN buttons. The default resistance level is 1. Press ENTER to confirm. Using the UP/DOWN buttons enter values for TIME, DISTANCE, CALORIES, PULSE, and then press START to begin your workout.
- Page 24 values for TIME, DISTANCE, and CALORIES. You will see a random program profile. Press START/STOP to start the exercise. The duration of the program graph is 16 minutes, divided into sixteen segments. To program time, distance and/or calories, go through the following procedure: Once the program has been selected and before pressing the START STOP button, press the ENTER button to program the time using the UP/DOWN buttons.
- Page 25 CONSOLE PROGRAMS...
-
Page 26: Maintenance And Cleaning
• iPad (3rd generation) • iPad BH Fitness iConcept products are compatible with Apple® devices with iOS 4.2.3 or later. It is recommended to update iOS to latest version to obtain the best user experience. “Made for iPod “, “Made for iPhone,” and “Made for iPad” mean that an electronic accessory has been designed to connect specifically to iPod, iPhone, or iPad, respectively, and has been certified by the developer to meet Apple performance standards. -
Page 27: Exploded View Drawing
EXPLODED VIEW DRAWING -23-... -
Page 28: Parts List
PARTS LIST To order replacement parts: provide your customer service representative with the product model number and the part number located on the Parts List below, along with the quantity you require. ITEM PART NAME Q’TY ITEM PART NAME Q’TY Main Frame Assembly Wire Plug Pulse Handlebar... -
Page 29: Warranty
* Applies to defects from the manufacturer only. FOR WARRANTY REPAIRS, PLEASE DO NOT TAKE YOUR MACHINE BACK TO THE RETAIL STORE. CONTACT BH FITNESS FIRST. BH North America Corporation 20155 Ellipse Foothill Ranch, CA 92610 Phone: 949.206.0330;...
Need help?
Do you have a question about the RS2i and is the answer not in the manual?
Questions and answers