Table of Contents
Advertisement
Quick Links
Advertisement
Table of Contents

Subscribe to Our Youtube Channel
Related Manuals for BH FITNESS R5


Summary of Contents for BH FITNESS R5
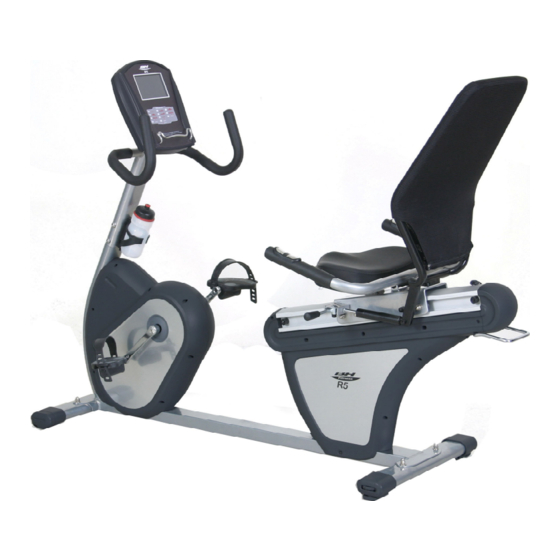
- Page 1 All manuals and user guides at all-guides.com R5 RECUMBENT BIKE OWNER’S MANUAL BH FITNESS 20155 Ellipse, Foothill Ranch, CA 92610 Phone: 949-206-0330 Fax: 949-206-0013 Email: fitness@bhnorthamerica.com Web: www.bhnorthamerica.com www.bhfitness.com Issued: 6 October 2008 (v1)
-
Page 2: Table Of Contents
All manuals and user guides at all-guides.com R5 Recumbent Bike TABLE OF CONTENTS IMPORTANT SAFETY INFORMATION ................2 ASSEMBLY ........................4 HEART RATE CALCULATION ..................18 CONSOLE OPERATION ....................19 Buttons .........................21 Modes .........................23 Programs ......................24 Manual Program, CP.1.................25 Custom, CP.8....................27 CP.1-CP.7 ....................28 HRC.1-HRC.3, (PROGRAMS 9-11) ............29 Appearance of Program Displays .................31... -
Page 3: Important Safety Information
All manuals and user guides at all-guides.com R5 Recumbent Bike IMPORTANT SAFETY INSTRUCTIONS User Safety 1. Users should pass a full medical examination before they begin an exercise program. Work at the recommended exercise level. Do not over exert yourself. If you feel any pain or discomfort, stop exercising immediately and consult your doctor. - Page 4 All manuals and user guides at all-guides.com R5 Recumbent Bike IMPORTANT SAFETY INSTRUCTIONS 9. Use the unit only as described in this manual. Only use attachments recommended by the manufacturer. 10. Never operate this unit if it has a damaged electrical cord or plug. Do not operate this unit if it is not working properly.
-
Page 5: Assembly
All manuals and user guides at all-guides.com R5 Recumbent Bike ASSEMBLY 1. Assembly Parts (159) Bolt-1PCS (151) Nylon Nut M8-1PCS Page 4... - Page 6 All manuals and user guides at all-guides.com R5 Recumbent Bike ASSEMBLY Page 5...
- Page 7 All manuals and user guides at all-guides.com R5 Recumbent Bike ASSEMBLY 2. Assemble the Front Stabilizer 彈簧華司 Spring Washer M8*2.0T – 2PCS (112) Washer 20*9*2.0T – 2PCS (113) 華司 袋帽 M8 Acorn Nut – 2PCS (110) Screw M8*56 – 2PCS (109) 傘頭馬車螺絲...
- Page 8 All manuals and user guides at all-guides.com R5 Recumbent Bike ASSEMBLY 3. Assemble the Rear Stabilizer 彈簧華司 Spring Washer M8*2.0T – 2PCS (112) 華司 Washer 20*9*2.0T – 2PCS (113) 袋帽 M8 Acorn Nut – 2PCS (110) Screw M8*56 – 2PCS (109) 傘頭馬車螺絲...
- Page 9 All manuals and user guides at all-guides.com R5 Recumbent Bike ASSEMBLY 4. Assemble the Upright Washer 8*9*2.0t–6 PCS (5) 華司 Wahser 18*9*2.0t—6PCS (5) 傘頭內六角螺絲M8x15--6PCS(108) Bolt M8*16—6PCS (108) Appearance after assembled Step A: 1. Connect the Hand Pulse Wires (17) and (83)
- Page 10 All manuals and user guides at all-guides.com R5 Recumbent Bike ASSEMBLY 5. Assemble the Computer Connect the control wires (99) and (122). Connect the hand pulse wires (83) and (98). Secure the computer on the upright (80) with four screws (100). Insert the book shelf iron string (104) into the computer.
- Page 11 All manuals and user guides at all-guides.com R5 Recumbent Bike ASSEMBLY 6. Assemble the Seat, Handrail, Seat Sliding Base, Spacers and Rear Covers Phillips Screw ST4.0*25-4PCS (41) 殺拉頭十字自攻螺絲ST4.0x25--4PCS(41) 傘頭內六角螺絲M6x35--2PCS(91) Allen Bolt M6*35-2PCS(91) 華司18x9x2.0t--4PCS(5) Washer18*9*2.0t-4PCS(5) 傘頭內六角螺絲M8x15--4PCS(108) Allen Bolt M8*15-4PCS(108) Allen Bolt M10*15-3PCS(161) 傘頭內六角螺絲M10x15-- 3 PCS( 161 )
- Page 12 All manuals and user guides at all-guides.com R5 Recumbent Bike ASSEMBLY Step B: Turn the Handle (93) of the Seat Sliding Base (51) in the direction shown in the right drawing. Slide the Seat Sliding Base onto the Aluminous Tube...
- Page 13 All manuals and user guides at all-guides.com R5 Recumbent Bike ASSEMBLY 步驟 F: 用十字 開口 扳手(117),螺絲 Step F: Attach the Rear Covers (48) and (49) to the Rear Frame with Screws (41) (41)將後飾蓋左右(48)(49)組到主架 上. and Open Spanner Wrench (117). 7.組立氣彈簧...
- Page 14 All manuals and user guides at all-guides.com R5 Recumbent Bike ASSEMBLY 如右圖所示, 用螺絲(164) ,彈簧華 Using right drawing, attach the Cylinder 司 (165) ,華司 (166) 將氣壓棒 (157) (157) to the seat sliding base (51) with 與座墊滑動焊接件組立,4mm 內六角 Bolts (164), Spring Washers (165), 扳手...
- Page 15 All manuals and user guides at all-guides.com R5 Recumbent Bike ASSEMBLY 8. Assemble the Handlebar Appearance after assembled Assemble the Handlebar (96) and Frame (1) with Washers (5), Bolts (108) and 6mm Allen Wrench (118). Page 14...
- Page 16 All manuals and user guides at all-guides.com R5 Recumbent Bike ASSEMBLY 9. Assemble the Bottle and Bottle Holder Appearance after assembled Step A: Unfasten the Bolt (82) from the Upright (80) with Open Spanner (117). Step B: 1. Attach the Bottle Holder (107) to the Upright (80) with Bolts (82) and Open Spanner (117).
- Page 17 All manuals and user guides at all-guides.com R5 Recumbent Bike ASSEMBLY 10. Assemble the Pedal Assembly Appearance after assembled Step A:Attach the Pedal Belt to each Pedal. Step B:Tighten the (right) Pedal by turning in the direction of the arrow in Picture B with Open Spanner wrench (117).
- Page 18 All manuals and user guides at all-guides.com R5 Recumbent Bike ASSEMBLY 11. Install the Adapter Plug in one end of the Adapter (127) at the front of the Frame. Step A: Plug one end of the Plug the other end of the Adapter Transformer (127) into the Frame (1) into a 110-120V dedicated circuit.
-
Page 19: Heart Rate Calculation
All manuals and user guides at all-guides.com R5 Recumbent Bike HEART RATE CALCULATION Before beginning any test, calculate your maximum heart rate. The maximum number of heartbeats that a person must not exceed is referred to as the maximum heart rate and this value drops with age. -
Page 20: Console Operation
All manuals and user guides at all-guides.com R5 Recumbent Bike CONSOLE OPERATION Page 19... - Page 21 All manuals and user guides at all-guides.com R5 Recumbent Bike CONSOLE OPERATION 1. Display: 1) The upper half of the console has a touch screen for operating the Programs. The touch screen can detect the presence and location of contact by a finger or hand. The areas which operate like buttons are painted onto the display.
-
Page 22: Buttons
All manuals and user guides at all-guides.com R5 Recumbent Bike CONSOLE OPERATION 5) Resistance: Resistance can be adjusted anytime during the program by pressing the ▲ or ▼ button up to level 16. The resistance level of the remainder of the program will be adjusted to the new level. - Page 23 All manuals and user guides at all-guides.com R5 Recumbent Bike CONSOLE OPERATION 4) ENTER Button – Press this button to approve a value. 5) RESET Button Press RESET in order to go backwards to a prior entry. Press QUICKSTART/STOP. Press RESET to display “PROG” in the top left of the display window.
-
Page 24: Modes
All manuals and user guides at all-guides.com R5 Recumbent Bike CONSOLE OPERATION GRADE (A+ thru C) will display in the main field. When it counts down to 0, it will display a GRADE. A+: Excellent A: Very Good B+: Good... -
Page 25: Programs
All manuals and user guides at all-guides.com R5 Recumbent Bike CONSOLE OPERATION (Figure 2) 5. Programs: 1) Initial operation: NOTE: If necessary press RESET until “U1” appears. A. Select USER 1 or 2 or 3: The “U1” appears in the center of the display and a message displays “SELECT USER”, see Figure 2. -
Page 26: Manual Program, Cp.1
All manuals and user guides at all-guides.com R5 Recumbent Bike CONSOLE OPERATION (Figure 3) B. Press ENTER button to accept the User and the Scrolling message displays “SELECT WORKOUT PROGRAM OR QUICK START TO MANUAL MODE”, see Figure 3. C. Select PROGRAM: To enter into MANUAL (CP.1) program directly press ENTER button, or:... - Page 27 All manuals and user guides at all-guides.com R5 Recumbent Bike CONSOLE OPERATION CP.1 (MANUAL) Press ENTER button to accept WEIGHT. Setting TIME: The WORKOUT TIME is displayed in the center of the display (default time is 20:00). The message displays “ENTER TIME”. Press the ▲ or ▼ button to adjust the WORKOUT TIME.
-
Page 28: Custom, Cp.8
All manuals and user guides at all-guides.com R5 Recumbent Bike CONSOLE OPERATION 3) CP.1-CP.8, HRC.1-HRC.3 program: Press PROGRAM button to scroll through preset profiles in order to select one of the following programs: CP.1→ CP.2→ CP.3→ CP.4→CP.5→CP.6→CP.7→CP.8→HRC.1→HRC.2→HRC.3 CP.1: MANUAL CP.2: ROLLING HILL CP.3: PEAK... -
Page 29: Cp.1-Cp.7
All manuals and user guides at all-guides.com R5 Recumbent Bike CONSOLE OPERATION CP.1-CP.7: Press the PROG button until the desired CP.1-CP.7 program displays. CP.2 (ROLLING HILL) Press ENTER. Enter AGE : A message displays “ENTER AGE”. Press the ▲ or ▼ button to adjust the AGE value. -
Page 30: Hrc.1-Hrc.3, (Programs 9-11)
All manuals and user guides at all-guides.com R5 Recumbent Bike CONSOLE OPERATION (4). Maximum RESISTANCE LEVEL can be adjusted, during the workout by pressing the ▲ or ▼ button. During the workout the Level window displays the resistance level of the current profile segment. - Page 31 All manuals and user guides at all-guides.com R5 Recumbent Bike CONSOLE OPERATION Enter TIME: (1). The WORKOUT TIME is displayed in the center of the display (default time is 20:00). The message displays “ENTER TIME”. (2). Press the ▲ or ▼ button to adjust the WORKOUT TIME.
-
Page 32: Appearance Of Program Displays
All manuals and user guides at all-guides.com R5 Recumbent Bike CONSOLE OPERATION 4) Initial appearance of program display: CP.1 (MANUAL) CP.2 (ROLLING HILL) Page 31... - Page 33 All manuals and user guides at all-guides.com R5 Recumbent Bike CONSOLE OPERATION CP.3 (PEAK) CP.4 (PLATEAU) Page 32...
- Page 34 All manuals and user guides at all-guides.com R5 Recumbent Bike CONSOLE OPERATION CP.5 (MOUNTAIN) CP.6 (HILL INTERVAL) Page 33...
- Page 35 All manuals and user guides at all-guides.com R5 Recumbent Bike CONSOLE OPERATION CP.7 (STRENGTH) CP.8 (CUSTOM) Page 34...
- Page 36 All manuals and user guides at all-guides.com R5 Recumbent Bike CONSOLE OPERATION HRC.1 (FAT BURN HR), PROGRAM 9 HRC.2 (CARDIO HR), PROGRAM 10 Page 35...
- Page 37 All manuals and user guides at all-guides.com R5 Recumbent Bike CONSOLE OPERATION HRC.3 (TARGET HEART RATE), PROGRAM 11 6. Program Variables Item Windows Display Range Default Stored 0:00 - 99:00 (minute : second) TIME 20:00 0.00 DISTANCE 0.00 - 99.99 (mile or km) SPEED 0.0 - 99.9 (mile or km per hour)
-
Page 38: Warranty
LABOR – 1 Year (Home Warranty) BH Fitness shall cover the labor cost for the repair of the unit for a period of one year from the date of original purchase, so long as the unit remains in the possession of the original owner for home use. - Page 39 This warranty gives you specific legal rights and your rights may vary from state to state. WARRANTY REGISTRATION Your warranty card must be completed and sent to BH FITNESS before a warranty claim can be processed. Page 38...
Need help?
Do you have a question about the R5 and is the answer not in the manual?
Questions and answers