Table of Contents
Advertisement
Advertisement
Table of Contents

Related Manuals for MOTO GUZZI BREVA V750IE


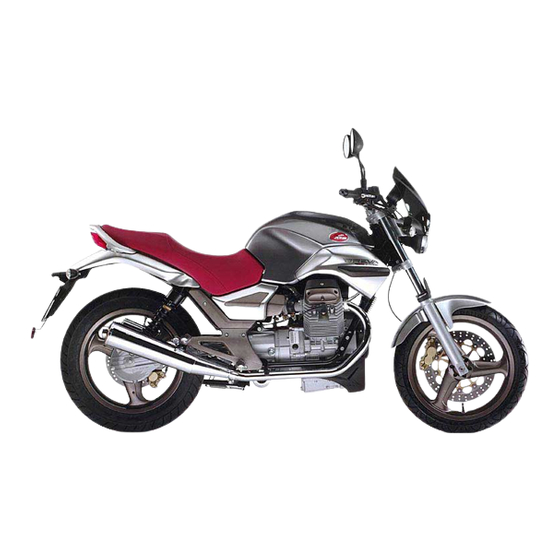
Summary of Contents for MOTO GUZZI BREVA V750IE
- Page 1 part# 977483 USE+MAINTENANCE BOOK...
-
Page 2: Safety Warnings
© 2006 Moto Guzzi S.p.A. SAFETY WARNINGS TECHNICAL INFORMATION Mandello del Lario (LECCO) The following precautionary warnings are The operations preceded by this used throughout this manual in order to symbol must be repeated on the convey the following messages: opposite side of the vehicle. - Page 3 N O T E Moto Guzzi has carried out this manual I n s o m e c o u n t r i e s t h e VERSION: with the maximum attention, in order to antipollution and noise regulations in force...
-
Page 4: Table Of Contents
TABLE OF CONTENTS SAFETY WARNINGS ........2 PRELIMINARY CHECKING OPERATIONS..37 CHANGING THE HEADLIGHT BULBS....74 PRE-RIDE CHECKS CHART ....... 38 CHANGING THE FRONT AND REAR TURN TECHNICAL INFORMATION ......2 STARTING ............39 INDICATOR BULBS ..........75 WARNINGS - PRECAUTIONS - GENERAL MOVING OFF AND RIDING......... - Page 5 SAFE DRIVE...
-
Page 6: Basic Safety Rules
The use of medicines, alcohol and drugs or Most road accidents are caused by BASIC SAFETY RULES psychotropic substances notably increases inexperienced riders. To ride the vehicle it is necessary to be in the risk of accidents. NEVER lend the vehicle to beginners and, p o s s e s s i o n o f a l l t h e r e q u i r e m e n t s Your riding is also affected by your in any case, make sure that the rider has... - Page 7 Strictly observe all posted signs and Avoid obstacles that could damage the WARNING national and local road regulations. vehicle or make you lose control of the Always hold the handlebars with both vehicle. Avoid any sudden or risky manoeuvres h a n d s a n d k e e p b o t h f e e t o n t h e that may endanger your and other people's Avoid riding in the slipstream created by footrests (or on the rider's footboards),...
- Page 8 If in doubt, have the vehicle inspected at a Moto Guzzi Authorised Dealer and ask t h e m t o c a r e f u l l y c h e c k t h e f r a m e ,...
-
Page 9: Clothing
ONLY ORIGINALS Never change the position, inclination or Making any modifications to the vehicle CLOTHING colour of: number plate, turn indicators, and/or removing the original components Before starting, always wear a correctly lights and horns. can adversely affect vehicle performance fastened crash helmet. -
Page 10: Accessories
Moto Guzzi recommends the use of clearance and the angle of inclination in genuine accessories (Moto Guzzi genuine turns. - Page 11 Avoid fixing bulky, heavy and/or dangerous Do not carry any luggage unless firmly Do not exceed the maximum load capacity objects to the handlebars, mudguards and secured to the vehicle. of each luggage rack. forks - this could slow down the vehicle's Do not carry any bags which protrude too The overloaded vehicle will become response in turns and would inevitably...
-
Page 12: Position Of Key Components - Key
POSITION OF KEY COMPONENTS - KEY 1) Headlight 8) Battery 15) Swinging arm 2) Instrument panel 9) Passenger/rider seat 16) Side stand 3) Left rear-view mirror 10) Passenger grab rail 17) Rider left footrest 4) Fuel tank filler cap 11) Tool kit compartment 18) Gear shift lever 5) Fuel tank 12) Left rear shock absorber... - Page 13 1) Tail light 7) Horn 13) Electronic control unit 2) Glove compartment 8) Right rear-view mirror 14) Right rider footrest 3) Compartment for disc lock 9) Front brake fluid reservoir 15) Cardan shaft (disc lock 10) Air filter 16) Rear brake master cylinder 4) Rear brake fluid reservoir 11) Engine oil filter 17) Right passenger footpeg...
-
Page 14: Location Of Instruments/Controls
LOCATION OF INSTRUMENTS/CONTROLS INSTRUMENTS AND INDICATORS LOCATION OF INSTRUMENTS/CONTROLS - KEY LOCATION OF INSTRUMENTS/CONTROLS - KEY 1) Clutch lever 1) Green turn indicator warning light ( 2) Ignition switch/steering lock ( 2) Blue high beam warning light ( 3) Instruments and indicators 3) Red engine oil pressure warning light ( 4) Front brake lever 4) Amber low fuel warning light (... -
Page 15: Instruments And Indicators Table
Comes on when the ignition switch is set to " " with the engine stopped as a lamp test. If the light does not come on in this phase, contact a Moto Guzzi Authorised Dealer If the engine oil pressure light "( )"... -
Page 16: Multifunction Digital Display
Odometer (km/mi) (ODO) Indicates total distance covered. The figure will be stored for at least five years even in case battery is removed. Each time the key is turned to on, total distance covered indication (ODO) is displayed, regardless of which function had been selected previously. - Page 17 Clock External temperature in °C/°F HAZARD button operation Set the clock as follows: Indicates the external temperature reading. Pressing the HAZARD button turns on all When external temperature drops below four turn indicators (the button will also enter “clock” mode pressing TRIP (1): the 3°C, the display will switch to the ICE mode flash when activated).
-
Page 18: Main Independent Controls
MAIN INDEPENDENT CONTROLS 3) DIMMER SWITCH ( In position the high beam comes on, while if it is in " " position , the low beam comes on. " ” 4) HIGH BEAM FLASHER BUTTON ( Allows for the use of the passing lights in case of danger or emergency. -
Page 19: Controls On Right Handlebar
CONTROLS ON RIGHT HANDLEBAR NOTE The electric components only operate when the ignition switch is in the “ ” position. 6) ENGINE STOP SWITCH ( WARNING Do not operate the engine stop switch " " while riding. This switch serves as a safety or emergency switch. With the switch pressed in position “... -
Page 20: Ignition Switch
Position Function Key removal The steering is locked. n o t It is possible p o s s i b l e t o to remove the Steering lock s t a r t t h e key. e n g i n e switch on the lights. -
Page 21: Auxiliary Equipment
AUXILIARY EQUIPMENT To lock the seat (2): GLOVE/TOOL KIT UNLOCKING/LOCKING THE SEAT COMPARTMENTS Slide the seat front end into place and Place the vehicle on the stand, see page lower the rear end. a c c e s s t h e g l o v e / t o o l k i t 46 (PUTTING THE VEHICLE ON THE... -
Page 22: Luggage Anchor Points
The tool kit includes: – 5, 6, 8 mm L-shaped Allen keys (2); – 13 - 14 mm double fork spanner (3); – 22 - 27 mm double fork spanner (4); – 22 mm socket spanner for spark plug (5); –... -
Page 23: Where Provided (Or As An Accessory)
MORE ACCESSORIES WHERE PROVIDED (or as an accessory) The following are available: The following are available: – disc lock – centre stand (1), – large windshield – headlight fairing (2) – 30/40 lt. side panniers – soft side bags (3) –... -
Page 24: Instructions For Installing Soft Bags And Top Case
INSTRUCTIONS FOR INSTALLING Fastening the bag and top case Ensure that the support is properly in place SOFT BAGS AND TOP CASE in the fastener lower/upper seats. Move the bag close to the fastener Carefully follow instructions for correct Centre the bag fastener onto the bag To lock the bag onto the fastener, turn the i n s t a l l a t i o n a n d... - Page 25 Removing the bag and top case Note: use the first zip to open the bag, Retainers of the two side buckles must use the second one to increase bag a l w a y s b e s e c u r e d t o b a g b o d y Work the top lever as shown and lift the capacity by opening the bellow.
-
Page 26: Seat Bag
SEAT BAG It is supplied together with the top case and can be installed on the passenger seat. It is t h e r e f o r e i m p o s s i b l e t o r i d e w i t h a passenger when bag is fitted. -
Page 27: Main Components
MAIN COMPONENTS FUEL Use only premium grade unleaded petrol WARNING with 95 RON and 85 MON octane rating The fuel used in internal combustion minimum. engines is highly flammable and can To refuel, proceed as follows: become explosive under particular conditions. -
Page 28: Brake Fluid - Recommendations
BRAKE FLUID - recommendations WARNING WARNING NOTE This vehicle is provided with front Ensure that the brake discs have not In the event of accidental contact, flush and rea r disc brakes with sepa ra te b e c o m e c o n t a m i n a t e d w i t h o i l o r affected area thoroughly. -
Page 29: Disc Brakes
The front brake fluid reservoir is positioned Have brake fluid changed every two WEAR). on the right handlebar, near the front brake years by a Moto Guzzi Authorised Have the brake fluid changed every 20000 lever coupling. Dealer. km (12427 mi) or every two years by a... -
Page 30: Front Brake
STAND). Brake fluid is hygroscopic and will braking system, contact a Moto Guzzi Turn the handlebar fully to the right. absorb moisture from the air. Authorised Dealer, since it may be... -
Page 31: Rear Brake
WARNING lever or reduced efficiency of the CAUTION Avoid any prolonged exposure of the braking system, contact a Moto Guzzi brake fluid to the air. When the disc pads wear out, the level Authorised Dealer, since it may be of the fluid decreases progressively. -
Page 32: Tyres
Moto Guzzi Authorised Dealer indicators. -
Page 33: Engine Oil
49 (SCHEDULED MAINTENANCE ENGINE OIL LEVEL), should it be CHART) and page 54 (CHANGING incorrect, immediately stop the engine ENGINE OIL AND OIL FILTER). and contact a Moto Guzzi Authorised NOTE Use high-quality oil, see page 85 Dealer. (LUBRICANT CHART). -
Page 34: Adjusting Rear Brake Lever Free Play
If necessary, it is possible to adjust the Check the exhaust silencer and the brake control lever play: If necessary, contact your Moto Guzzi silencer pipes, making sure that there are Authorised Dealer. Loosen the lock nut (1). -
Page 35: Instructions For Use
INSTRUCTIONS FOR USE GETTING ON AND OFF THE CAUTION VEHICLE Do not apply the load of your weight or The instructions below must be followed of the passenger’s weight onto the side with the maximum care in order to avoid stand. - Page 36 of the fairing or the luggage without WARNING creating unbalance. Make sure that the parking surface is GETTING ON THE VEHICLE free from obstacles, firm and flat. Grasp the handlebar correctly and get With the left shoe heel, extend the side on the vehicle without loading your stand completely.
-
Page 37: Preliminary Checking Operations
Do not hesitate to contact your Moto Guzzi Authorised Dealer if you need clarifications about the operation of vehicle controls or if y o u s u s p e c t o r h a v e i d e n t i f i e d a malfunction. -
Page 38: Pre-Ride Checks Chart
Check horn and indicators for proper operation. Change bulbs or fix a failure, if necessary. 74, 75, 76, 77 rear brake light switches and electrical devices Moto Guzzi Transmission fluid Check. If level needs topping up, contact a Authorised Dealer. -
Page 39: Starting
Make sure that the dimmer switch (1) is in position " ". Set the engine stop switch (2) to position " ". Turn the key (3) and set the ignition switch to position " ". The following occurs: – the pointers of both instruments go to full scale and then back to zero;... - Page 40 I n t h i s c a s e , s t o p t h e e n g i n e Pull in the clutch lever (8) completely detected a failure. immediately and contact a Moto Guzzi and shift the gear lever (9) to select Authorised Dealer.
-
Page 41: Moving Off And Riding
Refuel as soon as possible, see page STARTING THE ENGINE FROM COLD MOVING OFF AND RIDING 27 (FUEL). If ambient temperature is low (close to or below 0°C/32°F), you may have trouble WARNING WARNING starting the engine at the first attempt. This is a high-performance vehicle. - Page 42 WARNING CAUTION WARNING On moving off, release the clutch lever Never exceed the recommended rpm, If you are riding with a passenger, give gradually, otherwise the engine may see page 44 (RUNNING-IN). your passenger proper instructions to stall or the vehicle may jerk forwards. avoid problems when manoeuvring.
- Page 43 I n t h i s c a s e , s t o p t h e e n g i n e lever for the shortest time possible. immediately and contact a Moto Guzzi Authorised Dealer. WARNING...
-
Page 44: Running-In
When approaching a bend, slow down RUNNING-IN WARNING or brake in good time. Take the bend at The running-in of the engine is essential to P a y t h e u t m o s t a t t e n t i o n t o a n y moderate, steady speed or accelerate ensure its life and correct operation. -
Page 45: Stopping
It is very important to choose a suitable After the first 1000 km (625 mi), have a parking area, respecting the road signs Moto Guzzi Authorised Dealer carry and the indications given below. out the checks indicated in the column “After running-in”... -
Page 46: Putting The Vehicle On The Stand
To park the vehicle: PUTTING THE VEHICLE ON THE Push down the side stand (8) with your STAND right foot and extend it completely. Choose a suitable parking area. Incline the vehicle until the stand rests Stop the vehicle, see page SIDE STAND on the ground. - Page 47 NOTE CENTRE STAND Do not let the side stand touch the ground. Keep the vehicle in vertical WARNING WARNING position. Make sure that the vehicle is stable. It is forbidden to position the vehicle on Press the side stand with your right foot the centre stand while seated astride and extend it completely (8).
-
Page 48: Maintenance
Park the vehicle in a safe place, possibly in Ask your Moto Guzzi Authorised Dealer to engine and the exhaust system have a garage or a protected place. -
Page 49: Scheduled Maintenance Chart
SCHEDULED MAINTENANCE CHART OPERATIONS TO BE CARRIED OUT BY THE Moto Guzzi Authorised Dealer (WHICH CAN BE CARRIED OUT EVEN BY THE USER). Component End of running-in Every 7500 km Every 15000 km [1000 km (625 mi)] (4687 mi) or 12 months... - Page 50 OPERATIONS TO BE CARRIED OUT BY THE Moto Guzzi Authorised Dealer Component End of running-in Every 7500 km Every 15000 km [1000 km (625 mi)] (4687 mi) or 12 months (9375 mi) or 24 months Gearbox fluid Idle mixture (CO)
- Page 51 Component End of running-in Every 7500 km Every 15000 km [1000 km (625 mi)] (4687 mi) or 12 months (9375 mi) or 24 months Final transmission fluid Fuel pipes every 4 years: Brake lines every 4 years: Clutch wear (*) = check and clean, adjust, lubricate or change, if necessary (as specified in the Workshop Manual);...
-
Page 52: Identification Data
Moto Guzzi Authorised Engine no. The frame number must be quoted when Dealer. -
Page 53: Checking And Topping Up Engine Oil Level
Undo the filler plug/oil dipstick (1). Check oil level on the dipstick (1). MAX = maximum level MIN = minimum level. The difference between "MAX" and "MIN" amounts to approximately 400 cu. cm. The level is correct when the oil almost reaches the “MAX”... -
Page 54: Changing Engine Oil And Oil Filter
CAUTION Changing engine oil and engine oil filter can prove difficult; these operations are best left to experienced mechanics. If necessary, contact your Moto Guzzi Authorised Dealer. If you want to perform these operations personally, keep to the following instructions. -
Page 55: Front Wheel
The disassembly and reassembly of the The disassembly and reassembly of the front wheel may be difficult for unskilled rear wheel may be difficult for unskilled operators. operators. Contact a Moto Guzzi Authorised Contact a Moto Guzzi Authorised Dealer. Dealer. WARNING WARNING... -
Page 56: Front Brake Calliper
CAUTION degreaser. In this case consult a Moto Guzzi After reassembly, operate the brake Authorised Dealer, who will carry out lever repeatedly and check the braking CAUTION the proper maintenance operation. -
Page 57: Checking The Cardan Shaft Oil Level
Check that oil level is just below the hole for the level plug (1). Top up if oil is below the specified level. To top up or change cardan shaft oil, contact a Moto Guzzi Authorised Dealer. CHECKING THE CARDAN SHAFT REMOVING THE SIDE BODY... -
Page 58: Removing The Rear-View Mirrors
CAUTION CAUTION REMOVING THE REAR-VIEW MIRRORS On refitting, adjust the rear-view mirrors H a n d l e t h e p l a s t i c a n d p a i n t e d Place the vehicle on the stand, see page and tighten the nuts to secure them components with care to avoid scraping 46 (PUTTING THE VEHICLE ON THE... -
Page 59: Inspecting The Front And Rear Suspensions
To change the front fork fluid, NOTE It is possible to adjust the vehicle contact a Moto Guzzi Authorised Dealer, Have the front fork oil seal changed after rear end height, to customise riding height who will ensure you prompt and accurate the first 30000 km (18750 mi) and then according to use conditions. -
Page 60: Checking The Brake Pads For Wear
If necessary, contact Check the brake pad wear after the first your Moto Guzzi Authorised Dealer. 1000 km (625 mi) and successively every 2000 km (1250 mi) and before every trip. -
Page 61: Adjusting The Throttle Control
(1); all brake pads changed. – from below at the rear to check the rear brake calliper (2). WARNING Have the pads changed by a Moto Guzzi Authorised Dealer. use and maintenance Breva... -
Page 62: Spark Plugs
If not so: SPARK PLUGS CAUTION Place the vehicle on the stand, see page C a r e f u l l y r e a d p a g e Always change the spark plugs as a set, 46 (PUTTING THE VEHICLE ON THE (MAINTENANCE). - Page 63 Inspection and cleaning: Removal: CAUTION Remove the spark plug cap (1). CAUTION When changing the spark plug, check Remove any trace of dirt from the spark This vehicle is fitted with spark plugs the thread pitch and length. plug base. with platinum electrodes.
-
Page 64: Checking The Side Stand
CAUTION Never attempt to adjust electrode gap. Electrode gap should be 0.6 - 0.7 mm. If not so, change the spark plug. Make sure that the washer (8) is in good condition. For the installation: Position the washer (8) and screw in the spark plug by hand in order not to damage the thread. -
Page 65: Battery
If the engine does not stop, contact a or vegetable oil and seek medical Moto Guzzi Authorised Dealer advice immediately. Using a conventional battery charger might damage your maintenance-free The battery gives off explosive gases;... -
Page 66: Long Inactivity Of The Battery
LONG INACTIVITY OF THE BATTERY If the vehicle remains unused for more than fifteen days, it is necessary to recharge the battery, in order to prevent sulphation, see page 68 (CHARGING THE BATTERY). Remove the battery, see page (REMOVING THE BATTERY) and store it in a cool, dry place. -
Page 67: Removing The Battery
REMOVING THE BATTERY Release and remove the negative (-) If necessary: terminal screw (2). Remove the battery, see page Move aside the negative cable (3). CAUTION (REMOVING THE BATTERY). Release and remove the positive (+) When the battery is removed, the digital Clean off cable and battery terminals terminal screw (4). -
Page 68: Checking Battery Fluid Level
CHARGING THE BATTERY Remove the battery, see page (REMOVING THE BATTERY). Remove the battery caps. Check battery fluid level, see at the side (CHECKING BATTERY FLUID LEVEL). Connect the battery to a battery charger. A recharge with an amperage equal to 1 / 1 0 t h o f t h e b a t t e r y c a p a c i t y i s recommended. -
Page 69: Installing The Battery
Refit the rider seat, see page (UNLOCKING/LOCKING THE SEAT). Move battery bracket (4) down, and engage it onto reference pin (5). Refit the left side body panel, see page 57 (REMOVING T HE SIDE BO DY PANELS). CAUTION When the battery is removed, the digital clock is automatically reset. -
Page 70: Checking The Switches
In this case it is advisable to contact a Moto Guzzi Authorised Dealer. If an electric component does not work or works irregularly, or if the vehicle fails to start, it is necessary to check the fuses. - Page 71 Check the auxiliary fuses first and then the NOTE ARRANGEMENT OF AUXILIARY FUSES If you use one of the spare fuses, main fuses. put a new fuse in the proper seat. a) From safety lockout For the check, proceed as follows: system/starting (10 A).
-
Page 72: Beam Setting
ARRANGEMENT OF MAIN FUSES BEAM VERTICAL ADJUSTMENT BEAM SETTING f) From battery to voltage regulator (30A). Place the vehicle upright. NOTE Beam inspection procedures may g) From battery to key and C and D fuses Slightly loosen screws (1) fixing the vary from country to country. -
Page 73: Bulbs
BEAM HORIZONTAL ADJUSTMENT Place the vehicle on the stand, see page 46 (PUTTING THE VEHICLE ON THE STAND). Turn the screw (2) using a screwdriver until obtaining the desired beam setting. After the adjustment: WARNING Make sure that the vertical adjustment of the headlight beam is correct. -
Page 74: Changing The Headlight Bulbs
PARKING LIGHT BULB CHANGING THE HEADLIGHT LOW/HIGH BEAM BULB BULBS – Do not pull on the wires to extract the CAUTION bulb connector. Carefully read page 73 (BULBS). Grasp the bulb connector (4) and pull to To extract the bulb holder, do not pull The headlight contains: disconnect it from the bulb. -
Page 75: Changing The Front And Rear Turn Indicator Bulbs
Press the bulb (3) slightly and rotate it anticlockwise. Extract the bulb (3) from its seat. CAUTION Insert the bulb into the bulb holder, so that the two pins slide into the slots in the holder. Fit a new bulb of equal rating. CAUTION If the bulb holder (4) comes off, refit it into its seat so that the chamfered... -
Page 76: Changing The Tail Light Bulb
Place the vehicle on the stand, see page CAUTION CHANGING THE TAIL LIGHT BULB 46 (PUTTING THE VEHICLE ON THE Insert the bulb in the bulb socket, Carefully read page 73 (BULBS). STAND). making the two bulb pins coincide with Unscrew and remove the two screws (1). -
Page 77: Replacing The Number Plate Bulb
REPLACING THE NUMBER PLATE BULB Carefully read page 73 (BULBS). Place the vehicle on the stand, see page 46 (PUTTING THE VEHICLE ON THE STAND). CAUTION To extract the bulb holder, do not pull the electric wires. Grasp the parking light (1) bulb holder and pull to extract. -
Page 78: Transport
TRANSPORT DRAINING THE FUEL TANK Place the vehicle on the centre stand on firm and level ground. Carefully read page 27 (FUEL). Stop the engine and wait until it has cooled down. WARNING Prepare a container large enough to hold the fuel in the tank and place it on Risk of fire. -
Page 79: Cleaning
CLEANING Clean the vehicle frequently if it is used in To remove dirt and mud from painted WARNING particular areas or conditions, such as: surfaces, use a low-pressure water jet on After the vehicle has been washed, dirty areas, remove mud and dirt with a soft Polluted areas (town and industrial braking efficiency could be temporarily car body sponge soaked with abundant... - Page 80 CAUTION CAUTION Use only mild detergent to wash the Do not aim high-pressure water/air jets vehicle, rinse with water, but do not use or steam jets at the following parts: a w a t e r c l e a n e r ( s e e p a g e wheel hubs, controls on the right and (CLEANING)).
-
Page 81: Long Periods Of Inactivity
Proceed as follows: AFTER STORAGE Remove the battery, see page NOTE Remove the plastic bags from the ( L O N G I N A C T I V I T Y T H E exhaust silencers. BATTERY) and page 67 (REMOVING Remove the cover and clean the vehicle, THE BATTERY). -
Page 82: Technical Data
TECHNICAL DATA Max. length 2190 mm DIMENSIONS Max. width 730 mm Max. height 1190 mm Seat height 790 mm Distance between centres 1449 mm Min. ground clearance 176 mm Dry weight 182 kg Model Breva V 750 IE ENGINE Type 90°... - Page 83 DRIVE Ratio Primary Final Final ratio RATIOS gears 11/26 = 1: 2.3636 cardan 8/33 = 1:4.825 16/21 = 1: 1.3125 14/23 = 1: 1.6429 18/23 = 1: 1.2778 18/19 = 1: 1.0556 22/25 = 1: 0.9 Type electronic injection (Weber - Marelli) FUEL FEED SYSTEM Throttle...
- Page 84 SPARK PLUGS Standard NGK BR8ES Spark plug gap 0.6 – 0.7 mm Ω Resistance ELECTRICAL SYSTEM Battery 12 V – 14 Amp/h Main fuses 30 A Auxiliary fuses 3 A – 10 A – 15 A Generator (with permanent magnet) 12 V –...
-
Page 85: Lubricant Chart
LUBRICANT CHART 10 W 60 (Recommended) Engine oil (1800 cc): RACING 4T As an alternative to recommended oils, top brand oils meeting or exceeding CCMC G-4 A.P.I. SG specifications can be used. (Recommended) Transmission oil (170 cc): TRUCK GEAR 85 W 140. (Recommended ) Gearbox oil (1000 cc) ROTRA MP/S 80 W 90. -
Page 86: Authorised Dealers And Service Centres
When you demand Moto Guzzi Genuine Parts, you are purchasing products that have been developed and tested as early as the vehicle design stage. Moto Guzzi Genuine Parts systematically undergo strict quality control procedures to ensure total reliability and a long service life. - Page 87 NOTE ASK FOR GENUINE SPARE PARTS ONLY use and maintenance Breva...
- Page 88 Moto Guzzi S.p.A. wishes to thank you for purchasing this vehicle and recommends the following: – Do not release oil, fuel, polluting substances and components into the environment. – Do not keep the engine running when not necessary. – Avoid disturbing noise.
Need help?
Do you have a question about the BREVA V750IE and is the answer not in the manual?
Questions and answers