Table of Contents
Advertisement
Quick Links
Advertisement
Table of Contents

Related Manuals for Gigabyte GB-AEGT


Summary of Contents for Gigabyte GB-AEGT
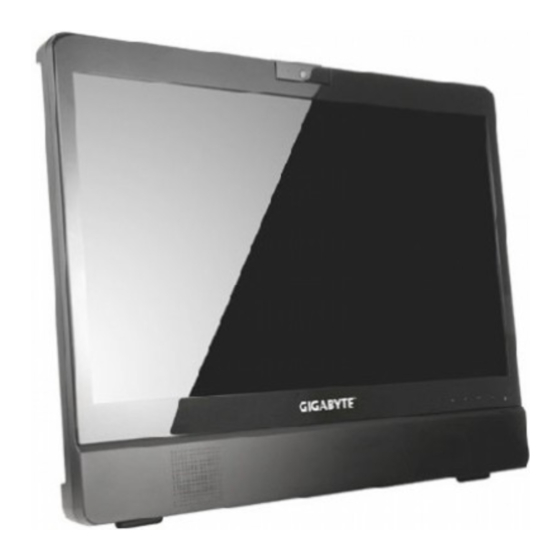
- Page 1 GB-AEGT-SI GB-AEGTN-SI 24" AIO System User's Manual Rev. 2.0...
-
Page 2: Table Of Contents
CD-Writable Drives .......................22 DVD-Writable Drives ......................22 Inserting a disc ......................22 Using the touch screen (for select models) ............... 24 Using the Peripheral Devices ..................25 Quick Start Guide (QSG) of Monitor Mode for GB-AEGT-SI/GBAEGTN-SI ..... 25 Functionalities ......................25 GB-AEGT-SI/GB-AEGTN-SI... - Page 3 Installing a VGA card ....................45 Troubleshooting ......................46 Frequently Asked Questions (FAQ) ................46 Power problems ........................46 Internet access problems .....................47 Display problems ........................48 Keyboard and mouse problems ....................49 Sound and microphone problems ..................50 Miscellaneous problems .......................51 Specifications ........................53 GB-AEGT-SI/GB-AEGTN-SI...
-
Page 4: Overview Of Your Documentation
CAUTION: Indicates important information to prevent potential damage to the unit and data, or personal injury caused by improper use. NOTE: Indicates additional information for a particular situation. TIP: Indicates useful information for completing a task. GB-AEGT-SI/GB-AEGTN-SI... -
Page 5: Box Contents
2.5" Holder and Screws • The box contents above are for reference only and the actual items shall depend on the product package you obtain. The box contents are subject to change without notice. • The motherboard image is for reference only. GB-AEGT-SI/GB-AEGTN-SI... -
Page 6: Getting Started With Your Pc
Touch-enabled widescreen The monitor is equipped with a touch screen. You may make adjust- (for select models) ments to your work field at your fingertips. The touch screen will re- sponsively react with your fingertip commands. GB-AEGT-SI/GB-AEGTN-SI... - Page 7 The Volume function is only available for the VGA or HDMI input signal. When OSD is activated, press this button to move between the different menu options. Speakers The internal speakers deliver high-quality audio while listening to music or watching your home videos and DVD discs. GB-AEGT-SI/GB-AEGTN-SI...
-
Page 8: Rear View
HDMI output port. Use an HDMI cable to connect an external display device with HDMI input ports, such as an HDTV. 15-pin D-Sub input jack. Use a 15-pin D-Sub cable to connect an de- vice with D-Sub output ports, such as a notebook, or a game console, etc. GB-AEGT-SI/GB-AEGTN-SI... - Page 9 Audio input jack. Connect to an audio in jack on external audio equipment for audio sound. GB-AEGT-SI/GB-AEGTN-SI...
-
Page 10: Right-Side View
Connect the USB plugs into the USB ports to connect your USB de- vices, such as MP3 players, digital cameras, keyboard and mouse, or external hard disk drives, etc. Connect your microphone to this jack to record sound or voice. GB-AEGT-SI/GB-AEGTN-SI... - Page 11 Audio/Headphone Output Audio/Headphone output jack. Connect your headphones or speakers Jack to this jack to listen to the sound from your PC when watching videos and DVDs, listening to music, and playing games. GB-AEGT-SI/GB-AEGTN-SI...
-
Page 12: Left-Side View
LAN (Local Area Network) port. Use an Ethernet (RJ45) cable to con- nect your computer with a network or broadband device. DC IN port. Connect the DC power to this port to power the computer. Graphics card cover Under the medal plates is where the hidden graphics card connectors locate. GB-AEGT-SI/GB-AEGTN-SI... -
Page 13: Setting Up Your Pc
Pull the computer stand till it reaches the first detent stop. (approximately 10° apart from the rear of the computer). Please ensure the computer stand has been pulled up to the first detent position, so that your computer may stand firm and upright. GB-AEGT-SI/GB-AEGTN-SI... - Page 14 Please ensure the computer stand has been pulled up to the first detent position, so that your computer may stand firm and upright. Now you are ready to access some ports on the side panel of the computer to make cable connections. GB-AEGT-SI/GB-AEGTN-SI...
-
Page 15: Connecting The Power
Connect the power plug to the power jack on the left side of the computer. Connect the power adapter to a nearby power outlet. Do not plug in or turn on the power to the computer until instructed to do so. GB-AEGT-SI/GB-AEGTN-SI... -
Page 16: Turning On Your Pc
To turn off the system, close all the active windows, and then click the Start menu at the bottom left corner of your screen, and then click Shut Down on the right side of the open tab. Shut Start down GB-AEGT-SI/GB-AEGTN-SI... -
Page 17: Configuring The Display
To move between option items shown on the OSD, use the Brightness/Increase or Volume/ Decrease buttons. • To make selections or enter the submenus, press the MENU button. To return to the previous menu or exit OSD, press the Input button. • GB-AEGT-SI/GB-AEGTN-SI... - Page 18 Slightly enlarges the input image. Activates this feature to hide annoying edge noise if present around your image. The function is available only when the input source is HDMI. Select Exit to return to the previous menu. Exit Selects to exit OSD. GB-AEGT-SI/GB-AEGTN-SI...
-
Page 19: Brightness Control
To adjust the sound level, press the Volume/Decrease button on the front panel of the computer to display the Volume indicator, and then press the Brightness/Increase button to increase the level or press the Volume/Decrease button to decrease the level. GB-AEGT-SI/GB-AEGTN-SI... -
Page 20: Using Your Pc
For details about installing the wireless LAN card, router, or access point, please refer to the manuals that shipped with the product you purchased or contact the manufacturer. 1. Choose a network you intend to join from the list. GB-AEGT-SI/GB-AEGTN-SI... -
Page 21: Using The Webcam
Check the ambient light conditions around the webcam to avoid getting images that appear too dark or too light. GB-AEGT-SI/GB-AEGTN-SI... -
Page 22: Using The Optical Disc Drive
Inserting a disc When the optical disc drive is in use, the indicator lights up and flashes. When the indicator light is flashing, do not move the computer. 1. Press the Eject button on the drive, as shown below. GB-AEGT-SI/GB-AEGTN-SI... - Page 23 3. With the label side facing forward, place the disc in the center of the disc tray. 4. Gently push the disc tray back into the disc slot. 5. The optical disc drive indicator is on and your computer will start to read the disc you just inserted. GB-AEGT-SI/GB-AEGTN-SI...
-
Page 24: Using The Touch Screen (For Select Models)
• Tap once for a single mouse click. • Tap twice for a double mouse click • Press and hold an item to open the item's menu, then move your finger to the appropriate menu item. When your remove your finger, the item is selected. GB-AEGT-SI/GB-AEGTN-SI... -
Page 25: Using The Peripheral Devices
Quick Start Guide (QSG) of Monitor Mode for GB-AEGT-SI/ GB-AEGTN-SI • GB-AEGT-SI/GB-AEGTN-SI is the first AIO computer that allows user to plug in any kind of off- the-shelf discrete graphic card (except for dimension/power limitation). • GB-AEGT-SI/GB-AEGTN-SI provides 2 external power adaptors for graphic card and up to 360W power support (180W x 2). - Page 26 • HDMI mode : This mode is on when user has connected HDMI cable to back-cover's HDMI connector. • D-SUB mode : This mode is on when user has connected D-SUB and audio cables to back cover's D-SUB connector. All modes can work at same time but only one can be displayed on screen. GB-AEGT-SI/GB-AEGTN-SI...
-
Page 27: Discrete Graphic Card Support
Discrete Graphic Card support Performance Once use plugged nVidia graphic card and installed nVidia Synergy driver, user can experience nVidia graphic performance in PC mode. Expandability GB-AEGT-SI/GB-AEGTN-SI... - Page 28 GB-AEGT-SI/GB-AEGTN-SI...
-
Page 29: System/Graphic Power Adaptor
System/Graphic Power Adaptor: 1. System power adaptor only. 2. System power adaptor with one Graphic power adaptor. GB-AEGT-SI/GB-AEGTN-SI... - Page 30 If your graphics card receives power supply from the motherboard, keep the jumper cap on the location as shown in the following illustration (red line). If you are installing a graphics card that requires external power, move the jumper cap to the location as shown in the following illustration (red line). GB-AEGT-SI/GB-AEGTN-SI...
-
Page 31: Upgrading Your Pc
• Leave all components inside the static-proof packaging until you are ready to use the component for the installation. Caution For Battery • Risk of explosion if battery is replaced by an incorrect type. • Dispose of used batteries according to the instructions. GB-AEGT-SI/GB-AEGTN-SI... -
Page 32: Removing Pc Cover
Make sure the computer is not turned on or connected to an AC adapter. Follow these instructions to remove the system cover: 1. Detach the hinge protective cover. 2. Loosen and remove the eight screws securing the back cover. GB-AEGT-SI/GB-AEGTN-SI... - Page 33 3. Use screwdrive to remove the back cover. GB-AEGT-SI/GB-AEGTN-SI...
-
Page 34: Removing Vga Metal Cover
Removing VGA Metal Cover Follow these instructions to remove the VGA metal cover: 1. Loosen and remove the screws securing the VGA metal cover. 2. Slide the metal cover away from the I/O ports then lift up. GB-AEGT-SI/GB-AEGTN-SI... -
Page 35: Removing Motherboard Metal Cover
Removing Motherboard Metal Cover Follow these instructions to remove the motherboard metal cover: 1. Loosen and remove the screws securing the riser card. 2. Loosen and remove the screws securing the motherboard metal cover. GB-AEGT-SI/GB-AEGTN-SI... - Page 36 3. Slide the metal cover away from the I/O ports then lift up. GB-AEGT-SI/GB-AEGTN-SI...
-
Page 37: Replacing Hard Disk Drive
The tray will not fit back into the bay if inserted incorrectly. Follow these instructions to install the hard disk drive: 1. Loosen and remove the screws securing the HDD bracket. 2. Loosen the four screws. Please secure the screws on the location numbered 1. GB-AEGT-SI/GB-AEGTN-SI... -
Page 38: Installing Cpu
1. Raise the metal locking lever on the socket. Remove the plastic covering on the CPU socket. Insert the CPU with the correct orientation, it will only fit in one direction. 2. Replace the metal cover. 3. Push the metal lever back into locked position. GB-AEGT-SI/GB-AEGTN-SI... -
Page 39: Installing Memory
Please note that the memory module has a foolproof insertion design. A memory module can be installed In only one direction. 2. Push down the memory and seat it firmly. 3. Reverse the installation steps when you wish to remove the SODIMM module. GB-AEGT-SI/GB-AEGTN-SI... -
Page 40: Installing Wifi Module
1. Align the WiFi card with the Mini Card Slot and insert the card into the slot. Please note that WiFi module has a foolproof insertion design. A WiFi module can be installed in only one direction. 2. Push down the WiFi card and seat it firmly. GB-AEGT-SI/GB-AEGTN-SI... -
Page 41: Installing Heat Sink
Follow these instructions to install the heat sink: 1. Apply an even and thin layer of thermal paste on the surface of the heat sink. 2. Seat the heat sink in the retention modules and secure with the four screws. GB-AEGT-SI/GB-AEGTN-SI... -
Page 42: Installing A Second Disk Drive Module
2. Insert your portable hard drive disk module with correct orientation as shown, and firmly push the hard disk module into the modular bay under the HDD cover until the latch clicks into place. If you don’t hear the click, try it again. GB-AEGT-SI/GB-AEGTN-SI... -
Page 43: Installing A Wall Mount
Installing a Wall Mount Follow these instructions to install a wall mount: 1. Detach the hinge protective cover. 2. Remove the 4 screws fastening the computer stand. Detach the computer stand. GB-AEGT-SI/GB-AEGTN-SI... - Page 44 4. Secure the wall mount pad (128.5 x 120.5 mm) to the rear panel with the 4 screws you just removed in the previous step. 5. Follow the manual came with the wall mount kit (VESA 100) you purchased to install it to the wall mount pad. GB-AEGT-SI/GB-AEGTN-SI...
-
Page 45: Installing A Vga Card
Installing a VGA card Follow these instructions to install a VGA card: 1. Attach the expansion slot card on the riser bracket and secure it with screws. 2. Insert the card into the system. Make sure that the card is properly seated. GB-AEGT-SI/GB-AEGTN-SI... -
Page 46: Troubleshooting
Reconnect the power adapter and restart the system. • Certain operating system files may be damaged or missing. If so, you have to back up all your data first, and then recover your system. Check the sup- plied driver disc for details. GB-AEGT-SI/GB-AEGTN-SI... -
Page 47: Internet Access Problems
A couple of feet will sometimes make a big difference in signal strength. • If you are using an access point, try changing the channel, as another access point may be interfering. • Contact your ISP to ensure they are not experiencing technical problems. GB-AEGT-SI/GB-AEGTN-SI... -
Page 48: Display Problems
Check if the brightness level of the display is adjusted correctly, and is not set screen are too bright or too low or too high. Use the Brightness control by pressing the Brightness Increase/Decrease buttons on the top of the unit to adjust the brightness too dark. level. GB-AEGT-SI/GB-AEGTN-SI... -
Page 49: Keyboard And Mouse Problems
• Click Start > Control Panel > Mouse to open the Mouse Properties dialog fast or too slow. box. Click Pointer Options tab and drag the Motion slider toward Slow or Fast to adjust the speed at which the cursor responds to mouse movement. When done, click OK to finish the configuration. GB-AEGT-SI/GB-AEGTN-SI... -
Page 50: Sound And Microphone Problems
Then try playing the file again. If the audio file still cannot be played, it might require a codec that is not supported by Windows Media Player. For more information about available codecs, see the documentation for Windows Media Player at the Microsoft web site. GB-AEGT-SI/GB-AEGTN-SI... -
Page 51: Miscellaneous Problems
Ensure that there is enough space available on the hard disk drive to store the temporary files that are created during the writing process. • Click Start > Computer to check the space available on your hard disk drive. GB-AEGT-SI/GB-AEGTN-SI... - Page 52 If you are using a USB hub, the power requirements of the USB port may be exceeded. • Try connecting your USB device directly to the USB port on your computer. • Check if you need to pre-install software before connecting your USB device. Read the documentation or user manual of the product. GB-AEGT-SI/GB-AEGTN-SI...
-
Page 53: Specifications
Slim tray type DVD Super Multi Optical Drive (Optional) Network • Built-in Gigabit Ethernet LAN Expansion Slot • 1 x full size & 1 x half size mini-card slots, PCI-E interface 2.5" HDD Slot • 2.5" SATA II HDD support (Optional) GB-AEGT-SI/GB-AEGTN-SI... - Page 54 Viewing Angle • 170/160 (Typical : H/V) Support Color • 16.7M Colors (RGB 6-bit + Hi_FRC) Video interface Panel • LVDS Language • Iconic & English Adjustment Tilt • 10~50 degree Adapters • 180W Cables Power Cord • 1.8m GB-AEGT-SI/GB-AEGTN-SI...
Need help?
Do you have a question about the GB-AEGT and is the answer not in the manual?
Questions and answers