Advertisement
Quick Links
Advertisement

Subscribe to Our Youtube Channel
Related Manuals for Gigabyte GB-BTIP-N150


Summary of Contents for Gigabyte GB-BTIP-N150
- Page 1 B R I X Ultra Compact PC Kit GB-BTIP-N150/GB-BTIP-N250 Quick Start Guide Rev. 1.0...
- Page 2 BRIX Ultra Compact PC Kit BRIX GB-BT Ultrakompaktes PC Kit / Kit PC ultra compact BRIX GB-BT / Kit de PC ultra compacto BRIX GB-BT / Kit PC BRIX GB-BT Ultra Compact / Kit per PC BRIX GB-BT Ultra Compatto / Ультракомпактный...
- Page 3 Para obtener una lista de la memoria probada, SSD M.2, adaptadores inalámbricos y SO com- patibles, vaya a: https://www.gigabyte.com Para descargar los drivers y las actualizaciones de BIOS más recientes, vaya a:https://www.gigabyte.com: Para soporte del producto, vaya a: https://www.gigabyte.com: - 3 -...
- Page 4 Para uma lista de memória testada, M.2 SSD, adaptadores sem fios e SO suportado, ir para: https://www.gigabyte.com Para transferir as drivers mais recentes e atualizações BIOS, ir para: https://www.gigabyte.com: Para suporte de produto, ir para: https://www.gigabyte.com...
- Page 5 , 在下拉列表中查找 您的保修信息,或者点击地图。网页会跳转到您所在地区对应的页面。 要获取测试的内存、 M.2 SSD、无线适配器和支持的OS列表,请访问: https:// www.gigabyte.com 要下载最新的驱动器和BIOS更新,请访问: https://www.gigabyte.com: 要获取产品支持,请访问:https://www.gigabyte.com サポート を開いてドロップダウンリストから BRIX 保 https://www.gigabyte.com/support-downloads/customer-service 証情報を見つけるか、地図上をクリックしてください。地域の対応するページに誘導されま す。 試験済みのメモリ、 M.2 SSD 、ワイヤレスアダプタ、対応 OS の一覧はこちら: https://www.gigabyte.com 最新のドライバと BIOS のアップデートはこちら https://www.gigabyte.com: 製品サポートはこちら: https://www.gigabyte.com - 5 -...
- Page 6 지원 https://www.gigabyte.com/support-downloads/customer-service 의드롭다운목록에서또는맵을클릭 하여BRIX보증정보를으십시오그러면사용자지역의해당페이지로이동합니다. 테스트된 메모리, M.2 SS D, 무선어댑터및O S지원목록은다음사이트를참조하십시오 https://www.gigabyte.com 최신드라이버와BIOS업데이트를다운로드하려면 다음사이트로이동하십시오 https://www. gigabyte.com: 제품지원은다음사이트로이동하십시오 https://www.gigabyte.com - 6 -...
- Page 7 Satety and Regulatory Information This product must be grounded with the plug on the adapter's power cord connected to a power socket with a grounding connection. Risk of explosion if the battery is replaced with an incorrect type. Batteries should be recycled where possible. Disposal of used Batteries, must be in accor- dance with local environmental regulations.
- Page 8 Informazioni di sicurezza e sui regolamenti Sostituire la batteria con una di tipo non corretto può comportare rischio di esplosione. Se possibile, le batterie vanno riciclate. Lo smaltimento delle batteria usate effettuato secondo le regole ambien- tali in vigore nella regione in cui ci si trova. ...
- Page 9 安全与法规信息 以不正确类型的电池进行更换,有可能发生爆炸的危险。应承担电池回收的风险。 按照当地规定弃置使用过的电池。 在打开机箱更换内部组件之前,需要先关闭设备电源,并让设备冷却至少10分钟。 不使用随附的 GB-BT 型号电源适配器可能违反法规要求,且可能让用户面临危 险。 安全および規制に関する情報 誤ったタイプのバッテリーに交換すると、爆発の危険があります。バッテリーは 可能な限りリサイクルしてください。使用済みバッテリーの廃棄は地域の規制を 遵守する必要があります。 内部部品を交換するためにシャーシを開ける前に、デバイスの電源をオフにして 少なくとも10分間冷却する必要があります。 付属のモデルGB-BT電源アダプタをご使用にならない場合、規制違反となる場合 があり、安全上の危険が生じる恐れがあります。 안전 및 규제 정보 배터리를 올바르지 않은 유형으로 교체할 경우 폭발의 위험이 있습니다. 배터리 는 가능한 한 재활용해야 합니다. 폐배터리는 현지 환경 규 제에 따라 폐기해야 합니다.
- Page 10 Conventions The following conventions are used in this user's guide: NOTE! Gives bits and pieces of additional information related to the current topic. CAUTION! Gives precautionary measures to avoid possible hardware or software problems. WARNING! Alerts you to any damage that might result from doing or not doing specific actions.
- Page 11 Symbol Statement At the end of its serviceable life, this product should not be treated as household or general waste. It should be handed over to the applicable collection point for the recycling of electrical and elec- tronic equipment, or returned to the supplier for disposal. This device complies with part 15 of the FCC Rules.
- Page 12 THIS PRODUCT CONTAINS A BUTTON BATTERY If swallowed, a lithium button battery can cause severe or fatal injuries within 2 hours. Keep batteries out of reach of children. If you think batteries may have been swallowed or placed inside any part of the body, seek immediate medical attention.
- Page 13 Table of Contents Chapter 1 System Information ..................14 Installation Precautions .................. 14 Product Specifications ..................15 Package Contents ..................17 1-3-1 GB-BT Bare-bone ....................17 1-3-2 65W Adapter & Power Cord (19 Vdc, 3.42 A) ............18 1-3-3 Quick Start Guide ....................18 1-3-4 VESA Mount Bracket &...
- Page 14 Chapter 1 System Information Installation Precautions The system contain numerous delicate electronic circuits and components which can become damaged as a result of electrostatic discharge (ESD). Prior to installation, carefully read the user manual and follow these procedures: • Prior to installation, do not remove or break motherboard S/N (Serial Number) sticker or warranty sticker provided by your dealer.
- Page 15 System 113 x 116.52 x 56.22 mm, 0.67 L Š Motherboard size: 154 x 109 mm Dimension Š GB-BTIP-N150 Intel® Processor N150 4C, up to 3.6 GHz, 6W GB-BTIP-N250 Intel® Processor N250 4C, up to 3.8 GHz, 6W Memory 1 x SO-DIMM DDR5 slot Š...
- Page 16 Rear I/O 1 x HDMI Š 1 x GbE RJ45 Š 2 x USB 3.2 Gen2 Type-A Š 1 x USB 3.2 Gen2 with Type-C DP Š 1 x Wire Clamp Screw Hole Š Left I/O 1 x DC-In Š Right I/O 1 x Kensington lock slot Š...
- Page 17 Package Contents Lieferumfang / Contenu du colis / Contenido del paquete / Conteúdo da embalagem / Contenuto della confezione / Комплект поставки / Zawartość opakowania / Paket İçeriği / 包裝內容物 / 包装内容 / 同梱品 / 패키지 포함 물품 1-3-1 GB-BT Bare-bone - NOT Include any of the following: M.2 (2280), SO-DIMM memory - Folgendes ist NICHT enthalten: M.2 (2280), SO-DIMM Arbeitsspeicher - N'inclut PAS les éléments suivants : M.2 (2280), mémoire SO-DIMM...
- Page 18 1-3-2 65W Adapter & Power Cord (19 Vdc, 3.42 A) The product should be used with the included power cord. The included power cord should not be used with other products. 製品には、同梱された電源コードセットを使用すること。同梱された電源コードセットは、他の製品に使用しないこと。 1-3-3 Quick Start Guide 1-3-4 VESA Mount Bracket & 6 x Screws System Information - 18 -...
- Page 19 1-3-5 Wire Clamp Screw 1-3-6 M2 Heatsink 1-3-7 HDD/SSD Screws x 4 System Information - 19 -...
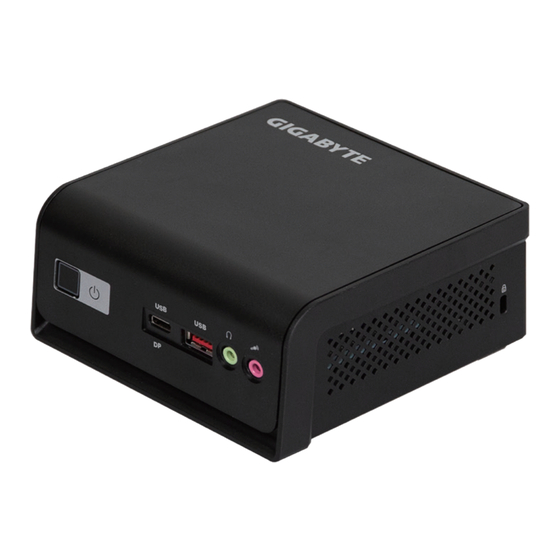
- Page 20 Chapter 2 System Appearance Getting Familiar with Your Unit Erste Schritte mit Ihrem Gerät / Se familiariser avec votre appareil / Familiarizándose con su unidad / Familiarizar- se com a unidade / Imparare a conoscere la propria unità / Знакомство с изделием / Zapoznanie się z jednostką / Cihazınız Hakkında Bilgi Sahibi Olun / 認識您的裝置...
- Page 21 Rear View Description USB 3.2 Gen2 Type A (10Gbps)(5V/1A) RJ-45 (10/100/1000Mbps) USB 3.2 Gen2 Type-C with DisplayPort 1.4(10Gbps)(5V/2A) HDMI 2.0 4K(3840 x 2160) 60Hz System Appearance - 21 -...
- Page 22 Left View Description DC-In (電源輸入) Right View Description Kensington Lock Slot (防盜鎖槽) System Appearance - 22 -...
- Page 23 Bottom View Description VESA Screw Hole (支架螺絲孔) System Appearance - 23 -...
- Page 24 PIN Definition PIN Definition M.2 2280 SSD Connector DDR SO-DIMM slot Wi-Fi Connector SATA SSD/HDD Connector NOTE! Wireless module inclusion may vary based on local distribution. 注意:根据各地经销商之产品规格配置,有些市场将不提供预载的无线模块。 System Appearance - 24 -...
- Page 25 Chapter 3 System Hardware Installation Pre-installation Instructions Computer components and electronic circuit boards can be damaged by electrostatic discharge. Working on computers that are still connected to a power supply can be extremely dangerous. Follow the simple guidelines below to avoid damage to your computer or injury to yourself.
- Page 26 Removing the Bottom Cover Before you remove the bottom cover • Make sure the system is not turned on or connected to AC power. Follow these instructions to remove/install the Bottom Cover: Unscrew and remove the bottom cover from system. 將底蓋從機器上移除。) Reinstall the bottom cover to system.
- Page 27 Installing the M.2 SSD M.2 SSD: Installation der M.2 2280 SSD / SSD M.2 : Comment installer le SSD M.2 2280 / SSD M.2: Como instalar el SSD M.2 2280 / M.2 SSD: Como instalar o M.2 2280 SSD / SSD M.2: Come installare l'SSD M.2 2280 / M.2 SSD: Установка...
- Page 28 Installing the Memory Arbeitsspeicher Installation: SO-DIMM DDR5 / Installation de la mémoire : SO-DIMM DDR5 / Instalación de la memoria: SO-DIMM DDR5 / Instalação de memória: SO-DIMM DDR5 / Installazione della memoria: SO-DIMM DDR5 / Установка модулей памяти: SO-DIMM DDR5 / Instalacja pamięci: SO-DIMM DDR5 / Hafıza Yüklemesi: SO-DIMM DDR5 / 安裝記憶體:SO-DIMM DDR5 / 内存安装:SO-DIMM DDR5 / メモリインストール:...
- Page 29 Remove the Wireless Module Drahtlosmodul: Sicheres Entfernen des Moduls / Module sans fil : Comment retirer le module en toute sécurité / Módulo inalámbrico: Cómo quitar el módulo de forma segura / Módulo sem fios: Como remover com segurança o modulo / Modulo senza cavi: Come rimuovere il modulo in sicurezza / Беспроводной...
- Page 30 Installing the VESA Bracket VESA Halterung / Support VESA / Soporte VESA / Suporte VESA / Staffa VESA / Кронштейн VESA / Wspornik VESA / VESA Braketi / VESA 支架 / VESA 支架 / VESAブラケット / VESA 브래킷 Follow these instructions to install the VESA Bracket: Attach the screws on the underside of the system.
- Page 31 Support 2.5’’ HDD / SSD Follow these instructions to install the 2.5" HDD/SSD: Unscrew and remove the bottom cover. (將底蓋從機器上移除。) Install the HDD / SSD on the bottom panel and secure with four screws provided, then connect the cable to the HDD / SSD. (用隨附的四顆螺絲將HDD / SSD固定於底蓋,並將傳輸線連接於HDD / SSD。) Reinstall the bottom cover with HDD / SSD to system.
- Page 32 Chapter 4 BIOS Setup USB Power On Function Allows Device Power-on Via USB. Useful When Mounted Behind a Display or TV USB Power On Funktion / Fonction Démarrage par USB / Función USB Power On / Função USB Power On / Funzione USB Power On / Функция USB Power On / Opcja USB Power On / USB Güç USB 埠啟動功能...
Need help?
Do you have a question about the GB-BTIP-N150 and is the answer not in the manual?
Questions and answers