Table of Contents
Advertisement
Quick Links
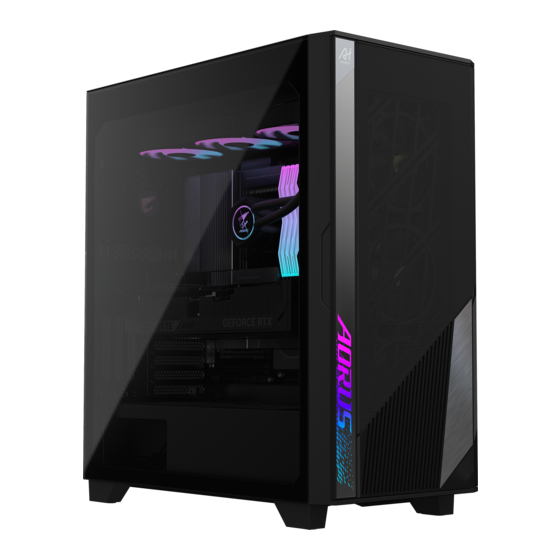
AI TOP 100 Z890
Premium Gaming & AI Empowered
Desktop PC
(AT1I9N9-0000/AT1I9N9-0001/
AT1I9N9-0002/AT1I9N9-0003/
AT1I9N9-0004)
User's Manual
Rev. 1001
To reduce the impacts on global warming, the packaging materials of this
product are recyclable and reusable. GIGABYTE works with you to protect the
environment.
Advertisement
Table of Contents

Related Manuals for Gigabyte AI TOP 100 Z890


Summary of Contents for Gigabyte AI TOP 100 Z890
- Page 1 AI TOP 100 Z890 Premium Gaming & AI Empowered Desktop PC (AT1I9N9-0000/AT1I9N9-0001/ AT1I9N9-0002/AT1I9N9-0003/ AT1I9N9-0004) User's Manual Rev. 1001 To reduce the impacts on global warming, the packaging materials of this product are recyclable and reusable. GIGABYTE works with you to protect the environment.
- Page 2 GIGABYTE's prior written permission. Documentation Classifications In order to assist in the use of this product, GIGABYTE provides the following types of documentations: „ For quick set-up of the product, read the Quick Start Guide included with the product.
-
Page 3: Table Of Contents
Table of Contents Box Contents ........................4 Chapter 1 Hardware Setup .....................5 Safety Information .................... 5 Hardware Information ..................6 System Overview ......................6 Front View ........................6 Top View ...........................6 Back View-A ........................7 Back View-B ........................10 Getting Started ....................11 Connecting Peripheral Devices ..................11 Connecting the Power Cord ...................12 Turning on ........................12 Chapter 2 BIOS Setup ....................13... -
Page 4: Box Contents
Box Contents 5 AI TOP 100 Z890 Premium Gaming & AI Empowered Desktop PC 5 Quick Start Guide 5 Antenna 5 Accessory Cables 5 Case Accessory * The box contents above are for reference only and the actual items shall depend on the product package you obtain. -
Page 5: Chapter 1 Hardware Setup
Chapter 1 Hardware Setup Safety Information • Before connecting to the power outlet, make sure that the voltage rating of the power cable is compatible with the power specification in the country where you are located. • The power cord plug must be connected to a properly wired and grounded power outlet. •... -
Page 6: Hardware Information
Hardware Information System Overview Front View Top View Reset Button The reset button allow users to quickly reset the computer Mic In The mic in jack. Line Out The line out jack. Power Button The power button allows users to turn on/off the computer. USB 3.2 Gen 1 Port The USB 3.2 Gen 1 port supports the USB 3.2 Gen 1 specification and is compatible to the USB 2.0 specification. -
Page 7: Back View-A
Back View-A DisplayPort In port The DisplayPort In port offers video outputs to the motherboard. Refer to the pictures below and the Thunderbolt 5 Connector (USB4 USB Type-C port) introduction for more information. ™ ® ® Step 1: Step 2: Connect your DisplayPort cable or Mini-DisplayPort Then connect the USB Type-C or DisplayPort... - Page 8 HDMI Port The HDMI port is HDCP 2.3 compliant and supports Dolby TrueHD and DTS HD Master Audio formats. It also supports up to 192KHz/24bit 7.1-channel LPCM audio output. You can use this port to connect your HDMI-supported monitor. The maximum supported resolution is 4096x2160@60 Hz, but the actual resolutions supported are dependent on the monitor being used.
- Page 9 Mic In The mic in jack. The mic in jack supports only mono microphone input. & Please visit GIGABYTE's website for details on configuring the audio software. https://www.gigabyte.com/WebPage/697/realtek897-audio.html • When removing the cable connected to a back panel connector, first remove the cable from your device and then remove it from the motherboard.
-
Page 10: Back View-B
Back View-B HDMI Port The connector supports HDMI 2.1b version. DisplayPort The connector supports DisplayPort 2.1b version. - 10 -... -
Page 11: Getting Started
Getting Started • This product is designed and intended to be used in vertical position only. • Peripheral devices are not included. • We recommend that you connect the monitor cable to the graphics card. Before making the connections, please open the case and remove the protection foam bag inside. Connecting Peripheral Devices Connect your peripheral devices such as keyboard, mouse, monitor, and etc. -
Page 12: Connecting The Power Cord
Connecting the Power Cord Connect the included power cord to the desktop computer and a power outlet. Turning on Press the power button to turn on the desktop computer. - 12 -... -
Page 13: Chapter 2 Bios Setup
Chapter 2 BIOS Setup Entering the BIOS Setup To access the BIOS Setup program, press the <Delete> key during the POST when the power is turned on. When the power is turned off, the battery on the motherboard supplies the necessary power to the CMOS to keep the configuration values in the CMOS. -
Page 14: Chapter 3 Appendix
1. From GIGABYTE's website, download the latest compressed BIOS update file that matches your product model. 2. Uncompress the downloaded BIOS file, save it to your USB flash drive, and rename it to GIGABYTE.bin. Note: The USB flash drive must use the FAT32/16 file system and it must be a USB 2.0 flash drive. -
Page 15: Installing The Operating System
Installing the Operating System The operating system will be determined according to the specifications at the time of purchase. Depending on the purchase specifications, it may include Windows 11 operating system or no operating system at all. • For the United States and Canada regions, there is a verification code attached to the upper left corner of the case back panel (as shown in the picture). - Page 16 After you install the operating system, a dialog box will appear on the bottom-right corner of the desktop asking if you want to download and install the motherboard drivers and GIGABYTE applications via GIGABYTE Control Center (GCC). Click Install to proceed with the installation. (In BIOS Setup, make sure Settings\IO Ports\ Gigabyte Utilities Downloader Configuration\Gigabyte Utilities Downloader is set to Enabled.)
- Page 17 System recovery (Restore your operating system) When something is going wrong with the laptop operating system, the storage of the laptop has a hidden partition containing a full back up image of the operating system that can be used to restore the system to factory default settings.
- Page 18 Step 5: Advanced options System Restore Use a restore point recorded on your PC to restore Windows. System Image Recovery Recover Windows using a specific system image file. Startup Repair Fix problems that keep Windows from loading. Command Prompt Use the Command Prompt for advanced trobleshooting. UEFI Firmware Settings Change settings in your PC's UEFI firmware.
-
Page 19: Contact Us
Contact Us GIGA-BYTE TECHNOLOGY CO., LTD. Address: No.6, Baoqiang Rd., Xindian Dist., New Taipei City 231, Taiwan TEL: +886-2-8912-4000, FAX: +886-2-8912-4005 Tech. and Non-Tech. Support (Sales/Marketing) : https://esupport.gigabyte.com WEB address (English): https://www.gigabyte.com WEB address (Chinese): https://www.gigabyte.com/tw GIGABYTE eSupport • To submit a technical or non-technical (Sales/Marketing) question, please link to: https://esupport.gigabyte.com...
Need help?
Do you have a question about the AI TOP 100 Z890 and is the answer not in the manual?
Questions and answers