Table of Contents
Advertisement
Advertisement
Table of Contents

Related Manuals for Gigabyte GB-AEDNK


Summary of Contents for Gigabyte GB-AEDNK
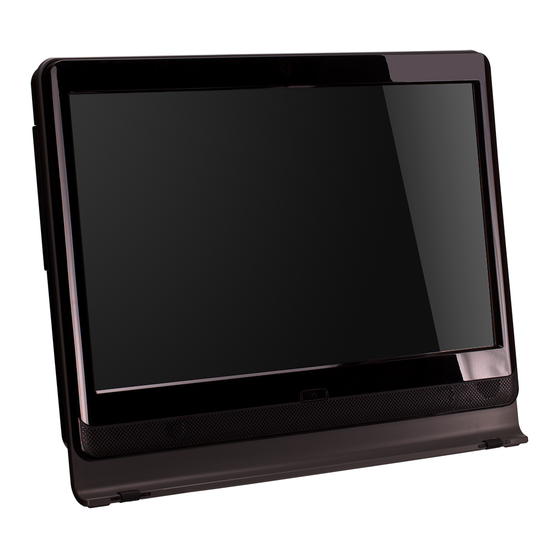
- Page 1 GB-AEDTK-SI GB-AEDNK-SI 21.5" AIO System User's Manual Rev. 1.0...
-
Page 2: Table Of Contents
Table of Contents Overview Of Your Documentation ...................4 Document Type ......................4 Document Type ........................4 Non-printed documentation ....................4 Servicing ..........................4 Typographics ....................... 4 Box Contents ........................5 Standard Items ......................5 Getting Started With Your PC ..................6 Touring Your PC ......................6 Front View ..........................6 Rear View ..........................7 Right-side View ........................8... - Page 3 Installing WiFi Module ....................26 Troubleshooting ......................27 Frequently Asked Questions (FAQ) ................27 Power problems ........................27 Internet access problems .....................28 Display problems ........................29 Keyboard and mouse problems ....................30 Sound and microphone problems ..................31 Miscellaneous problems .......................32 Specifications ........................33 GB-AEDTK...
-
Page 4: Overview Of Your Documentation
Overview Of Your Documentation Document Type Your documentation contains printed information and PDF user manuals to help you perform vari- ous tasks. Document Type • Quick Start Guide provides information about setting up your computer. Non-printed documentation • Manual CD (containing this manual) provides information about using your computer, clean- ing and maintaining the monitor and the accessories, and the common solutions to the prob- lems you may encounter while using your computer. -
Page 5: Box Contents
Box Contents Carefully unpack the system and check that the following items were included. If any are missing or damaged, please contact your vendor. Retain the box and packing in case you need to transport your personal computer in the future. The fitted foam packaging is ideal for protect- ing the device during transport. -
Page 6: Getting Started With Your Pc
Getting Started With Your PC Touring Your PC This section describes the views and the features of the controls, ports, buttons, components, and connectors of your computer. Front View Item Description Webcam The built-in camera allows you to capture still images, record videos, and have video chats. -
Page 7: Rear View
Rear View Item Description Vents The design of the vents is to prevent the computer from overheating. The internal fans blow hot air away from heat-sensitive components in the computer. Keep the vents clean and free of dirt and dust, as blocking it may cause serious thermal problems. -
Page 8: Right-Side View
Right-side View Item Description B-CAS/SIM Insert the B-CAS card or SIM card into this card reader. All ISDB receiving apparatus such as DTV TV, tuner, and DVD recorder except 1seg-only devices require a B-CAS card. The SIM is used to identify and authenticate subscribers on mobile tele- phony devices. -
Page 9: Left-Side View
Left-side View Item Description Optical Disc Drive Insert CD's or DVD's for viewing or playback of data, music or video (Optional) files. GB-AEDTK... -
Page 10: Bottom-Side View
Bottom-side View Item Description Audio input jack Connect to an audio in jack on external audio equipment for audio sound. SPDIF OUT Connect to a SPDIF digital audio output on certain expansion cards. USB 3.0 Ports Connect a Universal Serial Bus device. It supports v3.0 of the USB standard, which allows data exchange rates as high as 5.0 Gb/s. -
Page 11: Setting Up Your Pc
Setting Up Your PC This section describes how to set up your computer and make adjustments to the monitor. Preparing To Setup Your PC To protect the computer and monitor, before setting up your computer you should: • Find a flat open area on your desk to position your computer. • Place a soft item like the computer packaging bag on the desk for padding. - Page 12 10 °~170 ° Please ensure the computer stand has been pulled up to the first detent position, so that your computer may stand firm and upright. Now you are ready to access some ports on the side panel of the computer to make cable connections. GB-AEDTK...
-
Page 13: Turning On Your Pc
Turning On Your PC After you finish the installation of your computer, press the Power button on the front panel of the computer to turn it on. Then follow the on-screen instructions to complete the initial setup. Turning Off Your PC To turn off the system, close all the active windows, and then click the Start menu at the bottom left corner of your screen, and then click Shut Down on the right side of the open tab. -
Page 14: Brightness Control
Brightness control To adjust the brightness level of the monitor, press the Brightness Increase button to increase the brightness level or press the Brightness Decrease button to decrease the brightness level. GB-AEDTK... -
Page 15: Using Your Pc
Using Your PC This section describes more tasks your computer can perform, including connecting to the Inter- net, using the Webcam to communicate with your family and friends, enjoying your digital enter- tainment from CD and DVD, reading and writing to your memory cards, and taking control of your computer via the touchscreen technology. -
Page 16: Using The Webcam
If the selected network requires security authentication, please enter a user name and password. 2. If you are able to successfully connect to a wireless network, you will receive a message indicating that the connection has been established. 3. Open the Web browser and access any Web site to test the network connection. If the selected network requires security authentication, please enter a user name and password. -
Page 17: Using The Optical Disc Drive (Optional)
Using The Optical Disc Drive (Optional) Your computer comes with an optical disc drive, which supports music CDs, video CDs and DVDs. You can also use it to burn CD-R/CD-RW or DVD±R/DVD+RW/DVD-RW/DVD-RAM discs. The following tables show which formats are supported by the optical disc drive. CD-Writable Drives Media Type Read... -
Page 18: Upgrading Your Pc
Upgrading Your PC Safety Measures Computer components and electronic circuit boards can be damaged by discharges of static electricity. Working on computers that are still connected to a power supply can be extremely dangerous. Follow the simple guidelines below to avoid damage to your computer or injury to yourself. -
Page 19: Removing Pc Cover
Removing PC Cover Before you remove or install the PC cover: • Make sure the computer is not turned on or connected to an AC adapter. Follow these instructions to remove the system cover: 1. Loosen and remove the eight screws securing the back cover. 2. -
Page 20: System Components
System Components Item Description Motherboard Metal Cover Hard Disk Drive Heat Sink Battery WiFi Module Memory Module GB-AEDTK... -
Page 21: Removing Motherboard Metal Cover
Removing Motherboard Metal Cover Follow these instructions to remove the motherboard metal cover: 1. Loosen and remove the screws securing the motherboard metal cover. 2. Slide the metal cover away from the I/O ports then lift up. GB-AEDTK... -
Page 22: Installing Cpu
Installing CPU Before installing the processor, adhere to the following cautions: • The processor will overheat without the heatsink and/or fan, resulting in permanent irreparable damage. • Never force the processor into the socket. • Apply thermal compound evenly on the top of the processor before installing the heat sink. -
Page 23: Installing Heat Sink
Installing Heat Sink Before installing the heat sink, adhere to the following cautions: • Apply thermal compound evenly on the top of the processor before installing the heat sink. Follow these instructions to install the heat sink: 1. Apply an even and thin layer of thermal paste on the surface of the heat sink. 2. -
Page 24: Replacing Hard Disk Drive
Replacing Hard Disk Drive Before installing or removing the HDD, adhere to the following cautions: • Take note of the drive tray orientation before sliding it out. • The tray will not fit back into the bay if inserted incorrectly. Follow these instructions to install the hard disk drive: 1. -
Page 25: Installing Memory
Installing Memory Before installing a memory module, make sure to turn off the computer and unplug the power cord from the power outlet to prevent damage to the memory module. Follow these instructions to install the memory: 1. Align the memory with the SODIMM module and insert the SODIMM memory module into the SODIMM slot. -
Page 26: Installing Wifi Module
Installing WiFi Module Before installing a WiFi module, make sure to turn off the computer and unplug the power cord from the power outlet to prevent damage to the WiFi module. Follow these instructions to install the WiFi module: 1. Align the WiFi card with the Mini Card Slot and insert the card into the slot. Please note that WiFi module has a foolproof insertion design. -
Page 27: Troubleshooting
Troubleshooting The section describes situations that you may encounter while using the computer and provides troubleshooting steps. Before you begin troubleshooting, verify the following items: • If you have added or removed a program or a hardware before the problem appeared, make sure that your computer has met all the pre-installation requirements, review if the in- stallation procedures are correct, and check if the program or hardware is properly installed. -
Page 28: Internet Access Problems
Internet access problems Symptom Possible Solution The wireless Internet • Check the wireless interference. connection is unstable. • Reset your wireless router or access point to factory defaults and reconfig- ure the settings. For details about resetting your wireless router or access point, refer to the documentation or user manual for the unit. -
Page 29: Display Problems
• Ensure that there is enough space available on the hard disk drive to store the temporary files that are created during the writing process. • Click Start > Computer to check the space available on your hard disk drive. Display problems Symptom Possible Solution... -
Page 30: Keyboard And Mouse Problems
Keyboard and mouse problems Symptom Possible Solution Keyboard or mouse • If you are using a wired keyboard or mouse, check the cable connection commands are not between the unit and your computer. recognized by the com- • If you are using a wireless keyboard or mouse, check the following items. •... -
Page 31: Sound And Microphone Problems
Sound and microphone problems Symptom Possible Solution I hear noise when con- • Check if the earphone works on another device. necting a headphone to • Connect the earphone to other devices, such as a radio, to see if you can the computer. -
Page 32: Miscellaneous Problems
Miscellaneous problems Symptom Possible Solution Certain video files can- • Check if Windows Media Player is set to automatically download codecs. • Right-click on the menu bar, select Tools from the opened menu, and then not be played, and the Codec error messages click Options. -
Page 33: Specifications
Specifications Model GB-AEDT ® Processor • Intel Core i7, Core i5, Core i3, Sandy Bridge Processors • Support up to 95W Chipset • Intel ® H61 Express Chipset Operating System • Windows ® ® • Windows Memory • Dual channel SODIMM DDR3 1333/1066 MHz •... - Page 34 Dimensions • 531 mm (W) x 392 mm (H) x 69.35 mm (D) Net Weight • 7 KG GB-AEDTK...
Need help?
Do you have a question about the GB-AEDNK and is the answer not in the manual?
Questions and answers