Table of Contents
Advertisement
Quick Links
Advertisement
Table of Contents

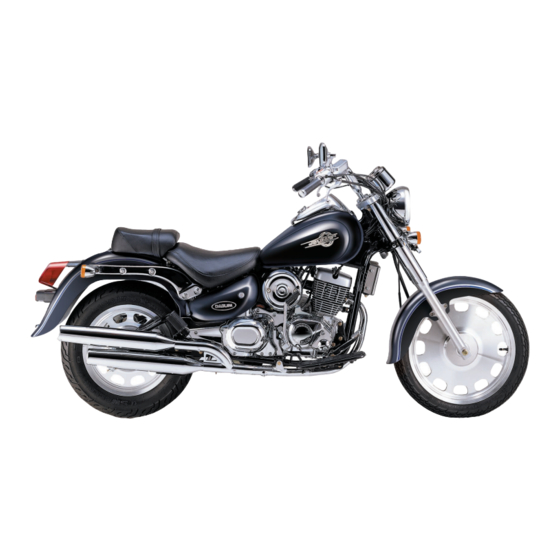
Related Manuals for DAELIM DAYSTAR


Summary of Contents for DAELIM DAYSTAR
- Page 1 OWNER S MANUAL (VL125L)
- Page 2 IMPORTANT NOTICE OPERATOR AND PASSENGER This motorcycle is designed to carry the operator and one passenger. ON-ROAD USE This motorcycle is designed to be used only on the road. READ THIS OWNER'S MANUAL CAREFULLY Pay special attention to statements preceded by the following words: WARNING Indicates a strong possibility of severe personal injury or death if instructions are not followed.
-
Page 3: Table Of Contents
CONTENTS WINKER SWITCH ............. 14 SPECIFICATION ..............3 HORN BUTTON ..............15 OPERATION INSTRUCTION ..........4 ............15 EQUIPMENT USAGE ..........4 SAFETY PRECAUTIONS STEERING WHEEL LOCK ..........15 PRIOR TO STARTING VEHICLE ........5 TOOL BOX ................. 16 CORRECT ATTIRE ............. 5 FUEL .................. - Page 4 DRIVE CHAIN ..............31 SAFE DRIVING ............... 48 ENGINE OIL LEVEL CHECK ..........33 ......48 PREPARATION BEFORE DRIVING CHANGING ENGINE OIL ..........33 ............49 DRIVING METHOD LIGHTS AND WINKER ............34 DRIVING POSITION ............49 BACK MIRROR ..............34 PRECAUTION WHEN DRIVING ........
-
Page 5: Specification
SPECIFICATION ITEM DATA ITEM DATA IGNITION SYSTEM C.D.I LENGTH WIDTH HEIGHT(mm) 2,240 860 1,140 BATTERY CAPACITY 12V 9AH WHEEL BASE(mm) 1,505 FUEL CAPACITY( ) 17.3 GROUND CLEARANCE(mm) 90 / 90 - 18 SEAT HEIGHT(mm) TIRE SIZE 130 / 90 - 15 WEIGHT(kgf) 147.5 TELESCOPIC... -
Page 6: Operation Instruction
To ensure more comfortable and safer operation, operation of the daystar. Please obey traffic regulations and make sure to read this manual carefully prior to operation. do not be hurried and careless. -
Page 7: Prior To Starting Vehicle
PRIOR TO STARTING VEHICLE Read user's manual carefully. Conduct maintenance checks prior to operation. Always maintain vehicle in clean status and carry out specified maintenance checks. Make sure to stop engine and stay away from fire when fueling. Exhaust gas contains harmful substance such as carbon monoxide, Start engine in well-ventilated places. -
Page 8: Operation
OPERATION CARGO Operators should naturally fix bodies to keep smooth driving. When carrying cargo, you must keep in mind that operating Please check whether or not you are unnaturally strained and the vehicle, especially when turning, will be different. strung up. Make sure not to overload the vehicle with goods as this can Driving pose has a great influence on safe operation. -
Page 9: Modification
Fellow passenger care must pay enough attention not to be burn by contacting with the muffler. Except designated attachment by DAELIM MOTOR CO., LTD., don’t attach any extra lighting device, because it may If haystack or vinyl is stuck to the muffler, fire can be cause an early discharging of battery. -
Page 10: Parts Location
PARTS LOCATION FUEL TANK CAP TOOL BOX FRONT BRAKE LEVER STEERING HANDLE LOCK KICK STARTER PILLION STEP BAR BATTERY/FUSE REAR BRAKE PEDAL... - Page 11 PARTS LOCATION CLUTCH LEVER FUEL COCK RADIATOR SIDE STAND PILLION STEP BAR GEAR CHANGE PEDAL MAIN STAND AIR CLEANER ELEMENT...
-
Page 12: Meter Reading And Usage
METER READING AND USAGE METER TACHOMETER <SPEEDOMETER> Indicates engine rpm. Indicates speed in km/h during travel. Maintain legal speed limits to ensure safe operation. <ODOMETER> Indicates total operating distance in km. <TRIP METER> Indicates travel distance from the point the meter is reset to “0”. To reset meter, turn the trip meter knob to the direction of arrow. -
Page 13: Indicator Lamps
INDICATOR LAMPS FUEL GAUGE <HEADLIGHT HIGH-BEAM INDICATOR> Indicates amount of gasoline in fuel tank. Pay particular attention because Turned on when the headlight is in high- If needle is within E mark(red zone), idle engine running or abrupt beam position. immediately fill gasoline. -
Page 14: Switch Operation
SWITCH OPERATION MAIN SWITCH HEADLIGHT POSITION LAMP <TURNING ON HEADLIGHT> Main switch is used to turn on or turn off CAUTION engine. Put main switch key in “ON” position and Do not manipulate main switch key turn on headlight switch. during operation. -
Page 15: Engine Stop Switch
ENGINE STOP SWITCH This switch is the device for immediate CAUTION engine stop by hand in any emergencies. Use this engine stop switch in In normal condition, make sure its position emergencies. “ ”(RUN), and do not use on the position When this engine stop switch of “... -
Page 16: Starter Button
STARTER BUTTON WINKER SWITCH Starter motor runs while this button is Use winker switch when you turn to left or CAUTION pressed to start engine. right, or when you change course of travel. Using light-bulbs with wrong watts may cause malfunction to the <HOW TO USE>... -
Page 17: Horn Button
EQUIPMENT USAGE HORN BUTTON STEERING WHEEL LOCK If horn button is pressed when main switch To prevent theft, lock steering wheel when is in “ON” position, horn is sounded parking the vehicle. <HOW TO LOCK> 1. Turn the steering wheel to left completely. -
Page 18: Tool Box
TOOL BOX FUEL <REFULELING> There is a tool box inside the right front side cover. Safeguard tools inside the tool Open key cover ; insert main switch key box. ; turn key to right and fuel tank cap is opened. <HOW TO USE>... -
Page 19: Correct Driving Operation
CORRECT DRIVING OPERATION <FUEL COOK> Make sure to check the oil, gasoline, The fuel cock lever arrow indicates the etc., before starting the engine. status of fuel. Please ensure that the main stand and ON..Gasoline is injected to carburetor the side stand is in a up-position when when engine is started. -
Page 20: Starting The Engine
STARTING THE ENGINE <WHEN ENGINE IS COLD(WINTER)> 6. Close throttle grip and press starter 1. Verify the steering weel lock is released. button. (If engine is not started with 1-2 2. Make sure engine stop switch is in “ ” (RUN) position times of trial, verify fuel cock lever is in “ON”... -
Page 21: If Engine Cannot Be Started
IF ENGINE CANNOT BE STARTED <GEAR DOWN OPERATION> CAUTION If engine cannot be started or vehicle does If you gear down when you need to drasti- Exhaust gas contains harmful not move, check the followings. cally accelerate speed such as when you substance such carbon... -
Page 22: Operation
OPERATION HOW TO USE BRAKE Make sure side stand is in original Apply brakes on front wheel and rear CAUTION position prior to starting vehicle. wheel simultaneously. Always start in the 1 gear, and start If side stand moves unsatisfactorily, Avoid unnecessary abrupt braking. -
Page 23: Parking
PARKING <ENGINE BRAKE> <PARKING WHEN SIDE STAND IS USED> Put gear in neutral and put main switch If you turn throttle grip in reverse, engine to “OFF” position to stop engine. Stop vehicle on level ground and park with brake functions and, if you need stronger Put fuel cock to “OFF”... -
Page 24: Self Inspections Before Operation
SELF INSPECTIONS BEFORE OPERATION INSPECTION OF CONCERNED AREA Self inspect the motorcycle and have Check areas which caused for concern CAUTION regular maintenance inspections for when last operating the vehicle. Observe safety rules when conducting increased safety and the prevention of inspections. -
Page 25: Brakes
BRAKES <BRAKE FLUID LEVEL> In addition, check hose and pipe protective The front brake is the hydraulic disk type, part to sec if they make contact with other and the rear brake is the drum brake type. WARNING parts when you make left or right turn due As the brake pad wear, the brake fluid Brake fluid may cause irritation. - Page 26 <REPLENISHING BRAKE FLUID> CAUTION Move steering wheel and set the top of Do not fill brake fluid above upper reserve tank level. level as it may cause brake fluid to Clean dust and other foreign matter leak outside. from around master cylinder and take Exercise full caution, when caution not to allow foreign matter to replenishing brake fluid, not to...
- Page 27 [REAR WHEEL] <BRAKE PAD INSPECTION> Operate brake and, if the brake pad wear Push the brake pedal with hands for limit line reaches the brake disc side, it resistance and check if the pedal indicates the pad has reached wear limit. movement appropriate.
-
Page 28: Tires
TIRES <TIRE PRESSURE CHECK> <CRACKS/DAMAGE> <BRAKE SHOE INSPECTION> Check for an appropriate level of air Check tire tread and sides for cracks and Push brake pedal completely and, if the pressure by examining how the tire sits on damage. brake arm arrow and the “ ”... -
Page 29: Battery
BATTERY <FOREIGN MATTER> <TREAD DEPTH> <BATTERY ACID LEVEL CHECK> Check tire tread and sides for nails, rocks, Check the wear indicator(wear limit Remove the four flange bolts, and take etc. That might have become wedged in marking) to see if there is an insufficient off the right lower cover. - Page 30 CAUTION the vehicle and install battery. Make Except designated attachment by sure, at this time, that side cord is DAELIM MOTOR CO., LTD., do connected first, followed by side not attach any extra lighting device, cord. because it may cause an early discharging of battery.
-
Page 31: Throttle Grip
THROTTLE GRIP Check for smooth rotation of the throttle CAUTION Battery acid contains thin sulfuric grip from the fully open to the fully acid. Prevent its contact with eyes Turn the ignition switch OFF closed position at both full steering or skin as it causes damage if before disconnecting the terminal positions. -
Page 32: Clutch
CLUTCH MAJOR ADJUSTMENT <LEVER FREE PLAY INSPECTION> <CLUTCH LEVER ADJUSTMENT> Pull clutch lever until you feel resistance, Adjust lever free play by using the clutch and using a graduated ruler, check the lever cable’s clutch lever side or clutch side end free play to verify it is within prescribed adjuster. -
Page 33: Drive Chain
DRIVE CHAIN The service life of drive chain is 4 Rotate the rear wheel slowly and inspect 3 Move the position of chain tensioner dependent upon proper lubrication and the drive chain and sprockets for any of roller up and down with hands to check adjustment. - Page 34 <ADJUSTMENT> WARNING 50~60mm Drive chain slack slould be checked and If a torque wrench is not used for adjusted, if necessary, every 1,000km. this installation, see your authorized When operated at sustained high speeds dealer as soon as possible to verify or under conditions of frequent rapid proper assembly.
-
Page 35: Engine Oil Level Check
ENGINE OIL LEVEL CHECK CHANGING ENGINE OIL <RECOMMENDED OIL> Put vehicle in upright position on flat If engine oil is polluted, it seriously affects ground and check engine oil level and the engine life span. Maintain appropriate If oil sold on markets or privately-manu- degree of pollution. -
Page 36: Lights And Winker
LIGHTS AND WINKER BACK MIRROR [HEAD LIGHT, TAIL LIGHT] Sit squarely on the seat and check to see if CAUTION you have a good view behind the vehicle Start the engine and make sure the lights If you change engine oil imme- turn on. -
Page 37: Maintenance
These instructions are based on the assumption that the motorcycle will be used exclusively for its designed purpose. Sustained high speed operation, or operation in unusually wet or dusty conditions, will require more frequent service than specified in the MAINTENANCE SCHEDULE. Consult your authorized Daelim dealer for recommendations applicable to your individual needs and use. -
Page 38: Maintenance Schedule
MAINTENANCE SCHEDULE Perform the Self Inspections Before Operation at each scheduled maintenance period. I: INSPECT AND, CLEAN, ADJUST, LUBRICATE OR REPLACE IF NECESSARY R: REPLACE L: LUBRICATE C: CLEAN ODOMETER READING(NOTE 1) FREQUENCY 1,000Km REMARK ITEM MONTH FUEL LINE FUEL FILTER THROTTLE OPERATION CARBURETOR CHOKE AIR CLEANER... - Page 39 ODOMETER READING(NOTE 1) FREQUENCY REMARK 1,000Km ITEM MONTH BRAKE FLUID NOTE (3) BRAKE SHOE / PAD WEAR BRAKE SYSTEM BRAKE STOP SWITCH HEADLIGHT ADJUSTMENT SUSPENSION CLUTCH SIDE STAND BOLTS, NUTS, FASTENERS WHEELS / TIRES STEERING HANDLE BEARING If you do not have the appropriate tools or information to conduct maintenance, or if you feel you are not capable to perform maintenance on this vehicle, contact authorized dealers or repair shops for maintenance and repairs.
-
Page 40: Maintenance Precautions
Use new, genuine Daelim parts or company. their equivalent for maintenance Exhaust gas contains harmful and repair. Parts which are not of substance such as carbon monoxide. -
Page 41: Air Cleaner Element
AIR CLEANER ELEMENT IDLE SPEED ADJUSTMENT <INSPECTION> Put vehicle in upright position on a flat This vehicle is equipped with viscous ground. type air cleaner element containing oil Start engine and let it run idle for a few and the element cannot be cleaned. minutes. -
Page 42: Wheel Removal
WHEEL REMOVAL [FRONT WHEEL REMOVAL] Raise the front wheel off the ground by Loosen the axle nut. Fit the caliper over the disc, taking care placing a support block under the Withdraw the front wheel axle and not to damage the brake pads. Install the engine. - Page 43 [REAR WHEEL REMOVAL] WARNING Set vehicle on main stand in upright If a troque wrench was not used for position on level ground. installation, see your authorized Loosen the rear brake adjuster nut and dealer as soon as possible to verify remove the brake rod.
-
Page 44: Bulb Replacement
BULB REPLACEMENT Be sure to turn the ignition switch OFF [HEADLIGHT BULB] when replacing the bulb. Loosen the washer screw and remove Do not use bulbs other than that the headlight. specified. After installing a new bulb, check that the light operates properly. WARNING The light bulb becomes very hot while the light is ON, and remain... - Page 45 [TAIL/STOPLIGHT BULB] [LICENSE LIGHT BULB] [FRONT/REAR WINKER BULB] Loosen the tapping screw and remove Loosen the tapping screw and remove Loosen the tapping screw and remove the taillight lens. the license light lens. the winker lens. Slightly press down on the bulb and Slightly press down on the bulb and Slightly press down on the bulb and turn it counterclockwise.
-
Page 46: Spark Plug
SPARK PLUG If electrode is stained or plug gap is not CAUTION right, satisfactory spark is not produced. If plug of different maker or Clean and make adjustment. different heat value is used, it Remove spark plug cap. causes unsatisfactory engine Clean around the plug. -
Page 47: Fuse Replacement
FUSE REPLACEMENT Turn off main switch and check fuse for CAUTION sign of cut. Turn the ignition switch OFF Remove the four flange bolts, and take before checking or replacing fuse to off the right lower cover. prevent accidental short-circuiting. Fuse is installed inside fuse holder When disassemble fuse, make sure located near battery. -
Page 48: Side Stand
SIDE STAND CABLE RUBBER PART NOTABLES FOR CAR WASHING A rubber part is assembled on the cable to Make sure to stop the engine prior to car Erect main stand and place vehicle in protect the inner cable. washing. upright position on level ground. Make sure that this part is placed firmly Be careful not to allow water to enter Check side stand spring for signs of... -
Page 49: Storage Guide
STORAGE GUIDE Extended storage, such as for winter, <REMOVAL FROM STORAGE> CAUTION requires that you take certain steps to Gasoline is extremely flammable reduce the effects of deterioration from Uncover and clean the motorcycle. and is explosive under certain non-use of the motorcycle. Charge the battery as required. -
Page 50: Safe Driving
SAFE DRIVING PREPARATION BEFORE DRIVING Performing daily inspection Putting on the protective gears (Helmet, glove, goggles, etc.) Bringing the driver's licence Determinating the path to the desired destination... -
Page 51: Driving Method
DRIVING METHOD DRIVING POSITION The appropriate driving position is most important thing to driving safely. Eyes : Look at the front direction widely. Shoulders : Relieve the tension. Arms : Relieve the tension and bend arms to inside and let them act as the spring. -
Page 52: Precaution When Driving
PRECAUTION WHEN DRIVING Secure the safe distance. If any abnormality is found, stop driving and contact service center to inspect the vehicle. Drive protectively. Do not obstruct the traffic. Restart the vehicle after 2~3 min when it is turned over. Do not drive on the pedestrian way or walkway. -
Page 53: Starting
STARTING Prior to starting always look around to avoid accident. Get on the vehicle after pulling back the stand. Start driving slowly after turning on the winker and releasing the brake while ensuring the safety around the vehicle. CAUTION Return the side stand to its original position, keep driving without doing this may cause turnover accident. -
Page 54: Turning Method
TURNING METHOD PRINCIPLE OF TURN EFFECT OF SPEED The basic principle of turn is balancing using the centrifugal The centrifugal force increases in inverse portion to the radius force which makes vehicle go outside and the gravity which of a curve and in portion to the square speed. Decelerate prior makes vehicle fall inside. -
Page 55: Positions Of Turning
3 POSITIONS OF TURNING The basic principle of turn is balancing using combined force of < LEAN-IN > the centrifugal force and the gravity. This is a turning position with driver leaned inside more than All 3 positions require straightening the head and keeping the motorcycle. -
Page 56: Turning Method
TURNING METHOD < LEAN-OUT > This is a turning position with motorcycle leaned inside more than driver, which is opposite to the lean-in position. With this position, quick turn is well performed and driver can obtain wide front visual field adequate to drive on the rained or slippy road because it has best road holding. -
Page 57: Precaution When Turning
PRECAUTION WHEN TURNING Do not drive inside of large truck's turn circle. < DEAD ANGLE ZONE > < DISTANCE BETWEEN THE FRONT AND REAR WHEEL TURN > Dead angle zone is the sight range which cannot be identified by It is distance between path of the front and rear wheel and driver and increases in proportion to the width of the motorcycle. -
Page 58: Braking Method
BRAKING METHOD BASIC PRINCIPLE OF BRAKE (FRICTION FORCE) RESTRAINT OF BRAKE EFFECT (INERTIA) Vehicle is braked using friction between road surface and tires. Braking distance increases 1.5 times on wet road and 3 times on icy road because friction force of road surface is decreased. -
Page 59: Braking Method
BRAKING METHOD IMPACT WHEN COLLISION Turn the throttle grip to its original position and decelerate Learn the proper braking method to prevent accident. using the engine brake. Erect the motorcycle straight. Brake using both front and rear brakes. COMPARISION OF BRAKING DISTANCE Vehicle speed : 50 km/h Impact increases in proportion to the speed and weight. -
Page 60: Wiring Diagram
WIRING DIAGRAM ST.LI.KILL.SW. FR.STOP SW. COMB SW. R. FR WINKER KILL START LIGHT 12V 10W BATTERY BAT2 12V 9AH ILLUM, LAMP (ENGINE) 12V 1.7W FUEL GAGE WINKER RELAY HORN (ENGINE) RR STOP SW. FUSE 15A WINKER PILOT(R) 12V 1.7W 250 : BLACK LG/R LG/R NEUTRAL PILOT... - Page 61 MEMO :...
- Page 62 2002. 05 PRINTED NO COPY 1999. 11 PUBLICATION...
Need help?
Do you have a question about the DAYSTAR and is the answer not in the manual?
Questions and answers
Yes I need to no if you can send me diagram of wireing on a 125 day star
A wiring diagram for the DAELIM DAYSTAR 125 is mentioned in the provided context. You can find it in the document titled "Daelim Daystar 125cc Wiring Diagram."
This answer is automatically generated