
Related Manuals for Cateye EC3600E


Summary of Contents for Cateye EC3600E
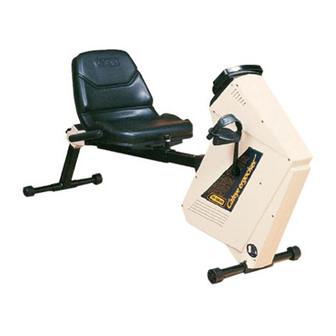
- Page 1 RECUMBENT TYPE Cateye ergociser OPERATING INSTRUCTIONS CATEYE ERGOCISER MODEL : EC-3600 POWER : DC 12V POWER CONSUMPTION: MAX 15W USE THE SPECIFIED CAT EYE ERGOCISER AC ADAPTER ONLY. CO.,LTD. MADE IN JAPAN SERIAL No.
-
Page 2: Table Of Contents
How to Use This Manual After you read the Starting up section of this manual, assemble your Cateye Ergociser™ and try it out. When you get used to the machine and develop a greater interest in it, please read the Operation section in preparation to trying the machine's numerous functions. -
Page 3: Important Safety Instructions
INTRODUCTION Thank you very much for your purchase of the Model EC-3600 Cateye Ergociser™. The model EC-3600 is a new recumbent type high-tech exerciser with a built-in computerized training system designed specifically to promote cardiovascular fitness and overall endurance, the keystone of good health. With its endurance test program and four training programs, the EC-3600 will help you to maintain or improve your physical strength in a fun and pleasant way. - Page 4 Let's Assemble How to adjust each part Handling the pulse (earlobe) sensor Your first ride The five programs of operation Using your Cateye Ergociser™ without a data card Make sure all components are included in a Warranty Registration Card Tools Seat Pipe, Inner Pipe Seat Pulse Sensor...
-
Page 5: Let's Assemble
Let's assemble Mounting Front Leg Mounting Rear Leg Mounting Seat and Assembling Rear Connecting Inner Pipe Mounting Pedals Handlebar Frame • Remove the leg plate from the • Place the rear leg (with level • Mount the seat to the seat pipe •... -
Page 6: How To Adjust Each Part
How to Adjust each part Level Adjustment A d j u s t i n g S e a t Adjusting Seat Height Adjusting Pedal Belts Position • Turn the level adjuster on the rear • The seat height can be adjusted at •... -
Page 7: Handling The Pulse(Earlobe) Sensor
Handling the pulse(earlobe) sensor This model detects and displays Installing the pulse Use of sensor clip Using pulse sensor Checking the Pulse your pulse rate during exercise sensor during exercise Sensor by the pulse sensor from your earlobe. Being a sensitive •... -
Page 8: Your First Ride
Your first ride Turn on power and Insert the start card Checking the screen Press the Calorie display When you finish attach pulse sensor (red card provided) display button to start • Insert the DC connector into the • Find the red card (start card) in the •... -
Page 9: The Five Programs Of Operation
The five programs of operation Aerobic power Automatic training Isopower training Manual training Hill profile training (training at a constant pulse (training at a constant (training at a constant (training by cycling up measurement rate) energy pedal mountains) (physical fitness test) expenditure) resistance) •... -
Page 10: Using Your Cateye Ergociser
Using your Cateye Ergociser without a data card The red card you used on your first ride contains data used in selecting different types of training. Even without this card, you can use buttons on the control unit to run through the same operations. Switch on power Select a training Input training... - Page 11 Your strength level and training index Aerobic power measurement (Physical fitness test) Automatic training Isopower (constant load) training Manual training Hill profile training How to make a data card...
-
Page 12: Your Strength Level And Training Index
Your strength level and training index (1) Purpose of Exercise Glossary of Terms PULSE RATE (bpm) TARGET PULSE RATE CHART • Maximum Heart Rate • Have you ever been out of breath after climbing a flight of stairs or after a brisk walk? When we are walking, running and even The heart rate increases according to the intensity of exercise, there sleeping, our body is taking in oxygen and generating energy. - Page 13 Your strength level and training index (2) Physical Fitness Level The "Aerobic power measurement" program evaluates your Manual Training physical fitness level according to 5 levels, and it also evaluates your and Training Index maximum oxygen uptake with an estimated value. Based on the •...
-
Page 14: Aerobic Power Measurement (Physical Fitness Test)
Aerobic power measurement (1) Test Result Display, S e l e c t t h e A e r o b i c • For program selection see the Starting up section page 16. • The buzzer sounds at ten minutes and the test result is displayed on Cool Down P o w e r M e a s u r e m e n t the LCD. - Page 15 Aerobic power measurement (2) Physical Fitness Level (PFL) Test Protocol • There are five physical fitness levels: 1 ~ 5. These levels are relative • In the "Aerobic power measurement" program of the EC-3600, evaluations that compare your maximum oxygen uptake (MOU), the workload (pedal resistance:torque) for the subsequent stage is estimated by the aerobic power measurement program, with the determined depending on your pulse rate at the previous stage.
-
Page 16: Automatic Training
Automatic training Exercise Maintaining Select the Automatic • For program selection see the Starting up section page 16. • After the symbol has gone out, during exercise every time WARM Training Program the Target Pulse Rate the pulse rate digresses 3 bpm from the target, the load changes 0.1 kg·m, keeping your pulse rate close to the target pulse rate. -
Page 17: Isopower (Constant Load) Training
Isopower (constant load) training Select the Isopower E x e r c i s e • For program selection see the Starting Up section page 16. • After the symbol goes out, the pedal resistance (torque WARM Training Program Constant Wattage kg·m) increases or decreases according to the pedal cadence. -
Page 18: Manual Training
Manual training Select the Manual • Exercise with the set pedal resistance (torque, kg·m). • For program selection see the Starting up section page 16. Exercise Training Program Note: In this program, you can increase or decrease the pedal – resistance by the buttons whenever desired. -
Page 19: Hill Profile Training
Hill profile training Select the Hill Profile • The buzzer sounds at the specified time and the program • For program selection see the Starting up section page 16. End Program completely ends. Review the calorie consumption using Training Program button when you get close to the specified time. -
Page 20: How To Make A Data Card
How to make a data card minutes Examples of data card MANU MANU If you record your training conditions to this "Data Card", you can HILL HILL set the conditions merely by inserting the card into the card inlet of the control unit. - Page 21 Different setting of control unit Troubleshooting Handling/Warranty service Specifications...
-
Page 22: Different Setting Of Control Unit
Different setting of control unit Using the select switches Remove the control unit No.1 to 4 at the back of the • Remove the 4 screws at the back of the control unit. control unit, the initial • Turn over the control unit slowly, watching the connecting cable. setting such as fitness level evaluation table, body weight Caution: Do not disconnect the cable. -
Page 23: Troubleshooting
Troubleshooting Troubleshooting Problems noted in the following chart are not disorders. Prior to seeking repair, read the contents of the entire chart first. Item to check Countermeasure Problem Display does not appear. Is the power supply connected? Connect the AC adaptor correctly. (see page 12) Is the power switch on? Turn the power on. -
Page 24: Handling/Warranty Service
• Do not place the EC-3600 in direct sun light. Warranty service and parts • Cat Eye Co., Ltd. guarantees that the Cateye Ergociser™ Model EC-3600 is free from material defects and malfunctions under correct and normal use for a period specified in the separate Warranty Card. In case there should be defects or malfunctions, Cat Eye will repair or replace the unit or parts, according to the terms and conditions mentioned in the Warranty Card. -
Page 25: Specifications
U.S. Pat. 4775145 , Pat. & Design Pat. Pending * The specifications and design are subject to alteration without notice for improvement purpose. **"CATEYE " and "ERGOCISER " are registered trademarks of CAT EYE CO., LTD. Copyright© 1993 Cat Eye Co., Ltd. Printed in Japan... - Page 26 CO.,LTD. 2-8-25 Kuwazu, Higashi Sumiyoshi-ku, Osaka 546 JAPAN PHONE: 81-6-719-7781 FAX: 81-6-719-2362 0689191 (E)
Need help?
Do you have a question about the EC3600E and is the answer not in the manual?
Questions and answers