Table of Contents
Advertisement
Advertisement
Table of Contents
Troubleshooting

Related Manuals for Cateye Ergociser EC-1200


Summary of Contents for Cateye Ergociser EC-1200
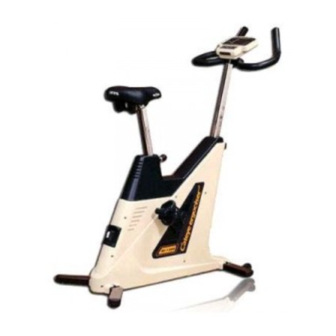
- Page 1 Cateye Ergociser MODEL EC-1200 OPERATING INSTRUCTIONS EC-1200...
-
Page 2: Table Of Contents
Handling/Warranty service --------------------------------------------------------- 42 Specifications -------------------------------------------------------------------------- 43 How to Use This Manual After you read the Starting up section of this manual, assemble your Cateye Ergociser and try it out . When you get used to the machine and develop a... -
Page 3: Name Of Parts
Pulse Symbol Elapsed Time Weight Calorie Consumption Target Pulse Target Load Physical Work Capacity Load Scale (Pedal Resistance) Time Scale EC-1200 CADENCE TRAINING COURSE PEDAL TORQUE PRF-2 the Cascades TIME PRF-3 the Pyrenees 4. Press to adjust blinking digits. 5. Press to let other digits blink. - Page 4 Cable Inlet MAIN UNIT Control Unit Handlebar Handlebar Saddle Lever Cable Holder Seat Post Handlebar Post Spring Lock Pin Handlebar Post Adjusting Knob Crank AC Adapter Inlet Power Switch Pedal EC-1200 Front Leg Caster Rear Leg Levelling Knob Levelling Knob...
-
Page 5: Important Safety Instructions
With its endurance test program and four training programs, the EC-1200 will help you to maintain or improve your physical strength in a fun and pleasant way. We hope you will make good use of your Cateye Ergociser come. -
Page 6: Installing The Control Unit
Installing the control unit How to adjust each part Your first ride The five programs of operation Using your Cateye Ergociser™ without a data card Make sure all components are included in a package. Control Unit Legs (2 pcs) Saddle Main Body Handlebar &... - Page 7 Assembly 1. Attaching the front leg 2. Attaching the rear leg • Remove the two screws from the re- • Place the rear leg pipe under the spective leg pipes. The one with rear end of the main body, and ad- casters should be used as front leg.
-
Page 8: Installing The Control Unit
NO.3-OFF -------- kg • When the Model EC-1200 Cateye NO.3-ON ---------- lb Ergociser leaves the factory, it is set for American use. -
Page 9: How To Adjust Each Part
• For proper handlebar height and angle, you should be leaning slightly forward when holding the handle- levelling knob bar. • When you move the exerciser, lift the saddle and roll the exerciser on lower higher its casters. EC-1200... -
Page 10: Your First Ride
Now, adaptor other than the one sup- however, the goal is to get you acquainted with Model EC-1200, plied with the Model EC-1200. so if you change any of the numeral values, please return them to their original setting. -
Page 11: The Five Programs Of Operation
• In isopower training, you set the de- Torque setting range: sired energy expenditure in watts. The Model EC-1200 takes into ac- Minimum graduation: 0.1 kg·m count your cadence (rpm) and ad- justs pedal resistance (kg·m) auto- matically so that energy expendi- ture in watts remains constant. -
Page 12: Using Your Cateye Ergociser Tm Without A Data Card
AD but- ton.) • You should now understand how to use the Model EC-1200 Cateye Er- gociser . Once you get used to the exerciser, you will probably want to... - Page 13 Your strength level and training index Aerobic power measurement (Physical fitness test) Auto matic training Isopower (constant load) training Manual training Hill profile training How to make a data card...
-
Page 14: Your Strength Level And Training Index
(about 3 months),you become aware of the effect on your body. Test your physical fitness level again and gradually set a higher training index, thus maintaining and improving your physical fitness level. A special feature of the Ergociser EC-1200 is that it combines testing with exercise. Aerobic Power Measurement... - Page 15 Your strength level and training index (2) Physical Fitness Level The "Aerobic power measurement" program evaluates your physical fitness level according to 5 levels, and it also evaluates your maximum and Training Index oxygen uptake with an estimated value. Based on the result, you can choose your own training level (program type and exercise intensity) from the following index.
-
Page 16: Aerobic Power Measurement (Physical Fitness Test)
Aerobic power measurement (1) Select the Aerobic Power Measurement • For program selection see the Starting up section page 16. Program • Input your age, pulse limit, weight and sex. The initial display prior Input Conditions to input is as in the drawing. The numeric for age is blinking. Initial Pulse Limit Weight... - Page 17 (Physical Fitness Level Test Table). • Ergociser EC-1200 stores the following physical fitness level test table, which can be selected by the selector switch on the back panel of the control unit. (See page 8)
-
Page 18: Automatic Training
Automatic training Select the Automatic • For program selection see the Starting up section page 16. Training Program • Input age, pulse limit, exercise time and the target pulse rate. The Input Conditions initial display before input is as in the drawing, with the numeric for age blinking. -
Page 19: Isopower (Constant Load) Training
Isopower (constant load) training Select the Isopower • For program selection see the Starting Up section page 16. Training Program Input Conditions • Input age, pulse limit, exercise time and set wattage.The initial dis- play prior to input is as in the drawing. The numeric for age is blink- ing. -
Page 20: Manual Training
Manual training Select the Manual • For program selection see the Starting up section page 16. Training Program Input Conditions • Input age, pulse limit, exercise time, and the setting torque value. The initial display prior to input is as in the drawing. The numeric for age is blinking. -
Page 21: Hill Profile Training
Hill profile training Select the Hill Profile • For program selection see the Starting up section page 16. Training Program Input Conditions • Input pulse limit, exercise time, and the exercise pattern. The initial display prior to input is as in the drawing. The numeric for age is blinking. -
Page 22: How To Make A Data Card
Note 2: If Interval program is Specify the set wattage. "G" indi- specified on the Data Card, the cates the first digit of the wattage, model EC-1200 will take it as "H" indicates the second, and "I" Isopower program. indicates the third digit. -
Page 23: Handling The Pulse (Earlobe) Sensor
Handling the pulse (earlobe) sensor Troubleshooting Handling/Warranty service Specifications... -
Page 24: Handling The Pulse (Earlobe) Sensor
Handling the pulse(earlobe) sensor Precautions • Firmly clip the pulse sensor to the center of your right or left ear lobe. If you are wearing ear rings remove them. • When it is cold, massage your earlobe before use to improve blood circulation. •... -
Page 25: Handling/Warranty Service
• Handle the pulse sensor carefully. If strongly pulled out the cable may become disconnected. • When the EC-1200 is not in use, shut the power switch OFF and disconnect the power cord from the outlet. • Do not wipe the main unit with organic solvents such as thinner, kerosine, gasoline and alcohol. - Page 26 CO.,LTD. 2-8-25, Kuwazu, Higashi Sumiyoshi-ku, OSAKA, 546-0041 JAPAN PHONE: (06) 6719-7781 FAX: (06) 6719-2362 0689111(E)
Need help?
Do you have a question about the Ergociser EC-1200 and is the answer not in the manual?
Questions and answers