Table of Contents
Advertisement
Quick Links
Warning notices: Before using this product, please read this manual carefully and keep it for future reference.
The design and specifications are subject to change without prior notice for product improvement.
Consult with your dealer or manufacturer for details.
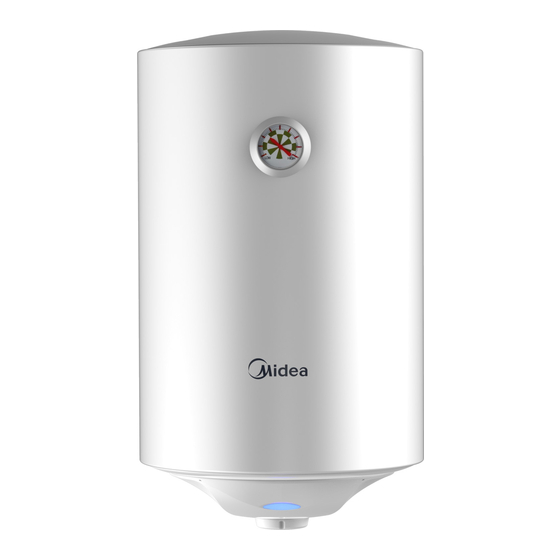
The diagram above is just for reference. Please take the appearance of the actual product as the standard.
Storage Electric Water Heater
FASHION SERIES
USER MANUAL
D30-15F6
D50-15F6
D80-15F6
D100-15F6
Advertisement
Chapters
Table of Contents

Related Manuals for Midea FASHION D50-15F6


Summary of Contents for Midea FASHION D50-15F6
- Page 1 Storage Electric Water Heater FASHION SERIES USER MANUAL D30-15F6 D50-15F6 D80-15F6 D100-15F6 Warning notices: Before using this product, please read this manual carefully and keep it for future reference. The design and specifications are subject to change without prior notice for product improvement. Consult with your dealer or manufacturer for details.
- Page 3 English Italian Polish LANGUAGES...
-
Page 4: Table Of Contents
THANK YOU LETTER Thank you for choosing Midea! Before using your new Midea product, please read this manual thoroughly to ensure that you know how to operate the features and functions that your new appliance o ers in a safe way. -
Page 5: Safety Instructions
SAFETY INSTRUCTIONS Intended Use The following safety guidelines are intended to prevent unforeseen risks or damage from unsafe or incorrect operation of the appliance. Please check the packaging and appliance on arrival to make sure everything is intact to ensure safe operation. If you find any damage, please contact the retailer or dealer. - Page 6 CAUTION Before installing this water heater,check and confirm that the earthing on the supply socket is reliably grounded. Otherwise, the electrical water heater can not be installed and used. Do not use extension boards. Incorrect installation and use of this electrical water heater may result in serious injuries and loss of property.
-
Page 7: Specifications
During heating, there may be drops of water dripping from the pressure release hole of ● the multifunction valves. This is a normal phenomenon. If there is a large amount of water leak, please contact customer care center for repair. This pressure release hole shall, under no circumstances, be blocked;... -
Page 8: Product Overview
PRODUCT OVERVIEW Product Shell Thermometer Inner tank Thermal insulation Anode rod Heating element Power cord Cold water inlet Hot water outlet Heating indicator light (Note:All dimensions are in mm) -
Page 9: Internal Wire Diagram
Internal Wire Diagram Thermal Cut Out Thermostat Brown Blue Yellow/Green WIRING DIAGRAM Accessories Plastic expansion pipe × 2 Safety valve × 1 Wall hanging screw × 2... -
Page 10: Quick Start Guide
QUICK START GUIDE Before First Use CAUTION Fill the inner tank with water before use. 1. Plug in 2. Rotate the thermostat knob clockwise to adjust the temperature inside the water heater. Ground 3. When the water temperature reaches 4. Open the water outlet valve, you the adjusted temperature, the heating can use hot water. -
Page 11: Product Installation
PRODUCT INSTALLATION Installation Instruction This electrical water heater shall be installed on a solid wall. If the strength of the wall cannot bear the load equal to two times of the total weight of the heater filled fully with water, it is then necessary to install a special support. Incase of hollow bricks wall, ensure to fill it with cement concrete completely. - Page 12 3. In order to avoid leakage when connecting the pipelines, the rubber seal gaskets provided with the heater must be added at the end of the threads to ensure leak proof joints (see Fig.4). Power cord Cold water inlet Hot water outlet Pressure relief valve Pressure release hole Adjusting handle for...
-
Page 13: Operation Instructions
OPERATION INSTRUCTIONS Methods of using First, open any one of the outlet valves at the outlet of the water heater, then, open the inlet valve. The water heater gets filled with water. When water flows out of the outlet pipe it implies that the heater has been filled fully with water, and the outlet valve can be closed. -
Page 14: Troubleshooting
3. If the button is not pressed and there is no clicking, then you should wait until the thermal switch cools down to the initial temperature. Manual reset button (Fig.6) Warning Non-professionals are not allowed to disassemble the thermal switch to reset. Please contact prefessionals to maintain. -
Page 15: Trademarks, Copyrights And Legal Statement
Midea may constitute trademark infringement or unfair competition in violation of relevant laws. This manual is created by Midea and Midea reserves all copyrights thereof. No entity or individual may use, duplicate, modify, distribute in whole or in part this manual, or bundle or sell with other products without the prior written consent of Midea. -
Page 16: Data Protection Notice
European Economic Area. Further information are provided on request. You can contact our Data Protection O cer via MideaDPO@midea.com. To exercise your rights such as right to object your personal date being processed for direct marketing purposes, please contact us via... -
Page 19: Manuale Utente
Scaldacqua elettrico ad accumulo SERIE ROUND MANUALE UTENTE D30-15F6 D50-15F6 D80-15F6 D100-15F6 Avviso: Prima di utilizzare questo prodotto, leggere attentamente il presente manuale e conservarlo per il futuro riferimento. Il design e le specifiche sono soggetti a modifiche senza preavviso per il miglioramento del prodotto. Consultare il proprio rivenditore o produttore per i relativi dettagli. - Page 20 LETTERA DI RINGRAZIAMENTO Ti ringraziamo per aver scelto Midea! Prima di utilizzare il tuo nuovo prodotto Midea, leggere attentamente il presente Manuale per assicurarti di sapere come utilizzare in modo sicuro le caratteristiche e le funzioni o erte dal nostro apparecchio.
-
Page 21: Istruzioni Di Sicurezza
ISTRUZIONI DI SICUREZZA Uso previsto Le seguenti linee guida di sicurezza hanno lo scopo di prevenire rischi imprevisti o danni derivanti da un utilizzo non sicuro o scorretto dell'apparecchio. Si prega di controllare l'imballaggio e l'apparecchio al momento della consegna per assicurarsi che sia intatto per garantire un futuro funzionamento sicuro. - Page 22 Pericolo: Rischio di lesioni! Prima di installare questo scaldacqua, controllare e confermare che la messa a terra sulla presa di alimentazione sia collegata a terra in modo a dabile. In caso contrario, lo scaldacqua elettrico non può essere installato e utilizzato. Non utilizzare schede di estensione.
-
Page 23: Specifiche
ridotte capacità fisiche, sensoriali o mentali, o mancanza di esperienza e conoscenza, a meno che non siano state supervisionate o istruite sull'uso sicuro dell'apparecchio da una persona responsabile della loro sicurezza. I bambini devono essere sorvegliati per assicurarsi che non giochino con lo scaldacqua. •... -
Page 24: Panoramica Del Prodotto
PANORAMICA DEL PRODOTTO Prodotto Alloggiamento Termometro Serbatoio interno Isolamento termico Asta anodica Elemento riscaldante Cavo di alimentazione Ingresso acqua fredda Uscita acqua calda Spia luminosa di riscaldamento 27 L 47 L 74 L 93 L (Nota: tutte le dimensioni hanno l’unità di misura in mm) - Page 25 Schema elettrico interno Taglio Termostato termico Marrone Giallo/Verde SCHEMA ELETTRICO Accessori Valvola di sicurezza × 1 Vite appesa a parete × 2 Tubo di espansione in plastica × 2...
-
Page 26: Guida Rapida
GUIDA RAPIDA Prima del primo utilizzo Pericolo Riempire il serbatoio interno con acqua prima dell'uso. 1. Inserire la spina 2. Ruotare la manopola del termostato in senso orario per regolare la temperatura all'interno dello scaldacqua. Terra 3. Quando la temperatura dell'acqua 4. -
Page 27: Installazione Del Prodotto
INSTALLAZIONE DEL PRODOTTO Istruzioni per l'installazione Questo scaldacqua elettrico deve essere installato su una parete resistente. Se la resistenza del muro non può sopportare il carico pari a due volte il peso totale dello scaldacqua riempito completamente d'acqua, è necessario installare un supporto speciale. - Page 28 Collegamento della valvola limitatrice di pressione con lo scaldacqua all'ingresso dello scaldacqua. Al fine di evitare perdite durante il collegamento delle tubazioni, le guarnizioni di tenuta in gomma fornite con lo scaldacqua devono essere aggiunte all'estremità delle filettature per garantire giunti a tenuta stagna (vedi fig.4). Cavo di alimentazione Ingresso acqua fredda Valvola limitatrice di pressione...
-
Page 29: Istruzioni Per L'uso
ISTRUZIONI PER L'USO Metodi di utilizzo 1. Innanzitutto, aprire una qualsiasi delle valvole di uscita all'uscita dello scaldacqua, quindi aprire la valvola di aspirazione. Lo scaldacqua si riempie d'acqua. Quando l'acqua fuoriesce dal tubo di uscita, significa che lo scaldacqua è stato riempito completamente d'acqua e la valvola di uscita può... -
Page 30: Risoluzione Dei Problemi
2. Premere il pulsante, posto al centro dell'interruttore termico, vedi Fig.6; Se il pulsante non viene premuto e non si fa clic, è necessario attendere che l'interruttore termico si ra reddi alla temperatura iniziale. Pulsante di ripristino manuale (Fig.6) Avvertenza I non-professionisti non sono autorizzati a smontare l'interruttore termico per ripristinare. -
Page 31: Marchi, Copyright E Note Legali
Midea Group e/o delle sue a liate ("Midea"), di cui Midea possiede marchi, diritti d'autore e altri diritti di proprietà intellettuale, e tutte le buone intenzioni derivanti dall'utilizzo di qualsiasi parte di un marchio Midea. -
Page 32: Conformità Alla Direttiva Rohs
Spazio economico europeo. Ulteriori informazioni sono fornite su richiesta. È possibile contattare il responsabile Midea della protezione dei dati tramite MideaDPO@midea.com. Per esercitare i vostri diritti, come il diritto di opporti al trattamento dei vostri dati personali per scopi di marketing diretto, contattaci tramite MideaDPO@midea.com. -
Page 35: Instrukcja Obsługi
Elektryczny Podgrzewacz Wody z Pojemnikiem SERIA MODOWA INSTRUKCJA OBSŁUGI D30-15F6 D50-15F6 D80-15F6 D100-15F6 Ostrzeżenia: Przed użyciem produktu zapoznaj się dokładnie z niniejszą instrukcją obsługi i zachowaj ją na przyszłość. Projekt i specyfikacje mogą ulec zmianie bez wcześniejszego powiadomienia w celu ulepszenia produktu. Skontaktuj się... -
Page 36: Podziękowanie
PODZIĘKOWANIE Dziękujemy za zakup produktu firmy Midea! Przed użyciem nowego produktu należy dokładnie przeczytać niniejszą instrukcję, aby zapoznać się z jego bezpieczną obsługą oraz cechami i funkcjami. ZAWARTOŚĆ PODZIĘKOWANIE ..............INSTRUKCJE BEZPIECZEŃSTWA ........SPECYFIKACJE..............PRZEGLĄD PRODUKTU ............SKRÓCONA INSTRUKCJA OBSŁUGI ......... -
Page 37: Instrukcje Bezpieczeństwa
INSTRUKCJE BEZPIECZEŃSTWA Zamierzone Stosowanie Poniższe wytyczne dotyczące bezpieczeństwa zostały opracowane w celu zapobiegania ryzyku lub uszkodzeniom wynikającym z niebezpiecznej, lub nieprawidłowej obsługi urządzenia. Po dostarczeniu należy sprawdzić opakowanie i urządzenie, aby dopilnować, że urządzenie jest w dobrym stanie, co zapewnia bezpieczne działanie. W przypadku stwierdzenia uszkodzeń... - Page 38 OSTROŻNOŚĆ Przed zainstalowaniem tego podgrzewacza wody należy sprawdzić, czy uziemienie gniazda zasilania jest prawidłowe. W przeciwnym razie nie zainstalować podgrzewacza wody. Nie używać przedłużaczy. Nieprawidłowa instalacja i użytkowanie tego elektrycznego podgrzewacza wody może spowodować poważne obrażenia ciała i utratę mienia. Specjalne Środki Ostrożności •...
-
Page 39: Specyfikacje
• Podgrzewacz wody nie jest przeznaczony do użytkowania przez osoby (w tym dzieci) o ograniczonych zdolnościach fizycznych, sensorycznych lub umysłowych, lub osoby nieposiadające doświadczenia i wiedzy, o ile nie otrzymały one nadzoru lub instrukcji dotyczących użytkowania urządzenia od osoby odpowiedzialnej za ich bezpieczeństwo. -
Page 40: Przegląd Produktu
PRZEGLĄD PRODUKTU Żywność Powłoka Termometr Zbiornik wewnętrzny Izolacja termiczna Pręt anodowy Elementy ogrzewania Kabel zasilający Wlot zimnej wody Wylot ciepłej wody Kontrolka ogrzewania (Uwaga: Wszystkie wymiary podano w mm) - Page 41 Schemat Okablowania Wewnętrznych Wyłącznik Termiczny Termostat Brązowy Niebieski Żółty/Zielony SCHEMAT OKABLOWANIA Akcesoria Śruba do zawieszenia Plastikowa rura rozprężna Zawór bezpieczeństwa × 1 na ścianie × 2 × 2...
-
Page 42: Skrócona Instrukcja Obsługi
SKRÓCONA INSTRUKCJA OBSŁUGI Przed Pierwszym Użyciem OSTROŻNOŚĆ Przed użyciem należy napełnić zbiornik wewnętrzny wodą. 2. Obrócić pokrętło termostatu 1. Włączenie w prawo, aby wyregulować temperaturę wody w podgrzewaczu. Podłoże 3. Gdy temperatura wody osiągnie 4. Otworzyć zawór wylotowy wody, ustawioną wartość, ogrzewanie aby korzystać... -
Page 43: Montaż Produktu
MONTAŻ PRODUKTU Instrukcja Montażu 1. Ten elektryczny podgrzewacz wody powinien być zainstalowany na ścianie z wytrzymałością. Jeśli ściana, na której zainstalowany jest elektryczny podgrzewacz wody, nie jest w stanie wytrzymać obciążenie ponad dwukrotnie większe od ciężaru elektrycznego podgrzewacza wody, gdy jest on wypełniony wodą, konieczne będzie zainstalowanie dedykowanego wspornika do wzmocnienia. - Page 44 2. Połączenie nadciśnieniowego zaworu bezpieczeństwa z podgrzewaczem na wlocie podgrzewacza wody. 3. Aby uniknąć wycieków podczas podłączania rurociągów, na końcach gwintów należy dodać gumowe uszczelki dostarczone wraz z podgrzewaczem (patrz Rys. 4). Kabel zasilający Wlot zimnej wody Wylot ciepłej wody Nadciśnieniowy zawór bezpieczeństwa Otwór nadciśnieniowego zaworu bezpieczeństwa Uchwyt regulacyjny...
-
Page 45: Instrukcja Obsługi
INSTRUKCJA OBSŁUGI Metody wykorzystania 1. Najpierw otworzyć jeden z zaworów wylotowych na wylocie podgrzewacza wody, a następnie otworzyć zawór wlotowy. Podgrzewacz wody napełnia się wodą. Gdy woda wypływa z rury wylotowej, oznacza to, że podgrzewacz wody został całkowicie napełniony wodą i można zamknąć zawór wylotowy. Uwaga Podczas normalnej pracy zawór wlotowy powinien być... -
Page 46: Rozwiązywanie Problemów
1. należy odłączyć zasilanie podgrzewacza wody, zdjąć płytę pokrywy bocznej/dolnej. 2. Nacisnąć przycisk znajdujący się na środku wyłącznika termicznego (patrz Rys. 6); 3. Jeśli przycisk nie jest wciśnięty i nie słychać kliknięcia, należy poczekać, aż przełącznik termiczny ostygnie do temperatury początkowej. Przycisk ręcznego resetowania (Rys. -
Page 47: Znaki Towarowe, Prawa Autorskie Ioświadczenie Prawne
PRAWNE logo, znaki słowne, nazwa handlowa, szata handlowa i wszystkie ich wersje są cennymi aktywami Grupy Midea i/lub jej spółek zależnych („Midea”), do których Midea posiada znaki towarowe, prawa autorskie i inne prawa własności intelektualnej, a także wartość wynikająca z używania jakiejkolwiek części znaku towarowego Midea. Używanie znaku towarowego Midea w celach komercyjnych bez uprzedniej pisemnej zgody Midea może stanowić... -
Page 48: Informacja O Ochronie Danych
Inspektorem Ochrony Danych Pod Adresem MideaDPO@midea.com. Aby skorzystać z przysługujących użytkownikowi praw, takich jak prawo sprzeciwu wobec przetwarzania danych osobowych użytkownika w celach marketingu bezpośredniego, należy skontaktować się z nami pod adresem MideaDPO@midea.com. Aby uzyskać więcej informacji, należy zeskanować Kod QR. - Page 49 Spotřebitelé (koncoví uživatelé) mají 3 níže uvedené možnosti uplatnění záruky: ČESKO od 01.04.2024: na webových stránkách online formulář: http://oprava.perfektservis.cz/ telefonicky: tel. linka MIDEA +420 241 401 865 k dispozici v pracovní dny od 9 do 17 hodin emailem: servis@perfektservis.cz SLOVENSKO od 01.06.2024: web site on-line form: http://oprava.perfektservis.cz/...
Need help?
Do you have a question about the FASHION D50-15F6 and is the answer not in the manual?
Questions and answers