Sign In
Upload
Download
Add to my manuals
Delete from my manuals
Share
URL of this page:
HTML Link:
Bookmark this page
Add
Manual will be automatically added to "My Manuals"
Print this page
×
Bookmark added
×
Added to my manuals
Manuals
Brands
SR Suntour Manuals
Bicycle Accessories
HLO
How to check
SR Suntour HLO How To Check
Cartridges
Hide thumbs
1
2
3
4
5
6
7
8
9
10
11
page
of
11
Go
/
11
Bookmarks
Advertisement
Quick Links
Download this manual
HOW TO CHECK & REPLACE
NLO / HLO / LO CARTRIDGES
V.1.0_09-2024
Previous
Page
Next
Page
1
2
3
4
5
Advertisement
Need help?
Do you have a question about the HLO and is the answer not in the manual?
Ask a question
Questions and answers
Related Manuals for SR Suntour HLO
Bicycle Accessories SR Suntour SR Suntour Owner's Manual
Pedelec/ebike components (28 pages)
Bicycle Accessories SR Suntour HESC Owner's Manual
Electric drive system for bicycle (39 pages)
Bicycle Accessories SR Suntour HESC User Manual
E-bike rear motor system (20 pages)
Bicycle Accessories SR Suntour HESC User Manual
Rear wheel motor (20 pages)
Bicycle Accessories SR Suntour HESC ATS Rear Motor System User Manual
E-bike components. rear wheel motor (20 pages)
Bicycle Accessories SR Suntour COIL SPING Series Owner's Manual
(64 pages)
Bicycle Accessories SR Suntour NRX Series Owner's Manual
(62 pages)
Bicycle Accessories SR Suntour NCX NEX Owner's Manual
Cross city seat post (24 pages)
Bicycle Accessories SR Suntour RAIDON Owner's Manual
Coil sping series (44 pages)
Bicycle Accessories SR Suntour AURON Owner's Manual
Suspension fork (12 pages)
Bicycle Accessories SR Suntour NCX 2019 Owner's Manual
Suspension seatpost (7 pages)
Bicycle Accessories SR Suntour REAR SHOCK Owner's Manual
(20 pages)
Bicycle Accessories SR Suntour Epicon Owner's Manual
(64 pages)
Bicycle Accessories SR Suntour ZERON36 Manual
(22 pages)
Bicycle Accessories SR Suntour RL How To Check
Cartridges (11 pages)
Bicycle Accessories SR Suntour SP25 NCX Owner's Manual
Suspension seatpost (8 pages)
Summarization of Contents
General Information
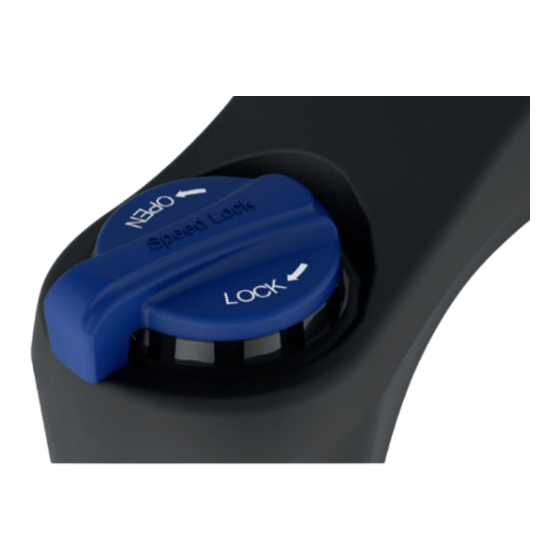
Identifying Forks by Setting Buttons
All forks can be identified by the setting buttons.
Step 1: Testing & Adjustment
Case A: Lockout Function Not Working (Fork Always Compresses)
Procedure for a fork that always compresses. Involves uncoupling the knob and adjusting the cartridge.
Case B: Lockout Function Not Working (Fork is Always Locked)
Procedure for a fork that is always locked. Involves uncoupling the knob and checking the cartridge.
Step 2: Replacing the Cartridge
Removing the Lockout Knob and Adjust Core
Procedure to remove the lockout knob and adjust core using a plastic lever and screwdriver.
Loosening and Removing the Lower-Leg Bolt
Steps to loosen and remove the lower-leg bolt using an Allen key and socket, or mallet.
Removing and Installing the Cartridge System
Using specialized tools to remove the old cartridge and prepare for installing a new one.
Finalizing Cartridge Installation and Lockout Setup
Setting the new cartridge to open position, installing the bottom bolt, and re-installing the lockout knob.
Print
Rename the bookmark
Delete bookmark?
Delete from my manuals?
Login
Sign In
OR
Sign in with Facebook
Sign in with Google
Upload manual
Upload from disk
Upload from URL
Need help?
Do you have a question about the HLO and is the answer not in the manual?
Questions and answers