Table of Contents
Advertisement
Advertisement
Table of Contents

Subscribe to Our Youtube Channel
Related Manuals for SR Suntour HESC


Summary of Contents for SR Suntour HESC
- Page 1 Owners Manual 2012.2 HESC - pedelec/ebike components...
-
Page 2: Table Of Contents
SR SUNTOUR OWNERS MANUAL HESC components Table Of Contents Quick Start Guide ......2 “Information Modes” ....16 How to reset the trip distance ..17 1. How do I turn the How to reset the trip time system on? .........2 (total time) ........17 2. -
Page 3: Quick Start Guide
SR SUNTOUR OWNERS MANUAL HESC components Quick Start Guide Please note that the chapter “Quick Guide” is here to provide you with an initial overview. It does not purport to be complete. For more information, please read the individual chapters of the enclosed user manual (handbook on DVD). -
Page 4: What Information Does The System Offer You
SR SUNTOUR OWNERS MANUAL HESC components ► Average speed vs. variation of speed ► Traffic conditions ► Type and condition of tires & tire pressure ► Driver weight ► Direction of wind & wind speed ► Battery temperature while charging (the lower = the better) ►... -
Page 5: How Do I Charge The Battery
SR SUNTOUR OWNERS MANUAL HESC components 5. How do I charge the battery? Both battery types shown below can be charged in the installed position and don't need to be disassembled. For more information about “charging the battery” please read the chapter on “charging the battery”... -
Page 6: How To Reset The Trip Distance
SR SUNTOUR OWNERS MANUAL HESC components Battery keys Your ebike system battery is secured with a lock to avoid theft. Your bike should be equipped with 3 matching keys. Please keep one of these keys in a secure place. In the case that all 3 keys are lost, the entire lock must be replaced. -
Page 7: Important Safety Information
Never try to open any SR SUNTOUR device of the electric bicycle, especially not the battery. Opening any SR SUNTOUR battery implies the risk of getting seriously injured. -
Page 8: Before Each Ride
Learn how to ride and train your skills. Know your limits and never ride beyond those. ► The torque sensor of your HESC system even detects slight pressure on the pedal. If the torque sensor detects and pressure on the pedal, it will give the motor the instruction to start running. -
Page 9: Foreword
Foreword Dear customer, congratulations on your new electric bicycle purchase. The bike is equipped with the SR SUNTOUR SRS-pedelec drive unit with a rechargeable Lithium-Ion battery, a display and user interface, a torque sensor, a controller and a brushless front hub motor.. - Page 10 25km/h. A Pedelec is sometimes called EPAC, Light-Electric-Vehicle (LEV), Hybrid Bicycle or eBike or electric bicycle with Pedal-Assisted- System (PAS). The below stated graphic gives you a better understanding how all HESC com- ponents interact with each other. fuel...
-
Page 11: Drive Unit Components
SR SUNTOUR OWNERS MANUAL HESC components... -
Page 12: Display / User Interface
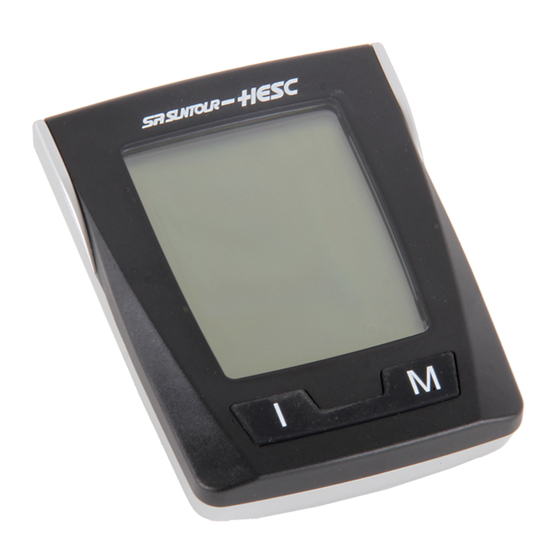
SR SUNTOUR OWNERS MANUAL HESC components Display / User Interface Speed Battey Capacity Motor Assist Assist Mode Data corresponding to the information mode Info-Button ON/OFF Button Mode Button... -
Page 13: How To Remove The Display
SR SUNTOUR OWNERS MANUAL HESC components How to remove the display SLIDE PRESS To remove the display off the docking station, carry out the steps like indicated above. To install the display onto the docking station, slide the display onto the docking station. -
Page 14: How To Operate The Display/User Interface
SR SUNTOUR OWNERS MANUAL HESC components Make sure to turn off the display before removing it Removing the display before turning off may result into a failure of the system. The display will save all data, like trip distance and average speed, on a flash memory. -
Page 15: How To Switch On/Off
- Applying pressure on the pedal Headlamp control The controller of the SR Suntour HESC pedelec/ebike system is equipped with a power supply mechanism which will automatically supply power to the the light system of our bike if the system is turn on. As this is not a standard feature, it might not being used on every pedelec or ebike which is equipped with SR Suntour HESC components, please refer to owner’s manual of... -
Page 16: Push-Up Support Switch
HESC components Push-up support switch Your HESC equiped ebike/Pedelec features a so called „push-up“support switch which helps you starting up on gradients, while waiting in front of the traffic lights etc. The push up knob supports you until 4-5km/h, beyond this is will be cut off automatically. -
Page 17: Range Influencing Factors
SR SUNTOUR OWNERS MANUAL HESC components Range Influencing Factors The riding distance might vary as it is influenced by the following factors: ► Operating Temperature of Battery when not in use (higher = better) ► Ambient Temperature while riding (higher = better) ►... -
Page 18: How To Reset The Trip Distance
SR SUNTOUR OWNERS MANUAL HESC components How to reset the trip distance 1. Switch to “trip distance” 2. Press the “Mode” button that followed press the “Info” button. Afterwards release both buttons ( the buttons should not remain pressed) How to reset the trip time (total time) 1. -
Page 19: Total Distance
SR SUNTOUR OWNERS MANUAL HESC components Total Distance The total distance is counted when the system is activated and is displayed in kilometres. Numerical values will get stored on the non-volatile memory. Value can not be reset manually. Display range: 0.0 .. 9999.9km / Display accuracy: 0.1km Trip Distance The trip distance is counting when the system is activated and the front wheel is turning. -
Page 20: Trip Time (Total Time)
SR SUNTOUR OWNERS MANUAL HESC components Trip Time (Total Time) The trip time (total time) is recorded when the system is turned on and the wheel is running. Display range: 00:00 .. 99:59 hh:mm / 1 unit = 1 minute The trip distance can be reset, please refer to “How to reset the trip time”... -
Page 21: Average Speed
SR SUNTOUR OWNERS MANUAL HESC components Average Speed The “average speed” indicates the average ridden speed and is calculted through the following formular: trip distance / trip time Please note! If the trip time is 0, the “average speed” cannot be displayed. -
Page 22: Remaining Capacity(Fuel Gauge)
SR SUNTOUR OWNERS MANUAL HESC components Remaining capacity(fuel gauge) Please note that the indication of the remaining capacity of the battery is getting update while the motor is inactive The indication of the remaining capacity of the battery will provide you with precise informa- tion regarding the remaining power. -
Page 23: Battery - General Information
• If battery indication gives information that the battery is fully charged, but the distance you are able to ride does vary from the information given in this manual, your batteries life may have come to an end. In this case please contact your local SR Suntour HESC dealer for further investigations. -
Page 24: Upright Type Battery
SR SUNTOUR OWNERS MANUAL HESC components upright type battery (located behind seat tube) flat type battery (integrated into rear carrier) -
Page 25: Always Keep In Mind
SR SUNTOUR OWNERS MANUAL HESC components Always keep in mind! ► Recharge the battery before each journey - always recharge if it hasn’t been used for at least one month. ► Li-ion batteries cannot be charged at temperatures over 59˚C(138˚F) or under -2˚C(28˚F) ►... -
Page 26: Battery Charging (Upright Type Battery)
► Use only a power source rated at 100-240 volts AC. ► Do not use damaged components – consult your authorised SR SUNTOUR Dealer imme- diately. ► If the supply Cord is damaged, it must be replaced by the Manufacture or its service agent or a similarly qualified person in order to avoid a hazard. - Page 27 SR SUNTOUR OWNERS MANUAL HESC components Your bike is delivered together with a charger. every use, regardless of the remaining capacity Please only use this charger, don’t try to com- of the battery. The battery doesn’t need to be bine with other devices.
-
Page 28: Charging Status
SR SUNTOUR OWNERS MANUAL HESC components Charging status 6. Plug charger into power outlet = battery is not getting charged, please check all connections. = battery is getting charged = battery is fully charged Battery indication 7. The status indication should now shine “red”... -
Page 29: Battery Charging (Flat Type Bat- Tery)
► Battery Condition (state of charge) & Battery Recovery Time (how soon after last journey) ► Battery Storage (Cool, dry place recommended) ► Driver ability & Driver concentration (inadvertently braking with the throttle open) ► Condition/repair state (a well-serviced SR SUNTOUR improves range) ► Topography ► Speed – Average / Speed – Variability ►... - Page 30 SR SUNTOUR OWNERS MANUAL HESC components Your bike is delivered together with a charger. every use, regardless of the remaining capacity Please only use this charger, don’t try to com- of the battery. The battery doesn’t need to be bine with other devices.
-
Page 31: Charging Status
SR SUNTOUR OWNERS MANUAL HESC components Battery indication Plug charger into power outlet Your flat type battery provides you with 3 dif- ferent indications: 1. Remaining capacity (press button for 1sec) 6. Status LED should now shine red Provides you with information about the re- maining capacity of your battery. - Page 32 SR SUNTOUR OWNERS MANUAL HESC components 2. Release button for 1 sec. Absolute Capacity 3. Press button for at least 10 sec (absolute capacity LED Indicator Absolute capacity mode shows up) - 80% 4. Release button for 1 sec. 79 - 60% 5.
-
Page 33: Error Codes
HESC components Error Codes Your SR Suntour HESC ebike/pedelec system is equipped with an automatic error message report system (EMRS). This system has been developed to provide you with immediate and effective feedback in case your system detected a major problem. This system has to be seen as first aid help tool, please always visit your local dealer if any error messages show up. -
Page 34: How To Dissamble The Front Wheel
SR SUNTOUR OWNERS MANUAL HESC components How to disassemble the front wheel To remove the front wheel off your bike, please follow the steps indicated below. WARNING ! Remove the battery from the bike before opening any cable connection and before removing the front wheel. - Page 35 SR SUNTOUR OWNERS MANUAL HESC components 3. Unfasten the nuts using a 19mm flat wrench 4. Before removing the front wheel, remove the washer which secures the axle.
-
Page 36: How To Assemble Front Wheel
SR SUNTOUR OWNERS MANUAL HESC components How to assemble front wheel 1. Reinstall the washer to secure the axle 2. Tighten the fixing bolt with 25-30Nm by using a flat wrench... - Page 37 SR SUNTOUR OWNERS MANUAL HESC components Re-connect the cord. Reassemble the cable guide by using a 4mm Allen key. Tighten screws with 1 Nm..
-
Page 38: Limited Warranty
HESC components Limited Warranty SR SUNTOUR warrants its pedelec drive unit to be free from defects in material and workmanship under normal use for a period of two years from the date of original purchase. Excluded from this warranty is the Li-Ion Battery. The battery warranty is 1 year.This warranty is made by SR SUNTOUR Inc. - Page 39 Fax: +886 4 7694028 email: orders@srsuntour.com.tw SR SUNTOUR EUROPE SR SUNTOUR NORTH AMERICA SR SUNTOUR EUROPE GMBH SR SUNTOUR NORTH AMERICA INC. Am Marschallfeld 6a 14511 NE 10th Avenue, Unit E 83626 Valley Vancouver, Washington 98685 USA Germany Tel: +1 360 737 6450 Tel.:...
Need help?
Do you have a question about the HESC and is the answer not in the manual?
Questions and answers