Table of Contents
Advertisement
Forma Scientific, Inc.
P.O. Box 649
Marietta, Ohio 45750
U.S.A.
Telephone: (740) 373-4763
Telefax: (740) 373-4189
________________________________________
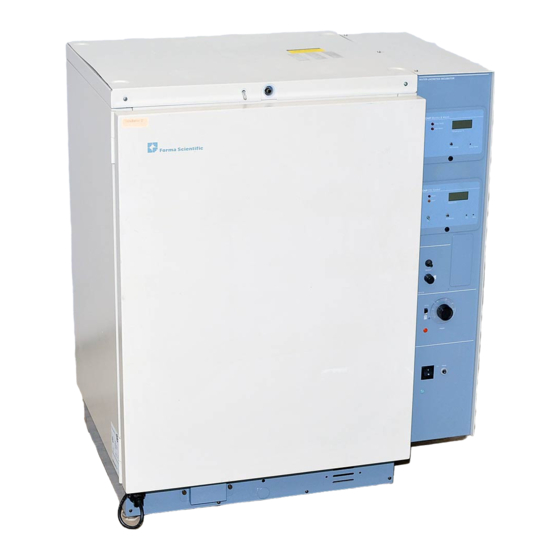
Models
3546 and 3548
Water Jacketed
Incubator
Operating Manual
Manual No. 7053546
Rev. 0
Read this Instruction Manual
Failure to read, understand and follow the instructions in this manual may result in
damage to the unit, injury to operating personnel and poor equipment performance.
Advertisement
Table of Contents

Related Manuals for Forma Scientific 3548


Summarization of Contents
Section 1 - Receiving
Preliminary Inspection
Initial visual check of the incubator upon receipt for any damage.
Visible Loss or Damage
Procedure for documenting and reporting any shipping loss or damage.
Responsibility for Shipping Damage
Outlines Forma Scientific's and carrier's liability for shipping damage.
Section 2 - Unpacking List
Unpacking List
Comprehensive list of accessories and components included with the incubator.
Section 3 - Installation and Start-Up
Location
Guidelines for selecting an appropriate and safe location for the incubator.
Preliminary Disinfecting
Steps for initial disinfection of incubator interior surfaces before installation.
Installing the #6 Neoprene Stopper (Access Port)
Instructions for installing the neoprene stopper for the access port.
Installing the Shelf Brackets and Cam Latch Assembly to the Duct Sheets
Detailed steps for attaching shelf brackets and cam latches to duct sheets.
Installing the Duct Sheets
Procedure for correctly installing the left and right duct sheets.
Installing the Shelves
Instructions on how to place shelves within the incubator chamber.
Leveling
Guide to ensuring the incubator is level for optimal performance and stability.
Connecting the Incubator to a Power Source
Steps for safely connecting the incubator to an electrical power supply.
Preparing the Incubator for Filling
Steps to prepare the incubator's water jacket before filling with water.
Filling the Water Jacket
Instructions for filling the incubator's water jacket using two methods.
Filling the Humidity Reservoir or Pan
Procedures for providing elevated humidity using reservoir or pan.
Setting the Chamber Temperature
How to set and calibrate the desired chamber temperature.
Setting the Overtemp Safety Thermostat
Procedure for setting the overtemperature safety limit for protection.
Connecting the Optional Gas Guard
Instructions for connecting the optional gas guard to the CO2 supply.
Connecting the Gas Supply when not using the Gas Guard
How to connect the CO2 gas supply directly to the incubator.
Zeroing the CO2 Controller
Steps for calibrating the CO2 controller using ambient air.
Setting the CO2 Content
Procedure for setting the desired CO2 percentage in the chamber.
Section 4 - Operation
Operation
Overview of the incubator's basic operational principles and functionality.
Overview of Humidification and CO2
Explains the interaction between humidity, CO2, and chamber atmosphere.
Control Panel
Description and function of the incubator's main control panel components.
Gas Sample Port
Location and purpose of the port used for CO2 sampling.
Setpoint Adjustment Screwdriver
Details on accessing and using the screwdriver for setpoint adjustments.
CO2 Module
Explanation of the CO2 control module, its display, and switches.
Audible CO2 Alarm and Pilot Light
How the CO2 alarm and indicator light function and are activated.
Set/Silence Push Button
Operation of the button used to silence alarms and set CO2 levels.
Alarm Disable Switch
Instructions for enabling or disabling the CO2 alarm system.
CO2 Inject Light
Indicates when the incubator is injecting CO2 to maintain setpoint.
CO2 Zero Adjustment
Procedure for performing a user-level zero adjustment on the CO2 controller.
Alarm/Monitor Module
Description of the module that monitors temperature and water level alarms.
Overtemperature Controller and Push-to-Set Button
How to adjust and set the overtemperature control point.
Overtemp Alarm and Pilot Light
Functionality of the overtemperature alarm and its indicator light.
Add Water Pilot Light and Audible Alarm
Indicates when the water level in the jacket is low.
Remote Alarm Relay System
Information on connecting the incubator to a remote monitoring system.
Alarms and Indicators
Table detailing alarm conditions, indicators, and relay states.
Recorder Output
How to connect a recorder to monitor temperature and CO2 data.
Optional Gas Guard
Details on the optional built-in gas guard for continuous gas supply.
Control Switch
Operation of the control switch for the gas guard system.
Silence Switch
Function of the silence switch for the gas guard alarm.
Gas Depletion Alarm
How the gas depletion alarm alerts the user to empty tanks.
Active Tank Indicating Lights
Yellow LEDs indicating which gas tank is active.
Pressure Low Indicating Lights
Red LEDs indicating a low pressure condition in a gas tank.
Start-Up Procedure (Gas Guard)
Initial steps for starting up the gas guard system.
Section 5 - Routine Maintenance
Installing the Decontamination Kit
Step-by-step instructions for installing the decontamination kit.
Disinfecting the Incubator Interior
Procedures and precautions for thoroughly disinfecting the incubator's interior.
Cleaning the Cabinet Exterior
Guidance on cleaning the external surfaces of the incubator.
Draining the Water Jacket
Instructions for draining and changing the water in the incubator's water jacket.
Changing the CO2 Filter
Procedure for replacing the CO2 filter, intended for qualified personnel.
CO2 Test Instruments
Information on using CO2 test instruments for calibration and verification.
Section 6 - Service
General Troubleshooting
Common problems and their possible causes with solutions.
CO2 Control Module Calibration
Detailed procedure for calibrating the CO2 control module.
37°C Control Calibration
Steps to calibrate the incubator's temperature control for the 37°C setting.
Replacing the CO2 Sensor
Instructions for safely removing and replacing the CO2 sensor.
Replacing the Triac
Procedure for replacing the Triac component on the control panel.
Replacing the CO2 Solenoid
Steps for removing and installing a new CO2 solenoid valve.
Replacing the Temperature Control
Instructions for replacing the incubator's temperature control unit.
Replacing Pilot Lights
Procedure for replacing defective indicator pilot lights.
Replacing the Circuit Breaker
Steps for replacing a tripped or faulty circuit breaker.
Replacing the Power Switch
Instructions for replacing the main power on/off switch.
Replacing the Thermistor
Procedure for replacing the thermistor used for temperature sensing.
Replacing the 0.3 Amp Fuse
Steps for locating and replacing the 0.3 Amp fuse.
Replacing the Blower Motor
Detailed instructions for replacing the incubator's blower motor assembly.
Fuse Chart
Reference chart for identifying fuse types and specifications.
Section 7 - Features, Specifications and Accessories
Construction
Description of the incubator's build materials and design features.
CO2 Control Features
Details on the capabilities and technology of the CO2 control system.
Temperature Control
Information on the incubator's temperature control system and its features.
Specifications and Accessories
Technical specifications and a list of available accessories with stock numbers.
Section 8 - Parts List
Parts List
A comprehensive list of replacement parts with their corresponding stock numbers.
Section 9 - Schematics
Schematics
Diagrams illustrating the electrical connections and layout of the incubator.
Need help?
Do you have a question about the 3548 and is the answer not in the manual?
Questions and answers