Table of Contents
Advertisement
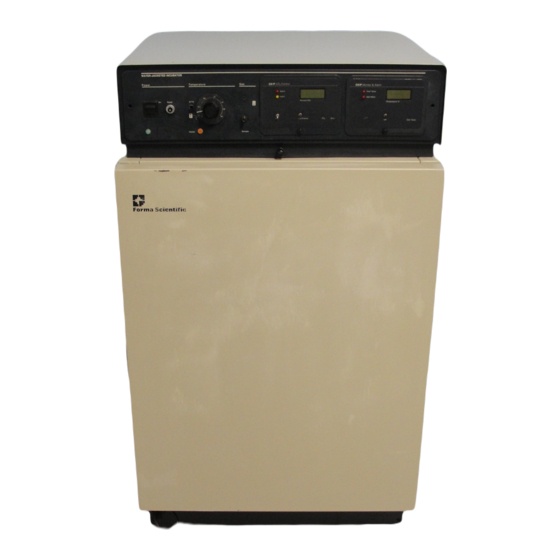
Forma Scientific, Inc.
P.O. Box 649
Marietta, Ohio 45750
Telephone: (740) 373-4763
________________________________________
Failure to read, understand and follow the instructions in this manual may
result in damage to the unit, injury to operating personnel and poor equipment
performance.
Caution: All internal adjustments and maintenance must be performed by
qualified service personnel
Telefax: (740) 373-4189
Model: 3158
Single Chamber
Manual No. 7003158
Important!
Read this instruction manual.
Advertisement
Table of Contents
Troubleshooting

Subscribe to Our Youtube Channel
Related Manuals for Forma Scientific 3158


Summary of Contents for Forma Scientific 3158
- Page 1 Forma Scientific, Inc. P.O. Box 649 Marietta, Ohio 45750 Telephone: (740) 373-4763 Telefax: (740) 373-4189 ________________________________________ Model: 3158 Single Chamber Water Jacketed Incubator Manual No. 7003158 Important! Read this instruction manual. Failure to read, understand and follow the instructions in this manual may result in damage to the unit, injury to operating personnel and poor equipment performance.
- Page 2 Forma Scientific, Inc. MANUAL ADDENDUM Re: Incubator CO Control CAUTION! If the incubator sustains a power failure long enough to affect temperature and in turn affect humidity, then the CO readout will be incorrect. The unit will return to NORMAL, indicating correct chamber conditions.
- Page 3 NOTE: The material in this manual is for information purposes only. The contents and the product it describes are subject to change without notice. Forma Scientific, Inc. makes no representations or warranties with respect to this manual. In no event shall Forma Scientific, Inc. be held liable for any damages, direct or incidental, arising out of or related to the use of this manual.
- Page 4 Forma Scientific, Inc. ____________________________________________________ UNPACKING LIST Remove the packing box from the incubator. If the unit is to be moved by fork lift leave the incubator on the skid until it has been moved to its designated location. A small box containing the following accessories is packed inside the incubator: STOCK # DESCRIPTION QTY.
- Page 5 Forma Scientific, Inc. ____________________________________________________ Table of Contents Section 1 - Introduction 1.1 The Water Jacket: Key Features 1.1 Auxiliary Equipment Section 2 - Specifications Section 3 - Operation 3.1 Operation Overview 3.2 Humidification and CO (IMPORTANT!) 3.3 Control Panel...
- Page 6 Forma Scientific, Inc. ____________________________________________________ Section 4 - Installation and Start-Up 4.1 Location 4.2 Preliminary Disinfecting 4.3 Installing the Duct Sheets 4.4 Installing the Shelves 4.5 Leveling 4.6 Connecting to Power 4.7 Connecting the CO Supply 4.8 Preparing the Incubator for Filling 4.9 Filling the Water Jacket...
- Page 7 Forma Scientific, Inc. ____________________________________________________ Section 6 - Service (For Qualified Personnel Only) 6.1 General Troubleshooting 6.2 Use of the Troubleshooting Flowcharts 6.3 CO Control Calibration 6.4 37C Control Calibration 6.5 Replacing the CO Sensor 6.6 Replacing the Chamber Heater 6.7 Replacing the Door Heater 6.8 Replacing the Triac...
- Page 8 Forma Scientific, Inc. ____________________________________________________ SECTION 1 - INTRODUCTION 1.1 THE WATER JACKET: KEY FEATURES Forma’s water jacket design represents the best combination of economy, accuracy and reliability available in today’s technology. Some of the salient features include: • A door heater which adjusts automatically to ambient conditions,...
- Page 9 Forma Scientific, Inc. ____________________________________________________ The design of the water jacket also allows for ease in disinfecting or autoclaving with a minimum of unit downtime. • There are no cracks or crevices in, or around, the chamber walls to harbor hidden or hard-to-reach bacterial growth.
- Page 10 Forma Scientific, Inc. ____________________________________________________ 4. Multiplex Strip Recorder This easy-to-install, self-contained strip recorder keeps a permanent record of both temperature and CO . Catalog # 197012 5. Extra Recorder Chart Paper A one-month supply of chart paper (1 roll) for the multiplex recorder.
- Page 11 Forma Scientific, Inc. ____________________________________________________ 12. Disinfection Kit Includes parts needed for improved disinfection of the incubator. Includes disposable blower wheel, O-ring for the CO sensor and blower shaft seal. Catalog # 190028 13. Laboratory Disinfectant For use in and around the laboratory. Ideal for cleaning and disinfecting incubators, bio-freezers, glassware washers, baths, circulators, and other equipment.
- Page 12 Forma Scientific, Inc. ____________________________________________________ SECTION 2 - SPECIFICATIONS Capacity Chamber Capacity 5.7 cu. ft. (0.16 cu. m.) Water Jacket Volume 10.5 gal. (39.7 liters) Humidity Reservoir Capacity 1.46 gal. (5.5 liters) Humidity Pan Capacity 5.28 qt. (5 liters) Weights Net (approximately) 180 lbs.
- Page 13 Forma Scientific, Inc. ____________________________________________________ Shelves Capacity 22 (6 provided) 20 with use of optional humidity pan Dimensions 17.75"W x 17.75" F-B (45.2 cm x 45.2 cm) Construction 18 ga. perforated stainless steel, type 304 Surface Area 2.2 sq. ft. (0.2 sq. m) per shelf Maximum 48.2 sq.
- Page 14 Forma Scientific, Inc. ____________________________________________________ Heaters Chamber 260 Watts Door 5 Watts continuous, 120 Watts cycled 6 Watts Blower Wheel Material Polypropylene Motor 1/200 HP, 1700 RPM, 4 pole, externally mounted, internally removable Fittings Fill/Drain Port ¼” FPT Access Port 1.25" (3.17cm), plugged Connection ¼”...
- Page 15 Forma Scientific, Inc. ____________________________________________________ Control Tolerance Better than ±0.1% Range 0 to 20% Consumption @ 5% CO 1.7 liters/hour +7.2 liters/15 second door opening Recovery Rate after 10 second door opening **Within 5 minutes Recovery Rate after 20 second door opening...
- Page 16 Forma Scientific, Inc. ____________________________________________________ SECTION 3 – OPERATION OVERVIEW 3.1 OPERATION (See Figure 3-1) The water jacket is filled with approximately 10.5 gallons (39.7 liters) of water through the fill port located on the front of the unit. The water is then warmed by the chamber heater, providing very stable heating of the incubator chamber.
- Page 17 Forma Scientific, Inc. ____________________________________________________ It should be noted that temperature changes of themselves have little effect on calibration, but they do cause large changes in the absolute humidity, and these changes are reflected in changes in the CO calibration. If either the...
- Page 18 Forma Scientific, Inc. ____________________________________________________ Incubator Controls Figure 3-2...
- Page 19 Forma Scientific, Inc. ____________________________________________________ 3.3 CONTROL PANEL (See Figure 3-2) 1) Fill Port and Vent The fill/drain fitting has been located on the front of the unit to facilitate filling and draining of the water jacket without having to move the unit. When water enters the water jacket during filling, the air that was present in the jacket exits through the vent.
- Page 20 Forma Scientific, Inc. ____________________________________________________ 6) Setpoint Adjustment Tool A small screwdriver, located directly above the sample port, has been provided for setting the CO and overtemp setpoints. Pull out on the knob to release the screwdriver. 3.4 CO MODULE (Refer to Figure 3-2)
- Page 21 Forma Scientific, Inc. ____________________________________________________ 12) CO Inject Light The CO inject light is activated whenever there is a demand for CO to meet setpoint requirements. Since the CO inject light is independent of the CO alarm, it will continue to signal a need for CO...
- Page 22 Forma Scientific, Inc. ____________________________________________________ SECTION 4 - INSTALLATION AND START-UP 4.1 LOCATION Locate the incubator on a firm, level surface capable of supporting the unit filled with water. See weight specifications in Section 2. The incubator should be placed in a somewhat remote area of the laboratory away from any centrifuges, sonicators, doors, windows and air-conditioning or heating ductwork that might produce drafts.
- Page 26 0 to 30 PSIG to monitor actual input pressure to the incubator injection system. A suitable two-stage pressure regulator is available from Forma Scientific. See Section 2 for additional information. The CO source must be regulated at a pressure between 5 and 10 PSIG.
- Page 27 Forma Scientific, Inc. ____________________________________________________ TO CONNECT THE CO SUPPLY: The CO fitting is located near the top rear of the incubataor. Securely attach the vinyl CO line to the serrated fitting and check the connection for leaks. If a metal line is to be used, the serrated fitting can be removed and a 1/8 MPT fitting installed.
- Page 28 Forma Scientific, Inc. ____________________________________________________ a. Funnel Method 1. Fit the funnel into the vinyl tubing provided with the unit. 2. Hold funnel above the level of the fill port and pour the water into the funnel until the ADD WATER alarm and light are deactivated.
- Page 29 Forma Scientific, Inc. ____________________________________________________ There are two recommended methods of providing elevated humidity in the chamber. 1. The reservoir in the bottom of the incubator may be filled with at least 3/4" depth of sterile distilled water 2. The optional humidity pan (Forma Stock #237001) can be filled to the Full line with sterile distilled water.
- Page 30 Forma Scientific, Inc. ____________________________________________________ 4.12 SETTING THE OVERTEMP SAFETY THERMOSTAT Once the chamber temperature has stabilized (as indicated by the digital display), the Over Temp Safety should be set as follows: 1. Press the PUSH TO SET button on the Alarm Monitor Module.
- Page 31 Forma Scientific, Inc. ____________________________________________________ Step 1. Stabilize the incubator at the operating temperature and humidity level with no CO in the interior chamber. 1. Turn off the CO at the supply. 2. Fill the humidity reservoir or pan. 3. Allow the incubator temperature and humidity to stabilize. This will take a minimum of eight hours.
- Page 32 Forma Scientific, Inc. ____________________________________________________ 4.14 SETTING THE CO CONTENT The following conditions must be satisfied before the CO percentage can be set: 1. Allow the temperature and humidity in the chamber to stabilize. For initial settings of CO , it is recommended that temperature and humidity be allowed to stabilize for three days.
- Page 33 Forma Scientific, Inc. _________________________________________________ SECTION 5 - ROUTINE MAINTENANCE...
- Page 35 7. Reinstall the duct sheets and shelves. See Section 4.3 and 4.4. 5.3 CLEANING THE CABINET EXTERIOR The incubator exterior may be cleaned with soap and water and a general-use laboratory disinfectant. Information about disinfectants recommended by Forma Scientific is included as a supplement to this manual.
- Page 36 Forma Scientific, Inc. _________________________________________________ 5.4 DRAINING THE WATER JACKET For best results, the water in the water jacket should be changed yearly. 1. Turn off the incubator and disconnect the unit from the power supply. 2. Remove the cap from the fill port and attach the threaded fitting, vinyl tubing and funnel.
- Page 37 Forma Scientific, Inc. _________________________________________________ 5.6 A WORD ABOUT CO 2 TEST INSTRUMENTS The best standard available for zeroing or calibrating the Forma CO controller is air, which typically contains 0.033% CO by volume. Variations from this figure are insignificant. It is very important that any Forma automatic CO incubator be zeroed to air (See Section 4.13).
- Page 38 Forma Scientific, Inc. _________________________________________________ 5.8 FYRITE OPERATING PRECAUTIONS 1. DO NOT invert the FYRITE when the plunger is depressed. 2. DO NOT hold the FYRITE near your face when the top plunger is depressed. 3. ALWAYS hold the FYRITE by the fins to prevent heat transfer from your hands.
- Page 39 Forma Scientific, Inc. _________________________________________________ 7. Invert the FYRITE, and allow all the liquid to drain to the top. Turn upright, and allow all the liquid to drain to the bottom. Repeat once. 8. Momentarily hold the FYRITE at a 45° angle to allow the fluid droplets to drain to the bottom.
- Page 40 Forma Scientific, Inc. _________________________________________________ 5.11 RAISING OR LOWERING THE FYRITE FLUID LEVEL With the FYRITE vented and in the vertical position, it should be possible to adjust the zero scale to the top of the fluid column. If this is not possible, fluid should be added or removed.
- Page 41 Forma Scientific, Inc. ________________________________________________ SECTION 6 - SERVICE 6.1 GENERAL TROUBLESHOOTING Symptom Possible Cause Problem 1: Pilot lights not on. • Unit unplugged Readouts are dark. CO power switch • Circuit breaker tripped. is on. • Outlet overload protection has tripped.
- Page 42 Forma Scientific, Inc. ________________________________________________ Symptom Possible Cause Problem 6: Digital CO display and • Alarm is disabled. FYRITE read more than 1% different • Defective alarm circuit. from setpoint. CO alarm not • Defective CO sampler or control. activated. Problem 7: CO display and FYRITE •...
- Page 43 Forma Scientific, Inc. ________________________________________________ Symptom Possible Cause Problem 11: CO setpoint cannot be • Defective CO control. changed. Problem 12: Unit cannot be zeroed. • Defective CO potentiometer. • Defective zero control. • Defective CO sensor. Problem 13: CO overshoots setpoint •...
- Page 44 Forma Scientific, Inc. ________________________________________________ 6.2 USE OF THE TROUBLESHOOTING FLOWCHARTS Follow the instructions on the flow charts to diagnose problems with the incubator electrical system and/or the CO2 and alarm modules. For this diagnostic aid to be effective, all checks must be made in the sequence indicated by the flow chart, and all data must be carefully recorded.
- Page 45 Forma Scientific, Inc. ________________________________________________ Troubleshooting Flowchart, 1 of 2, Figure 6-1...
- Page 46 Forma Scientific, Inc. ________________________________________________ Troubleshooting Flowchart, 2 of 2, Figure 6-1...
- Page 47 Forma Scientific, Inc. ________________________________________________ 6.2B CO MODULE TROUBLESHOOTING – GENERAL NOTES NOTE 1: Before removing the CO control module from the unit, turn the power off to that module. NOTE 2: At various times during this procedure, the CO alarm may sound. Unless otherwise noted in the procedure, the alarm may be silenced by pressing the alarm silence switch.
- Page 48 Forma Scientific, Inc. ________________________________________________ Troubleshooting Flowchart, 1 of 1 Figure 6-2...
- Page 49 Forma Scientific, Inc. ________________________________________________ 6.2C MONITOR MODULE TROUBLESHOOTING – GENERAL NOTES NOTE 1: Unless otherwise noted in the procedure, the module referred to is the Monitor module, and the switches referred to are located on the Monitor module. NOTE 2: Switch locations for the Monitor module are labeled on the module picture.
- Page 50 Forma Scientific, Inc. ________________________________________________ Troubleshooting Flowchart, 1 of 1 Figure 6-3...
- Page 51 Forma Scientific, Inc. ________________________________________________ Incubator Component Location 1 of 1 Figure 6-4...
- Page 52 Forma Scientific, Inc. ________________________________________________ 6.3 CO CONTROL CALIBRATION (See Figure 6-4) The adjustment will only be necessary under the following conditions. DO NOT recalibrate the incubator for any other reasons! • After the CO controller is replaced • After the CO sensor is replaced •...
- Page 53 Forma Scientific, Inc. ________________________________________________ STEP 3: Adjust the Span Potentiometer 1. Turn ON the CO at the supply. 2. Turn the CO setpoint to 10%. Allow the CO to stabilize at 10% on the readout and control (inject light will cycle) for a minimum of 15 minutes.
- Page 54 Forma Scientific, Inc. ________________________________________________ STEP 5: Check the CO at the desired setpoint 1. Turn ON the CO at the supply. 2. Turn the CO setpoint to the desired level. 3. Allow the incubator to reach setpoint and control for 30 minutes.
- Page 55 Forma Scientific, Inc. ________________________________________________ 6.5 REPLACING THE CO SENSOR (See Figure 6-4) 1. Remove shelves, duct sheets, and blower channel from the chamber. 2. Locate CO sensor, and remove wingnuts. The sensor will drop down. See Section 5.1 photos. 3. There is a clip that connects sensor wiring to incubator wiring. To open the clip, pull out slightly on the clip tab to release the sensor.
- Page 56 Forma Scientific, Inc. ________________________________________________ 10. Peel the remaining paper backing from the heater, and apply it to the remaining area. 11. Connect the wiring from the new heater into the electrical connector on the wiring harness. 12. Reassemble the heater pan by reversing the above procedure.
- Page 57 Forma Scientific, Inc. ________________________________________________ 6.8 REPLACING THE TRIAC (See Figure 6-4) 1. Turn the incubator off and disconnect it from the power supply. 2. Loosen the two 1/4-turn fasteners on the front of the control panel and pull the panel out.
- Page 58 Forma Scientific, Inc. ________________________________________________ 6.10 REPLACING TEMPERATURE CONTROL (See Figure 6-4) 1. Loosen the two 1/4-turn fasteners on the front of the control panel and pull the panel out. 2. Remove the temperature control knob by loosening the two Allen head screws recessed in the knob.
- Page 59 Forma Scientific, Inc. ________________________________________________ 6.12 REPLACING CIRCUIT BREAKER (See Figure 6-4) 1. Loosen two ¼ -turn fasteners on the front of the control panel and pull the panel out. 2. Remove the two nuts securing circuit breaker mounting plate to the control panel.
- Page 60 Forma Scientific, Inc. ________________________________________________ 6.15 REPLACING THE BLOWER MOTOR (See Figure 6-4) 1. Disconnect the unit from the power source. 2. Remove the shelves, duct sheets and blower channel from the incubator interior. 3. Remove the four wingnuts that secure the blower mounting plate to the incubator ceiling.
- Page 61 Forma Scientific, Inc. ________________________________________________ SECTION 7 - PARTS LIST STOCK # DESCRIPTION 116011 Hinge, Interior Door 231011 Control Module, Alarm/Monitor 231039 Module, CO Control 290024 Assembly, CO Sensor 505522 Latch Tab, For Incub. Door 890155 Door, Glass, Inner 260001 Knob, Black, 1/4” Bush, 1/4” Dia.
Need help?
Do you have a question about the 3158 and is the answer not in the manual?
Questions and answers