
Related Manuals for KUHN EL92-230


Summarization of Contents
1. Dear Owner
About Improvements
Company reserves right to make improvements or changes without prior obligation.
Wear Parts
Service life of wear parts depends on usage conditions.
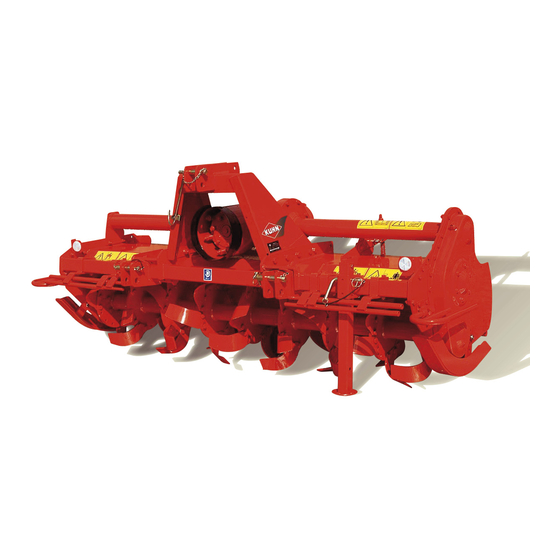
Document Illustrations
Illustrations may show one machine type; instructions apply to all.
5. Machine Specifications
5.1 Description and Glossary
Defines machine components and terminology.
5.2 Technical Specifications
Provides detailed technical data for different models.
5.3 Required Equipment
Lists essential equipment needed for operation.
5.4 Sound Levels
Details noise emission levels of the machine.
9. Optional Equipment
9.1 32x38-8 Spline Yoke
Details a specific optional equipment part.
9.2 Side Discs
Describes the function and adjustment of side discs.
9.3 Track Eradicators with Flexible Tines
Information on fitting and adjustments for track eradicators.
9.4 Set of Gearwheels
Equipment for changing rotor speeds.
9.5 Lighting and Signalling
Details lighting and signaling equipment.
3. Identification of the Machine
3.1 Front View
Diagram showing the front view of the machine.
3.2 Rear View
Diagram showing the rear view of the machine.
3.3 Model Identification Plate
Location and details of the machine's identification plate.
3.4 Optional Equipment
Checklist of available optional equipment for the machine.
4. Safety
4.1 Description of Symbols
Explains the meaning of safety symbols used in the manual.
4.2 Safety Instructions
General safety rules and precautions for operating the machine.
4.2.1 Introduction
General introduction to safety instructions and responsibilities.
4.2.2 Read and Follow Safety Instructions
Emphasizes reading and understanding safety procedures.
4.2.3 Precautions Before Operations
Safety steps before starting work or maintenance.
4.2.4 Precautions Before Using Machine
Safety measures before operating the machine.
4.2.5 Precautions When Coupling
Safety guidelines for attaching the machine to a tractor.
4.2.6 Precautions When Driving
Safety advice for operating the tractor-machine assembly.
4.2.7 Precautions on Public Roads
Safety rules for road transport.
Transport Position
How to set the machine for transport.
Lights and Indicators
Ensuring lights and indicators are functional.
Gross Weight and Weight Per Axle
Regulations regarding machine weight and axle loads.
Machines with Hoppers or Tanks
Specific advice for machines with hoppers/tanks.
Description of Symbols
Defines symbols related to weight and measurements.
How to Proceed: Stage 1
First step in calculating weights.
Stage 2: Load on Front Axle (t1)
Procedure to measure and adjust front axle load.
Stage 3: Total Weight (t)
Procedure to measure and check total weight.
Stage 4: Load on Rear Axle (t2)
Procedure to measure and check rear axle load.
4.2.8 Maximum Speed
Adhering to speed limits during transport.
4.2.9 PTO Shaft Safety
Safety precautions for PTO shaft use and maintenance.
4.2.10 Precautions During Manoeuvres
Safety during machine movement and positioning.
4.2.11 Remote Controlled Components
Hazards related to remote controlled parts.
4.2.12 Safety Decals
Importance of keeping safety decals clean and readable.
4.2.13 Waste Disposal
Environmental guidelines for disposing of waste.
4.2.14 Precautions for Maintenance and Repair
Safety measures for maintenance and repair.
4.2.15 Projection of Stones and Foreign Objects
Safety regarding projected debris.
4.2.16 Precautions for Machine Use
Safety checks before and during machine operation.
4.2.17 Precautions Before Using Parking Stands
Specific requirements related to parking stands.
4.3 Location and Description of Safety Decals
Visual guide to safety decal placement on the machine.
4.3.1 Location of Safety Decals
Visual guide to safety decal placement on the machine.
4.3.2 Description of Safety Decals
Detailed explanation of each safety decal's meaning.
4.4 Road Safety Equipment and Recommendations
Guidelines for road safety equipment and speed.
4.5 Likely Critical Failures
Lists potential critical failures.
4.6 Incorrect Use of Machine
Information on improper machine usage.
4.7 Limit State Criteria
Criteria related to operational limits.
5.1.1 Designated Use of the Machine
5.2.1 Designated Parameters
Lists specific parameters for machine designation.
5.3.1 PTO Shaft
Details the required PTO shaft specifications.
5.3.2 Depth Control
Describes depth control equipment options.
Without Depth Control
Information for machines without depth control.
6. Putting into Service
6.1 Coupling and Uncoupling
Procedures for attaching and detaching the machine.
6.1.1 Description of Coupling Elements
Identifies PTO shaft and 3-point hitch.
6.1.2 Preparing the Tractor
Steps to prepare the tractor for coupling.
Hitch Pin Parallelism
How to align hitch pins.
Lateral Adjustment of Lower Linkage Arms
Balancing and locking lower link stabilizers.
6.1.3 Preparing the Machine
Steps to prepare the machine for use.
Axial or Offset Working Position
How to set axial or offset working positions.
Offset Adjustment
Detailed steps for adjusting the offset position.
Categories of Linkage
Details of linkage categories for models.
Adjusting the Category
Steps to adjust the linkage category.
Coupling the Machine
Final steps for coupling the machine.
6.1.4 Primary PTO Shaft
Correct adjustment and connection of the PTO shaft.
6.1.5 Friction Slip Clutch
Checking and adjusting the friction slip clutch.
6.1.6 Uncoupling the Machine
Procedures for safely uncoupling the machine.
7. Instructions for Transport
7.1 Putting Machine into Transport Position
Steps to prepare the machine for transport.
7.2 Conformity with Road Regulations
Ensuring compliance with road rules.
Machine Transport Using Transport Means
Guidelines for transporting via other means.
8. Instructions for Work
8.1 Putting Machine into Work Position
Steps to move machine from transport to work position.
8.2 Adjustments in Working Position
Adjustments needed before starting work.
8.2.1 Working Depth
How to set the working depth.
Working Depth Adjustment
Adjusting working depth using wheels.
Adjusting Distance Between Wheels
How to adjust wheel spacing.
With Short Skids
Setting working depth with short skids.
With Standard Skids
Setting working depth with standard skids.
With Crumbler Roller
Setting working depth with a crumbler roller.
Working Depth Adjustment
Adjusting roller position for working depth.
With Packer Roller
Setting working depth with a packer roller.
Working Depth Adjustment
Adjusting roller position for working depth.
Adjusting the Roller Scrapers
How to adjust roller scrapers.
Nylon Scraper Plate (b)
Details on fitting and adjusting nylon scraper plates.
8.2.2 Rear Hood Adjustment
Adjusting the rear hood for tilth degree.
Hood Extension
Adjusting hood extension for mixing effect and tilth.
8.2.3 Rotor Speed Adjustment
Procedures for adjusting rotor speed.
8.3 Machine Use
General guidelines for using the machine in the field.
Before Engaging Machine in Ground
Pre-operation checks and safety.
8.3.1 Drive Speed
Adapting ground speed to working conditions.
9.2.1 Working Depth Adjustment
9.3.1 Fitting
How to fit track eradicators in different positions.
9.3.2 Coupling and Uncoupling
Procedures for coupling/uncoupling track eradicators.
9.3.3 Adjustments in Working Position
Lateral and depth adjustments for track eradicators.
9.3.4 Maintenance
Maintenance for track eradicator shares.
9.4.1 Rotor Speed Adjustment
Steps for adjusting rotor speed using gearwheels.
9.5 Lighting and Signalling
Details on lighting and signaling components.
9.5.1 Coupling and Uncoupling
Electrical connection for lighting system.
9.6 Lateral Signalling Equipment (for France)
Specific signaling for France.
9.7 USA Signalling Equipment
Specific signaling for USA.
9.8 Roller Arm
Details on the roller arm component.
9.9 Clamp (Rotors)
Information about rotor clamps.
10. Maintenance and Storage
10.1 Frequency Chart
Schedule for maintenance tasks based on usage.
10.2 Cleaning the Machine
Procedures for cleaning the machine.
10.3 Lubrication
General lubrication points and grease type.
10.3.1 Primary PTO Shaft Lubrication
Lubrication points for the PTO shaft.
10.3.2 Emptying Gearboxes
Procedures for draining and refilling the central gearbox.
10.3.3 Greasing
Greasing roller bearing housings.
10.4 Maintenance
General maintenance tasks.
10.4.1 Headstock
Checking headstock bolt tightness.
10.4.2 Tool Replacement
Replacing worn or damaged blades.
Partial Replacement
Guidelines for replacing individual tools.
Blade Mounting Chart
Chart showing blade configurations and counts.
Fitting Instructions for Blades in Helical Layout
How to fit blades in a helical pattern.
10.5 Storage
Procedures for storing the machine.
10.5.1 At the End of Each Season
Steps for storing the machine at season's end.
10.5.2 At the Start of Each Season
Checks before starting the machine for a new season.
10.5.3 Storage
Storage requirements.
10.6 Dismantling and Scrapping of the Machine
Guidelines for safe dismantling and disposal.
11. Troubleshooting Guide
Noisy Drive When Lifting Machine
Addresses noise issues during lifting.
Noisy Drive During Work
Addresses noise issues during operation.
Excessive Power Requirement (Wet Conditions)
Addresses high power draw in wet conditions.
Important Ground Projections to the Rear
Addresses excessive projections from the rear.
Excessive Power Requirement (Dry Conditions)
Addresses high power draw in dry conditions.
Tilth is Too Coarse
Addresses coarse tilth results.
Irregular Mix of Plant Residues
Addresses uneven mixing of plant residues.
Ridging Across Path Width
Addresses ridging issues across the working path.
12. Appendix
12.1 Calculating the Load on an Axle
Guide to calculating axle loads.
Rear Tool or Front-Rear Combination
Calculations for rear tools or front-rear combinations.
Calculation of Minimum Front Ballast Weight
Formula for calculating minimum front ballast.
Calculation of Minimum Front Ballast Weight M2
Formula for calculating minimum front ballast weight.
Calculation of Actual Front Axle Load T1
How to calculate the actual front axle load.
Calculation of Total Weight M
How to calculate the total machine weight.
Calculation of Actual Rear Axle Load T2
How to calculate the actual rear axle load.
Tyre Carrying Capacity
Information on tire load capacity.
Determining Machine Weight and Centre of Gravity
Method for determining machine weight and CG.
Rear Tool or Front-Rear Combination
Advice for rear tool or front-rear combinations.
Calculating Rear Tool Weight (M2)
Formula to calculate rear tool weight.
Calculating Distance (d)
Formula to calculate distance (d).
13. Limited Warranty
Warranty Exceptions
Lists parts and conditions not covered by warranty.
Customer Responsibilities and Costs
Customer responsibilities for maintenance and costs.
Warranty Observance Conditions
Conditions for warranty validity.
Warranty Application Limits and Responsibility
Warranty application limits and company responsibility.
Need help?
Do you have a question about the EL92-230 and is the answer not in the manual?
Questions and answers