
Related Manuals for Ingersoll-Rand SS350 E Ratio


Summary of Contents for Ingersoll-Rand SS350 E Ratio
- Page 1 P6633 03532561 Edition 7 January 2014 Starters Series SS175 and SS350 Installation and Maintenance Information Installation and Maintenance Information 安装和维护信息 据付および保守の情報 Save These Instructions...
-
Page 2: Installation General Information
Product Safety Information Intended Use: These air starters are intended for use in starting reciprocating internal combustion engines. These starters are designed to be operated from a remote location after proper installation on the engine requiring starting. For additional information refer to Air Starters for Internal Combustion Engines Product Safety Information Manual Form 45558624. Manuals can be downloaded from ingersollrandproducts.com The Ingersoll Rand Starter is a precision piece of equipment The recommendations outlined in this manual are based on over... - Page 3 Mounting the Air Starter Installation of HDL2 Lubricator 1. Study the piping diagrams on page 6. We strongly recommend Mounted on Starter that the Starter be connected exactly as shown. 2. The air receiver tank for a Starter installation must have a working Air Supply Hose pressure capability equal to or greater than the maximum pressure at which the Starter will be operated.
- Page 4 Series SS175 with Flange Mounting (Dwg. TPA929-3) 03532561_ed7...
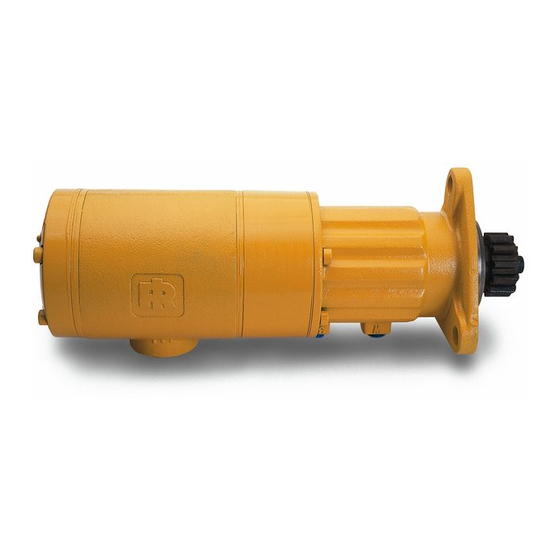
- Page 5 Series SS350 with Flange Mounting (Dwg. TPA930-3) 03532561_ed7...
- Page 6 Piping Diagram Typical Vehicular Installation: Starter Control Valve Y54-23 150BMP-2451B (24V) Air Supply from Compressor Starter Control Valve From Starter Y54-23 150BMP-1051B (24V) Control Valve Air Pressure Guage To Relay Valve AEROQUIP Hose #4 Check Valve 4411-4S 150BMP-1056 Hose #4 Y54-23 AEROQUIP AEROQUIP...
- Page 7 Model Code Identification Orientation * Basic Model Number SS175 SS350 etc. etc. Frame Size Sealed for Gas Operation Gear Ratio B = 2.1 E = 3.1 Mounting 01 = SAE 1 Flange 03 = SAE 3 Flange Pinion Rotation (when facing the drive pinion) R = Clockwise L = Counterclockwise Pinion Part Number Suffix (SS350-13-15)
- Page 8 产品安全信息 用途: 此类空气启动器应用于往复式内燃机的启动。此类启动器应在正确安装到需要启动的内燃机上后,进行远程操作。 更多信息请参见内燃机空气启动器产品安全信息手册表 45558624。 手册可从 www.irtools.com 下载。 Ingersoll Rand 起动器是一种精密装置,可长时间提供高效和经济性能。但是,如同任何产品一样,性能、经济性和耐用性大多都是由 少数简单的常识步骤确定,只能由制造商建议,并仅由客户遵守。本手册中略述的建议根据 30 多年以来在空气和气动起动器领域总结 的经验。学习和采纳这些建议。它们可让您节省大量时间和费用。本手册应存放在固定位置。 润滑 建议使用以上两种润滑系统中的任何一种。对于典型的起动器装 警 告 置(盘车时间低于 10 秒),我们建议使用 Ingersoll Rand No. HDL2 润滑器(按 页 3 上所示的方式安装)。使用柴油或 10W 非 不要使用煤油或喷气机燃油等易燃、易挥发的液体来润滑起动器。 去垢性机油进行滑润。如果盘车时间高于 10 秒,我们建议使用已 若温度高于 32° F (0° C), 可使用优质 SAE 10 非去垢性机油。 安装在主空气供应管线中的...
- Page 9 11. 在此,可在实际安装起动器之前或之后,确定将软管连接到起 在远处安装 动器是否可行或实用。 在多数情况下,可能需要在安装之前 将软管连接到起动器。 安装时需要上油的主 12. 请使用优质粘性齿轮润滑油来充分润滑小齿轮和环形齿轮上的 要润滑剂供应软管。 齿轮。这将有助于延长环形齿轮和传动小齿轮的寿命。 13. 将起动器安装在飞轮外壳上。按以下方式旋紧装配螺栓: 对于 5/8” 螺栓,扭矩是 英尺-磅(122 纳米) 对于 3/8” 螺栓,扭矩是 30 英尺-磅(41 纳米) 14. 请在起动器控制阀的“DEL”侧和起动器传动箱上的 “IN” 端 口之间安装 1/4” 软管管线。 15. 在起动器传动箱的 “OUT” 端口和起动器继动阀顶端的小管道分 接部分之间安装 1/4” 软管管线。 起动器气源进口 16. 在气动起动器上,请在起动器的排气管端口中安装消音器或公 路防溅导向板。使用...
- Page 10 系列 SS175 (带法兰装置) (Dwg. TPA929-3) 03532561_ed7...
- Page 11 系列 SS350 (带法兰装置) (Dwg. TPA930-3) 03532561_ed7...
- Page 12 管道布置图 典型的车载安装: 起动器控制阀 150BMP-2451B (24V) Y54-23 来自压缩机的气源 起动器控制阀 150BMP-1,051B (24V) Y54-23 始于起动器控制阀 压力表 进至主启动阀 AEROQUIP 号软管 单向阀 4411-4S 150BMP-1056 #4号软管 Y54-23 AEROQUIP AEROQUIP 2X 4411-4S 1¼” 或 1” 软管 4411-4S AEROQUIP ST400-411 2X 4411-4S 空气储气罐 AEROQUIP “出口”端 2024-20-16S JIC 37° 接头 Y54-3 ¼”...
- Page 13 型号代码标识 定向* 基本型号 SS175 SS350 etc. etc. 框架尺寸 对于天然气操作的密封 齿轮齿数比 B = 2.1 E = 3.1 安装 01 = SAE 1 法兰 03 = SAE 3 法兰 小齿轮旋转(在朝向传动小齿轮时) 顺时针方向 逆时针方向 (SS350-13-15) 小齿轮零件号码后缀 进口方向(参见尺寸图示) 排气方向(参见尺寸图示) 控制进口方向(参见尺寸图示) * 由于空间有限和对其他因素的考虑,以下方向不可能结合使用: 关于法半装置起动器 0-1-H 0-0-E 0-2-E 0-3-H 0-1-F...
- Page 14 製品に関する安全性 製品に関する安全性 これらのエアスターターは、 往復内燃機関の始動に使用するこ とを目的と しています。 これらのエアスターターは、 始動させる必要のある往復内 燃機関に正しく 取り付けた後、 離れた場所から操作するように設計されています。 詳細は、 「 内燃機関用エアスターター製品安全情報説明書 45558624」 を参照してく ださい。 www.irools.com から説明書をダウンロードすることができます。 Ingersoll Rand 始動装置は、 長期間に渡って効率のよい、 経済的な この取扱説明書で概説されている推奨内容は、 空気およびガスの 性能を示すことを目的とした精密機器です。 しかし、 どの製品もそう 始動装置の分野に於ける30年以上に渡る経験に基いています。 これ であるように、 性能、 経済性および耐久性は、 大部分が、 製造者によ らの推奨内容を検討し、 従ってください。 これらの推奨内容によって ってのみ推奨でき、 顧客によってのみ支持できる 2 ~ 3 の単純な常 時間と費用の節約が可能になります。...
- Page 15 3. これで、 駆動筐体は、 排気ポートに対し、 正しい向きにできたの 15. 1/4 インチ ホース ラインを [始動装置ドライブ筐体] 上の ”OUT” で、 吸気ポートがホースの再組付けに対し好ましい配置となっ ポートから [始動装置リレーバルブ] の上端の小管のタップ付き ているか注意します。 これで向きを変える場合、 4 本のモーター ポートに再組付けします。 筐体カバーキャップネジを外し、 モーター筐体カバーを希望の 16. 空気操作の [始動装置] については、 [始動装置] の排気ポートに 位置に回転させます。 駆動部筐体カバー キャップ ネジを元のよ [マフラー] または [道路泥除け装置] を再組付けしす。 SS175 始 うに再組み付けして、...
- Page 16 HDL2 ルブリケータを以下のように取り付けます。 3. HDL2 の側面の 1/8 インチ NPTF 注油口から圧力の掛かってい ない燃料ライン、 ディーゼル燃料タンクまたは別の油容器に 1. HDL2 ルブリケータを始動装置上に取り付ける場合、 始動装置上の No. 6 ホースを再組付けします。 ルブリケータの取り付け金具を [モーター筐体カバー] から 3/8 インチパイプ栓を外してHDL2と取 15~ 36 ft-lb (20.3 ~ 48.8 Nm) のトルクで締め付けます。 重要 : り替えます。 HDL2 を離れた位置に取り付ける場合、 [ルブリケータ] この接続は、 真空気密にする必要があります。 取り付け金具上の に使用できる...
- Page 17 ランジ取り付け台の付いた SS175 シリーズ (Dwg. TPA929-3) 03532561_ed7...
- Page 18 フランジ取り付け台の付いた SS350 シリーズ (Dwg. TPA930-3) 03532561_ed7...
- Page 19 配管図 典型的な車両再組付け: 始動装置制御バルブ 150BMP-2451B (24V) Y54-23 コンプレッサー 始動装置制御バルブ からの空気供給 始動装置制御 Y54-23 150BMP-1,051B (24V) バルブから 風圧計 リレーバルブへ AEROQUIP #4 ホース チェック バルブ 4411-4S 150BMP-1056 #4 ホース Y54-23 AEROQUIP 1¼ インチ または 2X 4411-4S AEROQUIP 1 インチ ホース 4411-4S AEROQUIP 2X 4411-4S ST400-411 空気だめタンク “OUT” ポート AEROQUIP JIC 37º アダ...
- Page 20 モデル コード識別 方向 * 基本モード番号 SS175 SS350 etc. etc. フレーム サイズ ガス運転用に密封された ギア比 B = 2.1 E = 3.1 取り付け フランジ 01 = SAE 1 フランジ 03 = SAE 3 ピニオン回転 (駆動ピニオンを向いたとき) 時計回り 反時計回り ピニオン部品番号サフィックス (SS350-13-15) 吸気口方向 (寸法図を参照してください) 排気管方向 (寸法図を参照してください) 制御吸気口方向 (寸法図を参照してください) スペースの制限などの考慮すべき事項のため、 以下の方向の組み合わせは不可能です: フランジ取り付け始動装置について 0-1-H 0-0-E 0-2-E 0-3-H...
- Page 21 SS175 and SS350 Series Starter - Cross Sectional View (Dwg. TPA934-1) 03532561_ed7...
- Page 22 SS175 and SS350 Series Starter - Exploded Diagram (Dwg. TPA931-3) 03532561_ed7...
- Page 23 SS175 Series Starter - Parts List Part Item Part Description Item Part Description Part Number Number Motor Housing Cover Assembly SS175-A102 Piston Kit SS350-K703 3/8” Pipe Plug (2) HSPPS-3 Piston O-Ring SS350-337 Nameplate SS800-301 Piston Bearing SS350-339 Nameplate Screw (4)
- Page 24 SS350 Series Starter - Parts List Item Part Description Part Number Item Part Description Part Number Motor Housing Cover Assembly SS350-A102 Needle Bearing SS350-278 3/8” Pipe Plug (2) HSPPS-3 Piston Kit SS350-K703 Nameplate SS800-301 Piston O-Ring SS350-337 Nameplate Screw (4) R4K-302 Piston Bearing SS350-339...
- Page 25 Drive Pinion Selection Chart Series SS175 Starter Model Number Pinion Part Number Starter Model Number Pinion Part Number SS175GB01R15-02H SS175GE03L38-02H SS350R-13-38 SS175GB01R15-02J SS175GB01R77-02J SS175GE01R15-02J SS350R-13-15 SS175GB03R77-02H SS35OR-13-77 SS175GE03R15-00H SS175GE01R77-02J SS175GE03R15-02H SS175GE03R77-02H SS175CE01R21-02J SS350R-13-21 SS175GB01R85-02J SS175GE01R29-02J SS175GB03R85-02J SS350R-13-85 SS175GE03R29-02A SS350R-13-29 SS175GE01R85-02J SS175GE03R29-02H SS175GE03R85-02H SS175GE01R31-02J...
- Page 26 Disassembly of the Starter General Information 8. Grasp the Drive Pinion in copper-covered vise jaws so that the three driving lugs are upward. 1. Always mark adjacent parts on the Motor Housing Cover (1), 9. While engaging the lugs on the Drive Shaft with those on the Cylinder Housing (9), Gear Case (23) and Drive Housing (48) so Drive Pinion, use an 8 mm hexagon wrench to unscrew the Drive these members can be located in the same relative position when...
- Page 27 12. Apply enough heat to the periphery of the bearing recess to NOTICE break the Loctite bond which holds the Bearing to the Rear End Plate. Discard any grease seal that was removed during disassembly 13. Being careful so as to not get burned, press the Rear Rotor of the Starter.
- Page 28 Assembly of the Piston and Drive Shaft 15. Tap the Rear End Plate into place so that it seats against the face of the Cylinder Housing. Make certain the End Plate O-ring does 1. Grasp the Drive Pinion (46) in copper-covered vise jaws so that not come out of the groove in the End Plate.
- Page 29 Assembly of the Starter 9. Place the Piston Return Spring over the end of the Drive Shaft so that it seats against the Piston Bearing Retaining Ring ((34) in the 1. Grasp the assembled motor in a large vise so that the Rotor front of the Piston.
-
Page 30: Troubleshooting Guide
Troubleshooting Guide Trouble Probable Cause Solution Remove the motor from the Motor Housing (9) and disassemble the motor. Examine all parts and replace any that are worn or damaged. Use the following guidelines for determining unserviceable parts: 1. Vanes (20) - Install a set of new vanes if any vane is separated, cracked, spalled or worn to the extent that its width is 0.67”... - Page 31 Notes:...
- Page 32 ingersollrandproducts.com © 2014 Ingersoll Rand...
Need help?
Do you have a question about the SS350 E Ratio and is the answer not in the manual?
Questions and answers