
Related Manuals for Pitney Bowes Relay 4000


Summarization of Contents
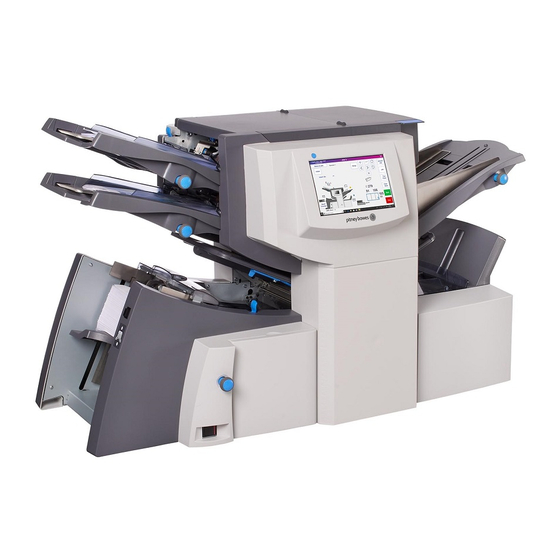
System Overview
Relay Inserter Introduction
Overview of the Relay 3000/4000 inserters and their touch screen and barcode scanning features.
Inserter Component Identification
Identifies and describes the main physical components of the Relay inserter system.
Touch Screen Display Identification
Details the various elements and icons on the inserter's touch screen interface.
Control Panel Icons
Explains the meaning and function of different icons displayed on the control panel.
Turn the Touch Screen On/Off
Instructions on how to power the touch screen display on and off.
Use the Touch Screen Keyboard
Guide on how to use the on-screen keyboard for data entry.
Change the Display Language
Procedure to change the language displayed on the inserter's touch screen.
Touch Screen Usernames and Passwords
Information on managing operator usernames and passwords for system access.
Rename Default Operator Usernames
Steps to rename existing default operator usernames on the touch screen.
Change an Existing Operator Password
Instructions for changing an operator's password via the touch screen interface.
Recover an Existing Operator Password
Procedure to recover a lost operator password using supervisor access.
Rename an Existing or Default Job
How to assign a new name to an existing or default job.
Inserter Control Reports
Details on accessing mailpiece reporting features via the touch screen.
Report Data
Information captured in reports when using enhanced barcode scanning.
Access Reports
Methods to access inserter report data by date or job file.
Archive Reports
Steps to automatically save reports to the pre-installed SD card.
Print Reports
Instructions for printing reports directly through the touch screen.
Program a Job
Navigate Using the Touch Screen
Guidance on navigating the programming sequence using the touch screen interface.
Scanning and Non-Scanning Jobs
Overview of setup steps for scanning and non-scanning job types.
Program a Job
Step-by-step process for setting up and saving a new job.
Log In
Procedure for logging into the system with supervisor level access.
Enter Supervisor Access Code
Instructions for entering the supervisor access code to access job settings.
Select the Job Number
How to select an existing job or program new settings for an unused job number.
Program a Scanning Job
Detailed steps for programming a job that includes scanning functionality.
Program a Non-Scanning Job
Steps for programming a job without scanning functionality.
Modify an Existing Job
Instructions for modifying the settings of an already programmed job.
Delete a Job
Procedure for removing a programmed job from the inserter system.
Run a Job
Run a Job
Overview of activities operators perform to run a programmed job.
Verify the Inserter Has Power
Steps to confirm the inserter is properly connected and powered on.
Turn On the Touch Screen
Instructions on powering up the touch screen display.
Log In
Process for logging into the system to access job functions.
Select a Job
How to choose a programmed job to run on the inserter.
Manual Feed Jobs
Specific instructions for running jobs configured for manual feeding.
Load Material
General guidance on preparing and loading materials into the inserter.
Adjust and Load the Sheet Feeders
Steps for adjusting and loading paper into the sheet feeders.
Adjust and Load the Envelope Feeder
Instructions for adjusting and loading envelopes into the envelope feeder.
Adjust and Load the Insert Feeder
Guidance on adjusting and loading inserts into the insert feeder.
Run a Trial Piece
Procedure to run a test piece to verify job settings and setup.
Start and Stop the Inserter
How to start and stop the automatic operation of the inserter.
Fill the Sealer
Instructions on refilling the sealer unit with solution.
Adjust the Stacker
How to adjust the drop stacker to accommodate job material.
OMR Scanning
Optical Mark Recognition (OMR)
Explanation of how Optical Mark Recognition works with the inserter.
OMR Scanning Types
Description of Basic OMR and Enhanced OMR scanning capabilities.
Basic OMR
Details on Basic OMR for collation and varying page counts.
Enhanced OMR
Details on Enhanced OMR for higher mailpiece integrity and control.
OMR Mark Positions
Information on the required locations for OMR marks on documents.
Standard OMR Positions
Diagram and explanation of standard OMR mark placement.
Offset OMR Positions
Diagram and explanation of offset OMR mark placement.
OMR Specifications
Technical specifications for OMR marks, including size, thickness, and spacing.
Available OMR Marks
Descriptions of various OMR marks used for job control and features.
OMR Troubleshooting
Guidance on resolving issues and errors encountered during OMR scanning.
Error Recovery for OMR Jobs
Steps to recover from stoppages and errors during OMR job execution.
OMR Error Messages
List of OMR error messages and their corresponding actions.
Barcode Scanning
Barcode Scanning
Introduction to barcode scanning for mailpiece integrity and job control.
How Barcode Scanning Works
Explanation of the process by which the inserter reads and uses barcodes.
1D and 2D Barcode Scanning
Distinction between 1D and 2D barcode scanning technologies.
Barcode Placement Specifications
Guidelines for positioning barcodes correctly on sheets for scanning.
Barcode Placement Areas
Defines the acceptable areas on sheets for barcode placement.
Barcode Zones - Clear and Blank
Specifies clear and blank zones around barcodes to avoid scanning errors.
2D Barcode Camera Setup
Instructions for setting up and configuring the 2D barcode camera.
Turn On the 2D Barcode Camera
Steps to enable or disable the 2D barcode camera using the switch.
Adjust the Position of the 2D Barcode Camera
Procedure for correctly positioning the 2D barcode camera for optimal scanning.
2D Barcode Scanning Final Checklist
A checklist to ensure all steps are completed before starting barcode scanning.
Barcode Error Messages
Table of barcode error messages and their solutions.
Clear Material
Clear Material
Instructions for clearing jams and material stoppages in the inserter.
Access Areas of the Inserter for Jam Removal
Guidance on accessing different areas of the inserter for jam clearance.
Sheet Feeders Trays - Remove and Replace
Steps for removing and replacing sheet feeder trays.
Fold Plates - Remove and Replace
Instructions for removing and replacing the fold plates.
Insert Tray - Remove and Replace
Procedure for removing and replacing the insert tray.
Access the Carriage Assembly
How to access the carriage assembly for jam removal.
Access to Envelope Feeder Area
Steps to access the envelope feeder area for clearing jams.
Access the Envelope Exit Area
Procedure to access the envelope exit area for jam clearance.
Access the Envelope Inserting/Sealing Area
How to access the insertion and sealing areas for jams.
Access to the Sheet Feed Area
Steps to access the sheet feed area for clearing jams.
Troubleshooting and Error Messages
General Troubleshooting
Common issues and their solutions for the inserter and its components.
Inserter Troubleshooting
Solutions for common inserter power and operation problems.
Envelope Troubleshooting
Solutions for problems related to envelope feeding, opening, and sealing.
Sheet Troubleshooting
Troubleshooting tips for sheet feeding, folding, and window alignment.
Insert Troubleshooting
Solutions for issues encountered with insert feeding.
Double Detect Troubleshooting
Guidance on resolving double detect errors and calibration issues.
Changing the Sealer Unit Felts
Step-by-step guide to replace the sealer unit felts for improved sealing.
Error Messages
Comprehensive list of inserter error messages and their corresponding actions.
Material Specifications
Material Specifications
General specifications for materials used with the inserter.
Sheet Feeders
Specifications for sheet feeders, including size, weight, and fold types.
Paper Weights
Details on the acceptable paper weights for the sheet feeders.
Fold Configurations
Limits for different fold types based on material length.
Insert Feeder
Specifications for the insert feeder, including size, weight, and capacity.
Envelope Feeder
Specifications for the envelope feeder, including size, weight, and capacity.
Inserter Specifications
Physical, electrical, and performance specifications of the inserter.
Service
Information on obtaining service and maintenance for the inserter.
Need help?
Do you have a question about the Relay 4000 and is the answer not in the manual?
Questions and answers