
Subscribe to Our Youtube Channel
Related Manuals for Pitney Bowes AddressRight 300


Summary of Contents for Pitney Bowes AddressRight 300
-
Page 1: Table Of Contents
Shipping & Mailing Printing AddressRight™ 300 Feeder User Guide AddressRight 300 Feeder Specifications Assembling and Connecting the AddressRight 300 Feeder AddressRight 300 Feeder Control Panel Setting Up the AddressRight 300 Feeder Cleaning the Feeder Replacing the Metering Segments (Sheet Separators) -
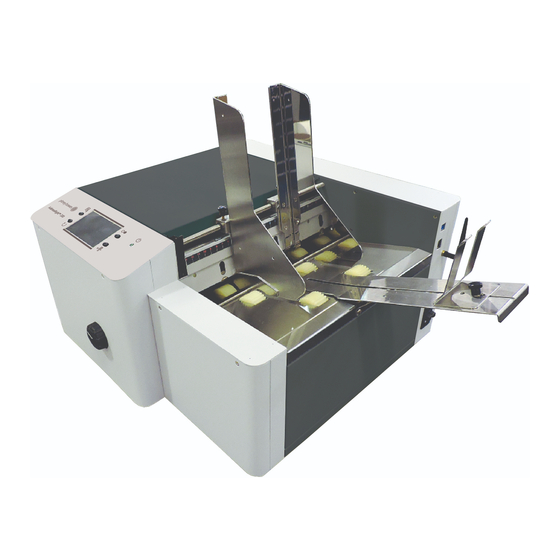
Page 2: Addressright 300 Feeder Specifications
It feeds up to 40,000 pieces per hour, depending on size and material. Assembling and Connecting the AddressRight 300 Feeder Important: Feeder installation and setup should only be performed by a qualified Pitney Bowes Representative. 1. Unpack the feeder. 2. Install the two side guides using the four screws [A] supplied (two on each side). -
Page 3: Addressright 300 Feeder Control Panel
The exit end of the feeder faces the closed end of the base. The feeder's rubber feet fit into the recesses on top of the base [B]. AddressRight 300 Feeder Control Panel 1. Speed control: Varies the speed of the feeder in either Manual or Auto mode to provide separation between printed pieces 2. -
Page 4: Setting Up The Addressright 300 Feeder
3. Fuse Holder: The fuse protects the electronics and motor in the feeder 4. Interface Connector: Can be used to control the feeder Setting Up the AddressRight 300 Feeder 1. Release the separator locking lever. Raise the separators and lock in position. - Page 5 For thicker material, adjust the lever so that the media is fed smoothly through the exit roller assembly. 5. Turn the feeder on. 6. Feed one piece with the speed control set to low speed (1 or 2). Pitney Bowes User Guide October 2019...
-
Page 6: Cleaning The Feeder
Internal areas are best cleaned with a vacuum with a soft brush attachment to help loosen dust particles. Take care not to damage PC Boards or electrical wiring. Exterior areas may be cleaned with any standard nonabrasive household cleaner. Pitney Bowes User Guide October 2019... -
Page 7: Replacing The Metering Segments (Sheet Separators)
Metering Segments (sheet separators) ensure separation of pieces as they are fed. They wear and must be replaced periodically. If you experience double sheet feeding and cannot adjust the separators to prevent it, replace them. Pitney Bowes User Guide October 2019... -
Page 8: Contacting Pitney Bowes
4. Remove screw [A] and separator support [B]. Then remove the separator [C] by prying it out of holder. 5. Install a new separator and reinstall the separator support and screw. Contacting Pitney Bowes For service and support: Visit our website at: pitneybowes.com... -
Page 9: Safety Information
Before operating the AddressRight™ Printer/Feeder, make sure that it has been properly prepared and that any other personnel in the area are standing clear of the machine. Pitney Bowes User Guide October 2019... - Page 10 Except as provided in writing, duly signed by an officer of Pitney Bowes, no license either express or implied, under any Pitney Bowes or third party’s patent, copyright or other intellectual property rights is granted by providing this information.
- Page 11 3001 Summer Street Stamford, Connecticut 06926 www.pitneybowes.com For Service or Supplies SV63338 Rev. A ©2019 Pitney Bowes Inc. All Rights Reserved...
Need help?
Do you have a question about the AddressRight 300 and is the answer not in the manual?
Questions and answers