HUUM DROP Manual
- Manual (41 pages) ,
- Installation and operation manual (24 pages) ,
- Installation (2 pages)
Advertisement
- 1 The set includes
- 2 BEFORE INSTALLATION
-
3
INSTALLATION
- 3.1 Positioning of the heater
- 3.2 Installation of the heat diverter
- 3.3 Installing an electric heater inside the sauna bench
- 3.4 Connecting the heater to the power supply
- 3.5 Insulation resistance of the electric heater
- 3.6 Laying of the heater stones
- 3.7 Requirements for laying stones
- 3.8 Safety railings
- 3.9 Controlling the heater
- 4 SAUNA ROOM
- 5 USING INSTRUCTION
- 6 WARRANTY
- 7 Spare parts
- 8 WARNINGS AND NOTES
- 9 Documents / Resources
The set includes
| DROP 4 / 6 | DROP 7 / 9 |
| electrical heater | electrical heater |
| heater mounting plate | heater mounting plate |
| reflector | reflector |
| heating element spacer (3pc) | heating element spacer (5pc) |
| heating element retainer for 3 heating elements | heating element retainer for 5 heating elements |
| heat diverter + fastenings | heat diverter + fastenings |
| installation and operation manual | installation and operation manual |
 ATTENTION! HUUM DROP electric heater requires a control system and stones. Ensure that all parts included in the box are installed.
This installation and operation manual is intended for use by the sauna owner or maintenance person as well as the electrician responsible for the installation of the heater. Before using the heater, please read the instructions carefully.
BEFORE INSTALLATION
Before installation read the operation manual thoroughly. Do not install or perform maintenance on the device if you do not understand all of the instructions. Contact vendor or local distributor with any questions or concerns. This way you can use all the benefits of the device and prevent damage:
- Check before installing the electric heater that the maximum amperage of the main fuse matches the heater parameters.
- Does the heater output (kW) match the volume (ft³ /m³) of the sauna room? In case there are any uninsulated brick, tile, or glass walls in the sauna room, an additional 3.3 ft³ must be added to the sauna room volume for each 1 ft² of such wall; or 1 m³ for each 1 m².
The suitable output of the heater can be found in Table 2 and Table 3. - Are minimal safety distances ensured at the installation site of the heater? Minimal safety distances between the sauna room's ceiling and walls in view of installing the electric heater have been provided in Table 1.
ATTENTION! The manufacturer's warranty is not valid, if the output of the heater does not correspond to the calculated volume of the sauna room.
INSTALLATION
Positioning of the heater
The heater should be positioned in such a way that there is a safe distance between flammable materials and external surfaces of the heater.
- Chec kTable 1 for minimal safety distances between the heater, sauna room's ceiling and walls.
- The opening for the power cable is located on the back of the heater. The exact position of the cable on the wall is measured in relation to the heater mounting plate and has been indicated in
- Place the heater in such a way that its location does not create dangerous situations during use and the possibility of accidental contact with the heater would be minimized.
- Keep in mind that the full weight of the heater with stones is 143.3 lb (65 kg) and ensure that the wall structure is strong enough for it. Attach the frame of the heater to the wall.
| Table 1. | A | B | C | D | E | MIN gap |
| DROP 4 | 3 ¹⁵/₁₆" 100 mm | 23 ⁷/₃₂" 590 mm | 17 ¹/₈" 435 mm | 6 ¹¹/₁₆" 170 mm | 12 ⁷/₃₂" 310 mm | 47 ¹/₄" 1200 mm |
| DROP 6 | 3 ²³/₃₂" 120 mm | 24 ¹³/₁₆" 630 mm | 17 ²⁹/₃₂" 455 mm | 7 ¹⁵/₃₂" 190 mm | 12 ⁷/₃₂" 310 mm | 47 ¹/₄" 1200 mm |
| DROP 7 | 5 ¹/₂" 140 mm | 26 ³/₈" 670 mm | 18 ¹¹/₁₆" 475 mm | 8 ⁹/₃₂" 210 mm | 12 ⁷/₃₂" 310 mm | 47 ¹/₄" 1200 mm |
| DROP 9 | 5 ²⁹/₃₂" 150 mm | 27 ⁵/₃₂" 690 mm | 19 ³/₃₂" 485 mm | 8 ²¹/₃₂" 220 mm | 12 ⁷/₃₂" 310 mm | 47 ¹/₄" 1200 mm |

Figure 1. Positioning of the heater
NOTE: Before installing the heater in its final position, ensure that all included parts are correctly placed. Follow the instructions below carefully.
Installation of the heat diverter
- Before installing, remove the protective film.
![]()
- Align the lug at the end of the heat diverter with the reflector, ensuring the lug and nut are on the sauna wall side of the reflector. Fasten using a bolt and nut.
![]()
- Slightly bend the lug at the heat diverter's opposite end away from you. Then, bend the diverter to align with the reflector and secure it with a bolt and nut.
![]()
- Bend the lugs in the middle of the heat diverter so they press against the reflector. Fasten these with a bolt and nut.


The edges of the components may be sharp. Wearing protective gloves is recommended.

Figure 3. Installation of the retainer of HUUM DROP 4 and 6 with 3 heating elements.

Figure 4. Installation of the HUUM DROP heating elements spacer.

Figure 5. Installation of the retainer of HUUM DROP 7 and DROP 9 with 5 heating elements.
Installing an electric heater inside the sauna bench
HUUM DROP electric heater can also be partially mounted inside the sauna bench or sauna floor.
- At least 14 ³/₄" (375 mm) of the submerged heater should protrude from the sauna bench surface;
- To cover the edges of the immersion hole use the embedding flange of HUUM DROP electric heater.
The embedding flange of HUUM DROP electric heater is an accessory that you can request from your HUUM product distributor. A user manual for the embedding flange is provided with the product.
The maximum permissible immersion of the heater has been provided in Figure 6.

Figure 6. Installing HUUM DROP electric heater inside the sauna bench
Connecting the heater to the power supply
ATTENTION! Only a certified electrician is allowed to connect the heater to the power supply.
- The power cable of the heater must meet the requirements (against sunlight, water and oil) of UL 62 in US and CSA 49 in Canada.
- The maximum current amperage in the cross-sectional area of the cable and circuit breaker has been provided in Table 2 and Table 3.
- It is recommended to connect the unit to the mains without a GFCI breaker.
ATTENTION! Crimping the power cable ends is mandatory.
The compression of the metal sleeve ensures that the wire threads are held in place, minimizing the risk of loose connections that can cause electrical faults or pose safety hazards.

| Table 2. | Output kW (240 V) | Room* | Amps A | Circuit Breaker A | Min. Wire Size AWG |
| DROP 4 | 4.5 | 106-248 ft3 3–7 m3 | 18.75 | 30 | 10 |
| DROP 6 | 6 | 177-318 ft3 5–9 m3 | 25 | 30 | 10 |
| DROP 7 | 7.5 | 248-389 ft3 7–11 m3 | 31.25 | 40 | 8 |
| DROP 9 | 9 | 283-460 ft3 8–13 m3 | 37.5 | 50 | 8 |
* In case there are any uninsulated brick, tile, or glass walls in the sauna room, an additional 3.3 ft³ must be added to the sauna room volume for each 1 ft² of such wall; or 1 m³ for each 1 m²
| Table 3. | Output kW (208 V) | Room* | Amps A | Circuit Breaker A | Min. Wire Size AWG |
| DROP 4 | 3.4 | 89-177 ft3 2.5-5 m3 | 16.35 | 20 | 10 |
| DROP 6 | 4.5 | 142-248 ft3 4-7 m3 | 21.63 | 30 | 10 |
| DROP 7 | 5.6 | 177-301 ft3 5-8.5 m3 | 26.92 | 30 | 8 |
| DROP 9 | 6.75 | 212-354 ft3 6-10 m3 | 32.44 | 40 | 8 |
* In case there are any uninsulated brick, tile, or glass walls in the sauna room, an additional 3.3 ft³ must be added to the sauna room volume for each 1 ft² of such wall; or 1 m³ for each 1 m²
ATTENTION! You shall not use a non-heat-resistant cable with PVC isolation as the power cable. When using the junction box in the sauna room, it should be waterproof and located at a maximum height of 19¹¹/₁₆ in (50 cm) from the floor.
- Open the cover of the heater's electrical box.
- Take the cable into the electrical box through the grommet.
- Attach the power cable on the terminal block according to the circuit diagram.
![warning]() NOTE: Crimping the power cable ends is mandatory. The compression of the metal sleeve ensures that the wire threads are held in place, minimizing the risk of loose connections that can cause electrical faults or pose safety hazards.
NOTE: Crimping the power cable ends is mandatory. The compression of the metal sleeve ensures that the wire threads are held in place, minimizing the risk of loose connections that can cause electrical faults or pose safety hazards. - Close the cover.
- Fix the cable on the bushing with a cable strap. Secure the cable to the electrical box cover screw using a retaining clip.
- Install the heater onto the wall frame and secure it with the safety bolt in the top right corner.
Insulation resistance of the electric heater
During the first use of the heater the insulation resistance of the heating element might prove to be temporarily lower than the standard. The reason for that is the moisture seeped into the insulating layer during storage in the warehouse and transportation. The moisture evaporates in 1–2 hours of heating the electric heater.
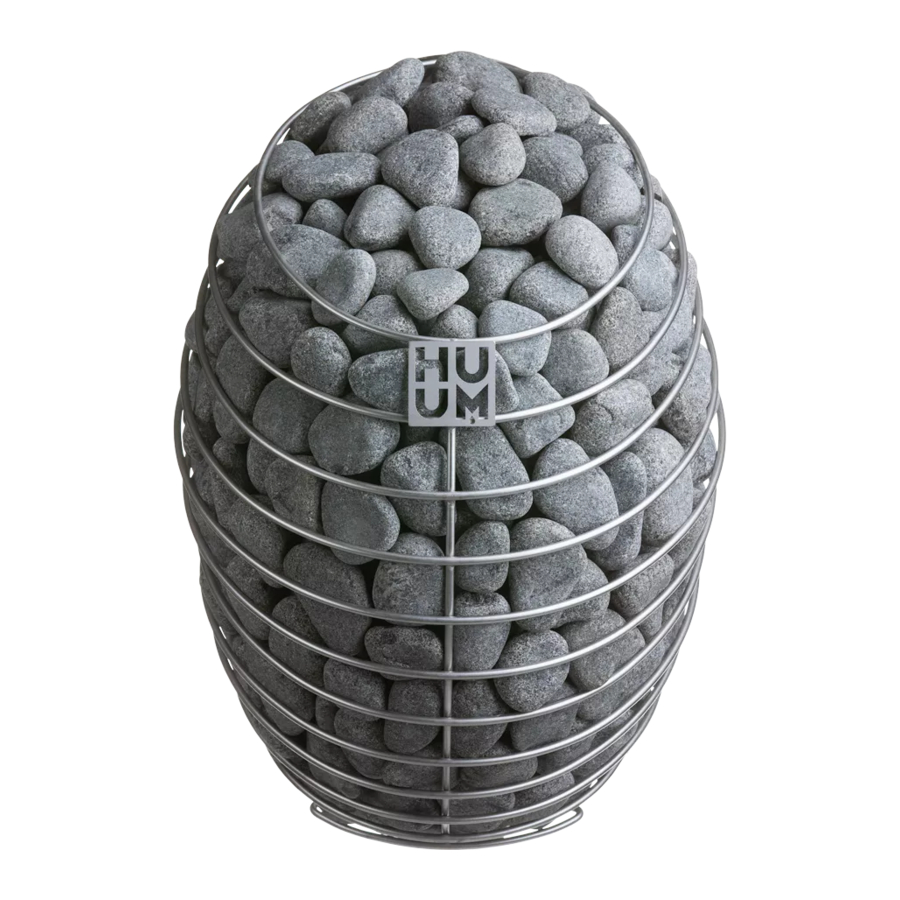
Laying of the heater stones
Before filling the heater with stones, ensure that all heater parts are correctly installed and in place. If you have a DROP 7 or DROP 9 heater, do not place stones under the heating element retainer.
- HUUM DROP electric heater requires approximately 121.3 lbs (55kg) of stones.
- The stones with a diameter of 2-4 in (5–10 cm) are suitable for HUUM DROP heater.
- Before laying, wash the stones clean of dust under running water.
- Natural stones (e.g. olivine diabase, olivine), which are sold specifically for use in sauna heaters, are suitable as heater stones.
- Do not use decorative stones as they do not accumulate enough heat and break easily. Broken pieces of stone inside the heater can block air holes and damage heating elements.
NOTE: The defects due to the use of unsuitable stones are not covered by warranty.
Requirements for laying stones
- Make sure the heater is turned off.
- Use gloves to protect your hands when laying stones.
- Lay the stones one by one and don't pour or throw them into the heater.
- Start with bigger stones, placing them to the bottom and to the sides. Use smaller stones to fix the larger stones in place.
- Try to lay the stones tightly, but leave some room for air to circulate in the heater.
- Lay the stones between the heating elements as well. This will help support the heating elements and prevent them from coming into contact. Take care not to push the stones too hard or bend the heating elements.
- Lay the outer surfaces of the heater tightly and make sure that the heating elements are not visible through the stones. Ladling water directly onto the heating elements shortens their lifespan and produces an excessively sharp heat.
![warning]() NOTE: If the heating elements are not properly surrounded by stones, the safety distances given in Table 1 do not apply, as additional heat radiation to flammable surfaces will occur. Make sure that the heating elements are not visible from between the stones!
NOTE: If the heating elements are not properly surrounded by stones, the safety distances given in Table 1 do not apply, as additional heat radiation to flammable surfaces will occur. Make sure that the heating elements are not visible from between the stones! - To ensure optimal performance, regularly check the heater stones:
- After 100 hours of use (or at least once a year), perform a visual inspection.
- After 200 hours of use, rearrange the stones and replace any that have cracked.
- After 400 hours of use, replace all stones for the best steam and sauna experience.
ATTENTION! TOO SPARSELY FILLED STONE CONTAINER CAUSES FIRE HAZARD!
Placing the stones in DROP 4 and DROP 6 with 3 heating elements
- Too tightly filled
![]()
- Partially filled
![]()
- Heating elements are bent
![]()
- Correctly laid stones
![]()


Placing the stones in DROP 7 and DROP 9 with 5 heating elements.
- Too tightly filled
![]()
- Partially filled and under retainer
![]()
- Heating elements are bent
![]()
- Correctly laid stones
![]()


Safety railings
To prevent accidental contact with the hot heater it is recommended to install a safety railing around the heater.
- You can build your own safety railing or use the special accessory HUUM DROP electric heater safety railing, which can be obtained from your HUUM distributor.
NOTE: When using flammable materials (e.g. wood) as safety railings, it is essential that the prescribed minimum safety distances between the heater and flammable structures are complied with.
Controlling the heater
- Only certified control panels designed for the control of an electric heater may be used to controlHUUM DROP electric heater.
- The output of the heater should remain in the interval determined by the control panel's producer.
- When installing the control panel, follow the installation and operation manual provided by the manufacturer.
SAUNA ROOM
Wall materials and insulating of the sauna room
In a sauna with electric heating, all massive heat accumulating wall surfaces (glass and concrete walls, brick, plaster, etc.) should be insulated to use the electric heater with optimal output. This prevents heat loss in the sauna room and overheating of the heater.
The following sauna construction guidelines can help ensure a well-insulated sauna room:
- An insulation layer of 2-4" (50-100mm) thickness is installed (foam insulation boards covered with a vapour barrier foil suit well).
- Aluminium foil or other reflective material on top of the insulation material without a vapour barrier. The joints are covered with foil tape.
- ¹³/₃₂" (10mm) ventilation gap (recommended) is left between the moisture barrier and the lining board with spacers.
- ¹⁵/₃₂ - ⁵/₈" (12-16 mm) wooden lining board is suitable for interior finishing. Before installing the lining boards, check the power cables and reinforcements in the walls that are necessary for e.g. installation of a heater and a sauna bench.
- To prevent moisture from the floor, the distance between the board and the floor should be at least 4" (100 mm).
- There is a minimum ventilation gap of ³/₁₆" (5 mm) between the wall and ceiling board.
- Wooden sauna surfaces should be coated with sauna wax or oil to prevent dirt being absorbed into the wood.
Ceiling of the sauna room
To optimize the heater's output, the recommended height of the sauna room is 79 - 91" (2000 - 2300 mm). In case of a higher sauna room, it is advisable to lower the ceiling, thus reducing the volume of the sauna room.
- The minimum permissible height of the sauna room for HUUM DROP electric heater is 75 in (1900 mm).
- The distance between the top step of the sauna bench and the ceiling should be between 44 and 51 in (1100 and 1300 mm).
- The ceiling of the sauna room should be insulated in the same way as the walls of the room.
ATTENTION! When covering the walls or ceiling with heat protection (e.g. with mineral tiles), a sufficient ventilation gap should be left between the materials. Installing tiles directly on a wall or ceiling surface can cause dangerous overheating of wall or ceiling materials.
ATTENTION! Check with the authorities responsible for fire safety which parts of the firewall can be insulated. It is forbidden to insulate flues in use.
Darkening of the sauna room walls
Over time, the wooden materials used in the sauna room may begin to darken due to the high temperature. This is a natural process that does not pose a risk and is usually caused by the darkening of the wood protection product used. The darkening process can also be caused by the fine stone dust, breaking away from the heater stones and lifted up by the airflow. By following the manufacturer's instructions when installing the heater, flammable materials in the sauna room will not become dangerously hot.
ATTENTION! The highest allowed temperature for the wall and ceiling surfaces of the sauna room is 284˚F (140˚C).
Floor of the sauna room
Due to large changes in temperature, the heater stones also crumble over time. Together with the sauna water, particles released from the stones and fine stone dust are washed onto the sauna floor. Hot stone chips can damage plastic covered floors under and near the heater. The splashes of heating stones and sauna water (especially for e.g. iron-rich water) can be absorbed into the light joint of the tile floor.
In order to avoid aesthetic damage, ceramic tiles and dark joint filler should be used under and around the heater.
You can use the optional DROP Drip Tray, available through your HUUM distributor.
Ventilation of the sauna
In order to ensure sufficient oxygen supply and fresh air, the sauna's ventilation should be as efficient as possible (air should exchange six times an hour).
The ventilation system depends on whether the building has a natural air inlet and outlet or forced ventilation.
Sauna ventilation consists of at least two, as a rule three parts:
- Supply air pipe. The supply air pipe diameter should be ∅ 1 ³¹/₃₂"-3 ¹⁵/₁₆" (50-100mm).
- Exhaust air pipe. The diameter of the exhaust air pipe should be 2x the diameter of the supply air pipe, ∅ 3 ¹⁵/₁₆"-7 ⁷/₈" (100-200mm).
- Drying pipe. In the absence of a drying pipe opening, the door may be left open for ventilation after using the sauna.
In case of a sauna room with mechanical ventilation, there should be:
- Supply air pipe in the middle of the heater or higher (≥ 15 ³/₄" / 400 mm).
- Exhaust air pipe in the opposite side of the heater (≤ 23 ⁵/₈" / 600 mm from the floor).
- Drying pipe opening in the opposite wall of the heater under the ceiling.
In case of a gravity based ventilation sauna room, there should be:
- Supply air pipe in the middle of the heater or lower (≤ 15 ³/₄" / 400 mm).
- Exhaust air pipe in the opposite wall at least 7 ⁷/₈" (200 mm) higher than the supply air pipe (≤ 23 ⁵/₈" / 600 mm from the floor).
- Drying pipe opening in the opposite wall of the heater under the ceiling.
The supply air pipe should be fitted with an adjustable valve.
If the exhaust air pipe is located in the washroom, there should be a gap of at least 3 ¹⁵/₁₆" (100 mm) under the door of the sauna room.
Use the drying pipe opening as a final ventilation after a sauna session or in between water ladling sessions if there have been a lot of people in the room at once and there is excessive humidity or lack of air. Keep the drying pipe opening closed while having sauna.
USING INSTRUCTION
Using the heater
ATTENTION! Always check that there are no foreign objects on, above or near the heater before switching it on. This could cause a fire hazard.
In order to use the heater, you will need to install a heater control system. The control system is not included in the set. Be sure to read the instruction manual of the control device of your choice before use.
Heating up the sauna room
When the heater is first switched on odours will emit from both the heating elements and the stones. In order to remove these odours, the sauna room should be thoroughly ventilated.
In a properly insulated sauna room and with a heater of the right capacity, it will take around one hour to reach the desired temperature. The stones are usually heated to the correct water ladling temperature simultaneously with the sauna room.
Throwing water on heated stones
As the sauna room heats up, the air in the sauna becomes dry. You can raise the humidity in the sauna room by ladling water onto hot stones. By choosing the frequency and amount of water you ladle, you can adjust the humidity and the perceived heat of the sauna to your personal preference.
- Try to throw water only on the heater stones and not on metal surfaces.
- Start water ladling only when the stones are fully heated and the water evaporates completely.
- Use only clean and warm water for ladling.
- We recommend that you ladle about 2 ³/₄ oz (80 ml) of water on the stones at a time. If you want more steam, wait for a few minutes and then ladle the same amount again. This will allow the stones to dry out and heat up again in the meantime.
ATTENTION! Never ladle water when someone is in the immediate vicinity of the heater as hot steam can cause burns.
WARRANTY
General terms and conditions can be found on our webpage huumsauna.com/warranty

Find the most up-to-date material on the manufacturer's website: huumsauna.com

Spare parts


WARNINGS AND NOTES
ATTENTION! The following instructions for electrical works must be carried out by a licensed electrician.
ATTENTION! We strongly recommend a specialist to lay the stones on the heater.
ATTENTION! This appliance is not intended for use by persons (including children) with reduced physical, sensory or mental capabilities, or lack of experience and knowledge.
ATTENTION! Children should be supervised to ensure that they do not play with the appliance.
ATTENTION! The installation instructions for appliances for public saunas that do not have a timer shall state that a pilot lamp showing that the heater is switched on is to be installed in the attendant's room.
The safety of the products is based on EN 60335-2-53: 2011
"Household and similar electrical appliances. Safety. Part 2-53: Particular requirements for sauna heating appliances and infrared cabins".
- The heater is designed to heat the sauna room to the temperature at which the sauna is enjoyed. It may not be used for any other purpose.
- All maintenance work requiring special skills should be carried out by a trained professional.
- Always disconnect the heater from the power source before carrying out any maintenance!
- Before turning on the electric heater, always check the sauna room and heater.
- The heater may be used only when it has been correctly filled with stones.
- Do not cover the heater—this causes fire hazard.
- Do not touch a working heater, it causes burns.
- Ventilating the sauna room incorrectly may dry the wood too much and cause a fire hazard in the sauna. If necessary, seek professional advice when planning ventilation.
- Never make steam by using a water hose.
- Use sauna fragrances and oils only in the steam water. If poured directly onto the stones in undiluted form they can catch fire.
- A layer of fireproof thermal insulation of at least 2 in (50 mm) is recommended under the board of the sauna room.
- Sauna doors should always open outward.
- Do not use the sauna for any other purpose than it is meant to be used.
- Do not leave small children in the sauna unattended.
- Sudden cooling after staying in the sauna room is not recommended for people with poor health. If necessary, consult a doctor.
- Do not stay in the sauna for too long. Enjoy the steam as long as it is comfortable for you.
- To prolong the lifespan of both the sauna room and heater, ensure proper ventilation after sauna session is completed.
- Keep this information in a secure place.
Documents / Resources
References
![huumsauna.com]() Limited Warranty Terms and Conditions - HUUM
Limited Warranty Terms and Conditions - HUUM![huumsauna.com]() Sauna heaters and innovative sauna controllers – HUUM
Sauna heaters and innovative sauna controllers – HUUM![www.huumsauna.com]() Sauna heaters and innovative sauna controllers – HUUM
Sauna heaters and innovative sauna controllers – HUUM
Download manual
Here you can download full pdf version of manual, it may contain additional safety instructions, warranty information, FCC rules, etc.
Advertisement


Need help?
Do you have a question about the DROP and is the answer not in the manual?
Questions and answers