Advertisement
Package Contents

Installation Requirements
- UVC G3 Flex (sold separately)
- Refer to the UVC-G3-FLEX Quick Start Guide for camera installation instructions
- Phillips screwdriver
- Drill and bit (6 mm for drywall anchors or 3 mm for screws)
- Category 5 (or higher) cable for indoor installations
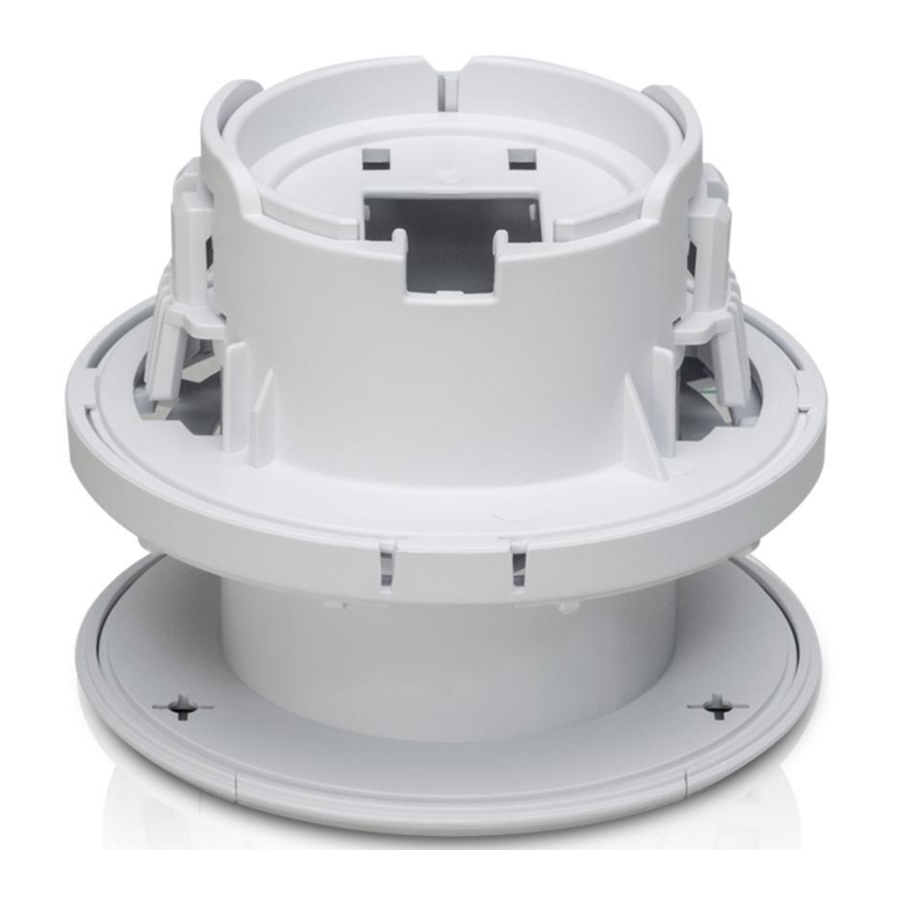
Hardware Overview

 Note: Use of the Ceiling Backing Plate is optional depending on the installation type.
Before You Begin
- Disassemble the separate pieces of the ceiling accessory:
- Push in the two side clips of theCeiling Backing Plate to release the backing plate from the Ceiling Mount Bracket.
- Pull theMounting Cover off of the Ceiling Mount Bracket.


Hardware Installation
The ceiling accessory can be installed in one of the following ceiling materials:
- Soft Ceiling Use for installation on removable ceiling tiles where you have rear access to the Ceiling Mount Bracket.
- Hard Ceiling Use for installation on hard lid ceilings where there is no rear access to the Ceiling Mount Bracket.
- Drywall Use for installation on drywall surfaces where Screw Anchors are required.
Proceed to the appropriate section for your installation.
Note: We recommend using the Ceiling Backing Plate in any installation where you have rear access to the Ceiling Mount Bracket once the camera has been installed.
Note: To change the viewing angle of the camera at any time:
- Tilt the lens up or down for vertical adjustment.
- Turn the base left or right for horizontal adjustment.
![]()

Soft Ceiling Installation
- Remove the ceiling tile.
- Cut a 2 ¼-inch (57 mm) opening in the ceiling tile.
- Place theCeiling Mount Bracket through the opening in the ceiling.
![information]() Note: Ensure that the arrows on the Ceiling Mount Bracket point in the direction the camera will face.
Note: Ensure that the arrows on the Ceiling Mount Bracket point in the direction the camera will face.

- Align the notches of theCeiling Backing Plate with the tabs on the Ceiling Mount Bracket. Slide the Ceiling Backing Plate onto the Ceiling Mount Bracket. Then feed an Ethernet cable through the Ceiling Backing Plate, Ceiling Mount Bracket, and ceiling tile.

- Connect one end of the Ethernet cable to the Ethernet port on the camera and the other end to a PoE 802.3af-compliant switch or compatible PoE adapter.

- Align the notches on the camera with the tabs on the Ceiling Mount Bracket. Slide the camera up into the Ceiling Mount Bracket, locking into place.

- Use a Phillips screwdriver to install the includedInstallation Screw through the Ceiling Mount Bracket and into the base of the camera.

- Proceed to theMounting Cover Installation section.


Hard Ceiling Installation
- Align the notches on the camera with the tabs on the Ceiling Mount Bracket. Slide the camera into the Ceiling Mount Bracket, locking into place.
![]()
- Use a Phillips screwdriver to install the includedInstallation Screw through the Ceiling Mount Bracket and into the base of the camera.
![]()
- Cut a 2 ¼-inch (57 mm) opening in the ceiling and pull an Ethernet cable though the opening.

- Connect one end of the Ethernet cable to the Ethernet port on the camera and the other end to a PoE 802.3af-compliant switch or compatible PoE adapter.

- Place theCeiling Mounting Bracket through the opening in the ceiling.
![information]() Note: Ensure that the arrows on the Ceiling Mount Bracket point in the direction the camera will face.
Note: Ensure that the arrows on the Ceiling Mount Bracket point in the direction the camera will face.

- Use the threeScrews to secure the Ceiling Mount Bracket to the ceiling.

- Proceed to theMounting Cover Installation section.


Drywall Ceiling Installation
- Cut a 2 ¼-inch (57 mm) opening in the ceiling.
- Place theCeiling Mount Bracket through the opening in the ceiling. Using the Ceiling Mount Bracket as a template, mark the three screw holes.
![information]() Note: Ensure that the arrows on the Ceiling Mount Bracket point in the direction the camera will face.
Note: Ensure that the arrows on the Ceiling Mount Bracket point in the direction the camera will face.

- Remove theCeiling Mount Bracket from the ceiling opening and pre-drill the screw holes, using a 6 mm drill bit.
- Align the notches on the camera with the tabs on the Ceiling Mount Bracket. Slide the camera into the Ceiling Mount Bracket, locking into place.
![]()
- Use a Phillips screwdriver to install the includedInstallation Screw through the Ceiling Mount Bracket and into the base of the camera.
![]()
- Insert the threeScrew Anchors into the three screw holes and then feed an Ethernet cable through the ceiling.
![]()
- Connect one end of the Ethernet cable to the Ethernet port on the camera and the other end to a PoE 802.3af-compliant switch or compatible PoE adapter.

- Align theCeiling Mount Bracket with the Screw Anchors.

- To secure theCeiling Mount Bracket to the ceiling, insert the three Screws into the threescrew holes and Screw Anchors.


Mounting Cover Installation
Once the ceiling accessory and camera have been installed in the ceiling, follow the steps below to install the Mounting Cover:
- Unlock theMounting Cover by sliding the tab out.

- Place the openMounting Cover over the camera and Ceiling Mount Bracket.

- Lock theMounting Cover into place by sliding the tab closed.


Online Resources
Website www.ui.com
Support help.ui.com
Community community.ui.com
Downloads downloads.ui.com
Documents / Resources
References
Download manual
Here you can download full pdf version of manual, it may contain additional safety instructions, warranty information, FCC rules, etc.
Advertisement


Need help?
Do you have a question about the UniFi G3 Flex and is the answer not in the manual?
Questions and answers