Table of Contents
Advertisement
Quick Links
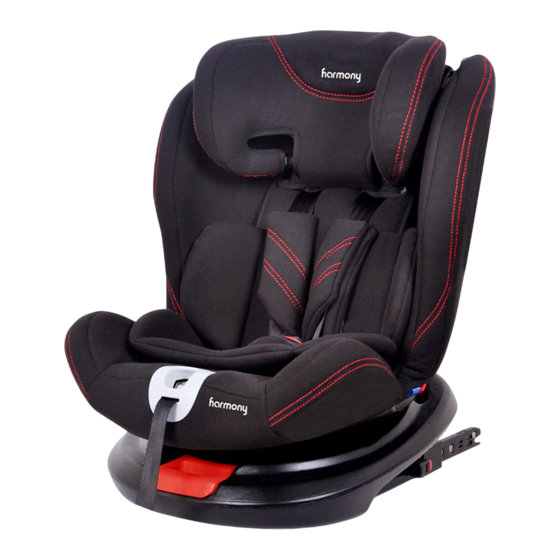
FREESTYLE DELUXE CAR SEAT
INSTRUCTION MANUAL
ECE regulations for use by children:
From birth to 13 kg (Rear-facing, Group 0+)
From 9 kg to 36 kg (Forward-facing, Group I / II / III)
Do not install or use this child restraint until you read
and understand the instructions in this manual and in
FAILURE TO PROPERLY USE THIS CHILD RESTRAINT
INCREASES THE RISK OF SERIOUS INJURY OR DEATH IN
A SHARP TURN, SUDDEN STOP OR CRASH.
IF YOU HAVE ANY PROBLEMS, PLEASE DO
NOT RETURN THIS PRODUCT TO THE PLACE
STOP
OF PURCHASE. PLEASE CONTACT CUSTOMER
SERVICE AT +44 (0) 1704 549881 OR AT
CUSTOMERSERVICE@HARMONYJUVENILE.COM
®Harmony Juvenile Products
This child restraint complies with
• Group 0+ / I / II / III
• Mass: Birth to 36 kg
For children approx. 0 - 12 years
READ THIS MANUAL
your vehicle owner's manual.
HMYFRECBB-UK2
23/02
UK
Advertisement
Table of Contents

Related Manuals for Harmony FREESTYLE DELUXE


Summary of Contents for Harmony FREESTYLE DELUXE
- Page 1 FREESTYLE DELUXE CAR SEAT INSTRUCTION MANUAL This child restraint complies with ECE regulations for use by children: • Group 0+ / I / II / III • Mass: Birth to 36 kg From birth to 13 kg (Rear-facing, Group 0+) From 9 kg to 36 kg (Forward-facing, Group I / II / III) For children approx.
-
Page 2: Table Of Contents
TABLE OF CONTENTS Registration information ............3 If you need help ...............4 Warnings .................4 General warnings..............4 Usage warnings ..............6 Injury warnings ..............7 Vehicle warnings ..............8 Certifications ...............8 Airbag warnings ..............10 Damage warnings ..............10 Mass and height limitations ..........11 Rear-facing with built-in harness ........12 Forward-facing ..............12 Maximum height ...............13 Parts list .................14... -
Page 3: Registration Information
Visit www.harmonyjuvenile.com/register to register your child restraint online, mail-in the registration card or send your name, address, the restraint’s model number, manufacturing date and date of purchase to: Harmony Juvenile Products UK 10 Beach Priory Gdns. Southport, UK PR8 1RT... -
Page 4: If You Need Help
Many seat belts are NOT safe to use with this child restraint. Please review the sections “Safe/Unsafe vehicle seat belt systems” carefully. If in doubt about installing this child restraint, consult the vehicle owner’s manual or call the Harmony Customer Service Department. - Page 5 WARNING! FAILURE TO PROPERLY READ, FOLLOW AND USE THESE INSTRUCTIONS AND THE CHILD RESTRAINT LABELS INCREASES THE RISK OF SERIOUS INJURY OR DEATH IN A SHARP TURN, SUDDEN STOP OR CRASH. Your child’s safety depends on the proper installation and use of this child restraint. Even if this child restraint seems easy to install and use, it is VERY IMPORTANT to read and understand these instructions and the vehicle owner’s manual.
-
Page 6: Usage Warnings
Harmony Juvenile Products advises against loaning or passing along a child restraint. DO NOT USE A SECOND-HAND CHILD RESTRAINT or a child restraint whose history you do not know. When disposing a child restraint system, ensure to dispose of the unit in a way others cannot reuse it (e.g. -
Page 7: Injury Warnings
unless they read and understand all the instructions and labels. DO NOT GIVE THIS CHILD RESTRAINT to someone else without also giving them this instruction manual. Additional instruction manuals can be downloaded directly from www.harmonyjuvenile.com. To ensure proper child restraint use, keep and store this instruction manual and refer to it when necessary. -
Page 8: Vehicle Warnings
The child restraint shall not be used without the cover. It MUST always be used with the fabric cover provided by the manufacturer. The seat cover should not be replaced with any other than the one recommended by the manufacturer, because the cover constitutes an integral part of the restraint performance. - Page 9 This child restraint has been classified as "Universal" under more stringent conditions than those which applied to earlier designs which do not carry this notice. If in doubt, please consult the child restraint manufacturer or the retailer. For rear-facing Installations with ISOFIX (ISOFIX attachments and top tether): This is an ISOFIX CHILD RESTRAINT SYSTEM.
-
Page 10: Airbag Warnings
Only suitable for use in the listed vehicles fitted with 3-point with retractor safety-belts, approved to ECE Regulation No. 16 or other equivalent standards. This restraint is NOT CERTIFIED for aircraft use. This child restraint must NOT be used in homes, boats, buses, motorcycles, motor homes, or any other vehicles that have non-forward-facing seats, missing seat belts, or whose seat belts do not meet the requirements of... -
Page 11: Mass And Height Limitations
WARNING: Verify your child’s height and weight frequently. DO NOT guess before choosing the proper setup for your child. Harmony Juvenile Products recommends that you ALWAYS confirm country laws with local authorities. Laws can vary from country to country regarding minimum/maximum child restraint requirements for age, mass and height. -
Page 12: Rear-Facing With Built-In Harness
REAR-FACING WITH BUILT-IN HARNESS ❶ To use this child restraint, your child MUST MEET ALL of the following requirements: • GROUP 0+ ❶ Rear-facing (with built-in harness): between 0 - 13 kg (0 - 28.7 lbs.) • Child’s ears MUST BE BELOW top of the headrest. -
Page 13: Maximum Height
• GROUP II / III ❸ Forward-facing (without built-in harness): between 15 - 36 kg (33 - 79 lbs.) • Shoulder belt MUST lie across the MIDDLE of the child’s shoulder and chest, and lap portion MUST be positioned ❹ low across child’s hips ❸. -
Page 14: Parts List
PARTS LIST A. Headrest H. Backrest B. Shoulder Belt Shoulder Pads Positioning Guides Harness Straps C. Infant Insert Cushion K. Buckle D. Crotch Strap and Pad Isofix Connectors E. Metal Up-front M. Rotation Adjuster Harness Adjustment N. Isofix Insert Guides Button O. - Page 15 PARTS LIST Backrest Belt Guides U. Headrest Height Q. Harness Strap Adjuster Connector V. Top Tether Strap R. Backrest Belt Slot W. Top Tether Adjuster Opening X. Top Tether Hook Harness Splitter Plate Base TO PURCHASE REPLACEMENT PARTS: In the United Kingdom, please contact us at customerservice@harmonyjuvenile.com or by calling +44 (0) 1704 549881.
-
Page 16: Vehicle Seating Positions
VEHICLE SEATING POSITIONS WARNING! FAILURE TO PROPERLY SECURE YOUR CHILD AND THE CHILD RESTRAINT IN YOUR VEHICLE INCREASES THE RISK OF SERIOUS INJURY OR DEATH IN THE EVENT OF A SHARP TURN, SUDDEN STOP OR CRASH. WARNING! IMPROPER PLACEMENT OF THE CHILD RESTRAINT INCREASES THE RISK OF SERIOUS INJURY OR DEATH. -
Page 17: Safe Vehicle Seat Belt Systems
You must determine if your vehicle’s seat belts are compatible for use with this child restraint. If you are unsure, consult your vehicle owner’s manual or call Harmony Juvenile Products. This child restraint is suitable for use in the listed vehicles fitted with 3-point with retractor safety-belts (lap-and-shoulder), approved to ECE Regulation No. -
Page 18: Unsafe Vehicle Seat Belt Systems
Review your vehicle owner’s manual for vehicle seat belt use with child restraints. UNSAFE VEHICLE SEAT BELT SYSTEMS This child restraint can be installed properly using MOST vehicle 3-point lap-and-shoulder seat belts. However, some vehicle seat belts are not safe to use as their anchoring points for the lap belt may not allow for a secure installation. -
Page 19: Preparing Child Restraint For Use
PREPARING CHILD RESTRAINT FOR USE WARNING! INCORRECT USE OF THE HARNESS SYSTEM IS THE MOST COMMON MISTAKE PEOPLE MAKE. IT IS VERY IMPORTANT TO READ, UNDERSTAND AND FOLLOW ALL INSTRUCTIONS AND WARNINGS. DO NOT MISTAKE COMFORT FOR SAFETY. THE HARNESS SYSTEM MUST BE SNUGLY ADJUSTED AT ALL TIMES. - Page 20 2. To determine what harness height is appropriate for your child, place your child in the child restraint with their ❷ back flat against the backrest. 3. Your child restraint has eleven (11) height ❶ adjustments: • Use one hand to squeeze the headrest height adjustment handle found on the rear of the headrest ❸...
-
Page 21: Rotation
The shoulder pads and crotch pads are optional and are not a safety feature. WARNING! FAILURE TO ADJUST THE HARNESS STRAPS CORRECTLY COULD RESULT IN SERIOUS INJURY OR DEATH. ROTATION ❶ Pull rotation adjuster located on the front of the base towards you to safely rotate the seat ❶. -
Page 22: Recline
RECLINE Place the child restraint in the desired seating position (see “Choosing an appropriate vehicle seat location”). Lift the recline handle found underneath the front of the seat and adjust the base to the desired angle. Release the handle when done and gently push on the seat to ensure it is firmly locked in place. -
Page 23: Installing Child Restraint In Harness Mode: Isofix And Top Tether
INSTALLING CHILD RESTRAINT IN HARNESS MODE: ISOFIX AND TOP TETHER Isofix is used for installing the child restraint IN CONJUNCTION WITH the use of the Top Tether. Isofix connectors can ONLY be used if your vehicle has the Isofix anchors installed and designated Isofix seating positions. -
Page 24: Using Top Tether
USING TOP TETHER Your vehicle’s Tether Anchor Points may be identified using one of these symbols: • Check that the Top Tether is securely attached to the child restraint. • Fasten Top Tether clip to anchor point ensuring the clip is facing downwards and the strap is not twisted ❶. - Page 25 3. Press the Isofix Release Button on ❷ each Isofix arm to release the two Isofix arms for installation. 4. Place the child restraint flush against a forward-facing vehicle seat, centered between the Isofix anchors. The child restraint must be level, stable and not rock side-to-side (see “Vehicle seating positions”).
-
Page 26: Disengaging Isofix Connectors
DISENGAGING ISOFIX CONNECTORS To release the Isofix connectors: Press the Isofix Release Button on each side of the Isofix connectors. INSTALLING WITH VEHICLE SEAT BELT WITH OR WITHOUT ISOFIX SYSTEM FORWARD-FACING GROUP I (9 - 18 KG) It is recommended keeping your child in the rearward- facing position until they reach the top height or mass limit allowed by your car seat’s manufacturer. - Page 27 3. Thread vehicle shoulder belt portion of the seat belt behind the headrest ON THE SAME SIDE as the seat belt retractor ❷. 4. Open harness system and lift insert cushion. Thread the lap portion of the vehicle’s seat belt through the red belt base positioning guide ON THE SAME SIDE as the seat belt retractor.
- Page 28 ❷ ❸ ❸ ❸ ❹ ❹ 6. Buckle the vehicle seat belt. Listen for an audible “click” ❹. The vehicle seat belt MUST NOT be twisted. 7. If your vehicle is equipped with a ELR/ALR switchable seat belt retractor system, we recommend that you pull out the full length of the vehicle seat belt (until you cannot pull out any more slack).
-
Page 29: Using Child Restraint With Built-In Harness
❺ ❻ USING CHILD RESTRAINT WITH BUILT-IN HARNESS WARNING! FAILURE TO FASTEN AND TIGHTEN THE HARNESS SYSTEM CORRECTLY MAY CAUSE THE CHILD TO BE EJECTED FROM THE RESTRAINT SYSTEM IN CASE OF A SHARP TURN, SUDDEN STOP OR CRASH CAUSING SERIOUS INJURY OR DEATH. In a crash, the child restraint will provide NO protection for your child unless the harness straps are properly secured. -
Page 30: Securing Child In Child Restraint
Incorrect use of the harness system is the most common mistake people make. It is VERY important to read, understand and follow ALL instructions and warnings. DO NOT mistake comfort for safety. The harness system MUST be snugly adjusted at all times. Snugly adjust the harness provided with this child restraint around your child. - Page 31 5. Place harness straps over child’s shoulders. Hold buckle clips together and insert two- piece buckle clip ❹ into buckle until they ‘click’ into place ❹. ENSURE that the buckle is properly fastened by gently tugging on it. ENSURE that the straps are ❺...
-
Page 32: Removing Child From Child Restraint
IF YOUR CHILD HAS REACHED 15 KG, YOU CAN USE THE SEAT IN BOOSTER MODE. Harmony Juvenile Products advises that your child remains in a 5-point harness for as long as possible per the mass and height requirements of the child restraint. - Page 33 crotch strap ❸ through the fabric seat cover and completely remove it ❺. • Replace fabric seat cover. To adjust crotch buckle: ❹ • The crotch buckle has two (2) positions. • Remove crotch buckle and reinstall with crotch buckle facing forward out of the desired slot ❻.
-
Page 34: Preparing Booster Seat For Use
PREPARING BOOSTER SEAT FOR USE WARNING! INCORRECT USE OF THE VEHICLE’S 3-POINT LAP-AND-SHOULDER SEAT BELT SYSTEM IS THE MOST COMMON MISTAKE PEOPLE MAKE. IT IS VERY IMPORTANT TO READ, UNDERSTAND AND FOLLOW ALL INSTRUCTIONS AND WARNINGS. DO NOT MISTAKE COMFORT FOR SAFETY. THE VEHICLE’S 3-POINT LAP-AND-SHOULDER SEAT BELT MUST BE SNUGLY ADJUSTED AT ALL TIMES. -
Page 35: Securing Child And Booster Seat In Vehicle
WARNING: You MUST use the Isofix ❶ system in conjunction with the vehicle 3-point lap-and-shoulder belt system when restraining the child in the booster seat ❶. WARNING: Vehicle belts MUST be tight, adjusted to the child’s body, and should not be twisted ❶. NEVER use a vehicle lap-only belt to secure child in booster seat ❷. -
Page 36: Installing With Isofix System & Vehicle Seat Belt Forward-Facing Group Ii/Iii (15 - 36 Kg)
IF IN DOUBT ABOUT THESE POINTS OR ANY QUESTIONS RELATED TO INSTALLATION, PLEASE CONTACT HARMONY JUVENILE PRODUCTS. INSTALLING WITH ISOFIX SYSTEM & VEHICLE SEAT BELT FORWARD-FACING GROUP II/III (15 - 36 KG) - Page 37 3. Place child in the booster seat ❶ with child’s back flat against the back of the booster seat. 4. Adjust headrest height (see "Adjusting headrest and harness shoulder straps"). 5. Thread shoulder belt portion of the 3-point lap-and-shoulder belt system through the shoulder belt guide ❷...
-
Page 38: Aircraft Installation
AIRCRAFT INSTALLATION This child restraint is NOT CERTIFIED for aircraft use. Aircraft seats are not equipped with 3-point lap-and- shoulder belts which are required for use with this child restraint. INSTRUCTION MANUAL STORAGE We recommend that you store your instruction manual in the mesh pouch under the backrest fabric on the side of the child restraint. -
Page 39: Care And Maintenance
Remove objects with tweezers and/or clean with a cotton swab. If you cannot get the harness to remain tight with the buckle securely locked, DO NOT USE this child restraint. Call Harmony Juvenile Products to purchase a replacement harness or buckle. -
Page 40: Warranty
UV radiation. The use of non-Harmony branded covers, inserts, toys, accessories or tightening devices is not approved by HJP. Their use could cause this child restraint to fail federal safety standards or perform worse in a crash. - Page 41 LIMITATIONS OF DAMAGES The warranty and remedies as set forth above are exclusive and in lieu of all others, oral or written, expressed or implied. In no event will HJP or the retailer selling this product be liable to you for any damages, including incidental or consequential damages, or loss of use arising out of the use or inability to use this product.
Need help?
Do you have a question about the FREESTYLE DELUXE and is the answer not in the manual?
Questions and answers