Table of Contents
Advertisement
Available languages
Available languages
Quick Links
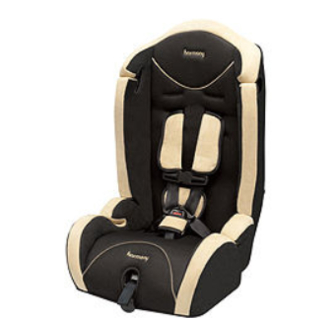
V7 3-IN-1
CONVERTIBLE CAR SEAT
INSTRUCTION MANUAL
This child restraint is designed for use by children
who meet the following requirements:
WITH HARNESS:
Weight: 10 - 23 kg (22 - 50 pounds)
Height: 74 - 114 cm (29 - 45 inches)
WITHOUT HARNESS:
Weight: 18 - 50 kg (40 - 110 pounds)
Height: 102 - 145 cm (40 - 57 inches)
READ THIS MANUAL
Do not install or use this child restraint until you read
and understand the instructions in this manual.
FAILURE TO PROPERLY USE THIS CHILD RESTRAINT
INCREASES THE RISK OF SERIOUS INJURY OR DEATH
IN A SUDDEN STOP OR CRASH.
KEEP INSTRUCTIONS FOR FUTURE USE.
®2013 Harmony Juvenile Products
HMYV7HBB-F4
12/10 CAN
Advertisement
Chapters
Table of Contents

Related Manuals for Harmony V7


Summary of Contents for Harmony V7
- Page 1 FAILURE TO PROPERLY USE THIS CHILD RESTRAINT INCREASES THE RISK OF SERIOUS INJURY OR DEATH IN A SUDDEN STOP OR CRASH. KEEP INSTRUCTIONS FOR FUTURE USE. ®2013 Harmony Juvenile Products HMYV7HBB-F4 12/10 CAN...
-
Page 2: Welcome To The Harmony Family
WELCOME TO THE HARMONY FAMILY! Thank you for choosing the Harmony® V7 3-in-1 Convertible Car Seat. You have chosen one of the safest and most comfortable options available for your child on the market today. At Harmony, we pride ourselves on bringing the most innovative, feature-rich products to our valued customers. -
Page 3: Table Of Contents
TABLE OF CONTENTS Welcome to the Harmony family ....... 1 Registration information ..........4 If you need help ............5 Warnings ..............6 General warnings ............ 6 Usage warnings ............7 Injury warnings ............9 Vehicle warnings ............ 9 Certifications ............10 Airbag warnings ............. - Page 4 TABLE OF CONTENTS Installing with Lap/Shoulder or Lap-Only belt system ..........32 Installation safety check ......... 33 Using child restraint with built-in harness ..34 Securing child in the child restraint ....34 Removing child from the child restraint ..36 Using child restraint in booster mode (without internal harness) ........
-
Page 5: Registration Information
Harmony Juvenile Products 2450 Cohen Street Montreal, Quebec, H4R 2N6, Canada or call 1-877-306-1001 or register online: http://www.harmonyjuvenile.com/register... -
Page 6: If You Need Help
IF YOU NEED HELP Please fill in the information below for future reference. The model number and manufacturing date can be found on a label on the underside of your child restraint base. Model Number: _______________________________ Manufacture Date: _____________________________ Date of Purchase: ______________________________ Our Customer Service Department is standing by to help you with any questions or concerns you may have regarding installation, use, care, parts... -
Page 7: Warnings
WARNINGS GENERAL WARNINGS WARNING! FAILURE TO PROPERLY READ, FOLLOW AND USE THESE INSTRUCTIONS AND THE CHILD RESTRAINT LABELS INCREASES THE RISK OF SERIOUS INJURY OR DEATH IN A SHARP TURN, SUDDEN STOP OR CRASH. Your child’s safety depends on the proper installation and use of this child restraint. -
Page 8: Usage Warnings
Make it a firm rule that the vehicle does not move until everyone is buckled up. MAKE NO EXCEPTIONS. Harmony Juvenile Products advises against loaning or passing along a child restraint. DO NOT USE A SECOND-HAND CHILD RESTRAINT or a child restraint whose history you do not know. - Page 9 According to accident statistics, CHILDREN ARE SAFER WHEN PROPERLY RESTRAINED IN REAR VEHICLE SEATING POSITIONS THAN IN THE FRONT SEATING POSITION. Please study the section “Choosing an appropriate vehicle seat location” (pg. 12). Many local police and fire departments frequently hold safety inspection events to ensure that child restraints are properly installed.
-
Page 10: Injury Warnings
INJURY WARNINGS INJURIES MAY OCCUR EVEN IF YOU ARE NOT IN A CRASH if the child restraint is not properly installed or if your child is not properly secured in the child restraint. DO NOT leave folding vehicle seats unlatched. In the event of a sharp turn, sudden stop or crash, a loose seat back could prevent the child restraint from protecting the child as well as it should. -
Page 11: Certifications
strap anchor. Read and follow these instructions, and your vehicle owner’s manual carefully. NEVER attach two UAS lower connectors to the same anchor point. CERTIFICATIONS This child restraint system conforms to Canada Motor Vehicle Safety Standards, section 213 and 213.2. WHEN USED WITH HARNESS SYSTEM: This child restraint conforms to Canada Motor Vehicle Safety Standards 213 and is certified for use in passenger... -
Page 12: Damage Warnings
This child restraint may be used in a rear seating position equipped with side impact airbags providing they are: • Roof mounted; • “Curtain” type deployment; • Will NOT interfere with, impact or in any way reposition the child restraint when inflated. Please refer to your vehicle owner’s manual for airbag type, and for appropriate use with child restraints. -
Page 13: Choosing An Appropriate Vehicle Seat Location
Some vehicles have NO seating positions which are compatible with this child restraint. If in doubt, consult your vehicle owner’s manual or call Harmony Juvenile Products. WARNING! Transport Canada reports that according to accident statistics, children aged 12 and under are safest when riding in the REAR seats, away from front airbags. -
Page 14: Height And Weight Limitations
WARNING! Only use this child restraint in forward-facing vehicle seats. Side-facing or rear-facing seats in vans, station wagons or trucks CANNOT be used. THE VEHICLE SEAT MUST FACE FORWARD. DO NOT use the child restraint with the following vehicle seats: •... -
Page 15: With Built-In Harness
WARNING: Verify your child’s height and weight frequently. DO NOT guess before choosing the proper setup for your child. Harmony Juvenile Products recommends using the child restraint WITH the internal harness system as long as possible until the weight or height limits specified are reached. -
Page 16: Without Built-In Harness, Without Back Support
If tops of ears are above the top of the booster seat, child is too large for the booster seat. FOR MAXIMUM SAFETY: If child is between 10 and 23 kg (22 and 50 lbs) and shoulders are below the upper harness slots, we highly recommend use of the built-in harness for as long as possible. -
Page 17: Maximum Height
MAXIMUM HEIGHT WARNING! With Back Support: Child is too tall when top of ears (mid-point of child’s head) are above the top of the child restraint. Without Back Support: Child is too tall when top of ears (mid-point of child’s head) are above the top of the vehicle seat back or vehicle headrest. -
Page 18: Parts List
PARTS LIST A - Backrest fabric cover (pre-installed) B - Shoulder harness slots (x3) C - Shoulder pads D - Chest clip E - Harness F - Harness buckle and clips G - Crotch strap and pad H - Seat fabric cover (pre-installed) I - Metal up-front harness adjuster button (above strap) J - Up-front harness adjustment strap... - Page 19 PARTS LIST...
-
Page 20: Parts List
PARTS LIST... -
Page 21: Assembling/Unassembling Child Restraint
ASSEMBLING/UNASSEMBLING CHILD RESTRAINT Adult assembly required; 2 x Phillips Screwdrivers required. 1. Identify the 6 cm (2.3 inch) screws pre-installed in the base of the child restraint under the fabric in the each armrest ❶. Remove both screws and Hex bolts, and set aside. -
Page 22: Vehicle Seating Positions
Insert the 1.2 cm (0.5 inch) screw with washer on opposite side and tighten ❷. TIP: If connector rod does not pass through easily, make sure it is aligned with holes and tap screw head lightly to guide it through the plastic. 6. -
Page 23: Installing Child Restraint: Uas Or Vehicle Seat Belt
WITHIN THE SAME VEHICLE. NOT ALL VEHICLE SEAT BELTS CAN BE USED WITH THIS CHILD RESTRAINT. If you are unsure, consult your vehicle owner’s manual or call Harmony Juvenile Products. Review your vehicle owner’s manual for vehicle seat belt use with child restraint systems. -
Page 24: Unsafe Vehicle Seat Belt Systems
UNSAFE VEHICLE SEAT BELT SYSTEMS This child restraint can be installed properly using MOST vehicle 3-point lap/shoulder seat belts. However, some vehicle seat belts are not safe to use as their anchoring points may not allow for a secure installation. NEVER use any unsafe vehicle seat belt systems. -
Page 25: Installing Locking Clip
INSTALLING LOCKING CLIP A locking clip is used to prevent certain vehicle seat belts from loosening before a sudden stop or crash. The locking clip can ONLY be used on a vehicle lap/shoulder belt. A locking clip will not fix all types of vehicle seat belt problems. If your vehicle’s 3-point lap/shoulder seat belt is equipped with an Emergency Locking Retractor (ELR) that is NOT convertible to function as an Automatic... -
Page 26: Using Top Tether
(see “Installation safety check”, pg. 33). If you have any questions, please contact Harmony Juvenile Products customer service. Store locking clip when not in use. -
Page 27: Preparing Child Restraint For Use
• With the child restraint installed ❷ with the UAS or vehicle seat belt, tighten the Top Tether strap securely by pulling on the free end of the Top Tether strap ❷. • To loosen, press the Top Tether release button ❸. ❸... -
Page 28: Adjusting Harness Shoulder Straps
Place your child in the child restraint with their back flat against the backrest: 1. Take note of the shoulder harness slots at or immediately above their shoulders. This child restraint has three (3) harness height positions. 2. Take note of the crotch slot at or immediately in front of your child. -
Page 29: Adjusting Crotch Strap Position
REMEMBER to check the shoulder straps and crotch strap position frequently and move to the next position when necessary. The harness straps must go in the slots even with or just above the shoulders. WARNING! FAILURE TO REINSTALL THE HARNESS STRAPS CORRECTLY COULD RESULT IN SERIOUS INJURY OR DEATH. -
Page 30: Installing Child Restraint
REMEMBER to check the shoulder straps and crotch strap position frequently and move them to the next position when necessary. The harness straps MUST be in the height position even with or just above the shoulders, and the crotch strap MUST be in the slot at or immediately in front of your child. -
Page 31: Uas (Universal Anchorage System)
WARNING: Remove the vehicle headrest if it inhibits the child restraint from lying flush against the vehicle seat back. ❷ UAS (UNIVERSAL ANCHORAGE SYSTEM) If your vehicle is equipped with UAS, the vehicle UAS anchorage points may be visible at the seat crease. If not visible, they may be marked with this symbol. -
Page 32: Installing With Uas System
INSTALLING WITH UAS SYSTEM 1. Unhook UAS. ease ❶ installation, extend UAS to its maximum length. Ensure the UAS strap is NOT twisted and that the UAS connectors are facing down ❶. 2. Place the child restraint flush ❷ against a forward-facing vehicle seat. -
Page 33: Installing With Lap/Shoulder Or Lap-Only Belt System
6. Secure the top of the child restraint using the Top Tether strap (see “Using Top Tether”, pg. 25). 7. Conduct a safety check for secure installation (see “Installation safety check”, pg. 33). Perform this test every time you drive with your child and whenever you readjust the child restraint as your child grows. -
Page 34: Installation Safety Check
simultaneously release the extra belt length until seat belt is taught and has no slack ❺. 6. The locked seat belt retractor will not allow you to add any length to the belt until you unbuckle the seat belt. For more information on how to tighten the belt for your seat belt system, see your vehicle owner’s manual. -
Page 35: Using Child Restraint With Built-In Harness
USING CHILD RESTRAINT WITH BUILT-IN HARNESS WARNING! FAILURE TO PROPERLY ADJUST THE HARNESS STRAPS FOR YOUR CHILD INCREASES THE RISK OF SERIOUS INJURY OR DEATH IN THE EVENT OF A SHARP TURN, SUDDEN STOP OR CRASH. In a crash, the child restraint will provide NO protection for your child unless the harness straps are properly secured. - Page 36 ❷ and simultaneously pull the chest strap towards you ❸. ❸ 3. Unbuckle harness straps pressing on the RED buckle release button and by pulling the buckle ❷ clips out ❹. Move harness straps to the side. ❹ 4. Place child in child restraint with child’s back flat against back of the backrest.
-
Page 37: Removing Child From The Child Restraint
and the child’s shoulder ❽. ❽ A snug strap should not allow any slack. It lies in a relatively straight line without sagging. It should not press the child’s flesh or cause your child’s body to be in an unnatural position. 8. -
Page 38: Using Child Restraint In Booster Mode
USING CHILD RESTRAINT IN BOOSTER MODE (WITHOUT INTERNAL HARNESS) REMOVING/INSTALLING HARNESS 1. Open chest clip and harness buckle. 2. Face the rear of the child restraint ❶ and remove the harness straps from the splitter plate ❶. 3. Pull up-front harness adjustment strap as far as it will go. -
Page 39: Booster With Backrest
It is recommended to rethread the ❺ chest clips and chest pads onto the harness and clip the entire harness system together for storage as to avoid losing pieces for future use. To reinstall, reverse the above steps. BOOSTER WITH BACKREST WARNING! FAILURE TO PROPERLY SECURE YOUR CHILD IN THE BOOSTER SEAT INCREASES THE RISK OF SERIOUS... - Page 40 NEVER USE A LOOSE SHOULDER ❸ BELT. NEVER position the shoulder belt under the child’s arm ❸ or place the shoulder belt behind the child’s back ❹. ❹ Lap portion of lap/shoulder belt MUST be low and snug across the hips, just touching the child’s thighs.
-
Page 41: Securing Child And Booster Seat In Vehicle
THE LAP BELT PORTION MUST PASS UNDER BOTH ARMRESTS. NEVER USE A VEHICLE LAP-ONLY BELT WHEN USING THIS CHILD RESTRAINT. WARNING: To avoid possible entanglement and choking with your vehicle’s shoulder belts, Harmony Juvenile Products recommends that the following precautions are taken when installing your booster seat:... - Page 42 7. Pull the shoulder portion of the vehicle seat belt all the way out until the retractor locks. 8. SLOWLY let the seat belt retract until it is snug against your child. 9. ENSURE that the seat belts do not press on the child’s flesh or push the child’s body into an unnatural position.
-
Page 43: Booster Without Backrest
5. Ensure the buckle is secure by gently pulling on it. WARNING: To avoid possible entanglement and choking with your vehicle’s shoulder belts, Harmony Juvenile Products recommends that the following precautions are taken when installing your booster seat: 6. -
Page 44: Installing Shoulder Belt Guide
8. ENSURE that the belts do not press on the child’s flesh or push the child’s body into an unnatural position. 9. Do the same for all unused vehicle seat belts. 10. Adjust the vehicle belt’s shoulder section to ensure that shoulder belt lies across child’s shoulder and chest, and NOT across child’s face or neck. -
Page 45: Using Shoulder Belt Guide
USING SHOULDER BELT GUIDE 1. Slide the vehicle’s shoulder belt ❶ into the RED clip ensuring it is flat. Position the belt guide just above the child’s shoulder ❶. THE VEHICLE’S SHOULDER BELT MUST LIE ACROSS THE CHILD’S SHOULDER. OPENING OF RED BELT GUIDE CLIP MUST FACE FORWARD. -
Page 46: Installing Cup Holder (When Applicable)
and unhook loops from plastic base. 3. Gently slide fabric cover off the backrest. Base: 4. Locate elastic fabric loops (x2) and snaps (x2) along base and detach from child restraint. 5. Gently slide fabric cover off the plastic base from the back of the child restraint towards the front of the seat. -
Page 47: Care And Maintenance
If you cannot get the harness to remain tight with the buckle securely locked, DO NOT USE this child restraint. Call Harmony Juvenile Products to purchase a replacement harness or buckle. AIRCRAFT INSTALLATION This restraint is certified for use in aircraft ONLY when used WITH the harness. -
Page 48: Instructions Manual Storage
WARRANTY This child restraint was manufactured by Harmony® Juvenile Products (HJP). HJP warrants this product to the original retail purchaser as follows: LIMITED 1-YEAR WARRANTY This child restraint is warranted against defective materials and workmanship for one (1) year from the date of original purchase. - Page 49 This warranty does not include damages which arise from negligence, misuse, or use not in accordance with this instruction manual. The use of non-Harmony branded covers, inserts, toys, accessories or tightening devices is not approved by HJP. Their use could cause this child restraint to fail federal safety standards or perform worse in a crash.
- Page 50 V7 SIÈGE D’AUTO À POSITIONNEMENT RÉGLABLE 3-EN-1 MANUEL D’EMPLOI Ce harnais d’auto est conçu pour les enfants dont la taille répond aux exigences suivantes: AVEC HARNAIS: Poids: 10 - 23 kg (22 - 50 livres) Hauteur: 74 - 114 cm (29 - 45 pouces)
- Page 51 BIENVENUE À LA FAMILLE HARMONY! Merci d’avoir choisi le V7 siège d’auto à positionnement réglable 3-en-1 Harmony®, un des sièges d’auto les plus sécuritaires et les plus confortables offerts sur le marché d’aujourd’hui. Harmony tire fierté d’offrir à sa clientèle des produits dotés des plus nombreux dispositifs novateurs...
- Page 52 TABLE DES MATIÈRES Bienvenue à la famille Harmony ........ 1 Enregistrement ............4 Si vous désirez de l’aide ….......... 5 Avertissements ............6 Consignes générales ..........6 Consignes d’utilisation ..........8 Avertissements - blessures ........9 Consignes du véhicule ..........10 Usages conformes aux normes ........
- Page 53 TABLE DES MATIÈRES Inclinaison .............. 32 Dispositif universel d’ancrages d’attaches (UAS) ..32 Installation à l’aide du dispositif UAS ....33 Installation à l’aide de la ceinture trois points ou de la ceinture abdominale ........34 Vérification de l’installation ........35 Utilisation à...
-
Page 54: Enregistrement
à: Harmony Juvenile Products 2450 rue Cohen Montréal, Québec, H4R 2N6, Canada ou téléphonez au: 1-877-306-1001 ou en ligne au: http://www.harmonyjuvenile.com/register... -
Page 55: Si Vous Désirez De L'aide
SI VOUS DÉSIREZ DE L’AIDE Remplir les informations ci-dessous à titre de référence. Le numéro de modèle et la date de fabrication se situent sur une étiquette en dessous du harnais d’auto. Numéro de modèle: ____________________________ Date de fabrication: _____________________________ Date d’achat: __________________________________ Nos préposés au service à... -
Page 56: Avertissements
AVERTISSEMENTS CONSIGNES GÉNÉRALES AVERTISSEMENT! FAUTE DE LIRE ET SUIVRE ATTENTIVEMENT CES INSTRUCTIONS ET LES ÉTIQUETTES DU HARNAIS D’AUTO AUGMENTENT LES RISQUES DE BLESSURES GRAVES OU DE MORTALITÉ EN CAS DE VIRAGE SERRÉ, D’ARRÊT BRUSQUE OU DE COLLISION. L’installation et l’usage correct de ce harnais d’auto sont essentiels à... - Page 57 NE FAITES AUCUNE EXCEPTION. Harmony Juvenile Products vous déconseille l’emprunt ou la location de harnais d’auto. NE PAS UTILISER UN HARNAIS D’AUTO DE SECONDE MAIN ou un harnais d’auto dont vous ne connaissez pas les antécédents.
-
Page 58: Consignes D'utilisation
d’expiration de ce harnais d’auto est indiquée au bas de la base du siège. CESSER L’UTILISATION ET DISPOSER DU HARNAIS D’AUTO dès la date indiquée. S’assurer que le produit est disposé de façon à ce qu’il ne soit pas réutilisable (p. ex. dans un sac de poubelles opaque, ne pas vendre à... -
Page 59: Avertissements - Blessures
ce harnais d’auto sans s’assurer qu’ils aient bien pris connaissances des consignes contenues dans ce manuel d’emploi et sur les étiquettes. NE PAS DONNER CE HARNAIS D’AUTO à une autre personne sans aussi lui donner ce manuel d’emploi. Afin d’assurer l’utilisation correcte de ce harnais d’auto, conserver ce manuel d’emploi et s’y référer au besoin. -
Page 60: Consignes Du Véhicule
Ranger le harnais d’auto dans un endroit sécuritaire quand il n’est pas en usage. NE PLACER AUCUN objet lourd sur le harnais d’auto durant son entreposage. CERTAINES PIÈCES DU HARNAIS D’AUTO POURRAIENT DEVENIR ASSEZ CHAUDES POUR BRULER L’ENFANT SI ELLES SONT LAISSÉES AU SOLEIL. Tout contact avec ces pièces pourrait blesser votre enfant. -
Page 61: Avertissements - Coussins De Sécurité Gonflables
LORSQU’UTILISÉ SANS SYSTÈME DE HARNAIS: Ce harnais d’auto (siège d’appoint) est conforme aux exigences des normes 213.2 des Normes de sécurité des véhicules automobiles du Canada. Ce harnais n’est PAS CERTIFIÉ pour usage à bord d’aéronefs lorsqu’il est utilisé comme siège d’appoint SANS le système de harnais. -
Page 62: Avertissements - Dommages
gonflables de votre véhicule et les consignes pour leur usage sécuritaire avec un harnais d’auto. AVERTISSEMENTS - DOMMAGES N’UTILISER AUCUN HARNAIS D’AUTO AYANT ÉTÉ EN USAGE LORS DE TOUT ACCIDENT PEU IMPORTE LA SORTE. Les accidents peuvent causer des dommages non apparents au harnais d’auto. -
Page 63: Positions D'assise Appropriées Du Véhicule
Certains véhicules n’offrent AUCUNE position d’assise compatible avec ce harnais d’auto. En cas de doute, consultez le manuel de votre véhicule ou appelez Harmony Juvenile Products. AVERTISSEMENT! Selon les statistiques d’accidents routiers rapportées par Transports Canada, tout enfant âgé de 12 ans et moins est mieux protégé... - Page 64 AVERTISSEMENT! Utiliser ce harnais d’auto seulement dans les sièges du véhicule faisant face à l’avant. NE PAS utiliser ce harnais d’auto sur des sièges faisant face au côté ou face à l’arrière tel que dans les fourgonnettes, les voitures familiales et les camions. LE SIÈGE DU VÉHICULE DOIT FAIRE FACE À...
-
Page 65: Limites De Hauteur Et De Poids
NE PAS deviner ces mesures afin de choisir l’installation appropriée pour votre enfant. Harmony Juvenile Products conseille l’utilisation de ce harnais d’auto AVEC son propre système de harnais intégré aussi longtemps que possible et/ou jusqu’à ce que votre enfant dépasse le poids et la taille indiqués... -
Page 66: Avec Système De Harnais Intégré
AVEC SYSTÈME DE HARNAIS INTÉGRÉ Votre enfant doit satisfaire à TOUTES les exigences suivantes: • Poids: Entre 10 et 23 kg (22 et 50 lb). • Taille: Entre 74 et 114 cm (29 et 45 po). • Être âgé d’un (1) an et plus. •... -
Page 67: Sans Système De Harnais Intégré - Sans Appuis-Dos
SANS SYSTÈME DE HARNAIS INTÉGRÉ - SANS APPUIS-DOS Votre enfant doit satisfaire à TOUTES les exigences suivantes: • Poids: Entre 18 et 50 kg (40 et 110 lb). • Taille: Entre 102 et 145 cm (40 et 57 po). • La ceinture diagonale DOIT être positionnée en diagonale contre l’épaule de l’enfant et la ceinture abdominale DOIT... -
Page 68: Liste Des Pièces
LISTE DES PIÈCES A - Housse d’appui-dos (préinstallée) B - Fentes pour la hauteur du harnais (x3) C - Épaulières D - Attache de poitrine E - Harnais F - Pinces et boucle du harnais G - Courroie et boucle de la fourche H - Housse de siège (préinstallée) I - Bouton métallique avant pour réglage du harnais (au-dessus de la courroie) - Page 69 LISTE DES PIÈCES...
- Page 70 LISTE DES PIÈCES...
-
Page 71: Assemblage/Désassemblage Du Harnais D'auto
ASSEMBLAGE/DÉSASSEMBLAGE DU HARNAIS D’ A UTO Doit être assemblé par un adulte; deux (2) tournevis cruciformes (Phillips) requis. 1. Repérer les vis de 6 cm (2,3 po) ❶ préinstallées sur la base du harnais d’auto sous la housse de chacun des accoudoirs ❶... -
Page 72: Positions D'assise Du Véhicule
5. Renverser le harnais d’auto et glisser la plaque de base entre les deux points d’ancrage de l’appui-dos ❷. Insérer la bielle de 22,3 cm (8,8 po) à travers le tout et la rattacher de l’autre côté à l’aide de la vis de 1,2 cm (0,5 po) et la rondelle et resserrer. -
Page 73: Installation Du Harnais D'autoà L'aide Du Dispositif Uas Ou De La Ceinture Du Véhicule
Pour les véhicules équipés de coussins gonflables, consulter le manuel du véhicule pour connaitre les consignes d’installation pour les harnais d’auto. Il est OBLIGATOIRE de désactiver le système de coussins gonflables lorsque le harnais doit être installé sur un siège avant. Faute de désactiver le système de coussins gonflables peut causer de blessures graves ou entraîner la mort. -
Page 74: Ceintures De Sécurité Sécuritaires
HARNAIS D’AUTO N’EST PAS COMPATIBLE AVEC TOUS LES TYPES DE CEINTURE DE SÉCURITÉ DU VÉHICULE. En case de doute, consultez le manuel du véhicule ou contactez Harmony Juvenile Products. Consulter le manuel du véhicule afin de connaitre toute consigne pour l’utilisation sécuritaire des ceintures de sécurité... -
Page 75: Installation Du Dispositif D'immobilisation
se verrouille uniquement lorsque le véhicule ralentit, change de direction ou s’arrête brusquement. NE JAMAIS utiliser une ceinture de véhicule automatique et motorisée. NE JAMAIS utiliser un système de ceinture de véhicule où la ceinture abdominale et la ceinture diagonale sont dotées d’enrouleurs individuels. - Page 76 (voir “Vérification de l’installation”, p. 35). Pour toute question, veuillez appeler le service à la clientèle de Harmony Juvenile Products. Bien ranger le dispositif d’immobilisation lorsqu’il n’est pas en usage. NE PAS utiliser le dispositif d’immobilisation en mode...
-
Page 77: Attache Du Haut
ATTACHE DU HAUT L’USAGE DE L’ATTACHE DU HAUT EST OBLIGATOIRE EN TOUT TEMPS. L’utilisation de ce harnais d’auto à l’aide de la courroie de l’attache du haut ancrée au véhicule, comme il est indiqué dans le présent manuel, pourrait réduire les risques et la gravité de blessures ou les risques de mortalité... -
Page 78: Consignes À Suivre Avant L'utilisation Du Harnais D'auto
• Pour desserrer, pousser sur le ❸ bouton de relâchement afin de desserrer la courroie ❸. ATTENTION: S’assurer courroie de l’attache n’est PAS torsadée. CONSIGNES À SUIVRE AVANT L’UTILISATION DU HARNAIS D’AUTO AVERTISSEMENT! L’erreur la plus fréquemment commise par les consommateurs est l’utilisation incorrecte de ce système de harnais. -
Page 79: Ajustement Des Courroies Diagonales Du Harnais
Asseoir l’enfant dans le harnais d’auto en assurant que son dos soit plat contre l’appui-dos: 1. Repérer les fentes du harnais situées à la hauteur des épaules de l’enfant sinon immédiatement supérieures aux épaules. Ce harnais d’auto comprend trois (3) positions de hauteur différentes. -
Page 80: Ajustement Du Positionnement De La Courroie De La Fourche
métal tout en assurant que les courroies ne soient PAS torsadées. Tirer sur le harnais afin d’assurer qu’il soit bien sécurisé. S’ASSURER QUE LES COURROIES DU HARNAIS SOIENT ENTIÈREMENT MONTÉES SUR LA PLAQUE SÉPARATRICE. NE PAS OUBLIER de revérifier le positionnement des courroies diagonales et des courroies de la fourche régulièrement et de modifier le positionnement en hauteur lorsqu’il est nécessaire. -
Page 81: Installation Du Harnais D'auto
S’ASSURER que la courroie est ENTIÈREMENT insérée dans la fente désirée et qu’elle ne soit PAS torsadée. S’ASSURER que la boucle fait FACE À L’AVANT ❷. 5. Pousser la boucle vers le haut à travers la housse. 6. Replacer la housse sur la base plastique et la housse de la courroie de la fourche. -
Page 82: Inclinaison
INCLINAISON Votre harnais d’auto peut être incliné afin d’être correctement installé dans votre véhicule. L’installation de ce harnais d’auto est meilleure lorsque toutes ses surfaces sont en contact avec le siège du véhicule. Placer le harnais d’auto dans la position d’assise désirée (voir ❶... -
Page 83: Installation À L'aide Du Dispositif Uas
Utiliser les ceintures de sécurité du véhicule (et NON les connecteurs UAS) pour toute installation destinée à un enfant de plus de 21,7 kg (48 lb). AVERTISSEMENT: CONSULTER LE MANUEL DE VOTRE VÉHICULE AFIN DE DÉTERMINER L’EMPLACEMENT EXACT DES ÉLÉMENTS DU DISPOSITIF UAS DE VOTRE VÉHICULE AVANT TOUTE INSTALLATION PUISQUE CERTAINS FABRICANTS EXIGENT UN POIDS MAXIMAL PLUS BAS POUR L’USAGE DU DISPOSITIF UAS. -
Page 84: Installation À L'aide De La Ceinture Trois Points Ou De La Ceinture Abdominale
pleine force vers le bas tout en tirant la ❸ ceinture libérée sur sa longueur vers le haut ❸. 5. Au besoin, pousser sur le bouton de relâchement afin de desserrer la courroie UAS ❹. ❹ AVERTISSEMENT: NE JAMAIS rattacher deux (2) connecteurs UAS à... -
Page 85: Vérification De L'installation
3. Boucler la ceinture du véhicule. La ❸ ceinture du véhicule ne DOIT PAS être torsadée. Pour activer l’enrouleur de la ceinture du véhicule: 4. Tirer la ceinture jusqu’à sa longueur maximale (jusqu’à ce qu’elle ne peut être tirée plus loin). Ceci activera alors l’enrouleur. -
Page 86: Utilisation À L'aide Du Système De Harnais Intégré
Le dos du harnais d’auto (le point de contact) doit être sécurisé de façon à limiter son mouvement à moins de 2,5 cm (1 po) dans n’importe quelle direction. Si le harnais d’auto est libre de mouvement ou n’est pas assez bien sécurisé, réinstaller le harnais SINON choisir un autre emplacement pour le harnais d’auto dans votre véhicule (voir “Positions d’assise appropriées du... -
Page 87: Sécuriser L'enfant Dans Le Harnais D'auto
Éviter le port de vêtements excessivement gonflant. SÉCURISER L’ENFANT DANS LE HARNAIS D’AUTO 1. Déboucler la pince du harnais en ❶ poussant sur les boutons tout en séparant les deux extrémités de la pince ❶. 2. Pour desserrer la courroie du harnais: Pousser bouton... - Page 88 NE PAS utiliser le harnais d’auto ❻ si le système de harnais n’est pas correctement sécurisé. 6. Reboucler la pince du harnais ❻. 7. Resserrer le système de harnais en tirant sur le courroie de réglage de harnais sur l’avant jusqu’à ce que ❼...
-
Page 89: Retirer L'enfant Du Harnais D'auto
RETIRER L’ENFANT DU HARNAIS D’AUTO 1. Déboucler la pince du harnais en poussant sur les boutons tout en séparant les deux extrémités de la pince. 2. Desserrer le système de harnais en poussant le bouton de réglage métallique avant situé à l’avant du harnais tout en tirant les courroies diagonales vers soi. -
Page 90: Siège D'appoint Avec Appui-Dos
7. Lever la housse de la base du ❹ siège afin de faire exposer la boucle de la fourche. Retirer la boucle de la fourche en tournant la courroie afin de retirer la plaque métallique du harnais ❺. Entreposer la boucle pour usage futur. - Page 91 AVERTISSEMENT: L’utilisation de la ❶ ceinture trois points du véhicule DOIT être utilisée pour retenir l’enfant dans le siège d’appoint ❶. AVERTISSEMENT: Les ceintures du véhicule DOIVENT être à plat contre la poitrine et les cuisses de l’enfant et ❷ ne DOIVENT PAS être torsadées.
-
Page 92: Sécuriser L'enfant Et Le Siège D'appoint Dans Le Véhicule
de la ceinture de sécurité du ❻ véhicule, NE PAS utiliser ce harnais en mode «siège d’appoint». Utiliser alors un autre mode d’utilisation ou un harnais d’auto différent. NE PAS positionner la ceinture du véhicule par-dessus les accoudoirs ❼ ❻. L’appui-tête du véhicule ne devrait pas causer d’écart entre le siège du véhicule et le siège d’appoint ❼. - Page 93 SEULE POUR SÉCURISER UN ENFANT DANS UN HARNAIS D’AUTO. AVERTISSEMENT: Afin d’éviter tout enchevêtrement ou suffocation, Harmony Juvenile Products conseille de prendre les précautions suivantes lors de l’installation de votre siège d’appoint: 7. Tirer sur la ceinture jusqu’à l’enrouleur soit verrouillé.
-
Page 94: Siège D'appoint Sans Appui-Dos
5. S’assurer que la ceinture est bien bouclée en la tirant doucement. AVERTISSEMENT: Afin d’éviter tout enchevêtrement ou suffocation, Harmony Juvenile Product conseille de prendre les précautions suivantes lors de l’installation de votre siège d’appoint: 6. Tirer sur la ceinture jusqu’à l’enrouleur soit verrouillé. -
Page 95: Installer Le Guide De Positionnement De La Ceinture Diagonale
poitrine et l’épaule de l’enfant et NON son cou ou son visage. LA CEINTURE DIAGONALE DU VÉHICULE DOIT ÊTRE POSITIONNÉE CONTRE L’ÉPAULE DE L’ENFANT ET NON CONTRE SON COU OU SON VISAGE. Si la ceinture n’est pas correctement positionnée contre l’épaule et la poitrine de l’enfant, le guide de positionnement ROUGE de la ceinture diagonale DOIT être employé... -
Page 96: Utiliser Le Guide De Positionnement De La Ceinture Diagonale
UTILISER LE GUIDE DE POSITIONNEMENT DE LA CEINTURE DIAGONALE 1. Glisser la ceinture diagonale du ❶ véhicule dans le dispositif ROUGE tout en assurant qu’elle demeure à plat. Positionner le guide de positionnement immédiatement au-dessus de l’épaule de l’enfant ❶. LA CEINTURE DIAGONALE DOIT ÊTRE POSITIONNÉE... -
Page 97: Retrait/Installation De La Housse
RETRAIT/INSTALLATION DE LA HOUSSE RETIRER: Les housses peuvent être retirées SEULEMENT lorsque le système de harnais a été retiré (voir “Retrait/Installation du harnais”, p. 39, étapes #1 et #2). Appui-dos: 1. Détacher les boutons-pression (x2) le long des côtés de l’appui-dos. 2. -
Page 98: Installation Du Porte-Gobelet (Lorsque Applicable)
INSTALLATION DU PORTE-GOBELET (LORSQUE APPLICABLE) 1. Déterminer le côté sur lequel vous désirez installer le porte-gobelet. Si vous installez le harnais dans un siège arrière situé près d’une porte du véhicule, installez le porte-gobelet à distance de la porte. 2. Repérer la protusion plastique sur chaque côté... -
Page 99: Usage À Bord Des Aéronefs
à l’aide d’une ouate de coton. Si vous n’arrivez pas à sécuriser correctement le harnais en sécurisant la boucle, NE PAS UTILISER ce harnais. Contacter Harmony Juvenile Products afin d’acheter un harnais ou une boucle de rechange. USAGE À BORD DES AÉRONEFS Ce harnais est certifié... -
Page 100: Garantie
GARANTIE Ce harnais d’auto est fabriqué par Harmony® Juvenile Products (HJP). HJP s’engage aux dispositions suivantes devant l’acheteur au détail de ce produit: GARANTIE LIMITÉE D’UN AN La couverture de la garantie de ce harnais d’auto comprend tout matériel et main-d’oeuvre pour une durée d’un (1) an suivant la date du premier achat. - Page 101 RESTRICTIONS DES DOMMAGES La garantie et les recours invoqués par la présente sont exclusifs et remplacent tout autre, qu’il soit par écrit ou verbal, exprès ou tacite. En aucun cas ne sera tenu responsable devant le consommateur ni HJP ni tout détaillant à...
Need help?
Do you have a question about the V7 and is the answer not in the manual?
Questions and answers