Table of Contents
Advertisement
Available languages
Available languages
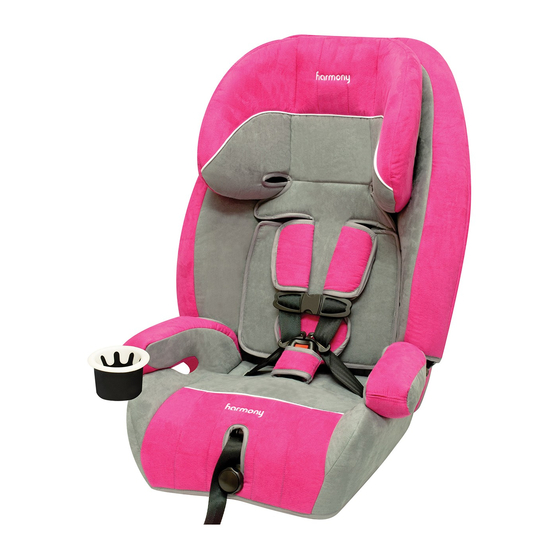
DEFENDER 360°
3-IN-1 DELUXE CAR SEAT
INSTRUCTION MANUAL
This child restraint is designed for use by children
who meet the following requirements:
Height: 27 - 57 in (68.6 - 144.8 cm)
Height: 34 - 57 in (86.4 - 144.8 cm)
Do not install or use this child restraint until you read
and understand the instructions in this manual.
FAILURE TO PROPERLY USE THIS CHILD RESTRAINT
INCREASES THE RISK OF SERIOUS INJURY OR
DEATH IN A SHARP TURN, SUDDEN STOP OR CRASH.
KEEP INSTRUCTIONS FOR FUTURE USE.
RETURN THIS PRODUCT TO THE PLACE OF
STOP
PURCHASE. PLEASE CONTACT HARMONY
JUVENILE PRODUCTS CUSTOMER SERVICE
®Harmony Juvenile Products
WITH HARNESS:
Weight: 22 - 65 lbs (10 - 29.5 kg)
WITHOUT HARNESS:
Weight: 30 - 110 lbs (13.6 - 50 kg)
READ THIS MANUAL
IF ANY PARTS ARE MISSING, DO NOT
AT 1-877-306-1001.
HMYD3HBB-S4
14/06
US
Advertisement
Chapters
Table of Contents

Related Manuals for Harmony DEFENDER 360


Summary of Contents for Harmony DEFENDER 360
- Page 1 DEATH IN A SHARP TURN, SUDDEN STOP OR CRASH. KEEP INSTRUCTIONS FOR FUTURE USE. IF ANY PARTS ARE MISSING, DO NOT RETURN THIS PRODUCT TO THE PLACE OF STOP PURCHASE. PLEASE CONTACT HARMONY JUVENILE PRODUCTS CUSTOMER SERVICE AT 1-877-306-1001. ®Harmony Juvenile Products HMYD3HBB-S4...
-
Page 2: Welcome To The Harmony Family
WELCOME TO THE HARMONY FAMILY! Thank you for choosing the Harmony® Defender 360° 3-in-1 Deluxe Car Seat. You have chosen one of the safest and most comfortable options available for your child on the market. At Harmony, we pride ourselves on bringing the most innovative, feature-rich products to our valued customers. -
Page 3: Table Of Contents
TABLE OF CONTENTS Welcome to the Harmony family ........1 Registration information ..........4 If you need help ............5 Warnings ............... 6 General warnings ............6 Usage warnings ............8 Injury warnings ............9 Vehicle warnings ............. 10 Certifications ............10 Airbag warnings ............ - Page 4 TABLE OF CONTENTS Installing with Lap-and-Shoulder or Lap-Only belt system ............ 32 Installation safety check ..........34 Using child restraint with built-in harness ....34 Securing child in child restraint ......35 Removing child from child restraint ....37 Using child restraint in booster mode (without internal harness) ..........
-
Page 5: Registration Information
Harmony Juvenile Products 1600 53 Street North Bergen, NJ, 07047, USA or call: 1-877-306-1001 or register online: http://www.harmonyjuvenile.com/register... -
Page 6: If You Need Help
IF YOU NEED HELP Please fill in the information below for future reference. The model number and manufacturing date can be found on a label on the underside of your child restraint base. Model Number: _______________________________ Manufacture Date: _____________________________ Date of Purchase: ______________________________ Our Customer Service Department is standing by to help you with any questions or concerns you may have regarding installation, use, care, parts... -
Page 7: Warnings
“Unsfe vehicle seat belt systems” (pg. 23) carefully. If in doubt about installing this child restraint, consult the vehicle owner’s manual or call the Harmony Customer Service Department. WARNING! FAILURE TO PROPERLY READ, FOLLOW AND USE THESE INSTRUCTIONS AND THE CHILD RESTRAINT... - Page 8 Make it a firm rule that the vehicle does not move until everyone is buckled up. MAKE NO EXCEPTIONS. Harmony Juvenile Products advises against loaning or passing along a child restraint. DO NOT USE A SECOND-HAND CHILD RESTRAINT or a child restraint...
-
Page 9: Usage Warnings
Please contact your local emergency services department to see if and when they offer this service. Harmony Juvenile Products recommends ALWAYS USING THE TOP TETHER WHEN USING THIS CHILD RESTRAINT WITH HARNESS. Failure to use the vehicle seat belt AND Top Tether, or LATCH AND Top Tether, or to adjust it properly can result in your child striking the vehicle’s interior in a sharp turn, sudden... -
Page 10: Injury Warnings
DO NOT allow others to install or use this child restraint unless they read and understand all the instructions and labels. DO NOT GIVE THIS CHILD RESTRAINT to someone else without also giving them this instruction manual. To ensure proper child restraint use, keep and store this instruction manual and refer to it when necessary. -
Page 11: Vehicle Warnings
use. DO NOT place heavy objects on top of the child restraint while in storage. PARTS OF THE CHILD RESTRAINT COULD BECOME HOT ENOUGH TO BURN THE CHILD IF LEFT IN THE SUN. Contact with these parts can injure your child. ALWAYS touch the surface of any metal or plastic parts before putting your child in the child restraint. -
Page 12: Airbag Warnings
Vehicle Safety Standard 213.2 and is certified for use in passenger motor vehicles only. This restraint is NOT CERTIFIED for aircraft use when used as a booster WITHOUT the harness. This child restraint must NOT be used in homes, boats, buses, motorcycles, motor homes, or any other vehicles that have non-forward-facing seats, missing seat belts, or whose seat belts do not meet the requirements of... -
Page 13: Choosing An Appropriate Vehicle Seat Location
DO NOT use this child restraint if it is damaged in any way or has missing parts. DO NOT tamper with or modify the child restraint, including the buckles, harness system or LATCH, for any reason. NEVER use a cut, frayed or damaged vehicle seat belt, LATCH belt or harness. - Page 14 WARNING! IMPROPER PLACEMENT OF THE CHILD RESTRAINT INCREASES THE RISK OF SERIOUS INJURY OR DEATH. Some seating positions in your vehicle may NOT be safe for this child restraint. Some vehicles have NO seating positions which are compatible with this child restraint because of the type of seat, seat belt system, airbag system, lack of location to anchor the Top Tether strap and/or any seating positions where...
-
Page 15: Weight And Height Limitations
• The front of the child restraint MUST NOT hang over the edge of the vehicle seat by more than 2 inches (5 cm). Refer to the vehicle owner’s manual child restraint installation instructions for your specific vehicle. DO NOT use this booster seat if it can’t be properly leveled, stabilized, and installed as per this instruction manual. -
Page 16: With Built-In Harness
Harmony Juvenile Products recommends using the child restraint WITH the internal harness system as long as possible until the weight or height limits specified are reached. -
Page 17: Without Built-In Harness, With Back Support
WITHOUT BUILT-IN HARNESS, WITH BACK SUPPORT Your child must meet ALL requirements: • Weight: Between 30 and 110 pounds (13.6 - 50 kg). • Height: Between 34 and 57 inches (86.4 - 144.8 cm). • The shoulder belt MUST lie across child’s shoulder and the lap portion of the belt MUST be positioned low on the child’s hips. -
Page 18: Maximum Height
MAXIMUM HEIGHT WARNING! With Back Support: Child is too tall when top of ears (mid-point of child’s head) are above the top of the child restraint’s headrest. Without Back Support: Child is too tall when top of ears (mid-point of child’s head) are above the top of the vehicle seat back or vehicle headrest. -
Page 19: Parts List
PARTS LIST A - Headrest B - Backrest C - Base D - Shoulder Belt Guides E - Harness Straps, Buckle and Clips F - Chest Clip G - Shoulder Pads H - Crotch Strap and Pad I - 1-Hand Headrest Height Adjustment Handle (Under Headrest Fabric) J - Cup Holder K - Metal Up-Front Harness Adjustment Button... - Page 20 PARTS LIST...
-
Page 21: Parts List
PARTS LIST... -
Page 22: Assembling/Unassembling Child Restraint
ASSEMBLING/UNASSEMBLING CHILD RESTRAINT Adult assembly: 2 x Phillips Screwdrivers required. 1. Locate both sets of screws with plastic knob, washers and plastic encased inner bolts in the hardware bag and set aside. 2. Locate the 0.5 inch (1.2 cm) screw and washer in the hardware bag and set aside. -
Page 23: Installing Child Restraint In Harness Mode: Latch Or Vehicle Seat Belt
Pass inch ❹ Backrest (22.3 connector anchor points through assembly. Insert the washer and 0.5 inch (1.2 cm) screw on opposite side and Base Connector plate screw tighten ❹. TIP: If connector rod does not pass through easily, make sure it is aligned with holes and tap screw head lightly to guide it through the plastic. -
Page 24: Safe Vehicle Seat Belt Systems
LOCATION WITHIN THE SAME VEHICLE. NOT ALL VEHICLE SEAT BELTS CAN BE USED WITH THIS CHILD RESTRAINT. If you are unsure, consult your vehicle owner’s manual or call Harmony Juvenile Products. Review your vehicle owner’s manual for vehicle seat belt use with child restraint systems. -
Page 25: Installing Locking Clip
NEVER use a vehicle seat belt system where the lap and shoulder belts have independent retractors. NEVER use a vehicle seat belt system with top or bottom anchorage points attached to the door in any way. NEVER use lap belts whose anchor points are forward of the seat crease. -
Page 26: Using Top Tether
(see “Installation safety check”, pg. 34). If you have any questions, please contact Harmony Juvenile Products customer service. Store locking clip when not in use. - Page 27 All LATCH seating positions have Top Tether anchors. Check your vehicle owner’s manual for Top Tether anchor locations. If your vehicle is not equipped with a Top Tether anchor, it may be possible to have one installed. Contact your vehicle dealership or a certified mechanic for the proper anchor location and installation.
-
Page 28: Preparing Child Restraint For Use
PREPARING CHILD RESTRAINT FOR USE WARNING! INCORRECT USE OF THE HARNESS SYSTEM IS THE MOST COMMON MISTAKE PEOPLE MAKE. IT IS VERY IMPORTANT TO READ, UNDERSTAND AND FOLLOW ALL INSTRUCTIONS AND WARNINGS. DO NOT MISTAKE COMFORT FOR SAFETY. THE HARNESS SYSTEM MUST BE SNUGLY ADJUSTED AT ALL TIMES. -
Page 29: Adjusting Crotch Strap Position
adjustment button. 4. Squeeze button and lift the headrest until the shoulder straps are at or just above your child’s shoulders. 5. Release the button and listen for a ‘click’ to make sure harness is locked in place. WARNING: To ensure headrest is locked in position, gently push down on headrest. -
Page 30: Recline
5. Push the buckle upwards through the fabric seat pad. 6. Replace fabric seat pad and fabric crotch pad. WARNING! FAILURE TO REINSTALL THE CROTCH STRAPS CORRECTLY COULD RESULT IN SERIOUS INJURY OR DEATH. REMEMBER to check the shoulder straps and crotch strap position frequently and move them to the next position when necessary. -
Page 31: Latch (Lower Anchors And Tethers For Children)
Place the child restraint in the desired seating position (see “Choosing an appropriate vehicle seat location”, pg. 12) and turn the front recline adjust knob ❶ to recline the backrest UNTIL THE BACKREST LIES FLUSH ON THE VEHICLE SEAT BACK ❷. ❶... -
Page 32: Installing With Latch System
Top tether LATCH anchors points anchor points Vehicle seat crease WARNING: CONSULT YOUR VEHICLE OWNER’S MANUAL FOR THE EXACT PLACEMENT OF THESE ELEMENTS IN YOUR VEHICLE, AND FOR MAXIMUM LATCH WEIGHT ALLOWANCES PRIOR TO INSTALLATION AS SOME MANUFACTURERS HAVE LOWER MAXIMUM WEIGHT ALLOWANCES FOR LATCH USAGE. -
Page 33: Installing With Lap-And-Shoulder Or Lap-Only Belt System
IP: If you are not able to tighten ❹ LATCH using the method above, try pulling the LATCH strap up through the belt path (under the fabric) ❹, then tighten. 5. Should you need to loosen the LATCH, push the LATCH release ❺... - Page 34 2. Thread the vehicle seat belt ❷ through the belt slot opening and out the other side. See illustrations for proper routing path of Lap- and-Shoulder Belt ❷ or Lap-Only Belt ❸. 3. Buckle the vehicle seat belt. The vehicle seat belt MUST NOT be twisted.
-
Page 35: Installation Safety Check
INSTALLATION SAFETY CHECK Perform this test EVERY TIME you drive with your child and whenever you readjust the child restraint as your child grows: ❶ Rock the child restraint back and forth and side to side to make sure the LATCH or vehicle seat belt does not lengthen or loosen, and the child restraint does not move easily ❶. -
Page 36: Securing Child In Child Restraint
Incorrect use of the harness system is the most common mistake people make. It is VERY important to read, understand and follow ALL instructions and warnings. DO NOT mistake comfort for safety. The harness system MUST be snugly adjusted at all times. Snugly adjust the harness provided with this child restraint around your child. - Page 37 5. Adjust headrest height so that the bottom of the headrest is even with the top of the child’s shoulders. 6. Place harness straps over child’s ❺ shoulders and insert buckle clips into buckle until they ‘click’ into place ❺. ENSURE that harness clips and buckle are properly fastened by gently tugging on each.
-
Page 38: Removing Child From Child Restraint
REMOVING CHILD FROM CHILD RESTRAINT 1. Open harness chest clip by pressing in pin clips while pulling apart the two piece chest clip. 2. Loosen the harness system by pressing on the up-front metal harness adjuster, and simultaneously pulling the shoulder straps towards you. 3. -
Page 39: Booster With Backrest
7. Pull up-front harness ❺ adjustment strap as far as it will go. This will lock the splitter plate into the base of the seat ❺. 8. Roll strap tightly, secure roll with an elastic band and store rolled strap under the fabric seat pad in the opening of the up-front adjuster. - Page 40 WARNING! FAILURE TO PROPERLY SECURE YOUR CHILD IN THE BOOSTER SEAT INCREASES THE RISK OF SERIOUS INJURY OR DEATH IN THE EVENT OF A SHARP TURN, SUDDEN STOP OR CRASH. In a crash, the child restraint provides NO protection for your child unless the vehicle 3-point lap-and-shoulder belt is properly secured.
- Page 41 NEVER position the shoulder belt ❸ under the child’s arm ❸ or place the shoulder belt behind the child’s back ❹. Lap portion of lap-and-shoulder belt MUST be low and snug across the hips, just touching the child’s thighs. The lap portion MUST NOT ❹...
-
Page 42: Entanglement With Vehicle Belt
ENTANGLEMENT WITH VEHICLE BELT WARNING: To avoid possible entanglement and choking with your vehicle’s shoulder belts, Harmony Juvenile Products recommends that the following precautions are taken when installing your booster seat: 1. Pull the shoulder portion of the vehicle seat belt all the way out until the retractor locks. -
Page 43: Booster Without Backrest
5. Thread both sides of the lap belt ❶ and the lower end of the shoulder belt UNDER BOTH armrests ❷ and ensure that the lap belt is snug ❷ across child’s hips just touching ❸ their thighs and is NOT across their stomach. -
Page 44: Installing Shoulder Belt Guide
Booster must be level, stable and not rock side- to-side (see “Choosing an appropriate vehicle seat location”, pg. 12). 2. Have your child sit on the booster seat with their back flat against the vehicle seat. 3. Thread both sides of the lap belt and the lower end of the shoulder belt UNDER BOTH armrests as indicated and ensure that the lap belt is snug... -
Page 45: Using Shoulder Belt Guide
USING SHOULDER BELT GUIDE 1. Slide the vehicle’s shoulder belt into the RED clip ensuring it is flat. Position the belt guide just above the child’s shoulder ❶. ❶ THE VEHICLE’S SHOULDER BELT MUST LIE ACROSS THE CHILD’S SHOULDER. OPENING OF RED BELT GUIDE CLIP MUST FACE FORWARD. -
Page 46: Removing/Installing Fabric Seat Cover
REMOVING/INSTALLING FABRIC SEAT COVER TO REMOVE Fabric covers can ONLY be removed once the harness system has been removed (see “Removing/Installing harness”, pg. 37 - #1-3). HEADREST: 1. Gently slide fabric downwards off the top of the headrest. 2. Unhook the elastic loops from each headrest shoulder belt guide opening on the bottom of the headrest. -
Page 47: Installing Cup Holder (When Applicable)
CAUTION: Reinstall harness system if applicable (see “Removing/Installing harness”, pg. 37). INSTALLING CUP HOLDER (WHEN APPLICABLE) 1. The cup holder can be installed on either side of the child restraint. 2. Locate the opening in the end of either armrest. 3. -
Page 48: Aircraft Installation
If you cannot get the harness to remain tight with the buckle securely locked, DO NOT USE this child restraint. Call Harmony Juvenile Products to purchase a replacement harness or buckle. AIRCRAFT INSTALLATION This restraint is certified for use in aircraft ONLY when used WITH the harness. -
Page 49: Warranty
This warranty does not include damages which arise from negligence, misuse, or use not in accordance with this instruction manual. The use of non-Harmony branded covers, inserts, toys, accessories or tightening devices is not approved by HJP. Their use could cause this child restraint to fail federal safety standards or perform worse in a crash. - Page 50 this product be liable to you for any damages, including incidental or consequential damages, or loss of use arising out of the use or inability to use this product. PLEASE REGISTER THIS CHILD RESTRAINT WITHIN 30 DAYS OF PURCHASE TO EXPEDITE WARRANTY CLAIMS AND TO VERIFY ORIGINAL DATE OF PURCHASE.
- Page 51 INSTRUCCIONES PARA PODER USARLAS EN EL FUTURO. SI LE FALTA ALGUNA PIEZA, NO DEVUELVA ESTE PRODUCTO AL LUGAR DE COMPRA. PARE POR FAVOR LLAME AL 1-877-306-1001 PARA CONTACTAR AL SERVICIO A LA CLIENTELA DE HARMONY JUVENILE PRODUCTS. ®Harmony Juvenile Products HMYD3HBB-S4 14/06...
- Page 52 ¡BIENVENIDO A LA FAMILIA HARMONY! Gracias por escoger el asiento de seguridad infantil elite 3-en-1 Defender 360° de Harmony®. Usted ha elegido una de las opciones más seguras y cómodas actualmente disponibles en el mercado para su niño. En Harmony, nos sentimos orgullosos de poder ofrecer los productos más innovadores, y de características...
- Page 53 ÍNDICE DE CONTENIDOS ¡Bienvenido a la familia Harmony! ......1 Información de registro ..........4 Si necesita ayuda ............5 Advertencias ............... 6 Advertencias generales .......... 6 Advertencias en cuanto a su uso ......8 Advertencias en cuanto a lesiones ....... 10 Advertencias en cuanto a su vehículo ....
- Page 54 ÍNDICE DE CONTENIDOS Instalación con el cinturón de seguridad de hombro y regazo o sólo de regazo ... 36 Inspección de seguridad de la instalación ....37 Uso del asiento con el arnés integrado ...... 38 Cómo sujetar al niño en el asiento de seguridad ... 39 Cómo sacar al niño del asiento de seguridad ..
-
Page 55: Información De Registro
Harmony Juvenile Products 1600 53 Street, North Bergen, NJ, 07047, EEUU llame al: 1-877-306-1001 o inscriba la información en línea:... -
Page 56: Si Necesita Ayuda
SI NECESITA AYUDA Por favor rellene la información en los espacios provistos para referencia futura. El número de modelo y la fecha de fabricación se encuentran anotados en una etiqueta adhesiva bajo el asiento de seguridad. Número de modelo: ____________________________ Fecha de fabricación: ____________________________ Fecha de compra: ______________________________ Nuestro departamento de servicio al cliente está... -
Page 57: Advertencias
25. Si tiene alguna duda sobre la instalación de este asiento, consulte el manual del usuario de su vehículo o llame a la línea de servicio al cliente de Harmony. ¡ADVERTENCIA! EL HECHO DE NO LEER, SEGUIR Y USAR... - Page 58 Siga todas las indicaciones escritas en las etiquetas de este asiento de seguridad y en el manual de instrucciones. NO INSTALE NI USE ESTE ASIENTO DE SEGURIDAD HASTA QUE HAYA LEÍDO Y COMPRENDIDO LAS INSTRUCCIONES DE ESTE MANUAL Y DEL MANUAL DEL USUARIO DE SU AUTOMÓVIL.
-
Page 59: Advertencias En Cuanto A Su Uso
Harmony Juvenile Products le aconseja que no preste ni pase de mano en mano los asientos de seguridad. NUNCA USE UN ASIENTO DE SEGURIDAD INFANTIL DE SEGUNDA MANO o uno del que no conozca su historia. Para prevenir lesiones debido a deterioro, daños escondidos, etc., deje de usar este asiento si tiene más... - Page 60 Póngase en contacto con su departamento local de servicios de emergencia para ver si ellos ofrecen este servicio y cuándo lo hacen. Harmony Juvenile Products le recomienda que SIEMPRE USE LA CORREA DE ANCLAJE SUPERIOR CUANDO UTILICE ESTE ASIENTO DE SEGURIDAD CON EL ARNÉS.
-
Page 61: Advertencias En Cuanto A Lesiones
ADVERTENCIAS EN CUANTO A LESIONES SU NIÑO PUEDE LESIONARSE EN EL VEHÍCULO INCLUSO SIN QUE USTED CHOQUE, si el asiento de seguridad no está debidamente instalado o si su niño no está sujeto en el asiento de seguridad de la forma apropiada. -
Page 62: Certificaciones
NO use este asiento de seguridad si no puede ser instalado debidamente. Es posible que su vehículo no cuente con un asiento adecuado para este asiento de seguridad debido al tipo de cinturón de seguridad que trae, el sistema de bolsas de aire o por falta de un punto de anclaje para la correa de anclaje superior. -
Page 63: Advertencias En Cuanto A Las Bolsas De Aire
Este asiento de seguridad es compatible con el sistema de anclaje de seguridad infantil LATCH. ADVERTENCIAS EN CUANTO A LAS BOLSAS DE AIRE NUNCA COLOQUE ESTE ASIENTO DE SEGURIDAD EN UN ASIENTO DE SU VEHÍCULO QUE TENGA UNA BOLSA DE AIRE ACTIVADA. Al inflarse, una bolsa de aire puede causar graves lesiones o incluso la muerte. -
Page 64: Selección De Un Asiento Apropiado Dentro De Su Vehículo
sistema LATCH o el arnés si está cortado, desgastado o dañado. NO use ningún objeto para elevar el asiento de seguridad sobre el asiento del vehículo. Modificaciones que no han sido probadas, como añadir más acolchonamiento, podrían afectar la seguridad del asiento de seguridad y resultar en lesiones graves o incluso la muerte en caso de sufrir un choque. - Page 65 ¡ADVERTENCIA! LA COLOCACIÓN INCORRECTA DEL ASIENTO DE SEGURIDAD AUMENTA EL RIESGO DE LESIONES GRAVES E INCLUSO DE MUERTE. Algunos asientos dentro de su vehículo pueden NO ser seguros para instalar este asiento de seguridad. Algunos vehículos NO cuentan con ningún asiento que sea compatible con este asiento de seguridad debido al tipo de asiento, el cinturón de seguridad del asiento, sistema de bolsas de aire o falta de un punto donde anclar la correa de...
- Page 66 EL ASIENTO DE SU VEHÍCULO DEBE MIRAR HACIA DELANTE. NO use este asiento de seguridad en los siguientes asientos de su vehículo: • Asientos que miren hacia los lados de su vehículo. • Asientos que miren hacia la parte trasera de su vehículo.
-
Page 67: Limitaciones De Peso Y Altura
Harmony Juvenile Products recomienda que se use el asiento de seguridad CON el arnés integrado todo el tiempo que sea posible, hasta que el niño alcance las limitaciones para el peso o la altura especificadas. -
Page 68: Con El Arnés Integrado
CON EL ARNÉS INTEGRADO Su niño debe cumplir TODOS los requisitos: • Peso: 10 a 29,5 kg (22 a 65 libras). • Altura: 68,6 a 144,8 cm (27 a 57 pulg.). • Tener un (1) año de edad como mínimo. •... -
Page 69: Sin El Arnés Integrado, Sin Respaldo
SIN EL ARNÉS INTEGRADO, SIN RESPALDO Su niño debe cumplir TODOS los requisitos: • Peso: 13,6 a 50 kg (30 a 110 libras) • Altura: 86,4 a 144,8 cm (34 a 57 pulg.) • El cinturón de hombro DEBE ajustarse cruzando el hombro del niño y la parte del regazo del cinturón DEBE cruzar la parte baja de la cadera del niño. -
Page 70: Lista De Partes
LISTA DE PARTES A - Apoyacabeza B - Respaldo C - Base D - Guía para el cinturón de hombro E - Correas, hebilla y enganches del arnés F - Enganche a la altura del pecho G - Almohadillas para los hombros H - Correa y almohadilla de la entrepierna I - Manilla para ajustar la altura del apoyacabeza con una sola mano (situada bajo la funda de tela... - Page 71 LISTA DE PARTES...
- Page 72 LISTA DE PARTES PARA COMPRAR REPUESTOS: Si se encuentra en Estados Unidos o Canadá, por favor póngase en contacto con nosotros en www.harmonyjuvenile.com o por teléfono al número 1-877-306-1001.
-
Page 73: Montaje Y Desmontaje Del Asiento
MONTAJE Y DESMONTAJE DEL ASIENTO Un adulto debe montarlo: se necesitan 2 destornilladores tipo Phillips. 1. Ubique en la bolsa de piezas de montaje ambos juegos de tornillos con pomos plásticos, arandelas y pernos interiores revestidos de plástico, y apártelos. 2. -
Page 74: Instalación Del Asiento En Modo Con Arnés
anclaje del respaldo. Pase ❹ Puntos de la varilla conectora de anclaje 22,3 cm (8,8 pulg.) de largo través ensamblaje. Inserte arandela y el tornillo de Placa de Tornillo la base conector 1,2 cm (0,5 pulg.) en el lado opuesto y apriételos ❹. UGERENCIA: Si la varilla conectora no pasa fácilmente, asegúrese de que esté... -
Page 75: Sistemas De Cinturones De Seguridad
SEGURIDAD DE UN VEHÍCULO PUEDEN SER UTILIZADOS CON ESTE ASIENTO DE SEGURIDAD. Si no está seguro, consulte el manual del usuario de su vehículo o póngase en contacto con Harmony Juvenile Products. Revise el manual del usuario de su vehículo para obtener más detalles en cuanto al uso de los cinturones... -
Page 76: Sistemas De Cinturones De Seguridad
SISTEMAS DE CINTURONES DE SEGURIDAD DEL VEHÍCULO QUE NO SON SEGUROS Este asiento de seguridad puede ser instalado adecuadamente usando la MAYORÍA de los cinturones de seguridad de tres puntos que van sobre el hombro y el regazo. Sin embargo, hay algunos cinturones de seguridad que no son seguros para emplearse con el asiento de seguridad, ya que puede que sus puntos de anclaje para el cinturón no permitan una instalación... -
Page 77: Instalación Del Gancho De Fijación
NUNCA use cinturones de regazo cuyos puntos anclaje encuentren por delante del pliegue del asiento. INSTALACIÓN DEL GANCHO DE FIJACIÓN Un gancho de fijación se usa para evitar que ciertos tipos de cinturones de seguridad de automóvil se aflojen ante una parada repentina o una colisión. - Page 78 (véase “Inspección de seguridad de la instalación”, página 37). Si le surge alguna pregunta, por favor póngase en contacto con el servicio a la clientela de Harmony Juvenile. Cuando no esté usando el gancho de fijación, guárdelo en su lugar de almacenaje.
-
Page 79: Uso De La Correa De Anclaje Superior
USO DE LA CORREA DE ANCLAJE SUPERIOR LA CORREA DE ANCLAJE SUPERIOR DEBE SER UTILIZADA EN TODO MOMENTO AL USAR EL ASIENTO DE SEGURIDAD CON EL ARNÉS INTEGRADO. Usar su asiento de seguridad con la correa de anclaje superior anclada adecuadamente en su vehículo, tal y como se indica en estas instrucciones, puede reducir las posibilidades de que su niño sufra lesiones, así... -
Page 80: Preparación Del Asiento Para Su Uso
anclaje superior de forma segura ❷ jalando dicha correa de la punta que queda libre ❷. • Para aflojar la correa, presione el botón que suelta la correa de anclaje superior ❸. ADVERTENCIA: Asegúrese de que la ❸ correa NO esté torcida. PREPARACIÓN DEL ASIENTO PARA SU USO ¡ADVERTENCIA! EL ERROR MÁS COMÚN QUE SUELE COMETERSE... -
Page 81: Ajuste De Las Correas Del Arnés
ADVERTENCIA: NO USE este asiento de seguridad si la mitad de la cabeza de su niño sobresale del apoyacabeza cuando éste se encuentra a su máxima altura. AJUSTE DE LAS CORREAS DEL ARNÉS 1. Afloje el arnés apretando el botón para ajustar el arnés que hay en la parte delantera del asiento, justo encima de la correa de ajuste, ❶... -
Page 82: Ajuste De La Posición De La Correa De La Entrepierna
AJUSTE DE LA POSICIÓN DE LA CORREA DE LA ENTREPIERNA La correa de la entrepierna tiene dos (2) posiciones. 1. Quite la almohadilla de tela de la entrepierna. 2. Empuje la hebilla y métala a través de la ranura de la almohadilla del asiento hacia la base de plástico del asiento. -
Page 83: Reclinación
DEBE estar en la ranura inmediatamente delante del niño. Las almohadillas del arnés y de la entrepierna son opcionales y no son una característica que aporte seguridad. ONSEJO: Para niños mayores que requieran una correa de la entrepierna más larga, retire la almohadilla de espuma EPP del asiento (véase “Lista de partes”, página 19). -
Page 84: Puntos De Anclaje Latch
ADVERTENCIA: Si el apoyacabeza del vehículo impide que el asiento de seguridad quede a ras del respaldo del asiento del vehículo, quítelo ❸. ❸ PUNTOS DE ANCLAJE LATCH Si su vehículo está equipado con el sistema LATCH, los puntos de anclaje quizá sean visibles en el pliegue del asiento. -
Page 85: Instalación Con El Sistema Latch
ADVERTENCIA: CONSULTE EN EL MANUAL DEL USUARIO DE SU VEHÍCULO DÓNDE SE LOCALIZAN EXACTAMENTE ESTOS ELEMENTOS EN SU VEHÍCULO Y CUÁL ES EL PESO MÁXIMO PERMITIDO PARA USAR CON EL SISTEMA LATCH ANTES DE PROCEDER CON LA INSTALACIÓN YA QUE ALGUNOS FABRICANTES INDICAN UN PESO MÁXIMO MENOR QUE OTROS CUANDO SE VA A EMPLEAR EL SISTEMA LATCH. - Page 86 ONSEJO: Si no logra tensar el ❹ sistema LATCH con el método anterior, jale la correa LATCH hacia arriba por donde va el cinturón de seguridad (debajo de la tela) ❹, y luego jale para tensarla. 5. Si necesita aflojar el sistema ❺...
-
Page 87: Instalación Con El Cinturón De Seguridad De Hombro Y Regazoo Sólo De Regazo
INSTALACIÓN CON EL CINTURÓN DE SEGURIDAD DE HOMBRO Y REGAZO O SÓLO DE REGAZO ADVERTENCIA: Cuando esté usando el cinturón de seguridad de su vehículo, el sistema LATCH debe ser guardado. Para hacerlo, enganche los ganchos LATCH a las anillas de tela que se encuentran a los lados del respaldo ❶. -
Page 88: Inspección De Seguridad De La Instalación
que sobra vuelva a su sitio para ❺ que éste permanezca tenso y sin ninguna holgura ❺. 6. El retractor del cinturón de ❹ seguridad una vez bloqueado no le permitirá que saque más cinturón hasta que desabroche la hebilla del cinturón. -
Page 89: Uso Del Asiento Con El Arnés Integrado
USO DEL ASIENTO CON EL ARNÉS INTEGRADO WARNING! SI EL ARNÉS NO ESTÁ BIEN ABROCHADO Y AJUSTADO, EL NIÑO PODRÍA SALIR EYECTADO DEL ASIENTO DE SEGURIDAD EN CASO DE UN GIRO BRUSCO, UNA FRENADA REPENTINA O UN CHOQUE, LO QUE LE CAUSARÍA GRAVES LESIONES O INCLUSO LA MUERTE. -
Page 90: Cómo Sujetar Al Niño En El Asiento De Seguridad
CÓMO SUJETAR AL NIÑO EN EL ASIENTO DE SEGURIDAD 1. Desabroche el enganche a la altura del pecho que viene con el arnés, presionando ambas patillas del enganche a la vez que separa las dos partes del enganche ❶. ❶ 2. -
Page 91: Cómo Sacar Al Niño Del Asiento De Seguridad
NO use este asiento de seguridad si el ❻ arnés no permanece bloqueado. 7. Abroche el enganche a la altura del pecho ❻. 8. Tense el arnés tirando suavemente de la correa de ajuste del arnés que encontrará en la parte delantera del ❼... -
Page 92: Uso Del Asiento De Seguridad En Modo De Asiento Elevador (Sin El Arnés Integrado)
USO DEL ASIENTO DE SEGURIDAD EN MODO DE ASIENTO ELEVADOR (SIN EL ARNÉS INTEGRADO) CÓMO QUITAR/INSTALAR EL ARNÉS 1. Desabroche el enganche a la altura del pecho y la hebilla del arnés. 2. Mirando la parte trasera del asiento ❶ saque de la placa separadora del arnés las correas de este ❶. - Page 93 bloquee en la base del asiento ❺. ❺ 8. Enrolle firmemente la correa, átela con una gomilla de plástico y así métala debajo de la almohadilla del asiento de tela en la abertura del ajustador delantero. Para volver a instalar, retire la placa del respaldo y siga los pasos ❻...
-
Page 94: Asiento Elevador Con Respaldo
ASIENTO ELEVADOR CON RESPALDO ¡ADVERTENCIA! SIEMPRE AYUDE AL NIÑO A SENTARSE Y SALIRSE DEL ASIENTO DE SEGURIDAD/ASIENTO ELEVADOR. NUNCA PERMITA QUE EL NIÑO SE APOYE EN EL APOYABRAZOS CUANDO SE SIENTE O SALGA DEL ASIENTO ELEVADOR PARA EVITAR QUE ESTE SE VUELQUE. VERIFIQUE QUE EL ASIENTO ELEVADOR ESTÉ... - Page 95 NO use este asiento si no puede ser debidamente nivelado, estabilizado e instalado de acuerdo con este manual de instrucciones. Es posible que su vehículo no cuente con un asiento adecuado para este asiento elevador debido a la superficie del asiento, el tipo de cinturón de seguridad que trae, o el sistema de bolsas de aire.
-
Page 96: Enredos Con El Cinturón De Seguridad Del Vehículo
DE SEGURIDAD DEL VEHÍCULO ADVERTENCIA: Para evitar las posibilidades de que el niño se enrede y asfixie con los cinturones de seguridad de hombro del vehículo, Harmony Juvenile Products recomienda que se tomen las siguientes precauciones cuando instale su asiento elevador: 1. -
Page 97: Cómo Sujetar El Niño Y El Asiento Elevador En El Vehículo
LENTAMENTE hasta que descanse sobre su niño. 3. ASEGÚRESE de que el cinturón de seguridad no esté apretando la piel del niño o provocando que su cuerpo tome una posición poco natural. 4. Haga lo mismo con todos los cinturones de seguridad que no estén siendo ocupados. -
Page 98: Asiento Elevador Sin Respaldo
inferior del cinturón del hombro POR DEBAJO DE LOS DOS apoyabrazos ❷, y asegúrese de que el cinturón de regazo permanezca bien sujeto a la altura de las caderas del niño tocando ligeramente sus muslos y NO sobre su estómago. 6. - Page 99 la perilla para inclinar el respaldo en la dirección de las manillas del reloj a todo lo que da para retirar la placa de la base en la parte de abajo del asiento. 1. Coloque el asiento elevador firmemente contra el respaldo de un asiento del auto que mire en la dirección de la marcha que esté...
-
Page 100: Instalación De La Guía Para El Cinturón De Seguridad De Hombro
INSTALACIÓN DE LA GUÍA PARA EL CINTURÓN DE SEGURIDAD DE HOMBRO 1. Localice la correa y el tornillo de la guía para el cinturón de seguridad de hombro, situadas en el bolsillo de almacenaje. Agujero 2. Usando un destornillador del piloto tipo Phillips, atornille la correa de la guía del cinturón al asiento... -
Page 101: Cómo Quitar La Guía Para El Cinturón De Seguridad De Hombro
seguridad del vehículo, para asegurar que esté bien sujeto. LA PORCIÓN DEL CINTURÓN DE SEGURIDAD QUE CRUZA EL REGAZO DEBE PASAR BAJO LOS DOS APOYABRAZOS Y CRUZAR SOBRE LAS CADERAS. CÓMO QUITAR LA GUÍA PARA EL CINTURÓN DE SEGURIDAD DE HOMBRO 1. -
Page 102: Instalación Del Portavasos (Cuando Sea Aplicable)
BASE: 1. Desabroche las tiras de gancho y bucle (x2) ❷ de la parte exterior de ambos lados de la base del asiento (donde el apoyabrazos coincide con el respaldo). 2. Con delicadeza deslice la funda de tela de la base de plástico desde la parte trasera del asiento hacia la parte delantera del asiento. -
Page 103: Cuidado Y Mantenimiento
Si no consigue que el arnés quede bien sujeto con la hebilla bien ajustada, NO USE este asiento de seguridad. Llame a Harmony Juvenile Products para comprar un arnés o una hebilla de repuesto. -
Page 104: Instalación En Aviones
INSTALACIÓN EN AVIONES Este asiento de seguridad está certificado para ser usado en un avión ÚNICAMENTE cuando se usa CON el arnés. Este asiento de seguridad NO ESTÁ CERTIFICADO para ser usado en aviones cuando se usa como asiento elevador SIN el arnés. PUNTOS IMPORTANTES QUE DEBE RECORDAR: 1. -
Page 105: Garantía
GARANTÍA Este asiento de seguridad ha sido fabricado por Harmony® Juvenile Products (HJP). HJP extiende las siguientes garantías a la persona que originalmente adquirió este asiento de seguridad en una tienda: GARANTÍA LIMITADA DE UN (1) AÑO En caso de materiales defectuosos o defectos de fabricación, este asiento de seguridad está... - Page 106 LIMITACIONES DE DAÑOS La garantía y los recursos que aquí se indican son exclusivos y en lugar de cualquier otro, ya sea verbal o por escrito, expreso o implícito. En ningún caso, ni HJP ni el comercio que le venda este producto tendrán responsabilidad legal hacia usted por cualquier daño, incluyendo los fortuitos o emergentes, o por inutilidad que pueda resultar del uso o de la inhabilidad para...
Need help?
Do you have a question about the DEFENDER 360 and is the answer not in the manual?
Questions and answers
Can the seat face forward and backwards?