Evolution R230 DCT, R255 DCT, R300 DCT, R300 DCT+, R350 DCT Manual
- Original instructions manual (69 pages) ,
- Original instructions manual (49 pages)
Advertisement
- 1 SPECIFICATIONS
- 2 LABELS & SYMBOLS
- 3 INTENDED USE OF THIS POWER TOOL
- 4 GENERAL POWER TOOL SAFETY WARNINGS
- 5 SAFETY INSTRUCTIONS FOR CUT OFF SAWS
- 6 FURTHER SAFETY INSTRUCTIONS FOR ABRASIVE CUTTING-OFF OPERATION
- 7 RESIDUAL RISKS
- 8 CLEANING AND MAINTENANCE
- 9 NOISE WARNING
- 10 PRODUCT OVERVIEW KEY
- 11 ASSEMBLY
- 12 SETTING UP THE SAW
- 13 DUST SUPPRESSION
- 14 PRE-CUTTING CHECKS
- 15 CUTTING
- 16 MAINTENANCE
- 17 Documents / Resources
SPECIFICATIONS
| SPECIFICATIONS | R230DCT | R255DCT | R300DCT | R300DCT+ | R350DCT | |||||
| Product Code UK/EU/AUS | 009-0001 009-0002 009-0003 009-0006 | 009-0001X 009-0002X 009-0003X 009-0006X | 010-0001 010-0002 010-0003 010-0006 | 010-0001X 010-0002X 010-0003X 010-0006X | 012-0001 012-0002 012-0003 012-0006 | 012-0001X 012-0002X 012-0003X 012-0006X | 012-0001A 012-0002A 012-0003A 012-0006A | 012-0001AX 012-0002AX 012-0003AX 012-0006AX | 130-0001 130-0002 130-0003 130-0006 | 130-0001X 130-0002X 130-0003X 130-0006X |
| Motor UK/EU/AUS (220-240V ~ 50Hz) | 2000W | 2000W | 2400W | 220-240V: 2400W AUS 240V: 2200W | 2700W | |||||
| Motor UK (110V ~ 50Hz) | 1600W | 1600W | 1600W | 2000W | 2200W | |||||
| Rated Speed (min-1) | 6000 | 6000 | 220-240V: 5090 110V: 4400 | 220-240V: 5090 110V: 4400 | 220-240V: 3750 110V: 3500 | |||||
| Recommended Max duty cycle | 20 mins | |||||||||
| Net Weight (kg) | 7.1kg | 7.3kg | 9.7kg | 9.7kg | 14.2kg | |||||
| Cable Length | 3m (10ft) | 4m (13ft) | 3m (10ft) AUS: 4m (13ft) | 4m (13ft) | 4m (13ft) | |||||
| Spindle Thread Size | M8 | |||||||||
| Cutting Capacity At 90° | 90mm (3-1/12") | 102.5mm (4-1/16") | 115mm (4-1/2") | 115mm (4-1/2") | 130mm (5-1/8") | |||||
| Blade Supplied | General Diamond | No Blade Included | General Diamond | No Blade Included | Premium Diamond | No Blade Included | Premium Diamond | No Blade Included | Premium Diamond | No Blade Included |
| Diameter | 230mm (9") | 255mm (10") | 300mm (12") | 300mm (12") | 350mm (14") | |||||
| UK & EU Bore | 22.2mm | 22.2mm | 22.2 / 20mm | 22.2 / 20mm | 25.4 / 20mm | |||||
| NOISE & VIBRATION DATA | ||||||||||
| Sound Pressure Max Lpa | 98.0dB(A) K=3dB(A) | |||||||||
| Sound Power Level Max Lwa | 109.0dB(A) K=3dB(A) | |||||||||
| Handle Vibration Max Level | 6.15m/s2 K=1.5m/s2 | |||||||||
LABELS & SYMBOLS
 | Warning |
 | Read Instructions |
 | Wear Safety Goggles |
 | Wear Ear Protection |
 | Wear Dust Protection |
 | Wear Head Protection |
 | Wear Safety Gloves |
 | Wear Safety Boots |
 | Keep Hands Away |
 | Protection Class II Double Insulated |
 | CE Certification |
 | Waste Electrical & Electronic Equipment |
 | Triman - Waste Collection & Recycling |
 | (RCM) Regulatory Compliance Mark for electrical and electronic equipment. Australian/New Zealand Standard |
 | Only use diamond blades. Do not use toothed blades. |
 | Do not use defected or broken blades |
 | High risk of kickback |
 | Risk of dust inhalation |
 | Risk of Fire. Ensure surrounding area is free from flammable materials. |
 | Unlock |
 | Lock |
 | Purchase separately |
INTENDED USE OF THIS POWER TOOL
This product is a disc cutter saw and has been designed to be used with diamond blades only. Only use accessories designed for use in this machine and/or those recommended specifically by Evolution Power Tools Ltd.
When fitted with an appropriate blade this machine can be used to cut: brick, paving, concrete and related construction materials, steel, non-ferrous metals and natural stone.
GENERAL POWER TOOL SAFETY WARNINGS
PLEASE READ THE GENERAL POWER TOOL SAFETY BOOKLET PROVIDED SEPARATELY BEFORE USING THIS TOOL.
SAFETY INSTRUCTIONS FOR CUT OFF SAWS
- The guard provided with the tool must be securely attached to the power tool and positioned for maximum safety, so the least amount of wheel is exposed towards the operator. Position yourself and bystanders away from the plane of the rotating wheel. The guard helps to protect operator from broken wheel fragments and accidental contact with wheel.
- Use only diamond cut-off wheels for your power tool. Just because an accessory can be attached to your power tool, it does not assure safe operation.
- The rated speed of the accessory must be at least equal to the maximum speed marked on the power tool. Accessories running faster than their rated speed can break and fly apart.
- Wheels must be used only for recommended applications. For example: do not grind with the side of cut-off wheel. Abrasive cut-off wheels are intended for peripheral grinding, side forces applied to these wheels may cause them to shatter.
- Always use undamaged wheel flanges that are of correct diameter for your selected wheel. Proper wheel flanges support the wheel thus reducing the possibility of wheel breakage.
- The outside diameter and the thickness of your accessory must be within the capacity rating of your power tool. Incorrectly sized accessories cannot be adequately guarded or controlled.
- The arbour size of wheels and flanges must properly fit the spindle of the power tool. Wheels and flanges with arbour holes that do not match the mounting hardware of the power tool will run out of balance, vibrate excessively and may cause loss of control.
- Do not use damaged wheels. Before each use, inspect the wheels for chips and cracks. If power tool or wheel is dropped, inspect for damage or install an undamaged wheel. After inspecting and installing the wheel, position yourself and bystanders away from the plane of the rotating wheel and run the power tool at maximum no load speed for one minute. Damaged wheels will normally break apart during this test time.
- Wear personal protective equipment. Depending on application, use face shield, safety goggles or safety glasses. As appropriate, wear dust mask, hearing protectors, gloves and shop apron capable of stopping small abrasive or workpiece fragments. The eye protection must be capable of stopping flying debris generated by various operations. The dust mask or respirator must be capable of filtrating particles generated by your operation. Prolonged exposure to high intensity noise may cause hearing loss.
- Keep bystanders a safe distance away from work area. Anyone entering the work area must wear personal protective equipment. Fragments of workpiece or of a broken wheel may fly away and cause injury beyond immediate area of operation.
- Hold the power tool by insulated gripping surfaces only, when performing an operation where the cutting accessory may contact hidden wiring or its own cord. Cutting accessory contacting a "live" wire may make exposed metal parts of the power tool "live" and could give the operator an electric shock.
- Position the cord clear of the spinning accessory. If you lose control, the cord may be cut or snagged and your hand or arm may be pulled into the spinning wheel.
- Never lay the power tool down until the accessory has come to a complete stop. The spinning wheel may grab the surface and pull the power tool out of your control.
- Do not run the power tool while carrying it at your side. Accidental contact with the spinning accessory could snag your clothing, pulling the accessory into your body.
- Regularly clean the power tool's air vents. The motor's fan will draw the dust inside the housing and excessive accumulation of powdered metal may cause electrical hazards.
- Do not operate the power tool near flammable materials. Sparks could ignite these materials.
FURTHER SAFETY INSTRUCTIONS FOR ABRASIVE CUTTING-OFF OPERATION
Kickback and related warnings
Kickback is a sudden reaction to a pinched or snagged rotating wheel. Pinching or snagging causes rapid stalling of the rotating wheel which in turn causes the uncontrolled power tool to be forced in the direction opposite of the wheel's rotation at the point of the binding.
For example, if an abrasive wheel is snagged or pinched by the workpiece, the edge of the wheel that is entering into the pinch point can dig into the surface of the material causing the wheel to climb out or kick out. The wheel may either jump toward or away from the operator, depending on direction of the wheel's movement at the point of pinching. Abrasive wheels may also break under these conditions. Kickback is the result of power tool misuse and/or incorrect operating procedures or conditions and can be avoided by taking proper precautions as given below.
- Maintain a firm grip on the power tool and position your body and arm to allow you to resist kickback forces. Always use auxiliary handle, if provided, for maximum control over kickback or torque reaction during start-up. The operator can control torque reactions or kickback forces, if proper precautions are taken.
- Never place your hand near the rotating accessory. Accessory may kickback over your hand.
- Do not position your body in line with the rotating wheel. Kickback will propel the tool in direction opposite to the wheel's movement at the point of snagging.
- Use special care when working corners, sharp edges etc. Avoid bouncing and snagging the accessory. Corners, sharp edges or bouncing have a tendency to snag the rotating accessory and cause loss of control or kickback.
- Do not attach a saw chain, woodcarving blade, segmented diamond wheel with a peripheral gap greater than 10 mm or toothed saw blade. Such blades create frequent kickback and loss of control.
- Do not "jam" the wheel or apply excessive pressure. Do not attempt to make an excessive depth of cut. Overstressing the wheel increases the loading and susceptibility to twisting or binding of the wheel in the cut and the possibility of kickback or wheel breakage.
- When wheel is binding or when interrupting a cut for any reason, switch off the power tool and hold the power tool motionless until the wheel comes to a complete stop. Never attempt to remove the wheel from the cut while the wheel is in motion otherwise kickback may occur. Investigate and take corrective action to eliminate the cause of wheel binding.
- Do not restart the cutting operation in the workpiece. Let the wheel reach full speed and carefully re-enter the cut. The wheel may bind, walk up or kickback if the power tool is restarted in the workpiece.
- Support panels or any oversized workpiece to minimize the risk of wheel pinching and kickback. Large workpieces tend to sag under their own weight. Supports must be placed under the workpiece near the line of cut and near the edge of the workpiece on both sides of the wheel.
- Use extra caution when making a "pocket cut" into existing walls or other blind areas. The protruding wheel may cut gas or water pipes, electrical wiring or objects that can cause kickback.
- Wear a dust mask. Exposure to dust particles can be harmful to your health and make it difficult to breath. Use a dust extraction system and wear a suitable protective mask.
- Wear noise protection. Exposure to high volumes of noise may cause hearing damage.
- Do not use any abrasive wheels.
- Use only saw blades that comply with the characteristics specified in this manual.
- Use only saw blade diameter(s) in accordance with the markings.
- Use only saw blades with a speed marking that is higher than or equal to the speed marked on the tool.
- Use only saw blades recommended by the manufacturer.
RESIDUAL RISKS
Even with application of safety standards and using the tool as prescribed, certain residual risks can remain:
- Risk of personal injury due to prolonged use.
- Risk of injury caused by dust.
- Risk of injury caused by flying objects.
- Risk of burns due to accessories becoming hot.
- Risk of electric shock due to cutting through electric cables. When cutting through floors, ceilings of walls ensure there are no hidden cables or water pipes.
CLEANING AND MAINTENANCE

Disconnect the tool from the power source before any adjustments, cleaning, or maintenance is carried out.
- Use compressed air to blow dirt out of the main housing air vents and the blade guard. Wear approved eye protection and a dust mask.
- Use a cloth dampened with water to clean the other areas of the tool. Never use solvent based or harsh chemicals of any type as this may weaken, damage or destroy plastic components.
- Do not attempt to modify the tool or accessories in any way.
- When servicing only use Evolution original parts and carried out by a qualified person.
NOISE WARNING
The noise emissions during actual use of the power tool can differ from the declared values depending on the ways in which the tool is used especially what kind of workpiece is processed.
The need to identify safety measures to protect the operator that are based on an estimation of exposure in the actual conditions of use (taking account of all parts of the operating cycle such as the times when the tool is switched off and when it is running idle in addition to the trigger time). The declared noise emission value(s) have been measured in accordance with a standard test method and may be used for comparing one tool with another. The declared noise emission value(s) may also be used in a preliminary assessment of exposure.
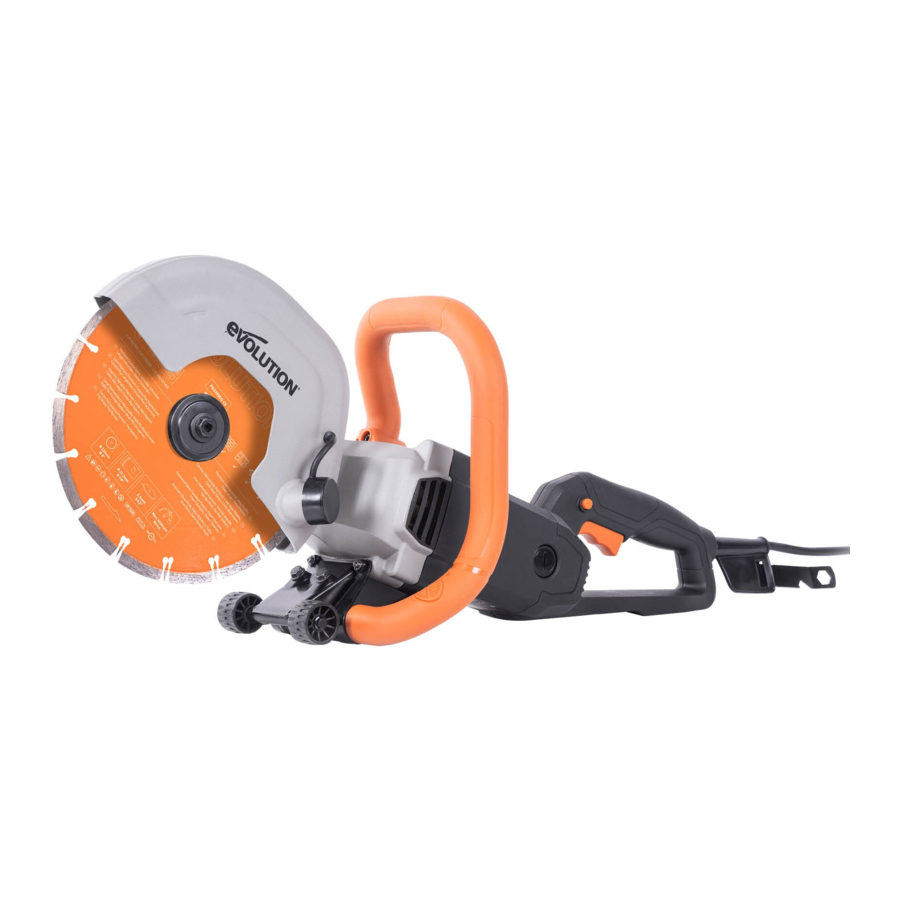
PRODUCT OVERVIEW KEY

- Safety lock button
- Trigger switch
- Multi-tool
- Cutting disc
- Blade guard
- Dust extraction port*
- Wheeled cutting aid
- Blade lock
- Dust suppression**
- Water control valve**
- Water control electrical valve (R350DCT only)
ASSEMBLY
To reduce risk of injury, disconnect the tool from the power source before installing, repositioning or removing accessories.
Only connect the plug to the power source just before starting the saw.
SETTING UP THE SAW
Fig. 1 Assembling the blade

Fig. 2 Removing the blade

Fig. 3 Assembling the wheeled undercarriage

Fig. 4 Adjusting the blade guard position***

Fig. 5 Using dust extraction*

DUST SUPPRESSION
**
Fig. 6 Residual Current Device (UK/EU 220-240V)

- When plugging the saw in, the RCD will need to be reset before the saw will power on.
- Plug the saw in, press the RESET button(c) on the RCD, there will be a click.
- The indicator window(b) will change to RED to show the power is on.
- To test, press the TEST button(a). Again, there will be a click and the indicator window will switch to black showing the power is off.
- Press the RESET button(c) again to reset and use the saw.
 Note: If the RCD trips during use, simply press RESET.
Note: It is recommended that the machine should always be supplied, via a RCD, with a rated residual current of 30MA or less.
Note: If the indicator light shows red, a problem may exist, if unable to reset after tripping, the RCD will need to be replaced immediately.
Fig. 7 Dust suppression for R300DCT+ and R350DCT models

Note: All R350DCT models are fitted with a manual AND electrical valve eliminating the need to manually turn water off and on when using the machine. When the manual valve is moved to the ON position, (fig. 7.3) slight depression of the trigger (fig. 7.4) causes the electrical valve to open allowing water to flow to the blade before the motor is started with full depression of the trigger, it will remain open until the trigger is released. The manual valve can also be used to control the amount of water that is allowed to flow to the blade.
Fig. 8 Manual override of electrical valve

Note: For R350DCT models, if the electrical valve is damaged and automatic water flow is not working, a manual override can be performed. Use a screwdriver to remove the front panel of the electrical valve to reveal the interal pipe. A screw is stored (Fig.8a) which can be removed and screwed into the opening (Fig.8b) to pierce the internal piping. This will allow water to flow through when the valve is in the ON position. Please contact Evolution Power Tools to request a repair for your tool.
PRE-CUTTING CHECKS
- Ensure that the power supply matches the requirements specified on the machines rating plate.
- If an extension cable is required it must be of a suitable type for the work environment. If used outdoors it should be waterproof and so labelled.
- The manufacturers instructions should be followed when using an extension cable.
- Route any extension cable so that it does not pose a trip (or any other) hazard to the operator, colleagues or any bystanders.
CUTTING
Fig.9 Cutting operation

Ensure the workpiece is supported for stable cutting. Allow the blade to reach maximum speed before starting the cut. Cut smoothly and allow the blade to do the work without forcing the blade.
For R350DCT models, there is a LED light located near the rear handle to indicate cutting pressure:
- Solid green light: Cutting pressure is correct.
- Solid red light: Too much pressure is being applied, operator should ease off until the LED light shows green, the blade speed will reduce if the saw is overworked.
- Flashing red light: Increased pressure will stall the blade. User will be required to remove the blade from the workpiece and re-engage the trigger for the tool to reset.
Do not attempt to cut curved or zig-zag lines. Never use the side of the blade as a cutting surface. Never use to perform inclination cutting.
MAINTENANCE
Ensure the carbon brush slot is clear of dust after multiple use. Risk of injury and/or tool failure may occur if the brushes are not checked and cleaned regularly. To perform a maintenance check -
- Unplug the machine.
- Remove the brush cap with a screwdriver and carefully remove the carbon brush.
- Clean the brush retainers and carbon brush with a dry brush.
- Inspect the carbon brushes for any damage or burn marks, replace with new items if necessary
- Carefully blow away any dust.
- Re-Install the carbon brushes while carefully sliding in the brush retainers.
- Re-attach the brush cap.
- Operate the machine for a few minutes while idling.
Note: Risk of dust build up in the motor and other internal parts can be minimised by running the machine after cutting. Keep the motor running with no load applied with the blade in free air, the airflow from the fan used to cool the motor will blow any dust out of the vents at the front of the machine.
*Excludes R350DCT models.
**R300DCT+ and R350DCT models only.
***R300DCT, R300DCT+ and R350DCT models only.
Documents / ResourcesDownload manual
Here you can download full pdf version of manual, it may contain additional safety instructions, warranty information, FCC rules, etc.
Download Evolution R230 DCT, R255 DCT, R300 DCT, R300 DCT+, R350 DCT Manual
Advertisement


Need help?
Do you have a question about the R230 DCT and is the answer not in the manual?
Questions and answers