Advertisement
INTRODUCTION
This helmet has been constructed, tested and approved in compliance with the European Standard EN1078:2012+A1:2012 and is in conformity to the European Regulation EU 2016/425. This product is tested and certified also under the corresponding UK legislation (i.e. Regulation (EU) 2016/425 as brought into UK law and amended and the Personal Protective Equipment (Enforcement) Regulations 2018). An EU Type Examination has been conducted on this product using the Notified Body as well as an UKCA Type Examination has been conducted using the UK Approved Body. The Notified Body and the UK Approved Body used for examinations of this product are indicated on the table on the back cover of this manual.
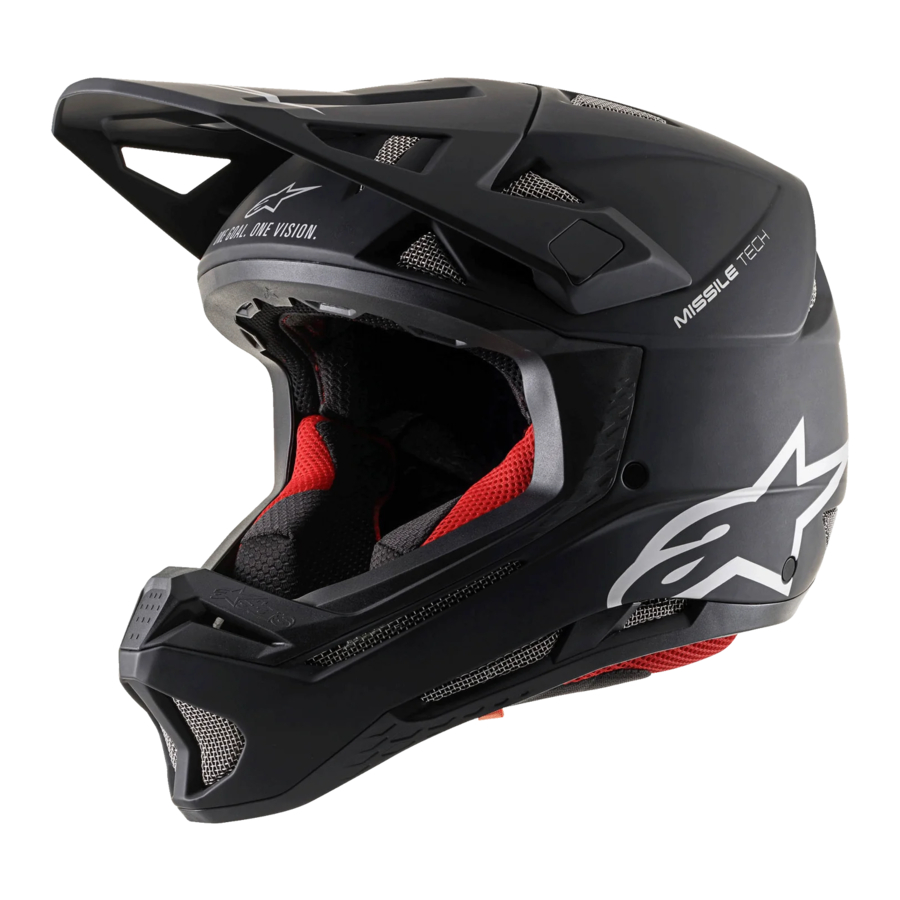
GET TO KNOW YOUR HELMET

- Visor/Peak
- Crown Pad
- Cheek Pad
- Chinstrap
Throughout this manual the numbers (in brackets) are used to refer to the components in figure 5.
CHOOSING AND WEARING A HELMET
The following steps must be followed when choosing a helmet.
Sizing
Bicycle helmets are sized to the circumference of the head: this is measured using a measuring tape at the head's widest point just above the eyebrows and the ears (Figure 1).
Select the helmet size that is closest to your circumference. If your circumference falls in the middle between two sizes, then try the smaller one first.

This helmet comes in the following sizes:
| XS | S | M | L | XL |
| 53-54 cm | 55-56 cm | 57-58 cm | 59-60 cm | 61-62 cm |
| 20.8-21.2" | 21.6-22" | 22.4-22.8" | 23.2-23.6" | 24-24.4" |
Note that the size table is to be used as a guide to sizing, any helmet should always be tried on to establish correct fitting as set out below.

An improperly sized or fitted helmet, even if the Chinstraps have been correctly fastened, will provide reduced or no protection in an accident or impact.
If you have difficulty with sizing or fit, consult Alpinestars or your local Alpinestars dealer.
Putting On the Helmet
- Take the Chinstraps of the helmet in each hand and pull them apart to widen the helmet slightly.
- Hold the helmet over your head and, keeping the tension in the Chinstraps, and your helmet widened, lightly guide the helmet down until the crown pad touches the top of your head.
- Fasten the Chinstrap securely.
- Check that the helmet sits correctly on your head, it must not be worn tilted forward or rearwards but in order to protect your forehead the helmet should sit just above your brow across your forehead (Figure 2).


Chinstrap
The helmet is designed to be retained by the Chinstrap under the lower jaw. The Chinstrap must be positioned UNDER your chin against your throat. Do not position the Chinstrap near the edge of your chin as the helmet can come off in an accident resulting in serious consequences including injuries or death.
CRITICAL SAFETY
It is ESSENTIAL that the Chinstrap is securely fastened and correctly adjusted EVERY time the helmet is worn. Failure to properly adjust the Chinstrap may result in the helmet not fitting properly and being thrown off in an accident or impact, causing loss of some or all protection afforded by the helmet.
- Fasten the Chinstrap as tightly as possible, without causing yourself pain, there should be no slack or space between your jawbone and the strap.
- Try to rotate the helmet towards the rear to see if you can push the helmet off your head. Next try to push the helmet forward and backwards to see if you can push the helmet off your head. It should be impossible for you to turn the helmet from side to side without moving your head.
- If the helmet starts to come off your head after any of the above attempts, then it is either too large or the Chinstrap is not properly secured or tight enough. Do not use the helmet in this situation. Try another size or pull the Chinstrap tight until it is impossible for you to pull the helmet off your head.
- To fasten the Chinstrap, insert the end of the Chinstrap inside the double D rings system following the order set-out in Figure 3, then pull the Chinstraps tight against your throat. Then to secure the loose end of the Chinstrap, snap the button until it audibly clicks into place.

To unfasten the Chinstrap, disengage the button and pull the red tab downwards (Figure 4).


Make sure the loose ends of Chinstrap are securely snapped into the button. Failure to do so can cause the straps and helmet to come loose leading to injury or death.
Never use your helmet with the Chinstrap unfastened.
NOTICE:
Never adjust the Chinstrap when cycling. If you feel the Chinstrap coming loose, STOP and adjust the Chinstrap.
Assessing the Fit
To be effective, a helmet must fit and be worn correctly. To check for correct fit, place the helmet on the head and make any adjustment indicated. Securely fasten the Chinstrap. Grasp the helmet and try to rotate it to the front and the rear and side to side. A correctly fitted helmet should be comfortable and should not move especially forwards to obscure vision or rearwards to expose the forehead.
Helmet Too Small – If you need to use excessive force to pull the helmet onto your head, this is a sign that the helmet is too small. If the helmet on your head, exerts strong pressure on a part or all of the head the helmet is too small. In either case a larger helmet must be selected.
Helmet Too Large – Too large a helmet will not provide protection, even if the Chinstrap has been correctly fastened. A helmet is too large if:
- You turn your head quickly left and right and the helmet continues to move after your head has stopped turning.
- You have a sensation that the helmet is not touching, or only lightly touching the complete circumference of your head (there should be firm contact all round).
- You can insert a finger between your forehead and the padding of the helmet.
Hydration system
The hydration system can be installed on the left or on the right side of the helmet.
The rear side of Cheek Pads (3) is fitted with two elastic rings that can be used for holding the hydration tube. So simply pull out the elastic rings from the back of the cheek pads and install the tube. Check the cheek pad emergency release system tab is free from hydration tube. See figure 6.

Visor/Peak
To remove the Visor/Peak, pull the left side of the Visor/Peak outwards, until it disconnects from the rubber plate. Repeat the same operation for the central connection and then for the right side connection.
To install the Visor/Peak, firmly push the right side of the Visor/Peak against the right side of the rubber plate, repeat the operation for the central connection and then for the left side connection.
Once complete, check the connection to ensure proper installation. Before riding always check that the Visor/Peak is securely installed.
See figure 7.

In the event of an accident or impact the Visor/Peak may shatter or disconnect due to the impact or pressure arising from such accident.
Do not use the helmet if the Visor/Peak is broken or damaged.
Replacement Visor/Peaks are available. ONLY use as genuine Alpinestars Visor/Peak parts, please ask your dealer for Alpinestars spare parts.

If the helmet is dropped, damaged or incurs a significant impact it MUST NOT be worn as helmets are designed in such a manner so as to absorb the forces from AN impact in the event of a fall through the partial or complete destruction of the helmets outer and/or inner shell. Even if after such an incident, there may be no visible damage to the helmet the helmet MUST be replaced for safety reasons as the helmets ability to absorb future impacts is compromised. If you have any doubts about the integrity of the helmet, consult Alpinestars or your local Alpinestars dealer.
Eye protection is not provided with this helmet. Accordingly when wearing the helmet always wear suitable goggles to protect your eyes. Always ensure that such goggles are not damaged or dirty and always ensure that your riding conditions have the proper visibility.
Removable lining
In order to facilitate cleaning, it is possible to remove the lining. Once the lining has been removed, parts are washable by hand using warm water (max 30°Celsius and 86°Fahrenheit) and neutral soap. Never use harsh cleaners or other chemical substances, as they may damage the lining. Always dry the lining completely without exposure to direct heat.
Crown pad removal and replacement: the crown pad is removable by pulling the two studs in the rear and the two Hook and Loop points in the front. To reinstall the crown pad, follow the reverse procedure.
MIPS VERSION (Missile Tech only): a second yellow layer is visible under the crown pad. DO NOT REMOVE THIS SECOND LAYER FROM THE HELMET. Removal of this layer will limit the capacity of the helmet to absorb rotational impact forces.
See figure 8.

Cheek pads removal and replacement: the cheek pads are removable by pulling them apart from the side EPP protective foam. To reinstall the cheek pads align the studs on the cheek pads above the holes on the side EPP protective foam, and push firmly until a click is heard. See figure 9.

Thicker cheek pads (+ 5 mm for all sizes) in order to obtain a snugger helmet fit are available as alternative part options to replace the regular ones, please ask your Alpinestars authorized Dealer.
MAKE SURE THAT THE CHEEK PADS ARE EQUIPPED IN YOUR HELMET BEFORE YOU USE YOUR HELMET. NOT USING CHEEK PADS WILL COMPROMISE THE FIT OF YOUR HELMET.
Filter foam: the filter foam is accessible from inside the helmet, by simply pulling the foam inwards. Once removed the filter foam can be cleaned with water. When reinstalling it, push it in place so that the edges will be inserted under the front EPP protective foam. See figure 10.

Emergency helmet removal system
In the event of an accident, and to help the medical staff to safely remove the helmet from the head of the rider, each Cheek Pad (3) is equipped with an orange tab. Strongly pull the tabs downward as shown in figure 11, and this action will release the Cheek Pads (3).
The helmet is also fitted with a removable insert on the top protective EPS foam. By removing this insert, space is made available for the installation of a helmet removal device, such as air bladder removal systems readily available on the market. The inflation tube must be accommodated inside the allocated space in the EPS (Figure 12).
For Missile Tech, the removable insert is accessible by lifting the yellow layer in the middle, where a finger hole is visible: the inflation tube must be accommodated inside the allocated space in the EPS under the yellow layer.
For details on installation, please follow the instructions supplied by the manufacturer of such a helmet removal system.
EMERGENCY REMOVAL OF THE HELMET SHOULD ONLY BE DONE BY TRAINED PROFESSIONALS.

Replacement parts
The following replacement and parts are available through your Alpinestars authorized Dealer:
- Visor/Peak
- Crown pad
- Semi-rigid bag
- Visor/Peak connection set
- Cheek pad
NOTICE:
Always use genuine Alpinestars approved parts when replacing any parts of the helmet.
SAFETY ADVICE
Helmet care
Be aware that your helmet is an important piece of safety equipment. When handling your helmet take note of the following points:
- When dirty, clean the shell of the helmet using only a clean damp cloth and mild soap and water. Dry immediately afterwards.
- To remove flies from the Visor/Peak place a clean wet cloth on top of the Visor/Peak and leave for a few minutes to soak the flies, wipe the Visor/Peak, then dry using a soft cloth.
- To keep the inside of the helmet fresh apply a water-based upholstery cleaner to the comfort padding. Wipe away the dirt and allow drying completely.
- Avoid dropping your helmet or impacting it on objects as it will weaken or damage the shell and/or the impact absorbing liner. Always place your helmet on a flat stable surface, do not balance it on the top of the bicycle or hang it from the handle bars.
- Periodically inspect the helmet for damage and to ensure that the Visor/Peak's, ventilation system and Chinstrap function properly.
- When not in use store the helmet in a cool, dry place, preferably inside the original carry bag. Keep away from direct sunlight as excessive heat can damage the helmet - especially if left inside a car.
- Do not mistreat your helmet! Do not sit on your helmet – do not ride with the helmet attached to the helmet holder of the bicycle – do not expose the helmet to excessive heat or cold.
![]()
NEVER use high pressure water jets to wash the helmet from dirt, since this can cause visible and invisible damages to the shell and the polystyrene liner.![]()
The helmet may be damaged and rendered ineffective by petroleum products, cleaning agents, paints, adhesives and similar products, without the damage being visible to the user. NEVER use strong solvents to clean the helmet. Exposure to strong solvents and/or solvent vapor (including petrol/ gasoline) can cause visible and non-visible damage to the factory paintwork, shell and polystyrene liner of the helmet.![]()
NEVER modify your helmet. Do not drill or cut any part or component of your helmet. Do not remove any part(s) from the helmet. Modifying the helmet will seriously weaken or damage the helmet, including its shell and liner, thereby reducing or eliminating the helmet's ability to provide protection in the event of an accident or impact. In the event that a component must be changed, always use the correct Alpinestars replacement part.- No attachments, accessories or modifications should be made to the helmet except those recommended by the helmet manufacturer. The helmet must not be modified or adapted to fit attachments or accessories not recommended by Alpinestars.
![]()
Always check and inspect the helmet, including all of its components, before each use and before starting your ride. Do not use the helmet should the helmet show signs of damage, deterioration and/or cracks. Always ensure that all liners and pads are attached into your helmet before you start your ride.![]()
Check that the Visor/Peak is securely attached to the helmet before you start your ride. Should the Visor/ Peak become unsecured during your ride, it may block your vision and result in an accident with serious consequences including injuries or death.![]()
The helmet is designed to absorb shock by partial destruction of the shell and liner.
Damage may not be visible. Therefore, if the helmet is subjected to a significant impact, the helmet should be destroyed and replaced even if it appears undamaged. If the helmet is dropped, damaged or incurs a significant impact it MUST NOT be worn as helmets are designed in such a manner so as to absorb the forces from AN impact through the partial or complete destruction of the helmet's outer and/or inner shell. After such an impact, there may be no visible damage to the helmet, the helmet MUST be replaced for safety reasons as the helmet's ability to absorb future impacts is compromised. If you have any doubts about the integrity of the helmet, consult Alpinestars or your local Alpinestars dealer.![]()
this helmet should not be used by children while climbing or doing other activities where there is a risk of hanging or strangulation if the child gets trapped whilst wearing the helmet.![]()
Certain paints and thinners can weaken and do permanent damage to the shell and/or the polystyrene liner of your helmet hence painting is not recommended. Alpinestars cannot guarantee the minimum protection level will be met on helmets that have been painted.
Life span
A helmet has a limited lifespan in use and should be replaced when it shows obvious signs of wear.
Alpinestars recommends the helmet be replaced after five years even if there is no visible damage or sign of wear. If your helmet becomes no longer snug when worn, Alpinestars recommends that the helmet be replaced regardless of age.
In the event of an accident where the helmet strikes the ground or the helmet incurs in any significant impact, it MUST NOT be worn and MUST be replaced as the helmet is designed to absorb ONE IMPACT. Even if there are no scratches or damage to the helmet's shell, the polystyrene liner, which is hidden from view, may have been compressed or compromised and will provide NO protection in the future.
At the end of the helmet's life, please ensure that it is disposed of in accordance with local waste regulations.
Damage Waiver
No helmet can protect you from all conceivable impacts, injuries and/or death.
No helmet can protect you against all possible impacts. Some head injuries cannot be prevented by this helmet and even low speed accidents can result in serious head injuries or death.
This helmet can only attempt to protect the areas it physically covers. This helmet will not protect the face, neck or other body parts nor can this helmet guard against spinal or other bodily injuries that may result from an accident.
Any helmet can be penetrated by sharp objects.
By using this helmet, you assume all risks and liabilities for loss, damage, or injury arising out of the helmet's use. You also WAIVE any claims against Alpinestars and/or any of its affiliated entities, distributors, suppliers, dealers and agents for:
- any and all injuries including death, and
- any claims of damage be they direct, indirect, consequential or otherwise including any financial loss or loss of profits that might be incurred as a result of using the helmet or from any alleged in the helmet.
Be aware that helmets may inhibit vision and block sound which may reduce your ability to safely ride your bicycle, may reduce your awareness of traffic, road conditions and/or your surroundings. Become aware of how you perceive traffic, road conditions and/or your surrounding when wearing your helmet. Do not use the helmet if it restricts the safe operation of your bicycle. Never take any risk simply because you are wearing a helmet.
Always ride safely and responsibly together with exercising good judgement and keeping a diligent outlook to avoid accidents. Observe and follow all the rules of the road and regulations and remember to ensure that you are at all times visible.
Alpinestars S.p. A helmet model MISSILE, made in China by DONGGUAN CITY EON SPORTING GOODS CO., LTD, Building A, QiSha Industrial Park, QiSha Village, Sha Tian Town, DongGuan City, Guangdong, China 523980
Distributed in Europe by:
ALPINESTARS EUROPE, 5 Viale Fermi, Asolo (TV), 31011, Italy, 0039-04235286
Distributed in USA by:
ALPINESTARS USA INC., 2780 West, 237Th Street, 90505 Torrance, CA, USA, 001-3108910222
Distributed in Australia by:
MONZA AUSTRALIA PTY LTD, 209-213 MAIDSTONE STREET, ALTONA VICTORIA 3018
Direct Tel: +61-3-83278856, Tel: +61-3-83278888, Fax: +61-3-93281080
Distributed in New Zealand by:
CROWN KIWI ENTERPRISES LTD, P.O. Box 819, 4310 New Plymouth, New Zealand, 0064-67514550
IMPORTANT INFORMATION FOR USERS
Please read the following important WARNING and LIMITATION of use notice carefully before using this product.
Cycling is an inherently dangerous activity and an ultra-hazardous sport, which may result in serious personal injury including death. Each individual bicycle rider must be familiar with the sport of bicycling, recognize the wide range of foreseeable and unforeseeable hazards and decide whether to assume the risks inherent in such an activity with the knowledge of the dangers involved and accept any and all risks of injury, including death. While all bicycle riders should utilize appropriate protective equipment, each rider should exercise absolute care for safety while riding and understand that no product can offer complete protection from injury, including death, or damage to individuals and property in case of fall, collision, impact, loss of control or otherwise. Ensure that your product is correctly fitted and used. DO NOT use any product that is worn out, modified or damaged.
Alpinestars makes no warranties guarantees or representations, express or implied, regarding the fitness of its products for any particular purpose.
Alpinestars makes no warranties guarantees or representations, express or implied, regarding the extent to which its products protect individuals or property from injury, death or damage.
ALPINESTARS DISCLAIMS ANY RESPONSIBILITY FOR INJURIES INCURRED WHILE WEARING ANY OF ITS PRODUCTS.
WARNING NOTICE
It is very important that you read and fully understand this entire instruction manual BEFORE using the helmet. You should not use the helmet until you have read and fully understood this instruction manual.
LIMITED IMPACT PROTECTION. A helmet can only provide limited protection in an accident or impact. No helmet can protect against all possible impacts and injuries, including serious injuries or death, can still occur even wearing this helmet. All head injuries cannot be prevented by this helmet, even a low impact or very low speed accident can still result in a serious head injury or death. As a result, complete protection can NEVER be guaranteed and the use of this helmet is undertaken at your own risk.
This helmet has been designed for riding a bicycle – NOT intended for use in motorsports or by motorcyclists or on other motorized vehicles or for any other sports or uses. This helmet may not be suitable for extreme riding such as jumping and high speed events. The activities involving the use of this helmet are inherently dangerous and present a risk of serious head injury that cannot be avoided by the use of this helmet.
USERS OF THE HELMET ARE FULLY RESPONSIBLE FOR THEIR ACTIONS AND ASSUME ALL RISKS FOR THEIR DECISIONS.
Documents / ResourcesDownload manual
Here you can download full pdf version of manual, it may contain additional safety instructions, warranty information, FCC rules, etc.
Advertisement


Need help?
Do you have a question about the MISSILE Series and is the answer not in the manual?
Questions and answers