Yamaha MOTIF ES6 Owner's Manual
Music production synthesizer
Hide thumbs
Also See for MOTIF ES6:
- Data list (88 pages) ,
- Software manual (36 pages) ,
- Software installation manual (35 pages)
Table of Contents
Advertisement
Quick Links
Advertisement
Table of Contents

Related Manuals for Yamaha MOTIF ES6


Summary of Contents for Yamaha MOTIF ES6
-
Page 2: Special Message Section
SPECIFICATIONS SUBJECT TO CHANGE: The information contained in this manual is believed to be correct at the time of printing. However, Yamaha reserves the right to change or modify any of the specifications without notice or obligation to update existing units. Model... -
Page 3: Important Safety Instructions
If instructions for enclosed installations any optional fixtures (where applicable) are well secured BEFORE are not provided, it must be assumed that unobstructed ventilation is using. Benches supplied by Yamaha are designed for seating only. No required. other uses are recommended. - Page 4 Yamaha service personnel. CAUTION Always follow the basic precautions listed below to avoid the possibility of physical injury to you or others, or damage to the instrument or other property.
- Page 5 If you experience any hearing loss or ringing in the ears, consult a physician. Yamaha cannot be held responsible for damage caused by improper use or modifications to the instrument, or data that is lost or destroyed. Always turn the power off when the instrument is not in use.
-
Page 6: Introduction
• This product incorporates and bundles computer programs and contents in which Yamaha owns copyrights or with respect to which it has license to use others' copyrights. Such copyrighted materials include, without limitation, all computer software, styles files, MIDI files, WAVE data and sound recordings. -
Page 7: Main Features
100, 270 files, as well as samples and program/voice data Exceptionally easy-to-understand interface with two- from other popular samplers, such as the Yamaha A- page 47 tiered operation buttons: [F1] - [F6] and [SF1] - [SF5] series. •... -
Page 8: How To Use This Manual
MIDI Implementation Chart. Installation Guide (separate booklet) Refer to this for instructions on installing the included software programs (on the “TOOLS for MOTIF ES6/MOTIF ES7/ MOTIF ES8” CD-ROM) to your computer. Various pages and menus appear on the LCD display of this instrument depending the selected mode or function. -
Page 9: Application Index
Application Index Application Index Listening to the MOTIF ES • Listening to the Demo song/pattern ..................................Page 55 • Listening to Song Chain playback ..................................Page 59 • Listening to Pattern Chain playback ..................................Page 115 • Listening to Arpeggio playback ..............Pages 66 (Voice mode), 70 (Performance mode), 105 (Song/Pattern mode) Playing the keyboard •... - Page 10 Application Index • Determining how the sound responds to a Breath Controller [UTILITY] [F1] GENERAL [SF1] TG BCCurve ............................Page 260 • Keeping the effect of a controller (Modulation Wheel, etc.) the same, even when changing Voices [UTILITY] [F1] GENERAL [SF4] OTHER CtrlReset = hold ........................
- Page 11 Application Index Creating Data • Creating a Voice Creating a Normal Voice in the Voice Edit mode ..............................Page 79 Creating a Drum Voice in the Voice Edit mode ..............................Page 82 Creating a Plug-in Voice in the Voice Edit mode ..............................Page 84 Creating a Normal Voice/Drum Voice by using the Sampling function ......................Page 94 Creating a Sample Voice by using the Sampling function ..........................Page 107 Creating a Normal/Drum Voice by importing a WAV or AIFF file........................Page 100...
- Page 12 Application Index Naming your created data ............................Page 53 Recovering lost data • Voice Comparing the Voice before editing with the just-edited one (Compare function)..................Page 80 Recalling an edited, but not-stored Voice (when another Voice has been selected) — Recall function............Page 82 •...
- Page 13 Application Index Connecting to a computer/external MIDI instrument • Determining which connector (among the MIDI, USB TO HOST, mLAN) is used as a MIDI input/output connector [UTILITY] [F5] MIDI [SF4] OTHER MIDI IN/OUT .............................Page 265 • Using the sounds of the MOTIF ES for song playback from a MIDI sequencer ....................Page 36 •...
-
Page 14: Table Of Contents
Table of Contents Table of Contents Introduction..............6 Quick Guide — Playing the MOTIF ES .. 55 Accessories ..............6 Playing the Demo Songs/Patterns ......55 Main Features ..............7 Playing the Keyboard (in the Voice Play mode)..60 How to use this manual ..........8 Selecting a Voice ..............60 Using Controllers ..............64 Application Index........ - Page 15 Table of Contents Basic Structure ........154 Appendix ..........275 The Controls & Connectors Internal Structure (System Overview) ......154 Information Displays ..........275 Controller Block..............154 Display Messages............277 Tone Generator block ............157 Setting Up Troubleshooting ............279 Sequencer Block...............165 Sampling Block ..............172 Installing Optional Hardware........
-
Page 16: The Controls & Connectors
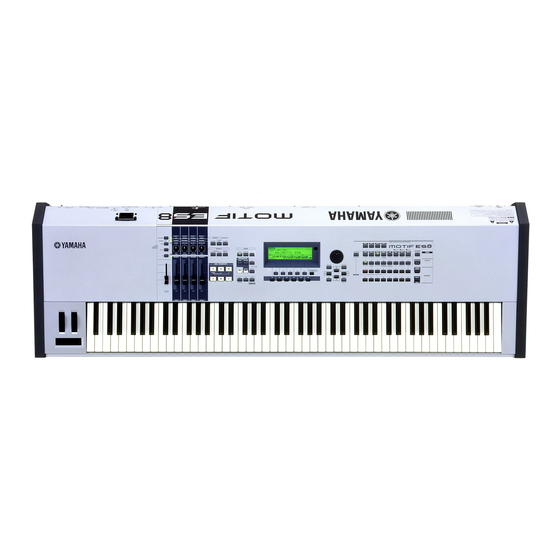
Front Panel The Controls & Connectors Front Panel MOTIF ES6 ASSIGN A ASSIGN B ASSIGN 1 ASSIGN 2 PAN/SEND REMOTE ARPEGGIO REVERB CHORUS TEMPO R-AUDIO CUTOFF RESONANCE ATTACK RELEASE ASSIGN ON / OFF ON / OFF G-MIDI SWING GATE TIME... - Page 17 Front Panel ¡ º § ∞ Integrated Sampling Sequencer / Modular Synthesis Plug-in System / Real-time External Control Surface MUSIC PRODUCTION SYNTHESIZER PRE 1 PRE 2 PRE 3 PRE 4 SLOT SLOT SLOT CATEGORY ª SEARCH DRUM KITS PRE 5 PRE 6 USER 1 USER 2...
- Page 18 1 Keyboard 4 Modulation wheel Page 64 The MOTIF ES6 features a 61-key keyboard, while the Controls the modulation effect. You can also assign other MOTIF ES7 has 76 keys and the MOTIF ES8 has 88 keys. functions to this controller.
- Page 19 Front Panel § ¡ º ∞ Integrated Sampling Sequencer / Modular Synthesis Plug-in System / Real-time External Control Surface MUSIC PRODUCTION SYNTHESIZER PRE 1 PRE 2 PRE 3 PRE 4 SLOT SLOT SLOT CATEGORY ª DRUM KITS PRE 5 PRE 6 USER 1 USER 2 PLG 1...
- Page 20 Front Panel @ SEQ TRANSPORT buttons * [INFORMATION] button Page 56 Page 53 These buttons control recording and playback of the For calling up a special “help” feature that shows Song/Pattern sequence data. information about the currently selected mode. You can go back to the previous display by pressing this button again ](Top) button or pressing any other button.
- Page 21 Front Panel ∞ SLOT 1-3 lamps ª [CATEGORY SEARCH] button Page 284 Page 62 These three lamps show the installation status of the Plug- When this button is turned on in the Performance mode, in Boards. the lower row of [BANK] buttons (labeled A.PIANO - If the Plug-in Board has been correctly installed, the REED/PIPE below the buttons) and the [GROUP] buttons corresponding SLOT lamp will light.
-
Page 22: Rear Panel
Rear Panel Rear Panel MOTIF ES6 MIDI POWER AC INLET mLAN I/O EXPANSION TO DEVICE TO HOST THRU BREATH ASSIG MOTIF ES7 POWER AC INLET mLAN I/O EXPANSION MOTIF ES8 POWER AC INLET mLAN I/O EXPANSION Owner’s Manual... - Page 23 Rear Panel GREEN 3.3V CARD YELLOW Plug-in SLOT ORANGE FOOT FOOT SWITCH CONTROLLER ASSIGNABLE OUTPUT OUTPUT A / D INPUT GAIN ASSIGNABLE SUSTAIN L /MONO PHONES GREEN 3.3V CARD YELLOW Plug-in SLOT ORANGE FOOT FOOT SWITCH CONTROLLER MIDI ASSIGNABLE OUTPUT OUTPUT A / D INPUT GAIN...
- Page 24 6 BREATH Controller Jack Page 43 Page 42 Press to turn power ON or OFF. Connect an optional Yamaha BC3 Breath Controller here for expressive breath control capability. 2 AC INLET (AC Power Cord Socket) Page 26 7 FOOT SWITCH jacks...
- Page 25 Rear Panel # GAIN knob Page 73 When the optional AIEB2 has been For adjusting the input gain of the audio at the A/D INPUT installed: jacks (above). Depending on the connected device (microphone, CD player, etc.), you may need to adjust this for optimum level.
-
Page 26: Setting Up
WARNING Use only the AC power cord supplied with the MOTIF ES. If the supplied cord is lost or damaged and needs to be replaced, contact your Yamaha dealer. The use of an inappropriate replacement can pose a fire and shock hazard! -
Page 27: About Data Storage To Smartmedia Cards And Usb Storage Devices
CAUTION Data of up to 128 MB can be saved to a SmartMedia card inserted to the CARD slot on the rear panel. Yamaha recommends the use of a large-capacity USB storage device, since you may want to save data more 128 MB — especially if you’ve installed optional DIMMs (page 289) and are using the Sampling feature. -
Page 28: Using The Smartmedia™* Cards
Never attempt to remove the SmartMedia card or turn the power off during Data Backup accessing. Doing so can damage the data on the instrument/SmartMedia For maximum data security Yamaha recommends that you card and possibly the SmartMedia card itself. keep two copies of important data on separate SmartMedia cards. -
Page 29: Using Usb Storage Devices
USB storage devices, please consult your A type and the B type. Connect the A type to your Yamaha dealer, or an authorized Yamaha distributor (see list computer and the B type to the USB TO HOST at end of the Owner’s Manual) for advice, or see the following connector. - Page 30 About data storage to SmartMedia cards and USB storage devices Basic settings for using SmartMedia or a USB Set Current to “CARD” if you wish to access the storage device SmartMedia, or set Current to “USB” if you wish to access the USB storage device.
-
Page 31: Connections
Connections Connections Connecting to External Audio Equipment Since the MOTIF ES has no built-in speakers, you’ll need an external audio system or a set of stereo headphones to properly monitor it. The following illustrations show various connection examples; use the one most similar to your intended setup. Audio Output Connecting stereo powered speakers (analog output) For optimum, accurate reproduction of the instrument’s rich sounds, effects and full stereo image, use a pair of powered... - Page 32 Connections The following settings can be made from the parameter pages listed above. Output jacks Stereo/Mono Output jacks Stereo/Mono L&R OUTPUT L and R Stereo ASSIGNABLE OUTPUT L Mono asL&R ASSIGNABLE OUTPUT L and R Stereo ASSIGNABLE OUTPUT R Mono as1&2 ASSIGNABLE OUTPUT 1 and 2 Stereo (1: L, 2: R) *...
-
Page 33: Audio Input
Connections Digital Output using the optional AIEB2 When the optional AIEB2 board has been installed to the rear panel, the sound output through the OUTPUT jacks by analog can also be output by digital through the OPTICAL OUTPUT jack and the DIGITAL OUTPUT jack. Using these digital output jacks, you can record the keyboard performance or Song/Pattern playback of this synthesizer to external media (e.g., an MD recorder) with exceptionally high-quality sound. -
Page 34: Connecting External Midi Instruments
Connections Digital Input using the optional AIEB2 By installing the optional AIEB2 I/O expansion board, you can directly record digital audio from digital sources — such as a CD player or DAT deck. For maximum compatibility and flexibility, the AIEB2 board includes two different input types: OPTICAL (optical fiber) and DIGITAL (coaxial cable). - Page 35 Connections MIDI Transmit Channel and Receive Channel Make sure match the MIDI Transmit Channel of the external MIDI instrument with the MIDI Receive Channel of the MOTIF ES. For details on setting the MIDI Transmit Channel of the external MIDI instrument, refer to the Owner’s Manual of the MIDI instrument. For details on setting the MIDI Receive Channel of the MOTIF ES, check the following points.
- Page 36 Connections Recording and playback using an external MIDI sequencer In this connection example, song data on the external MIDI sequencer plays the sounds of the tone generator on the MOTIF ES. The external song data can also be recorded to Song/Pattern tracks on the MOTIF ES. MIDI IN MIDI OUT MIDI IN...
- Page 37 MTC (MIDI Time Code) allows simultaneous synchronization of multiple audio devices via standard MIDI cables. It includes data corresponding to hours, minutes, seconds, and frames. The MOTIF ES does not transmit MTC. An instrument such as the Yamaha AW4416 is necessary as an MTC master.
-
Page 38: Connecting To A Computer
Connections Connecting to a Computer Connecting this instrument to a computer via MIDI opens up a whole world of musical possibilities — such as using sequencer software to record and play back compositions with the MOTIF ES sounds or using the included Voice Editor software to create and edit your own custom Voices. - Page 39 Connections About the Thru Port Setting MIDI ports can be used to divide playback among multiple synthesizers, as well as expand the MIDI channel capacity beyond sixteen. In the example below, a separate synthesizer connected to the MOTIF ES is played by MIDI data via port 5, as set in the ThruPort parameter with the following operation.
- Page 40 Connections Using a MIDI interface • Using the computer’s MIDI interface MIDI cable MIDI IN MIDI OUT MIDI IN MIDI OUT MUSIC PRODUCTION SYNTHESIZER Computer with MIDI interface MOTIF ES • Using an external MIDI interface MIDI cable MIDI interface Serial port (modem or printer port) or USB port MIDI IN...
- Page 41 Connections Local On/Off – when Connected to a Computer When connecting this synthesizer to a computer, the keyboard performance data is generally sent to the computer, and then returned from the computer to play the tone generator block. If the Local Control in the Utility mode is set to “on,” a “double”...
-
Page 42: Connecting Various Controllers
Footswitch (assignable) An optional Yamaha FC4 or FC5 Foot Switch connected to the rear panel FOOT SWITCH ASSIGNABLE jack can be assigned to a range of parameters. It is suited for switch-type (on/off) controls, such as Portamento Switch, increment/decrement of a Voice or Performance Number, start/stop of the Sequencer, and holding the Arpeggiator on or off. -
Page 43: Turning The Power On/Off
Turning the power on/off Turning the power on/off Power-on Procedure Once you’ve made all the necessary connections between your MOTIF ES and any other devices, make sure that all volume settings are turned down all the way to zero. Then turn on the every device in your setup in the order of MIDI masters (senders), MIDI slaves (receivers), then audio equipment (mixers, amplifiers, speakers, etc.). -
Page 44: Resetting The User Memory To The Initial Factory Settings
Resetting the User Memory to the Initial Factory Settings Resetting the User Memory to the Initial Factory Settings The original factory setting of this synthesizer’s User Memory (page 186) can be restored as follows. CAUTION When the factory settings are restored, all the Voice, Performance, Song, Pattern, and system setting in the Utility mode you created will be erased. Be sure to save all important data to SmartMedia or USB storage device before executing this procedure (pages 85, 91 and 131). -
Page 45: Basic Operation
Modes Basic Operation In this section, we’ll take a look at the fundamental operating conventions of the MOTIF ES. Here, you’ll learn the basics – how to select modes, call up the various functions, change settings, and edit parameter values. Take time to familiarize yourself with these nuts-and-bolts operations, and you’ll be on your way to mastering the instrument. -
Page 46: Mode Table
Modes Mode table The functions of each mode and how to enter each mode are as follows: Mode Function How to enter the mode Voice mode Voice Play mode Playing a Voice [VOICE] Voice Edit mode Editing/Creating a Voice [VOICE] [EDIT] Voice Job mode Initializing a Voice, etc. -
Page 47: Functions And Sub-Functions
Functions and Sub-Functions Functions and Sub-Functions Each mode described above contains various displays, with various functions and parameters. To navigate your way through these displays and select a desired function, use the [F1] - [F6] buttons and the [SF1] - [SF5] buttons. When you select a mode, the available displays or menus appear directly above the buttons at the bottom of the display (as shown below). - Page 48 Selecting a Program Using the [GROUP], [NUMBER] buttons As shown below, you can select a program number by pressing any of the GROUP [A] - [H] buttons and pressing any of the NUMBER [1] - [16] buttons. The explanations here apply when these four button indicators are off. SLOT SLOT SLOT...
-
Page 49: Moving The Cursor And Setting Parameters
Moving the Cursor and Setting Parameters Moving the Cursor and Setting Parameters Changing (editing) parameter values Rotating the data dial to the right (clockwise) increases the value, while rotating it to the left (counter-clockwise) decreases it. Moving the cursor For parameters with large value ranges, you can increase DEC/NO INC / YES Use these four buttons to navigate the display, moving the... -
Page 50: Knob (Kn) And Control Slider (Cs)
Knob (KN) and Control Slider (CS) Knob (KN) and Control Slider (CS) Knob (KN) You can change the brightness and tone characteristics of the current Voice or Performance in realtime by turning the knobs while you play. Rotating it to the right (clockwise) increases the program number, while rotating it to the left (counter-clockwise) decreases it. -
Page 51: Control Slider (Cs)
About the editing functions Control Slider (CS) You can adjust the volume of the Voice/Performance you play on the keyboard, or the volume of the specified part (track) of the Song/Pattern by using the Control Sliders (CS). In the Master mode, various functions as well as the volume can be assigned to the Control Sliders (CS) when the Zone Switch is set to on (page 137). -
Page 52: Compare Function
Confirmation Message Compare Function This convenient function lets you switch between the edited sound and its original, unedited condition – allowing you to listen to the difference between the two and better hear how your edits affect the sound. For example, when editing a Voice in the Voice Edit mode, the “E” Edit indicator is shown. Pressing the [COMPARE] button in this condition reverts to the original unedited sound (the button lamp flashes and the “C”... -
Page 53: Information Display
Information Display Information Display This convenient function lets you call up relevant details about the selected mode – simply by pressing the [INFORMATION] button. For example, when the Voice mode is active, you can quickly check information about which voice bank is selected, what Play mode (poly or mono) is being used, which effects are applied, and so on. - Page 54 Naming Basic naming operation As shown below, you can set the name by repeating the two operations – moving the cursor to the desired location by using the Cursor button and selecting a character by using the data dial, [INC/YES] button, and [DEC/NO] button. Moving the cursor to the desired location on the name Selecting a character at the cursor location DEC/NO...
-
Page 55: Quick Guide - Playing The Motif Es
Playing the Demo Songs/Patterns Quick Guide — Playing the MOTIF ES Playing the Demo Songs/Patterns Here’s the best place to start your explorations of the MOTIF ES. The Song and Pattern Demos have been specially programmed so you can hear just how amazing the sounds are, and find out just how powerful the instrument really is — for music creation, performance and production. - Page 56 Playing the Demo Songs/Patterns Set the LoadType to “All.” Select and play another Demo Song. You can select from the three Load Types listed below. Here, Move the cursor to “Song Number: Name” (with the cursor we’ll select “All.” buttons) then select another song by using the Data Dial, or the [INC/YES] and [DEC/NO] buttons.
- Page 57 Playing the Demo Songs/Patterns Some Sections of the Demo Pattern may have no data. Because of Press the [F] (Play) button to start Pattern this, selecting some Sections may result in no sound. playback. There is another way to start Pattern playback – by pressing the Press the [ ] (Stop) button to stop Pattern note son the keyboard.
- Page 58 Playing the Demo Songs/Patterns Using Mute/Solo with the Song and TRACK SELECT Pattern tracks ELEMENT/PERF. PART/ZONE NUMBER Try this with the Demo Songs to hear how the tracks sound MUTE both in isolation and in various combinations. SOLO To mute a track Press the [MUTE] button (the lamp lights).
-
Page 59: Song Chain
Playing the Demo Songs/Patterns Song Chain In addition, the following parameters can be set in the Song Chain. This function allows Songs to be “chained” together for Skips past (ignores) the selected chain number and skip automatic sequential playback. In this section, try using the continues playback from the next chain number. -
Page 60: Playing The Keyboard (In The Voice Play Mode)
Playing the Keyboard (in the Voice Play mode) Playing the Keyboard (in the Voice Play mode) The Voice Play mode is where you select and play the instrument sounds (voices) of this synthesizer. Selecting a Voice Selecting a Normal Voice Internally, there are two Voice Types: Normal Voices and Drum Voices. -
Page 61: Selecting A Drum Voice
Playing the Keyboard (in the Voice Play mode) Selecting a Drum Voice Select a Normal Voice Bank. Internally, there are two Voice Types: Normal Voices and Drum Voices. Normal Voices are mainly pitched musical instrument- Select one of the Banks from Preset 1~6, User 1~2, and GM. type sounds that can be played over the range of the keyboard. -
Page 62: Using The Category Search Function
Playing the Keyboard (in the Voice Play mode) Using the Category Search function All Categories are divided into two or three Sub Categories for further ease in selection. The Sub Category names are displayed at the bottom of the Category Search display. Press This synthesizer features a powerful Category Search function the [F1] - [F3] buttons to select the first Voice in the that gives you quick access to the sounds you want,... - Page 63 Voice (page 62). Keyboard octave setting Register the Voice selected in step #2 to the (MOTIF ES6/MOTIF ES7) Favorite Category by Pressing the [F5] SET/CLR button to checkmark the box next to the Voice Sometimes when playing a voice, you may wish to play in a lower or name.
-
Page 64: Using Controllers
Playing the Keyboard (in the Voice Play mode) Using Controllers Press the [F1] GENERAL button, then the [SF2] KBD button. Pitch Bend Wheel Use the Pitch Bend wheel to bend notes up (roll the wheel away from you) or down (roll the wheel toward you) while playing the keyboard. -
Page 65: Ribbon Controller
Playing the Keyboard (in the Voice Play mode) Ribbon Controller Edit Indicator The Ribbon Controller is touch sensitive, and is controlled by Tweaking the knobs in the Voice mode directly changes running your finger laterally across the surface. Various the parameters of the Voice. When any of the Voice function are assigned to each preset Voice. -
Page 66: Using The Arpeggio Feature
Playing the Keyboard (in the Voice Play mode) Using the Arpeggio feature This function lets you trigger rhythm patterns, riffs and phrases using the current Voice by simply playing notes on the keyboard. Since the preset Voices already have their own Arpeggio types pre-assigned, all you need to do is select the desired Voice and turn on the Arpeggio function. -
Page 67: Playing The Keyboard (In The Performance Play Mode)
Playing the Keyboard (in the Performance Play mode) Playing the Keyboard (in the Performance Play mode) As in the Voice Play mode, the Performance Play mode is where you select and play the instrument sounds of this synthesizer. In a Performance, you can mix several different Voices together in a layer, or split them across the keyboard, or even set up a combination layer/split. - Page 68 Favorite Category functions in the Performance Play mode. For details on how to use the function, see page 62. Keyboard octave setting (MOTIF ES6/MOTIF ES7) Using the [INC/YES], [DEC/NO] buttons and data dial As in the Voice Play mode, you can use the [OCTAVE UP/...
-
Page 69: Using Controllers
Playing the Keyboard (in the Performance Play mode) Using Controllers Pitch Bend Wheel Edit Indicator This is basically the same as in the Voice Play mode (page Tweaking the knobs in the Performance mode directly 64). changes the parameters of the Performance. When any of the Performance parameters are changed, the [E] The Pitch Bend Range setting depends on the setting (made in the (Edit) Indicator appears in the top left of the display. -
Page 70: Using The Arpeggio Feature
Playing the Keyboard (in the Performance Play mode) Using the Arpeggio feature As in the Voice mode, you can use the Arpeggio feature in the Performance mode. In the Performance mode, you can make independent Arpeggio playback settings for each Part of the Performance — including the on/off setting, as well as the Arpeggio type and related parameters. - Page 71 Playing the Keyboard (in the Performance Play mode) When an internal Voice is assigned to a Part, the following Press the [F2] VOICE button in the Performance Voice Banks are available. Play mode. PRE1 (Preset1) ~ Preset Banks 1 - 6 of the Normal Voice. These This calls up a list indicating which Voice is assigned to each PRE6 (Preset 6) correspond to the [PRE1] - [PRE6] buttons in the Voice...
-
Page 72: Using The A/D Input Sound
Playing the Keyboard (in the Performance Play mode) Using the A/D input sound One of the enormous benefits of the Performance mode is that you can have the A/D input sound — such as your voice through a microphone, a guitar, bass, or CD player — assigned as one of the four Parts of a Performance. Various Part parameters such as volume, pan, and effects can be set for this Part, and the sound of the Part is mixed and output together with the other Parts. - Page 73 Playing the Keyboard (in the Performance Play mode) Adjust the microphone input level by using the Press the [PERFORM] button to enter the GAIN knob on the rear panel. Performance Play mode and select the desired Performance. A / D INPUT GAIN Press the [UTILITY] button to enter the Utility mode, press the [F2] I/O button, then press the...
-
Page 74: Using The Plug-In Board
This synthesizer is compatible with the Modular Synthesis Plug-in System (see below). About MODULAR SYNTHESIS PLUG-IN SYSTEM The Yamaha Modular Synthesis Plug-in System offers powerful expansion and upgrade capabilities for Modular Synthesis- Plug-in-compatible synthesizers, tone generators and sound cards. This enables you to easily and effectively take advantage of sophisticated synthesizer and effects technology, allowing you to keep pace with the rapid and multi-faceted advances in modern music production. -
Page 75: Using A Single Part Plug-In Board
Using the Plug-in Board Using a Single Part Plug-in Board Install any of the Single Part Plug-in Boards such as PLG150-AN, PLG150-PF, PLG150-DX, PLG150-VL, PLG150-DR, and PLG150-PC to the MOTIF ES and play the Plug-in Voice in the Voice Play mode. After turning the power off, install a Single Part Set the MIDI port of the installed Plug-in Board to Plug-in Board to the instrument. - Page 76 Using the Plug-in Board Plug-in Voices and Board Voices The Voices of a Single Part Plug-in Board installed to this synthesizer can be divided into two types: Board Voices and Plug-in Voices. Board Voices are unprocessed, unaltered Voices of the Plug-in board – the “raw material” used for the Plug- in Voices.
-
Page 77: Using A Multi Part Plug-In Board
Using the Plug-in Board Using a Multi Part Plug-in Board In this section, we’ll explain how to play back an XG for mat song, using the PLG100-XG Plug-in Board. Naturally, to get the most out of these instructions, you should have XG song data (Standar d MIDI File) stored on a SmartMedia card or USB storage device. After turning the power off, install the Multi Part Press the [FILE] button to enter the File mode, then Plug-in Board PLG100-XG to slot 3 of this... -
Page 78: Using An Effect Plug-In Board
Using the Plug-in Board Using an Effect Plug-in Board In the example explanation below, the PLG100-VH Vocal Harmony Plug-in Board is used to apply harmony effects to the microphone sound in the Performance mode. For Songs/Patterns, the Effect Plug-in Board related parameters (which correspond to step #6 - 7 below) can be edited in the Song Mixing mode/Pattern Mixing mode. -
Page 79: Quick Guide - Advanced Course
Editing a Voice Quick Guide — Advanced Course Editing a Voice The Voice Edit mode ([VOICE] [EDIT]) gives you comprehensive tools for creating your own original Voices, either from scratch by changing the basic sounds, or by tweaking the various Voice parameters. Create your custom sounds by calling up a preset Voice and editing as desired. - Page 80 Editing a Voice Select the menu you wish to edit by pressing the Store the edited Voice to internal User memory [F1] - [F6] and [SF1] - [SF5] buttons, then edit the (page 187). parameters. The edited Voice can be stored in the Voice Store mode. See The following briefly describes the main Voice parameters.
- Page 81 Editing a Voice Editing a Voice by using the Knobs The four knobs at the top left of the instrument are not only for tweaking the sound while you perform — you can also use them to edit a Voice, either in the Voice Play mode or the Voice Edit mode. When the [PAN/SEND] indicator is turned on: Determines the stereo pan position of the Voice.
-
Page 82: Drum Voice Edit
Editing a Voice To solo an Element for editing Edit Recall This feature is useful for isolating the sound of single If you are editing a Voice and select a different Voice Element, for ease in editing. without storing the one you were editing, all the edits you’ve made will be erased. - Page 83 Editing a Voice Select the desired menu for editing by pressing Store the edited Voice to internal User memory the [F1] - [F6] and [SF1] - [SF5] buttons, then edit (page 186). the parameters. The edited Voice can be stored in the Voice Store mode. See The main parameters available are basically the same as in the page 85 for details.
- Page 84 Editing a Voice Setting the drum key for independent open and closed hi-hat sounds [VOICE] Drum Voice selection [EDIT] Key selection [F1] OSC [SF5] OTHER AltnateGroup In a real drum kit, some drum sounds cannot physically be played simultaneously, such as open and closed hi-hats. You can prevent drum instruments from playing back simultaneously by assigning them to the same Alternate Group.
-
Page 85: Plug-In Voice Edit
Editing a Voice Plug-in Voice Edit The Plug-in Voices (available when installing optional Plug-in Boards to the instrument) can be edited in basically the same way as in Normal Voice Edit (page 79). Unlike with Normal voices, the Plug-in voices only have one Element for editing. In addition, some of the other parameters may not be available. - Page 86 Editing a Voice Press the [INC/YES] button to execute the Store Set the Type parameter to “All Voice.” operation. After the Voice has been stored, a “Completed” message appears and operation returns to the Voice Play display. DEC/NO INC / YES Move the cursor to TYPE, then select a file type by using the data dial, [INC/YES] and [DEC/NO] buttons.
-
Page 87: Editing A Performance
Editing a Performance Loading Voice data from the SmartMedia/USB When Type is set to “Voice”: storage device When Type is set to “Voice,” you can specify and load a specific Voice from a file (with the extension W7V or W7A). [FILE] [F3] LOAD In the previous section, we saved Voice data as an “All Voice”... - Page 88 Editing a Performance Press the [PERFORM] button to enter the Performance mode, then select a Performance to be edited. Press the [EDIT] button to enter the Performance Edit mode. Call up the Common Edit display or Part Edit display. Use the Part Edit to edit the parameters for each Part. Use Common Edit to edit the parameters for all of the Parts. While in the Voice Edit mode, you can switch between the Common Edit display amd the Part Edit display as shown below.
- Page 89 Editing a Performance Effect related parameters ....Pages 177 and 215 Repeat steps #3 - 4 as desired. [COMMON] [F6] EFFECT [COMMON] [F2] OUT/MEF [SF3] MEF (Master Effect) Name the edited Performance. The Effects use DSP (Digital Signal Processing) to alter and enhance the sound of a Performance.
- Page 90 Editing a Performance Editing a Performance by using the Knobs The four knobs at the top left of the instrument are not only for tweaking the sound while you perform — you can also use them to edit a Performance, either in the Performance Play mode or the Performance Edit mode. When the [PAN/SEND] indicator is turned on: Determines the stereo pan position of the Performance.
-
Page 91: Storing/Saving The Created Performance
Editing a Performance Editing a Performance by using the Con- Edit Recall trol Sliders (CS) If you are editing a Performance and select a different Performance without storing the one you were editing, all the edits [PERFORM] Performance selection [EDIT] you’ve made will be erased. - Page 92 Editing a Performance Move the cursor to TYPE, then select a file type by using the Press the [INC/YES] button to execute the Store data dial, [INC/YES] and [DEC/NO] buttons. When Type is set operation. to “All,” execute the Save operation to save all the created data, including the Performances as well as the Voices After the Performance has been stored, a “Completed”...
- Page 93 Editing a Performance Select the file type to be loaded. The file saved in operation explained on the previous page contains all the Performances. If you wish to load all the Performances, set Type to “All.” In this case, all data that can be created on the MOTIF ES will be loaded in step #5 below.
-
Page 94: Creating A Voice By Using The Sampling Function
Creating a Voice by using the Sampling function Creating a Voice by using the Sampling function Sampling is a powerful function that lets you bring your own recorded sounds – your voice, an instrument, rhythms, special sound effects, etc. – into the system of this synthesizer, and play those sounds just like any other voices. These sounds, the audio data you capture with the Sampling function, are referred to as “Samples.”... - Page 95 Creating a Voice by using the Sampling function Press the [F6] REC button to call up the Press the [F6] REC button again to enable Sampling Record display (Sampling Standby Sampling Trigger Waiting. status), then set the parameters as required. Doing this puts sample recording on standby, waiting for an input signal that exceeds the Trigger level.
- Page 96 Creating a Voice by using the Sampling function When you play the sample from the keyboard, the more Press the [EDIT] button to enter the Sampling distant the played samples are from the original key, the less Edit mode, then press the [F4] RANGE button to natural the samples sound.
- Page 97 Creating a Voice by using the Sampling function Saving a Sample [FILE] [F2] SAVE Assign the Samples obtained via the Sampling function to specific Key Ranges to create a Waveform. Because the Waveform data including Samples which resides temporarily in DIMM (page 187) is lost when the power is turned off, you should always save the Waveform data or Samples to a SmartMedia/USB storage device before turning off the power.
-
Page 98: Sampling The Sound Of An Audio Device To Create A Drum Voice
Creating a Voice by using the Sampling function Sampling the sound of an audio device to create a Drum Voice In the previous section on page 94, you learned how to record a Sample using a microphone. Here, you’ll learn how to record Samples from an audio device, such as a CD player or MD player, and use the Samples to create a Drum Voice. - Page 99 Creating a Voice by using the Sampling function By repeating steps #5 - 8 above, you can create a Drum Voice Press the [F6] REC button again to enable in which each key has a different sound (as shown below). Sampling Trigger Waiting.
- Page 100 Creating a Voice by using the Sampling function Loading WAV or AIFF audio files to create a Waveform/Voice Any audio data created and edited on a computer and saved in the WAV or AIFF format can also be used as material for Samples on the MOTIF ES.
- Page 101 Creating a Voice by using the Sampling function Depending on whether you’re creating a Normal When creating a Drum Voice in steps #4 - 5 Voice or a Drum Voice, follow the appropriate By repeating steps #5 - 8 above, you can create a Drum instructions below.
-
Page 102: Creating A Song On The Motif Es
Creating a Song on the MOTIF ES Creating a Song on the MOTIF ES The MOTIF ES is a full-featured and enormously powerful music production machine, and all of the instrument’s advanced features and functions come together seamlessly in the creation of a Song. Here, you’ll learn how to get the most out of the sequencer-related functions of the MOTIF ES, using primarily the Song and Pattern modes. - Page 103 Creating a Song on the MOTIF ES If desired, make a backup of the Voice (Mixing) Move the cursor to the Template number settings made above. location, then select a Mixing Template. Select a Template number by using the data dial, or the [INC/ First, store the Voice settings as Song Mixing/Pattern YES]/[DEC/NO] buttons.
- Page 104 Creating a Song on the MOTIF ES If desired, make a backup of the Mixing settings made above. First, store the Voice settings as Song Mixing/Pattern Mixing. Press the [STORE] button to enter the Song Mixing Store mode/ Pattern Mixing Store mode, then press the [ENTER] button to execute the Store operation (page 131). Next, save the stored Song Mixing as a file for all Songs created on the instrument before turning the power off.
-
Page 105: Using The Arpeggio Function
Creating a Song on the MOTIF ES Using the Arpeggio Function Press the [MIXING] button (the lamp lights) to enter the Song Mixing mode/Pattern Mixing Just as in the Voice/Performance mode, you can use mode, then select the Part containing the desired Arpeggio playback in the Song/Pattern mode. -
Page 106: Creating A Pattern
Creating a Song on the MOTIF ES Store the edited Song Mixing/Pattern Mixing to Name the edited Mixing Voice. internal User memory. Input a name in the [COMMON] [F1] GENERAL [SF1] Press the [EXIT] button several times to return to the Song NAME display. - Page 107 Creating a Song on the MOTIF ES Sampling a rhythm loop (audio data) to a Pattern track With this method, you can record drum loops and rhythm patterns from CDs to the MOTIF ES by using the Sampling function, then slice the sample into separate components and assign the slices to different keys.
- Page 108 Creating a Song on the MOTIF ES Press the [F2] SLICE button to call up the Slice display. Edit the sample data in the [F1] TRIM display. Execute the Slice operation in the [F2] SLICE display. Set the parameters shown below. Measure Determines the number of measures the sample is recognized as having.
- Page 109 Creating a Song on the MOTIF ES Loading a WAV file/AIFF file to a Pattern track Audio data you’ve created and stored in the common WAV or AIFF computer audio formats can be loaded to the instrument and used with the Slice function to divide the sample and assign the slices to different MIDI notes — letting you match the sampled rhythm to virtually any tempo.
- Page 110 Creating a Song on the MOTIF ES Return to the Pattern Play mode by pressing the Call up the Slice Job display. [PATTERN] button or [EXIT] button. Press the [F1] KEYBANK button, move the cursor to “12: Slice,” then press the [ENTER] button. Press the [F] (Play) button to play the created Pattern.
- Page 111 Creating a Song on the MOTIF ES Press the [TRACK SELECT] button (the lamp Press the [F] (Play) button to start recording. lights), then select the desired track from the number buttons [1] - [16]. When a Drum Voice is selected, for example, try recording the rhythm pattern shown below.
- Page 112 Creating a Song on the MOTIF ES Recording a rhythm pattern created by Arpeggio Go back to the Pattern Play mode, then set the playback to a Pattern track meter, tempo, and length of the current pattern. The Arpeggio function is a virtually endless source of creative inspiration, putting a huge variety of rhythm patterns, riffs and phrases at your fingertips —...
- Page 113 Use the special preset Phrases already in internal memory, or create your own User Phrases — by recording, or loading Pattern data from the included CD-ROM (Sound Library for MOTIF ES6/MOTIF ES7/MOTIF ES8). Use the Assigning Phrases function to assemble your original Patterns, with up to 16 tracks.
- Page 114 Creating a Song on the MOTIF ES Select a different track and copy the User Phrase from the another pattern to the selected Pattern’s track. The User Phrases that can be assigned with the Patch function are limited to the ones contained in the currently selected Pattern.
- Page 115 Creating a Song on the MOTIF ES Save the created Pattern data to a SmartMedia/USB storage device (page 132) before turning the power off. Using the Groove settings to change the Pattern data Grid Groove is a playback-only feature that processes the recorded data of a Pattern without actually changing it. In other words, the original data (created via the Recording, Sampling, File Loading and Patch functions) remains intact.
- Page 116 Creating a Song on the MOTIF ES Editing a Pattern Chain Press the [F] (Play) button to start recording The Pattern Chain Edit mode makes it possible to edit the and play the Pattern. order of the Sections in a chain as well as inserting tempo, and scene/mute event data.
-
Page 117: Creating A Song
Creating a Song on the MOTIF ES Converting a Pattern Chain to Song data Press the [ENTER] button to execute the Convert operation. In the Pattern Play mode, select a Pattern for which Pattern Chain data has already been The Pattern Chain data is converted to Song data and copied created. - Page 118 Creating a Song on the MOTIF ES Recording with the keyboard to a Song Set the parameters related to recording in the track (in the Song Record mode) [F1] SETUP display. Recording your keyboard performance to an Set the Type parameter to “replace.” empty track (Replace) Set other parameters as necessary.
- Page 119 Creating a Song on the MOTIF ES Re-recording a specific part of a Song (Punch In/Out) Save the created Song data to a SmartMedia/USB Use the Punch In/Out recording method to record over only a storage device (page 132) before turning the specific portion of the track.
- Page 120 Creating a Song on the MOTIF ES Rehearsing parts before recording Song Recording using a Performance If you have a favorite Performance or one that would fit The MOTIF ES has a convenient Rehearsal mode in the Song to be recorded, you can copy certain settings recording, that lets you easily and temporarily disable of up to four Parts of the Performance to the Song recording in order to practice a part or try out various...
- Page 121 Creating a Song on the MOTIF ES Song Recording using Plug-in Voices This section shows you how to use the Voices of an optional Single Part Plug-in Board (such as PLG150-AN, PLG150-PF and PLG150-DX) in recording a Song. 1 ~ 4 When you play the keyboard, you should be able to hear Install a Single Part Plug-in Board to the the selected Voice of the Plug-in Board.
- Page 122 Creating a Song on the MOTIF ES Using the Groove function Press the [F2] SOURCE button to call up the display for setting the Sampling Source, then set Just as in the Pattern Play mode, the Groove function is the parameters as shown below. available also in the Song Play mode.
- Page 123 Creating a Song on the MOTIF ES Press the [F6] REC button again enable Punch In Stop the audio equipment when the Song Waiting. reaches the Punch Out point (when sampling stops). Doing this puts sample recording on standby, waiting for Press the [F3] AUDITION button to hear the sampled sound.
- Page 124 Creating a Song on the MOTIF ES Recalling a Song Scene and Arpeggio type during recording ARP1 - ARP5 menus appear also in the [F3] ARP display in the Song Record mode as well as the [F1] PLAY display in the Song Play mode.
- Page 125 Creating a Song on the MOTIF ES When changing the value, the entire line will flash on the Select a track to be edited. display indicating this is being edited and not fixed yet. Select one of the three available track types by pressing the [F4] TR SEL (Track Select) button.
- Page 126 Creating a Song on the MOTIF ES [F1] UNDO Undo (Canceling the executed Job)/Redo Press the [F] (Play) button to hear your edited (Restoring the executed Job) functions data. [F2] NOTE Note Data Job Since the Song can be played back from within the Song Edit [F3] EVENT Event Job mode, you can instantly hear and check the changes you’ve...
- Page 127 Creating a Song on the MOTIF ES Using the Undo/Redo functions If you’re not satisfied with the results of a just-executed Job, or you want to hear the difference of the sound before and after using a Job, you can use the convenient Undo and Redo functions. After changing the data with a particular Job, repeat steps #1 -4 as desired.
- Page 128 Creating a Song on the MOTIF ES Press the [EDIT] button to enter the Song Mixing Edit mode. EDIT STORE COMPARE SCENE STORE SET LOCATE Call up the Common Edit display or Part Edit display. Use Part Edit to edit the parameters for each Part. Use Common Edit to edit the parameters for all of the Parts. While in the Song Mixing Edit mode, you can switch between the Common Edit display and the Element Edit display as shown below.
- Page 129 Creating a Song on the MOTIF ES Editing a Mixing by using the Knobs (in the Song mode/Pattern mode) The four knobs at the top left of the instrument can be used to tweak the Song/Pattern Mixing settings as they play (in the Song Play/Pattern Play mode).
-
Page 130: Creating An Arpeggio
Creating a Song on the MOTIF ES Editing a Mixing by using Control Sliders (in the Song mode/Pattern mode) [SONG] Song selection [MIXING] [EDIT] Part selection [F2] OUTPUT [SF1] VOL/PAN Volume In the Song/Pattern mode, the four Control Sliders let you independently adjust the levels of the Parts (Voices), letting you control the overall balance of the Parts. -
Page 131: Storing/Saving The Created Song/Pattern
Creating a Song on the MOTIF ES Record the MIDI sequence data to a Song or Pattern track, referring to the previous instructions in this chapter as needed. The examples listed below are used as reference. Creating a rhythm pattern (using a Drum Voice) Track 1 Record a basic rhythm pattern using various drum instruments. - Page 132 Creating a Song on the MOTIF ES Saving the Song/Pattern data to the Press the [ENTER] button to execute the Save SmartMedia/USB storage device operation. [FILE] [F2] SAVE If you are about to overwrite an existing file, the display prompts you for confirmation. Press the [INC/YES] button to CAUTION execute the Save operation to overwrite an existing file, or press the [DEC/NO] button to cancel it.
- Page 133 Creating a Song on the MOTIF ES Loading a file saved to a SmartMedia/ Press the [ENTER] button to execute the Save USB storage device operation. If you are about to overwrite an existing file, the [FILE] [F3] LOAD display prompts you for confirmation. Press the [INC/ YES] button to execute the Save operation to These instructions describe how to recall the data saved as a file type overwrite an existing file, or press the [DEC/NO]...
- Page 134 Creating a Song on the MOTIF ES Select a file ( ) to be loaded. Move the cursor to the file (extension: W7A) which was saved as “All” on previous page. When Type is set to “All,” go to step #5. When Type is set to something other than “All,”...
- Page 135 Creating a Song on the MOTIF ES When Type is set to “Sample Voice”: Only when entering the File mode from the Song mode/Pattern mode, you can select and load a specified Sample Voice in the file (extension: W7A) to this instrument. ENTER ENTER Move the cursor to the file...
-
Page 136: Using As A Master Keyboard
Using as a Master Keyboard Using as a Master Keyboard This synthesizer is loaded with such a wealth of different features, functions and operations, you may find it difficult to locate and call up the particular feature you need. This is where the Master function comes in handy. You can use it to memorize the operations you use most often in each mode, and call them up instantly anytime you need them with a single button press. -
Page 137: Memorize To A Master
Using as a Master Keyboard Memorize to a Master Select a Master to be created. Store the edited Master to internal User memory. Press the [STORE] button to enter the Master Store mode. Press the [F2] MEMORY button to call up the Mode setting display. - Page 138 Using as a Master Keyboard Press the [F2] MEMORY button to call up the Mode setting display. After setting the Mode and Program number which you wish to memorize to the Master, set the Zone Switch to “on”. Set the Zone Switch to “on.” Determine the mode that is called up when the Master number is selected.
- Page 139 Using as a Master Keyboard Using Zones effectively with external The two examples below show how to use the Zones with both the internal tone generator and a connected external tone generator. These instructions correspond to step #6 on the previous page. Though all four Zones are used in the example below, you can use any number of Zones (two, three, or four).
- Page 140 Using as a Master Keyboard Assigning Control Change numbers to the Knobs/Sliders for each Zone Here in the KN/CS display of the Master Edit mode, you can set how the Control Knobs and Sliders will affect each Zone. This lets you specify a separate MIDI Control Change number for each Knob and Slider. Set the parameters as shown below, corresponding to step #6 on page 138.
- Page 141 Using as a Master Keyboard Setting up the Master Zones to Split or Layer This operation lets you easily determine whether the Zones of the selected Master are to be used in a Split or a Layer. The note range settings for each Zone can be determined by setting the NoteLimitH and NoteLimitL parameters from the NOTE display ([MASTER] [EDIT] Zone selection...
-
Page 142: Quick Guide - Computer Applications
Setting up Quick Guide — Computer applications Although the MOTIF ES is a powerful instrument in its own right and can effectively be used by itself for music creation and production, it is also designed for easy and comprehensive interfacing with a computer system. In this section, we’ll show you how set up the instrument with a computer (via USB) and how to use it with the software provided on the included CD-ROM, “Tools for MOTIF ES.”... -
Page 143: Controlling The Instrument From A Computer
Controlling the instrument from a computer Controlling the instrument from a computer Using a sequencer to play multiple Voices on the MOTIF ES The sequence software program SQ01 contained in the included CD-ROM lets you create and edit multi-part song data — which can be played using the sounds of the MOTIF ES. -
Page 144: Using The Multi Part Editor To Create/Edit Mixing Settings
Controlling the instrument from a computer Using the Multi Part Editor to create/edit Mixing settings The Multi Part Editor software (included on the CD-ROM) provides an intuitive way to create and edit the Mixing settings of the currently selected Song or Pattern. Thanks to the easy-to-understand graphical interface, you can edit virtually all of the Mixing parameters right from your computer –... -
Page 145: Using The Voice Editor To Create/Edit A Voice
Controlling the instrument from a computer Using the Voice Editor to create/edit a Voice The Voice Editor software (included on the CD-ROM) provides an intuitive way to create and edit Voices for the MOTIF ES. Thanks to the easy-to-understand graphical interface, you can edit virtually all of the Voice parameters right from your computer –... -
Page 146: Using The Twe Wave Editor To Edit Samples
Edit in the Voice Play Select and call up Plug-in Use the Voice Editor contained mode/Voice Edit. Preset Voice in the included CD-ROM, “TOOLS for MOTIF ES6/7/8.” Store Voice Play display Plug-in User Voice Select Voice Edit display MUSIC PRODUCTION SYNTHESIZER... -
Page 147: Controlling A Computer From The Instrument
Multi Part Editor program (contained on the included CD-ROM). The Remote Control function emulates popular hardware controllers such as the Yamaha 01X, letting you use the panel buttons/controllers on the MOTIF ES for controlling your music/audio software. -
Page 148: Setting Up For Remote Control
MOTIF ES via desired software to your computer. mLAN (with the optional mLAN16E installed), set For details on the Yamaha software contained in the included this parameter to “mLAN.” CD-ROM, refer to the separate Installation Guide. - Page 149 When setting the Port to “4” for example in step #3 of performs the required settings. “Setting up on the MOTIF ES,” add “YAMAHA USB IN 0-4” to the “Inputs” and add “YAMAHA USB OUT 0-4” to If for some reason Logic fails to recognize the MOTIF ES, the “Outputs.”...
-
Page 150: Functions Assigned To The Panel Buttons In The Remote Control Mode
Controlling a computer from the instrument Functions assigned to the panel buttons in the Remote Control mode To enter the Remote Control mode, press the REMOTE [ON/OFF] button (the lamp flashes). The REMOTE display appears (like those shown below), and the panel controls are enabled for Remote operation of the computer software (their normal functions are disabled). - Page 151 148). The functions of eight knobs on the emulated hardware controllers (such as the Yamaha 01X) are assigned to the four When the Mode is set to “General,” these buttons are assigned Knobs on the MOTIF ES. Pressing the [SF5] button changes to perform the same functions as panel buttons on the Yamaha which group’s functions (1 - 4 or 5 - 8) are assigned to the four...
- Page 152 Controlling a computer from the instrument Cursor [<] and [>] buttons Checking the Remote Control assignments By moving the cursor left/right, you can change the track or If you’re unsure as to which software function has been part to controlled by the data dial and [INC/YES]/[DEC/NO] assigned to a particular panel control on the MOTIF ES, buttons.
- Page 153 Install an mLAN-compatible audio sequencer or computer with a set of headphones. DAW application to the computer. Refer to the separate Installation Guide for information on how to install mLAN-compatible Yamaha applications. Set the audio related parameters on the DAW software.
-
Page 154: Basic Structure
Internal Structure (System Overview) Basic Structure This section gives you an easy-to-understand overview of the MOTIF ES — its wide range of sophisticated features, its MIDI control and performance functions, and its convenient file management system for original data you’ve created with the instrument. - Page 155 Internal Structure (System Overview) Controller related parameters in each mode The chart below shows the operations for calling up the Controller related parameters in each mode. Parameters for the Footswitch and the Assign Knobs A/B apply to the entire instrument, regardless of the selected program (Voice/Performance/ Song/Pattern).
- Page 156 Internal Structure (System Overview) Using one source to control several destinations For example, set the Source parameter of Control Set 1 to MW (Modulation Wheel) and the Destination parameter to ELFO-PM (Element LFO Pitch Modulation Depth). Then set the Source parameter of Control Set 2 also to MW, but set the Destination parameter to ELM PAN (Element Pan).
-
Page 157: Tone Generator Block
AWM2 (Advanced Wave Memory 2) is a synthesis system based on sampled waves (sound material), and is used in many Yamaha synthesizers. For extra realism, each AWM2 Voice uses multiple samples of a real instrument’s waveform. Furthermore, a wide variety of parameters — envelope generator, filter, modulation, and others — can be applied. - Page 158 Internal Structure (System Overview) Voice, Performance, and Mixing “Performance.” Each Performance can contain up to four different parts (Voices). Each Performance can be created by editing parameters unique to each part and parameters This instrument features three different types of programs, common to all the parts in the Performance mode (page 212).
- Page 159 Internal Structure (System Overview) The following illustrations may help in understanding the memory structure of the Voices, Performances, and Mixings. VOICE Voices Normal Voice Drum Voice Preset Voice Preset 1 Preset 4 PRE 1 PRE 4 (128 Voices) (128 Voices) Normal Voices: 768 ..
- Page 160 Internal Structure (System Overview) Normal Voices & Drum Voices Oscillator Internally, there are two Voice Types: Normal Voices and Drum VOICE] Voice selection [EDIT] Element selection/ Voices. Normal Voices are mainly pitched musical instrument- Drum Key selection [F1] OSC type sounds that can be played over the range of the keyboard.
- Page 161 Internal Structure (System Overview) Filter • Band Pass Filter This passes only those a band of signals around the Cutoff [VOICE] Voice selection [EDIT] Element selection/ frequency. The width of this band can be varied. Drum Key selection [F3] FILTER Range passed This unit modifies the tone of the sound output from Pitch by Level...
- Page 162 Internal Structure (System Overview) Single Timbre Tone Generator (Voice/ Amplitude Performance mode) and Multi-timbral [VOICE] Voice selection [EDIT] Element selection/ Tone Generator (Song/Pattern mode) Drum Key selection [F4] AMP This unit controls the output level (amplitude) of the sound The internal tone generator block operates in two different output from Filter.
- Page 163 Internal Structure (System Overview) Part structure of the tone generator block The MIDI receive channel in the Voice mode can be set from the following display in the Utility mode. [UTILITY] [F5] MIDI [SF1] CH BasicRcvCh This synthesizer plays the sounds in the tone generator block in The MIDI port number which this synthesizer can recognize in the response to MIDI messages received from the controller or Voice mode is 1.
- Page 164 Internal Structure (System Overview) Part structure of the tone generator block in the Song mode/Pattern mode In these modes, multiple parts are provided and different voice and different melodies or phrases can be played back for each part. Because these modes let you set the MIDI channel for each part of the tone generator block, you can use an external MIDI sequencer as well as the sequencer block of the instrument to play the sounds.
-
Page 165: Sequencer Block
Internal Structure (System Overview) Audio Input Part (AUDIO IN) The Performance mode, Song mode, and Pattern mode are capable of handling the audio input signal as a Part. Various parameters such as volume, pan, and effect can be set to this Part and the sound is output together with other Parts. Other available settings include how stereo input signals are handled, as well the output assignment of the audio Part. - Page 166 Internal Structure (System Overview) Song data structure The following illustration shows the track structure of a Song. Songs are created by recording MIDI sequence data to individual tracks and by setting tone generator related parameters (in Song Mixing). Song 64 Song 63 Song 02 Song 01...
- Page 167 Internal Structure (System Overview) Pattern data structure The following illustration shows the track structure of a Pattern. Patterns are created by recording MIDI sequence data to individual tracks, by assigning Phrases (Preset and User) which is material for a Pattern to individual tracks, and by setting tone generator related parameters (in a Pattern Mixing).
- Page 168 Internal Structure (System Overview) Pattern Chain Realtime recording and Step recording Pattern Chain allows you to string several different Sections Realtime recording (within a single Pattern) together to make a single Song. You With realtime recording, the instrument functions in the same can have the synthesizer automatically change Sections by way as a tape recorder, recording the performance data as it creating Pattern Chains in this way beforehand.
- Page 169 Internal Structure (System Overview) Punch In/Out (Song) You can use this method when you want to re-record only over a specific area of the track. You’ll need to set the start and end points before re-recording. In the eight-measure example below, the third measures through the fifth measure are re-recorded. Recording start Recording stop Before re-recording...
- Page 170 Internal Structure (System Overview) Arpeggio playback types The MOTIF ES features a total of 1787 Arpeggio types divided into 18 categories, each with its own playback type designed for use with particular types of Voices, as described below. Arpeggios for Normal Voices Arpeggio types (belonging to the categories except for the DrPC and Cntr) created for use of Normal Voices have the following two playback types.
- Page 171 Internal Structure (System Overview) Arpeggio related parameters The Arpeggio related parameters can be set from the following displays, depending on the selected mode. Voice mode Arpeggio type parameters called up when selecting a Voice [VOICE] Voice selection [F6] ARP Page 189 [VOICE] Voice selection [EDIT]...
-
Page 172: Sampling Block
Internal Structure (System Overview) Sampling Block Sampling is a powerful function that lets you bring your own recorded sounds – voice, instrument, rhythm, special sound effects, etc. – into the system of this synthesizer, and play those sounds just as you would the Voices of the instrument. In order to use the Sampling features of the instrument, you’ll need to install DIMM memory modules (sold separately) to the instrument. - Page 173 Internal Structure (System Overview) Data created by Sampling Note Data When you set the Type to “Sample + note” from the [SONG] or Regardless of the mode, the raw Sampled data is the same, [PATTERN] [INTEGRATED SAMPLING] [F2] SOURCE of course. However, various parameters are different, display and execute Sampling, a Sample Voice is created depending on the particular mode or settings.
- Page 174 Internal Structure (System Overview) Waveform and User Voices/Sample Voices Waveform (User 001 - 1024) Pattern 64 When entering Sampling mode from Voice/Performance mode Pattern 02 Sampling Pattern 01 User Voice 16 sections Pattern When entering Sampling mode from Pattern mode Track 1 Sampling Track 2...
-
Page 175: Trigger Mode
Internal Structure (System Overview) Trigger mode Start recording when the Song/Pattern playback reaches a specified point [INTEGRATED SAMPLING] [F6] REC TriggerMode [INTEGRATED SAMPLING] [F6] REC TriggerMode = meas The Trigger mode is a convenient feature in Sampling that lets you determine how sample recording is started — manually After pressing the [F6] REC button in the Sampling Setup or automatically, based on the audio level. - Page 176 Internal Structure (System Overview) Sample playback types Sample Wave Loop Playback [INTEGRATED SAMPLING] [EDIT] [F3] PARAM PlayMode Samples can be set to play back in the following three different ways. One Shot [INTEGRATED SAMPLING] [EDIT] [F3] PARAM Start Point Top Point End Point PlayMode = oneshot When you press a note on the keyboard, the Sample plays...
-
Page 177: Effect Block
Internal Structure (System Overview) Effect Block Plug-in Insertion Effects This is a special effect system, only available when an effect- type Plug-in Board is installed. Plug-in Board effects are not This block applies effects to the output of the tone generator available in the Voice mode. - Page 178 Internal Structure (System Overview) Equalizer (EQ) Part EQ This 3-band EQ is applied to each part of the Performance/ Usually an equalizer is used to correct the sound output from Song/Pattern, The high band and low band are the shelving amps or speakers to match the special character of the room, type.
- Page 179 Internal Structure (System Overview) Effect connection in each mode In the Voice mode The Effect parameters in the Voice mode are set for each Voice and the settings are stored to internal flash ROM as a User Voice. Please note that the Master Effect and Master EQ parameters are set for all the Voices in the Utility mode and stored to internal flash ROM as System settings by pressing the [STORE] button also in the Utility mode.
- Page 180 Internal Structure (System Overview) In the Song mode/Pattern mode The Effect parameters in the Song mode/Pattern mode are set for each Song/Pattern. The Effect settings are stored to internal DRAM in the Song Mixing mode/Pattern Mixing mode and saved to the SmartMedia/USB storage device in the File mode. [SONG] or [PATTERN] Song/Pattern selection [MIXING]...
-
Page 181: About Midi
About MIDI About MIDI MIDI (Musical Instrument Digital Interface) is a standard which allows electronic musical instruments to communicate with each other, by sending and receiving compatible Note, Control Change, Program Change and various other types of MIDI data, or messages. -
Page 182: Channel Messages
About MIDI CHANNEL MESSAGES Data Entry MSB (Control #006) Data Entry LSB (Control #038) Channel messages contain data related to the performance Messages which set the value for the parameter specified by on the keyboard for the specific channel. RPN MSB/LSB (page 183) and NRPN MSB/LSB (page 183). Parameter value is determined by combining the MSB and Note On/Note Off (Key On/Key Off) LSB. - Page 183 About MIDI Release Time (Control #072) RPN (Registered Parameter Number) LSB (Control #100) Messages which adjust the AEG release time set for each RPN (Registered Parameter Number) MSB (Control #101) Part. Messages which offset, or add or subtract values from a The value set here is an offset value which will be added to or Part’s pitch bend sensitivity, tuning, or other parameter subtracted from the voice data.
-
Page 184: System Messages
About MIDI Mono (Control #126) Master Volume Performs the same function as when an All Sounds Off When received, the Volume MSB will be effective for the message is received, and if the 3rd byte (mono number) is in System Parameter. the range of 0 - 16, it sets the corresponding channel to Mono F0 7F 7F 04 01 ll mm F7 (Hexadecimal) Mode (Mode 4: m = 1). -
Page 185: Internal Memory And File Management
Internal Memory and File Management Internal Memory and File Management As you use the MOTIF ES, you’ll create many different kinds of data, including Voices, Performances, Songs, and Patterns. This section describes how to maintain the various types of data and use the memory devices/media for storing them. Maintaining data You can maintain the data you’ve created via the following three methods. -
Page 186: Memory Structure
Internal Memory and File Management Memory Structure This diagram details the relationship among the functions of the MOTIF ES and the internal memory and SmartMedia/USB storage device. Internal Memory Internal data communication Data communication between this Recall Buffer Preset Data (ROM) synthesizer and the external device Compare Buffer •... - Page 187 Internal Memory and File Management Internal Memory Below are explanations of the basic terms used in the Memory Structure illustration on the previous page. Flash ROM ROM (Read Only Memory) is memory designed specifically for reading out of data, and as such data cannot be written to it. Unlike conventional ROM, Flash ROM can be overwritten –...
-
Page 188: Reference
Voice Play mode Reference Voice mode Creating Voices — basic procedure You can create and edit your original Voices by setting various parameters in both the Voice Play mode and Voice Edit mode, while the Voice Job mode provides some basic parameter-related tools, such as Initialize and Copy. Once you’ve edited a Voice, you can store it to a User Bank in internal memory (Flash ROM) and save all edited Voices to a SmartMedia/USB storage device in the File mode. -
Page 189: Voice Edit Mode
Voice Edit mode Normal Voice Edit Common Edit PortaTime (Portamento Time) Determines the pitch transition time. Higher values result in longer transition times. Settings: 0 ~ 127 Determines the Portamento mode. The behavior of the Portamento varies depending on whether Mono/Poly is set to PortaMode (Portamento Mode) “mono”... - Page 190 Voice Edit mode Normal Voice Edit Common Edit [SF2] PLY MODE (Play mode) From this display you can make various settings for the tone generator of this synthesizer, and assign different Micro Tuning settings. Mono/Poly Determines whether the Voice is played back monophonically (single notes only) or polyphonically multiple simultaneous notes).
- Page 191 Voice Edit mode Normal Voice Edit Common Edit RevSend Determines the Send level of the signal sent from Insertion Effect A/B (or the bypassed signal) to the Reverb effect. You can also adjust this parameter using the REVERB knob on the front panel. Settings: 0 ~ 127 ChoSend Determines the Send level of the signal sent from Insertion Effect A/B (or the bypassed signal) to the Chorus effect.
- Page 192 Voice Edit mode Normal Voice Edit Common Edit [SF3] PLAY FX These Play Effect parameters let you control the playback of the Arpeggio in useful and interesting ways. By changing the timing and velocity of the notes, you can change the rhythmic “feel” of the Arpeggio. UnitMultiply (Unit Multiply) Adjust the Arpeggio playback time.
- Page 193 Voice Edit mode Normal Voice Edit Common Edit TempoSync Determines whether or not the LFO is synchronized to the tempo of the Arpeggio or sequencer (song or pattern). Settings: off (not synchronized), on (synchronized) This parameter is available only when TempoSync above has been set to “on.” It allows you to make detailed note TempoSpeed value settings that determine how the LFO pulses in sync with the Arpeggio or sequencer.
- Page 194 Voice Edit mode Normal Voice Edit Common Edit [SF3] PHASE Phase Determines the starting phase point for the LFO Wave when it is reset. Settings: 0, 90, 120, 180, 240, 270 Time Phase 0 Offset EL1 - EL4 (Phase Offset Determines the offset values of the Phase parameter (above) for the respective Elements.
- Page 195 Voice Edit mode Normal Voice Edit Element Edit InsB Ctgry Determines the effect type for Insertion B. (Insertion B Category), InsB Type (Insertion B Type) Reverb Type Determines the effect type for Reverb. Chorus Ctg Determines the effect type for Chorus. (Chorus Effect Category), Chorus Typ (Chorus Effect Type) Reverb Send...
- Page 196 Voice Edit mode Normal Voice Edit Element Edit InsEffectOut Determines which Insertion effect (1 or 2) is used to process each individual Element. The “thru” setting lets you (Insertion Effect Output) bypass the Insertion effects for the specific Element. (This parameter is the same as “EL: OUT” on the [F6] EFFECT [SF1] CONNECT display in Normal Common Edit.
- Page 197 Voice Edit mode Normal Voice Edit Element Edit [SF3] PEG From this display you can make all the time and level settings for the Pitch EG, which determine how the pitch of the (Pitch Envelope Generator) sound changes over time. These can be used to control the change in pitch from the moment a note is pressed on the keyboard to the moment the sound stops.
- Page 198 Voice Edit mode Normal Voice Edit Element Edit Resonance/Width This parameter’s function varies according to the selected Filter Type. If the selected filter is an LPF, HPF, BPF (excluding the BPFw), or BEF, this parameter is used to set the Resonance. For the BPFw, it is used to adjust the Width of the band. Resonance is used to set the amount of Resonance (harmonic emphasis) applied to the signal at the cutoff frequency.
- Page 199 Voice Edit mode Normal Voice Edit Element Edit FCenterKey This indicates that the central note for Cutoff Sensitivity above is C3. At C3, the tone remains unchanged. For other notes played, the Cutoff Frequency varies according to the particular note and the Cutoff Sensitivity setting. Keep in mind that this is for display purposes only;...
- Page 200 Voice Edit mode Normal Voice Edit Element Edit Level, Determines the velocity sensitivity of the Amplitude EG Level. For positive settings, the more strongly you play the Curve keyboard, the more the volume changes. Negative settings do the opposite; the more softly you play, the more the volume changes.
- Page 201 Voice Edit mode Normal Voice Edit Element Edit [F5] LFO (Low Frequency Oscillator) This display gives you a comprehensive set of controls over the LFO for each individual Element. The LFO can be used to create vibrato, wah, tremolo and other special effects, by applying it to the pitch, filter and amplitude parameters.
- Page 202 Voice Edit mode Drum Voice Edit Common Edit Drum Voice Edit When a Drum Voice is selected, Voice Edit parameters are divided into Common Edit (parameters common to all keys, up to 73), and Key Edit (parameters of individual keys). Common Edit [VOICE] Drum Voice selection...
- Page 203 Voice Edit mode Drum Voice Edit Key Edit Category Determines the Category of the Wave/Normal Voice. If you switch to another Category, the first Wave/Normal Voice in that Category will be selected. For more information about the Categories, refer to the separate Data List booklet. [SF2] OUTPUT From this display you can set certain output parameters for the selected Drum key.
- Page 204 Voice Edit mode Drum Voice Edit Key Edit [SF2] VEL SENS (Velocity Sensitivity) Determines the velocity sensitivity of the Low Pass Filter Cutoff frequency. For positive settings, the more strongly LPFCutoff you play the keyboard, the higher the cutoff frequency becomes. For negative settings, the more strongly you play, the lower the cutoff frequency.
- Page 205 Voice Edit mode Plug-in Voice Edit Common Edit Plug-in Voice Edit These parameters are basically the same as in Normal Voice Edit. Unlike with Normal voices, the Plug-in voices only have one Element for editing. Depending on the particular Plug-in board you are using, some of the parameters described here may not be available. For details, refer to the relevant owner's manual of the Plug-in board.
- Page 206 Voice Edit mode Plug-in Voice Edit Element Edit FMod (Filter Modulation Depth) Determines the depth of control that keyboard aftertouch has over filter cutoff modulation. The higher the setting, the greater the depth of control. Settings: 0 ~ 127 AMod Determines the depth of control that keyboard aftertouch has over amplitude modulation.
- Page 207 Voice Edit mode [F2] PITCH From this display you can make various time and level settings for the Pitch EG, which determine how the pitch of the Plug-in Voice changes over time. The full names of the available parameters are shown in the chart below, as they appear in the display. Original pitch INIT DCY1...
-
Page 208: Voice Store Mode
Voice Job mode Voice Job mode [VOICE] Voice selection [JOB] The Voice Job mode features several basic operations, such as Initialize and Copy. After setting parameters as required from the selected display, press the [ENTER] button to execute the Job. [F1] INIT (Initialize) This function lets you reset (initialize) all Voice parameters to their default settings. - Page 209 Supplementary infomation Supplementary information Micro Tuning List [VOICE] [EDIT] [COMMON] [F1] GENERAL [SF2] PLY MODE M.TuningNo./M.TuningRoot (page 190) M.TuningNo. Type M.TuningRoot Comments Equal Temp (Equal temperament) The “compromise” tuning used for most of the last 200 years of Western music, and found on most electronic keyboards.
- Page 210 Supplementary HPF12 (12dB/oct High Pass Filter) BEF12 (12dB/oct Band Elimination Filter) Dual BPF (Dual Band Pass Filter) BEF6 (6dB/oct Band Elimination Filter) 12dB/oct dynamic high-pass filter. Two 6dB/oct band-pass filters connected in parallel. Level Cutoff range Resonance Level Distance Frequency Range passed Range passed Frequency...
- Page 211 Voice Store mode Setting example of Filter Scaling Setting example of Amplitude Scaling [VOICE] [EDIT] Element selection [F3] FILTER [SF5] SCALE [VOICE] [EDIT] Element selection [F4] AMP [SF5] SCALE (page 199) (page 200) The best way to understand Filter Scaling is by example. For the The best way to understand Amplitude Scaling is by example.
-
Page 212: Performance Mode
Performance Play mode Performance mode Creating Performances — basic procedure You can create and edit your original Performances by setting various parameters in both the Performance Play mode and Performance Edit mode, while the Performance Job mode provides some basic parameter-related tools, such as Initialize and Copy. Once you’ve edited a Performance, you can store it to a User Bank in internal memory (Flash ROM) in the Performance Store mode and save all the edited Performances to a SmartMedia/USB storage device in the File mode. -
Page 213: Performance Edit Mode
Performance Edit mode Common Edit [F5] EG (Envelope Generator) This display contains the basic EG settings, both volume and filter, for the Performance, as well as the filter’s cutoff frequency and resonance settings. The settings made here are applied as offsets to the AEG and FEG settings in the Performance Edit mode (pages 218, 219). The parameters are same as in Voice Play mode. - Page 214 Performance Edit mode Common Edit [SF2] MEQ (Master EQ) From this display you can apply five-band equalization to all Parts of the selected Performance. You can raise or lower the signal level at the Frequency of each band (LOW, LOWMID, MID, HIGHMID, HIGH). SHAPE Determines whether the equalizer type used is Shelving or Peaking.
- Page 215 Performance Edit mode Common Edit [SF1] OUTPUT Volume Determines the output level of the Audio Input Part. Settings: 0 ~ 127 Determines the stereo pan position of the Audio Input Part. Settings: L63 (Left) ~ C (Center) ~ R63 (Right) RevSend Determines the Send level of the Audio Input Part signal sent to the Reverb effect.
- Page 216 Performance Edit mode Part Edit [SF2] INS SW (Insertion Switch) The Insertion Effects can be applied to up to eight Parts. This display lets you set to which Parts the Insertion Effects are applied. [SF3] PLG-EF (Plug-in Effect) This display lets you set the Plug-in Insertion Effect related parameters when the Effect Plug-in Board PLG100-VH has been installed to this synthesizer.
- Page 217 Performance Edit mode Part Edit [SF5] OTHER PB (Pitch Bend) Upper, These two parameters are available for Parts 1 - 4 to which the internal Normal Voices are assigned. These PB (Pitch Bend) Lower determine the pitch change range (in semitones) of the Pitch Bend wheel for the Part’s Voice. For example, a Lower setting of -12 would result in the pitch being lowered up to a maximum of one octave (12 semitones) when the Pitch Bend wheel is moved downwards.
- Page 218 Performance Edit mode Part Edit [SF3] SELECT (Output Select) From this display you can assign individual Parts to sound from independent output connectors (jacks). OutputSel (Output Select) Determines the specific output(s) for the individual Part. You can assign each individual Part’s Voice to be output from a specific hardware output jack on the rear panel.
-
Page 219: Performance Job Mode
Performance Job mode [SF4] AEG From this display you can set the AEG (Amplitude Envelope Generator) parameters for each Part. (Amplitude Envelope Generator) Determines each parameter of the AEG for each Part. Please note that Sustain Level is not available for the Plug-in Attack (Attack Time) Part. -
Page 220: Performance Store Mode
Performance Store mode [F3] COPY From this display you can copy Part parameter settings from any Performance including the currently Source Performance/Part edited (but not yet stored) one to a particular Part of the Performance you are editing. This is useful if you are creating a Performance and wish to use some parameter settings from another Performance. -
Page 221: Song Mode
Song Play mode Song mode Creating Songs — basic procedure Songs consist of the following three types of data: • MIDI sequence data (created in the Song Record mode, Song Edit mode, and Song Job mode) • Setup data (created in the Song Play mode) •... -
Page 222: Song Record Mode
Song Record mode Song Record Standby mode PORT Determines the MIDI transmission port for the corresponding track. Playback data of tracks set to off is output without Port signal via MIDI. When using the internal tone generator block, the Port setting here is available for the tracks assigned to the Plug-in Parts 1-3 (when the single Plug-in Board has been installed) and Multi Plug-in Parts 17-32 (when the PLG100-XG has been installed) are assigned. - Page 223 Song Record mode Song Record Standby mode Event This parameter is available when the Recording Type is set to “step.” This lets you specify the event type to be entered. Settings: note, p.bend (pitch bend), CC#000~#119 (Control Change) RecTrack Determines the track to be recorded. Pressing the [F6] button lets you switch between Single Track recording and All Track recording.
- Page 224 Song Record mode During Song Recording Step Recording [F6] ALL TR (All Track)/1TR (1 track) Pressing the [F6] button lets you switch between Single Track recording and All Track recording. During Song Recording [SONG] Song selection [I] (Record) [F] (Play) Realtime Recording Refer to page 118 in the Quick Guide section.
-
Page 225: Song Edit Mode
Song Edit mode [F5] DELETE Press this to actually delete the note events at the current cursor position. [F6] BAK DEL (Back Delete) Moves the pointer backward by one step and deletes all notes at that location. Mistakenly entered notes can be erased by pressing [F6] immediately after they are entered (before changing the step time value). Song Edit mode [SONG] Song selection... -
Page 226: Song Job Mode
Song Job mode ControlChange These events control the sound and certain response characteristics of the voice, and are usually generated/ recorded by moving a controller (such as a modulation wheel, knob, slider or foot controller). FCTRL NO (Control Number) Determines the Control Change number. Settings: 000 ~ 127 For details on the specific functions assigned to each of the numbers, see page 182. - Page 227 Song Job mode Before executing the Note data Job, make sure that you specify the track (01~16, all) and range (measure : beat : clock) to which the Job is applied. 01: Quantize Quantization is the process of adjusting the timing of note events by moving them closer to the nearest exact beat. You can use this feature, for example, to improve the timing of a performance recorded in real time.
- Page 228 Song Job mode Rate Determines the percentage by which the gate time of the target notes will be changed. Settings below 100% shorten the notes, and settings above 100% lengthen the notes proportionately. When the Set All parameter (above) is set to something other than “off,” this parameter appears as “***” and cannot be changed. Settings: 000% ~ 200%, *** Offset Adds a fixed value to the Rate-adjusted gate time values.
- Page 229 Song Job mode TR (Track) Determines the track (01-16, all) and range of measures/beats/clocks over which the Job is applied. 001 : 1 : 000 - 999 : 4 : 479 Type Determines how the chord note data is sorted. Settings: up, down, up&down, down&up up ....
- Page 230 Song Job mode 04: Extract Event This Job moves all instances of specified event data from a specified range of a track to the same range in a different track. TR (Track) Determines the track (01 - 16) and range of measures/beats/clocks over which the Job is applied. 001 : 1 : 000 - 999 : 4 : 479 EventType Selects the event type to be extracted.
- Page 231 Song Job mode 08: Beat Stretch This Job performs time-expansion or compression over the selected range. Keep in mind that this operation affects all event timing, note step times, and note gate times. TR (Track) Determines the track (01 - 16, all) and range of measures/beats/clocks over which the Job is applied. 001 : 1 : 000 - 999 : 4 : 479 Rate Determines the amount of time expansion or compression as a percentage.
- Page 232 Song Job mode 02: Exchange Track This Job exchanges or “swaps” the specified type of Target tracks for the Exchange operation (01-16) data between two specified tracks in the current Song. Data Type to be exchanged Data Type to be exchanged Determines the type(s) of data to be exchanged.
-
Page 233: Song Mixing Mode
Song Mixing mode 02: Split Song To Pattern This Job allows you to copy a part of the current Song – Source Song range (in measures) all 16 tracks over a specific range of measures – to a specific Pattern, letting you use Song data to create a Pattern. -
Page 234: Song Mixing Edit Mode
Song Mixing Edit mode Common Edit [F6] 17-32/PLG1-3/1-16 You can switch between the displays for three types of parts by pressing this button. 1 - 16 are Parts of the internal tone generator, 17 - 32 are Multi Plug-in Parts of the optionally installed PLG100-XG, and PLG1 - 3 are Plug-in Parts of the optionally installed Single Part Plug-in board. - Page 235 Song Mixing Edit mode Part Edit [F5] AUDIO IN From this display, you can set parameters related to the Audio Input Part in the Song mode. The parameters are the same as in Performance Common Edit. See page 214. [F6] EFFECT For information on the effect connections in the Song mode, see page 180.
-
Page 236: Song Mixing Job Mode
Song Mixing Job mode [F3] EQ (Equalizer) From this display you can set parameters related to the Part EQ (page 178). The parameters are the same as in Performance Part Edit. See page 218. [F4] TONE [SF1] TUNE Same as in Performance Part Edit. See page 218. [SF2] FILTER Same as in Performance Part Edit. -
Page 237: Song Mixing Store Mode
Song Mixing Store mode Data type of Destination Song Set the Part of the destination Song. (current selected song) Destination part (Type): Part 1~16, PartP1~P3 (Plug-in Part 1~3), PartA1~A5 (Audio Part 1~5), Arp, Effect (Reverb, Chorus) If you choose Arp (Arpeggio) or Effect, the Arpeggio data or Effect settings for the Voice assigned to the source Part will be copied. - Page 238 Supplementary information Supplementary information Song Track Loop — setting example Step Recording — examples [SONG] [F3] TRACK [SF3] TR LOOP (Track Loop) page 222 [SONG] or [PATTERN] [I] (Record) [F1] SETUP page 224 Type = step In the example below, a 40-measure song has been recorded and This section explains how to step-record notes, using three specific Track 1 is set to play back normally over the 40 measures.
- Page 239 Supplementary information • Example 2 (Using the Tie function) Follow the instructions below to enter the next dotted half note. 1 Change this to a quarter note (480). 2 Press and release A. Set the parameters as illustrated below. Since the first note is a half note, set the StepTime to the half-note icon (a value of 960), and set the GateTime to 80%, since you don't want the notes to play in legato.
- Page 240 Supplementary information • Example 3 (Using the Rest function) Enter the next 4th note C as shown below. 1 Change this value to 480, since the rest value is a quarter note. Set the parameters as illustrated below. Set the StepTime to a quarter note (480) and the Gate Time to 80%.
-
Page 241: Pattern Mode
Pattern Play mode Pattern mode Creating Patterns — basic procedure Patterns consist of the following three types of data: • MIDI sequence data (created in the Pattern Record mode, Pattern Edit mode, and Pattern Job mode) • Setup data (created in the Pattern Play mode) •... - Page 242 Pattern Play mode [SF5] COPY The User phrases that can be assigned with When this box is checkmarked, Sample Voices assigned to the source phrase are copied to the Patch function are limited to the ones the destination phrase as Sample Voices, and Source Pattern number, contained in the currently selected Pattern.
-
Page 243: Pattern Record Mode
Pattern Record mode Pattern Record Standby mode [F2] COPY This display lets you copy all Pattern chain events from Source range a specified range of measures (source) to a destination location. After specifying the source range in measures, the top measure of the destination location, and NumberOfTimes (number of times the data is copied), press the [ENTER] button to execute the Copy... -
Page 244: Pattern Edit Mode
Pattern Edit mode During Pattern Recording [PATTERN] Pattern selection [I] (Record) [F] (Play) Realtime Recording Refer to page 110 in the Quick Guide section. Step Recording Examples of Step Recording are described on page 238. Parameters in the displays are the same as in the Song Record mode. See page 224. Pattern Edit mode [PATTERN] Pattern selection... - Page 245 Pattern Job mode 02: Copy Event Same as in the Song Job mode. See page 229. 03: Erase Event Same as in the Song Job mode. See page 229. Unlike in the Song Job mode, “Tempo,” “Scene Memory,” or “Track Mute” cannot be selected as Event Types. 04: Extract Event Same as in the Song Job mode.
- Page 246 Pattern Job mode 06: Get Phrase From Song This Job copies a segment of sequence-track data from Source Song, track, and range of measures Destination phrase to be copied. a Song into the designated destination phrase. After specifying the source Song/track/range of measures to be copied, the destination phrase, and setting the checkbox of Copy Sample, press the [ENTER] button to execute this Job.
- Page 247 Pattern Job mode 04: Normalize Play Effect This Job rewrites the data in the selected track so that it incorporates the current Grid Groove settings. After specifying a track (TR 01-16) to which this Job is applied, press the [ENTER] button to execute this Job. 05: Divide Drum Track Separates the note events in a drum performance assigned to a specified track, and places the notes corresponding to different drum instruments in separate tracks (tracks 1 through 8).
-
Page 248: Pattern Mixing Mode
Pattern Mixing mode Sample When this box is checkmarked, Sample Voices (if included in the source pattern) are copied to the destination Pattern. When the KEEP ORIGINAL PHRASE checkbox is checked, this Job requires twice the number of empty user phrases as the number of tracks containing data in which to store the appended phrase data. -
Page 249: Mixing Voice Mode
Mixing Voice Edit mode Common Edit Mixing Voice mode Creating Mixing Voices — basic procedure The Mixing Voice mode provides most of the same Normal Voice editing parameters as the Voice mode, with the main exception that these Voices are dedicated for use with the Songs and Patterns, and are stored specifically as Mixing Voices. The Mixing Voice Job mode lets you use the supplementary functions like Copy and Delete. -
Page 250: Mixing Voice Store Mode
Mixing Voice Job mode Mixing Voice Job mode [SONG] or [PATTERN] [MIXING] [F5] VCE ED [JOB] The Mixing Voice Job mode features two basic operations, Copy and Delete. After setting parameters as required from the selected display, press the [ENTER] button to execute the Job. [F2] RECALL If you are editing a Mixing Voice and select a different Mixing Voice, Mixing program, Song or Pattern without storing your edited one, all the edits you’ve made will be erased. -
Page 251: Sampling Mode
Sampling Record mode When entering the Sampling mode from the Voice mode/Performance mode Sampling mode Creating samples — basic procedure In the Sampling mode, the following three types of data can be created. • Waveform: Created by recording a sample. •... - Page 252 Sampling Record mode When entering the Sampling mode from the Voice mode/Performance mode Source Determines the recording source. Settings: A/D, resample, AIB2, mLAN1~4 A/D ....Analog audio from the A/D INPUT jacks is recognized as the recording source. resample ..The audio signal produced from the instrument when you play the keyboard along with the Audio Input part (in other words all the audio signals output from the OUTPUT jacks) is recognized as a recording source and “resampled.”...
- Page 253 Sampling Record mode When entering the Sampling mode from the Song mode/Pattern mode When entering the Sampling mode from the Song mode/Pattern mode In this case, you can create a Waveform or Sample Voice by recording sounds input from external devices such as a microphone and audio equipment.
- Page 254 Sampling Record mode When entering the Sampling mode from the Song mode/Pattern mode WAITING (Trigger Waiting or When Trigger Mode is set to “level” in the Sampling Standby display, press the [F6] REC button again to enter the Punch-in Waiting) Trigger Waiting condition;...
-
Page 255: Sampling Edit Mode
Sampling Edit mode Measure Determines the number of measures in the sample to be sliced. When the slice operation is executed, sequence data corresponding to the specified number of measures is created. The sequence data is created from the beginning of the current measure at which sampling is started. Settings: 1~8 Meter Specifies the meter (time signature) of the sample. -
Page 256: Sampling Job Mode
Sampling Job mode PlayMode Determines how the selected sample is to be played back. Settings: oneshot, reverse, loop oneshot ....The Sample plays back one time from Start point to End point. reverse .....The Sample plays back one time in reverse from End point to Start point. loop ....Sample playback begins from the Start point, continues to the Loop point, then repeats indefinitely between the Loop point and End point. - Page 257 Sampling Job mode 04: Move This Job lets you move a sample contained in a Source Waveform and Key Bank specified Key Bank to another Key Bank. This would be useful for creating a new Waveform from the samples of various other existing Waveforms.
- Page 258 Settings: C - 2 ~ G8 In the Slice display of the Sampling Record mode (page 254), this parameter is fixed to “C-1” for the MOTIF ES6, “E0” for the MOTIF ES7, and “A-1” for the MOTIF ES8, and cannot be set.
- Page 259 Sampling Job mode 04: Name This Job lets you assign a name to the selected Waveform. For specific instructions on naming, refer to page 53 in the Basic Operation section. [F3] OTHER 01: Clean Up Memory This Job deletes all the waveforms to which User voices or Sample voices are not assigned. 02: Optimize Memory This Job optimizes the memory (DRAM) for sampling.
-
Page 260: Utility Mode
Utility mode Utility mode The Utility mode features a variety of important settings related to overall operation of the MOTIF ES. These settings can also be stored — simply press the [STORE] button from any mode (with the exception of the Utility Job mode), and store the data to internal Flash ROM as system settings (page 186). - Page 261 Utility mode System F Reverb When this is set to on and the [SYSTEM] button is turned on, the Reverb effect is bypassed. F Chorus When this is set to on and the [SYSTEM] button is turned on, the Chorus effect is bypassed. For details about the Effects, see page 177.
- Page 262 Utility mode [SF1] MEQ (Master EQ) From this display you can apply five-band equalization to all Voices, raising or lowering the level of each frequency band (LOW, LOWMID, MID, HIGHMID, HIGH). The parameters are the same as in the Performance Common Edit. See page 214. Settings: For details about EQ, see page 178.
- Page 263 Utility mode SongEventChase Event Chase allows you to specify which non-note data types are properly recognized during fast-forward and rewind operations. Normally, if a Song or Pattern is played back from mid-point and/or fast-forward or rewind are used, certain data types (such as Program Change, Pitch Bend, and Control Change) may not play back as expected.
- Page 264 This synthesizer does not transmit MTC. A device such as the Yamaha AW4416 is necessary in order to use this synthesizer as an MTC master. MMC (MIDI Machine Control) allows remote control of multitrack recorders, MIDI sequencers, etc. A MMC-compatible multitrack recorder, for example, will automatically respond to start, stop, fast forward, and fast reverse operations performed on the controlling sequencer, thus keeping playback of the sequencer and multitrack recorder aligned.
-
Page 265: Utility Job Mode
Utility Job mode [SF4] OTHER MIDI IN/OUT Determines which physical output terminal(s) will be used for transmitting/receiving MIDI data: MIDI IN/OUT, USB, or mLAN (when the optional mLAN16E has been installed). Settings: MIDI, USB, mLAN Three types of terminals above cannot be used at the same time. Only one of them can be used to transmit/receive MIDI data. Many computer sequencers are capable of transmitting data over several MIDI ports, effectively breaking the 16- ThruPort (Through Port) channel barrier. -
Page 266: File Mode
File mode File mode The File mode provides tools for transferring data between the instrument and various storage media and devices, such as SmartMedia cards, hard disk drives and compact flash devices. For details about SmartMedia and USB storage devices, see page 27. For details about the relationship between the data created on this synthesizer and the files for saving, see page 186. - Page 267 File mode [F4] RENAME From this display you can rename files or folders in the selected SmartMedia/USB storage device, Select the desired file type. Select the file/folder to be renamed. using up to eight alphabetic and numeric characters. Files are named according to the MS-DOS naming convention. If the file name contains spaces and other characters unrecognized in MS-DOS, these characters will automatically be replaced by “_”...
- Page 268 Supplementary information Supplementary information File ( )/Folder ( ) selection Select the media to be formatted. Move the cursor to the Format value location and select “CARD” The illustrations and instructions below show you how to select files or “USB.” When selecting “USB,” specify the slot number at the and folders on the SmartMedia/USB storage devices within the File right top of the display as necessary and select the partition to mode.
- Page 269 Supplementary information File types that can be handled by the MOTIF ES File types that can be saved from the instrument to the SmartMedia/USB storage device [FILE] [F2] SAVE TYPE File TYPE Description extension* When this is set to “TYPE,” only the directories (folders) are displayed in the File/Folder selection box and the Save operation cannot be executed.
- Page 270 In addition to the file types above, Yamaha A5000/A4000/A3000/SU700 files and AKAI S1000/S3000 files can be loaded to the MOTIF ES. When files of the Yamaha A series samplers (A5000/4000/3000) are loaded, an “S” mark by the file name indicates the file contains only sample data and a “P”...
-
Page 271: Master Mode
Master Play mode Master mode Creating Masters — basic procedure The Master mode lets you play and edit special program combinations called “Masters.” A Master can contain up to four different Voices or Performances, each assigned to a separate MIDI “Zone.” Alternately, it can contain specific Songs or Patterns. As such, it lets you set up the instrument just as you need for live performance, switching through the Masters in order as you need them. - Page 272 Master Edit mode Common Edit Common Edit [MASTER] Master selection [EDIT] [COMMON] These parameters are for making global (or common) edits to all four Zones of the selected Master. [F1] NAME From this display you can create a name for the Master. For instructions on naming, refer to page 53 in the Basic Operation section. [F2] OTHER Knob/Slider From this display you can set which row of Knob/Slider functions will be lit and selected.
-
Page 273: Master Job Mode
Master Job mode Zone Edit MW (Modulation Wheel) Determines whether or not to transmit MIDI messages generated by using the Modulation Wheel to the internal and external tone generator. RB (Ribbon Controller) Determines whether or not to transmit MIDI messages generated by using the Ribbon Controller to the internal and external tone generator. -
Page 274: Master Store Mode
Master Store mode Zone Edit [F4] BULK (Bulk Dump) This function lets you send all your edited parameter settings for the currently selected Master to a computer or another MIDI device for data archiving. For details, see page 185. In order to execute Bulk Dump, you’ll need to set the correct MIDI Device Number, with the following operation: [UTILITY] [F5] MIDI [SF1] CH DeviceNo. -
Page 275: Appendix
Information Displays Appendix Information Displays The convenient Information displays let you see at-a-glance some of the more important settings relevant to each mode. Select the desired mode, then press the [INFORMATION] button to call up the Information display for that mode. To exit from the display, press the button again (or any other panel button). - Page 276 Information Displays Pattern mode File mode Pattern Play mode Card Free/USB Free Indicates the amount of currently unused (available) memory Indicates the amount of currently available (unused) memory (DRAM) for Pattern Phrase recording. of the SmartMedia inserted to the Card slot or the USB Pattern Mixing mode storage device connected to the MOTIF ES.
-
Page 277: Display Messages
Display Messages Display Messages LCD Indication Explanation Are you sure ? [YES]/[NO] Confirms whether you want to execute a specified operation or not. Press [INC/YES] or [DEC/NO] as required. Arp memory full The internal memory for Arpeggio data is full, preventing storing the recorded sequence data as an Arpeggio. Arpeggio type stored The current Arpeggio type has been stored to one of the [SF1] - [SF5] buttons. - Page 278 Display Messages LCD Indication Explanation No response from USB device There is no response from the USB device connected to the USB TO DEVICE terminal. No sample data. This message appears when a sample-related Job cannot be executed because the specified sample is not available. Not empty folder You have attempted to delete a folder that contains data.
-
Page 279: Troubleshooting
Troubleshooting Troubleshooting No sound is produced even when playing the keyboard • Are all four Sliders set to appropriate levels (other than zero or minimum)? ......................page 51 • Check the value of the [UTILITY] [F1] GENERAL [SF1] TG Volume parameter..................page 260 •... - Page 280 Troubleshooting Pitch or intervals are wrong • Is the Master Tune parameter in the [UTILITY] [F1] GENERAL [SF1] TG display set to a value other than “0”?.......... page 260 • Is the Note Shift parameter in the [UTILITY] [F1] GENERAL [SF1] TG display set to a value other than “0”?..........
- Page 281 Troubleshooting The drum sound is wrong or unexpected when changing the transpose value. • This is normal. Changing the transpose setting while playing a Drum Voice will produce different sounds for the same keys played. Microphone does not work properly •...
-
Page 282: Installing Optional Hardware
If this does happen, be sure to remove the screw(s) from inside the unit before turning the power on. Loose screws inside the instrument can cause improper operation or serious damage. If you are unable to retrieve a dropped screw, consult your Yamaha dealer for advice. -
Page 283: Optional Plug-In Board Installation
Keep the removed screw in a safe place. It will be used when re- Cable for Slot 2 Slot 2 attaching the cover to the instrument. (Yellow) Slot 1 Cable for Slot 1 MOTIF ES6 / MOTIF ES7 (Orange) ASSIGNABLE OUTPUT OUTPUT A D INPUT GAIN L MONO PHONES... - Page 284 Installing Optional Hardware With the board still protruding slightly from the Replace the cover with the screw you removed in step 2 expansion bay, bring the cable end around and connect above. it to the board. Make sure to connect the proper cable, matching the color Check that the installed Plug-in board is functioning of the cable to the slot used.
-
Page 285: Optional Aieb2 Or Mlan16E Installation
(The MOTIF ES6 and MOTIF ES7 have seven screws, Slide the cover Rear side while the MOTIF ES8 has five.) On the MOTIF ES6/7, slide away to remove. the cover away from you (toward the front of the instrument, as shown). - Page 286 Remove the AIEB2 power cables from the hook shaped cable clip in the MOTIF ES. Connect the flat ribbon cable coming from AIEB2 to the MOTIF ES6 / MOTIF ES7 circuit board of the MOTIF ES. Top (keyboard side) of the MOTIF ES Be careful to connect the cable in the proper direction as shown.
- Page 287 Installing Optional Hardware Connect the power cable coming from MOTIF ES to the Let the ribbon cable fall into place between the AIEB2 AIEB2. and the circuit board of the MOTIF ES. Connect the 3-pin cable to the CN3 connector of the Slide the flat ribbon cable in Underside of the MOTIF ES AIEB2, and the 4-pin cable to the CN1 connector.
- Page 288 Installing Optional Hardware Installing the mLAN16E Fasten the mLAN16E to the MOTIF ES. Flip the unit over, so that each connector section of the mLAN16E can be seen from the back side of MOTIF ES. Supporting the unit with one hand, attach it to the rear of Using the same procedure as in steps 1 - 4 of “Installing the MOTIF ES with the two screws you removed in step #4, the AIEB2”...
-
Page 289: Optional Dimm Installation
The MOTIF ES does not necessarily support all commercially available DIMMs. Yamaha cannot guarantee operation of DIMMs that you purchase. Before purchasing DIMMs, please consult your Yamaha dealer, or an authorized Yamaha distributor (see list at end of the Owner’s Manual) for advice, or see the following page: DIMM sockets http://www.yamahasynth.com/... -
Page 290: Glossary
Musical Instruments. If you come across a musical or technical term you don’t know, click on the following URL. Glossary for Electronic Musical Instruments http://www2.yamaha.co.jp/manual/english/word/index.html (This URL and title may be changed without notice.) Directory This is a path created on a data storage device (such as SmartMedia... - Page 291 Glossary [1] In copy operations, this refers to the original file or data which is to be copied. Parameter [2] In sampling operations, this refers to external audio which is to be A setting or data item which you can edit in the various mode and sub recorded (to the internal memory “destination”...
-
Page 292: Specifications
Keyboards MOTIF ES8 88 keys, Balanced Hammer Effect Keyboard (Initial Touch/Aftertouch) MOTIF ES7 76 keys, FS Keyboard (Initial Touch/Aftertouch) MOTIF ES6 61 keys, FS Keyboard (Initial Touch/Aftertouch) Tone Generator block Tone Generator AWM2 (complying with the Modular Synthesis Plug-in System) - Page 293 AC Power cord, CD-ROM x 3, Owner’s Manual (this book), Data List, Installation Guide * Specifications and descriptions in this owner's manual are for information purposes only. Yamaha Corp. reserves the right to change or modify products or specifications at any time without prior notice. Since specifications, equipment or options may not be the same in every locale, please check with your Yamaha dealer.
-
Page 294: Index
Index Index 1/4 Shift (1/4 shifted) ............209 BREAK POINT ..........199, 200, 211 Cutoff Frequency ..............161 1/4 tone ................209 Breath Controller ............42, 76 CutoffSens (Cutoff Sensitivity) ..........198 1/8 tone ................209 BREATH Controller Jack ............24 1st-on ................193 Brightness ................183 BULK (Bulk Dump) ........208, 220, 237, 274 Bulk Dump ...............185 Burglarproof Lock ..............28... - Page 295 Index EQ (Equalizer) ......201, 204, 207, 218, 236, 249 LPF6 ................. 209 Equal Temp (Equal temperament) ........209 LPFCutoff ..............203, 204 Equalizer ................. 178 LPFReso ................203 IEEE1394 interface ..........34, 39, 153 Erase Event ............. 229, 245 LVL/PAN (Level/Pan) ..........
- Page 296 Index NOTE OFST ............. 114, 221 PLG150-AN ................74 Reverse ................176 Note On/Note Off (Key On/Key Off) ......... 182 PLG150-DR ................74 reverse ................256 NoteLimit ..............191, 196 PLG150-DX ................74 Reverse button ..............20 NoteShift ................260 PLG150-PC ................74 RevSend ...........203, 213, 215, 217 NRPN (Non-Registered Parameter Number) ....
- Page 297 Index Store ................185 Strength ................227 Sub Function ............... 20, 47 Vallot&Yng (Vallotti & Young) .......... 209 SubDivide ................ 255 Value ................ 194, 224 sustain ................42 Variation ..............242, 258 Sustain Level ........... 160, 161, 162 VCE ED (Mixing Voice Edit) ........233, 249 SWING ..............
- Page 298 FCC requirements. Modifications not expressly approved by Yamaha may void your authority, granted by the FCC, to Relocate either this product or the device that is being affected by the use the product.
- Page 299 Niederlassung und bei Yamaha Vertragshändlern in den jeweiligen Bestimmungsländern erhältlich. Pour plus de détails sur les produits, veuillez-vous adresser à Yamaha ou au distributeur le plus proche de vous figurant dans la liste suivante. Para detalles sobre productos, contacte su tienda Yamaha más cercana o el distribuidor autorizado que se lista debajo.
- Page 300 U.R.G., Pro Audio & Digital Musical Instrument Division, Yamaha Corporation © 2003 Yamaha Corporation WB17970 406MWAP2.3-05E0 Printed in Japan...