Advertisement
- 1 The Industry Standard of Long-range E-bike
- 2 Range Reference Table
- 3 Bike Specification
- 4 Bike Assembly Guide
- 5 Recommended Torque Values
- 6 Assembly Instructions
- 7 OPERATING INSTRUCTIONS
- 8 Safety Precautions
- 9 Himiway E-Bike Use and Care
- 10 Battery Light Settings
- 11 Basic Display Settings
- 12 Battery Charging
- 13 Adjustment of the front fork
- 14 Riding Modes
- 15 Riding Limitations
- 16 MOVING AND STORAGE INSTRUCTIONS
- 17 Carrying Loads & Cargo
- 18 Safety and Care Instructions
- 19 Maintenance
- 20 Warranty
- 21 About Manual
- 22 IMPORTANT SAFETY NOTICE
- 23 Important Safety Notice
- 24 Safety Information
- 25 Documents / Resources
The Industry Standard of Long-range E-bike
After Bike Assembly
An e-bike that travels more than 60 miles on a paved road at an average speed of 15 mph with a gradient of 0 is called a long-range e-bike.
Description of the definition
An e-bike that travels more than 60 miles on a paved road at an average speed of 15 mph with a gradient of 0 is called a long-range e-bike.
- The constant need of recharging e-bikes is the biggest pain point for e-bike enthusiasts, who hope that a single charge can cover a week of travel.
- Their average ride frequency is 5 days a week, with an average mileage of 10.48 miles per ride.
- So the weekly mileage for e-bike enthusiasts is 52.4 miles.
- Combined with some other factors in riding, Himiway believes that an e-bike that can reach 60 miles on a single charge is an authentic long-range e-bike.
Range Reference Table
Different Terrain
| Terrain | Range |
| Paved Road | 76.2Miles |
| Dirt Trails | 62.7Miles |
| Beach | 55.8Miles |
| Gravel | 47.8Miles |
| Steep Hill | 33.3Miles |
Different Levels of Speed
| Speed | Range |
| 10 mph | 84.7Miles |
| 15 mph | 76.2Miles |
| 20 mph | 58.2Miles |
| 25 mph | 48.5 Miles |
| 28 mph | 40.1 Miles |
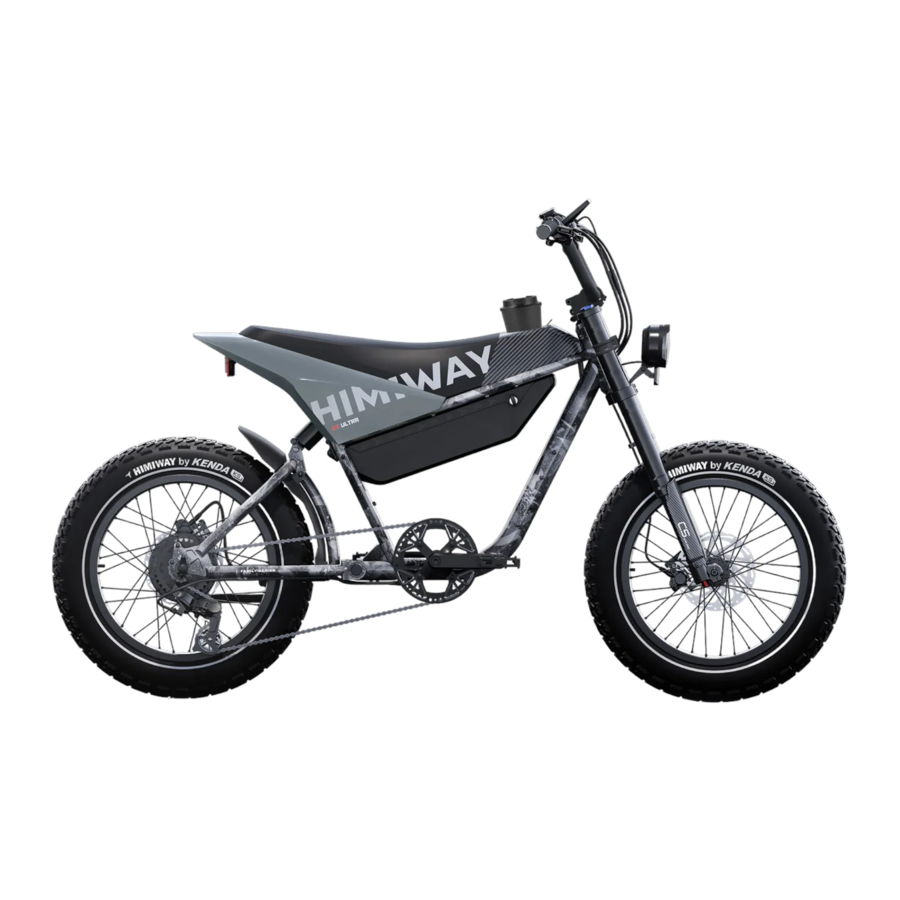
Bike Specification
Parts Information

Dimensions

| A | Total Length | 70.8 Inch |
| B | Handlebar Height | 48.8 Inch |
| C | Wheelbase | 47 Inch |
| D | Min Seat Height | 33 Inch |
| E | Seat adjustment height | 0 Inch |
| F | Chain Stay Length | 22.5 Inch |
| G | Frame stack | 31.9 Inch |
| H | Effective top tube | 29.4 Inch |
| I | Wheel Diameter | 23.3 Inch |
| J | Head Tube Length | 6.7 Inch |
| K | Handlebar Length | 29.1 Inch |
| L | Frame Reach | 13 Inch |
| M | Head angle | 65° |
Specification
| Battery | 48V 15 Ah LG lithium battery | Pedal Assist | 0~5 level pedal assist |
| Frame | 6061 alloy frame 197x12mm rear axle | Display | Himiway LCD display |
| Drive Unit | 750W brushless geared hub motor | Recommended Rider Heights | 5'4"~6'3" |
| Headset | A16M 44*44*30 | Charger | US standard 3.0 A smart charger |
| Fork | KKE R150S coil spring fork compression/Rebound adjustable 15*135mm axle 1111 | Range | 60-80 Miles |
| Rear Shock | EXA A5-RE 25*25*180L*90PSI | Throttle | Thumb throttle |
| Rear Derailleur | SHIMANO ALTUS RD-M310-L 7/8-SPEED | Handlebar | YC-B086 / 22.2*31.8*W:720 |
| Shifter | SHIMANO SL-SML315-7R | Stem | 28.6*31.8*40mm |
| Crankset | JE0-4212MA 6061-T | Seatpost | / |
| Chainring | 44T | Saddle | Moto-style Saddle |
| Chain | KMC Z8.3/EPT/ 130L | Tires | Himiway X Kenda 20*4 fat tires |
| Freewheel | SHIMANO MF-TZ500-7 7-SPEED 14-16-18-20-22-24-28T | Extras | Heavy-duty aluminum kickstand |
| Brakes | Tektro HD-E350 | MAX. System weight | 330 lb |
| Rotor | F:180mm R:180mm | Weight | 88 lb |
| Headlight | 48V LED light | Taillight | Integrated Taillight |
Check Wiring diagram & Color codes:
https://himiwaybike.com ![]() HELP CENTER
HELP CENTER ![]() Tools and Instructions
Tools and Instructions
Bike Assembly Guide
Preparation Checklist

Extra tools needed:
- 10mm Wrench
- 15mm Wrench
 NOTICE:
- Please keep the original packaging for at least 15 days!
- Before assembling your bike, it's recommended to remove the battery for the reasons outlined below:
- Determine if there's battery drain or damage during shipping.
- Reduce the weight of the ebike to make it easier to maneuver the bike while assembling.
- Avoid battery damage during the assembly process.
Go to "Basic Display Settings" to learn about removing and charging the battery.
*Follow our Youtube channel Himiway Bikes to watch bike assembly tutorials!
Recommended Torque Values
| Hardware | Recommended Torque(N.M) |
| Handlebar *4 | 12 |
| Stem *2 | 15 |
| Upper Fork Crown *3 | 10 |
| Lower Fork Crown *4 | 10 |
| Fork Axle Pinch Bolt *4 | 8 |
| Saddle *2 | 12-18 |
| Seatpost Clamp *1 | 8 |
| Front Axle *2 | 9-13.5 |
| Rear Axle *1 | 9-13.5 |
| Crank Arm Bolt *2 | 38-42 |
| Pedal Axle *2 | 28-33 |
| Rear Derailleur Pivot *1 | 8-10 |
| Front & Rear Brake Adapter *4 | 9-10 |
| Front & Rear Disk Bolts *12 | 8-10 |
NOTICE: Using an impact driver to achieve the required torque is not recommended as it might cause damage. We suggest you use the wrench set we provided and extra tools to manually adjust nuts and bolts.
Assembly Instructions
Handlebar Installation (4mm Hex Wrench)
Step 1: Loosen the bolts on your bike stem.
Step 2: Center your handlebars and rotate them to align to the marking pointed to in the below image.
 - Step 1")
Step 3: Tighten bolts to handlebar stem, but don't tighten completely as you may want to further adjust the angle later to align more precisely. Test the positioning, and adjust the handlebar to your preferred angle. After determining the best position, completely tighten all the bolts on the stem.
 - Step 2")
NOTICE: In addition to angle, the height of the handlebar can be adjusted by adding or removing the headset spacers if needed. For those without experience, we recommend having a professional make such adjustments for safety reasons.
Front Wheel Installation
Step 1: Lay a mat down to protect both bike and floor from scratches. Next, carefully flip your bike upside down for the front wheel installation.

Step 2: Remove the plastic axle guards from the front wheel, being careful to avoid contact with the brake rotor set.

Step 3: Remove the front forks protection bar by manually pulling it straight up. Pull out the red pad, which is used to protect the hydraulic brake caliper.

Step 4: Loosen the front wheel nuts. Remove the front wheel hub axle.

Step 5: Align the hole in the center of the tire with the hole in the hub axle. Then, insert and secure the hub axle while ensuring that the brake pads of the front wheel are properly engaged with the brake.

Step 6: Tighten the front wheel hub axle.

NOTICE: please go to "Recommended Torque Values" to check out the recommended torque values.
Headlight Installation (Extra Tool: 5mm Wrench)
Step 1: Loosen the bolt on the fork brace. Align the bolt holes of your headlight with the hole on the fork brace, then reinsert the bolt through all holes and tighten the bolt with a 5mm wrench and a hex wrench.

Step 2: Connect the light wire connectors together. Pay careful attention to the arrows on the wire connectors, making sure the arrows align with each other to avoid damaging the interior circuitry.

Pedals Installation (15mm wrench)
Make sure your pedals are installed on the correct side, as installing on the wrong side will damage the threads. Indicators for the right pedal (R) and the left pedal (L) can be found in two places: the stickers on the plastic cover, and the bottom of the pedal threads.
 - Step 1")
Before you install the pedals, apply a small amount of waterproof grease onto the spindle. Start threading the pedal on by hand to ensure the pedal is going in perfectly straight, rotating in the direction of the pointer shown on the crank. If it is not spinning smoothly, make doubly sure that you have the correct left or right pedal. After initial hand-tightening, finish tightening the pedals with a standard 15mm wrench.
 - Step 2")
After Bike Assembly
Please write down the serial numbers found on the head tube, battery and motor on the inside front cover of this manual to facilitate failure reporting. Make sure each letter and number is correct.

NOTICE:
- Before using your bicycle, find out about all relevant requirements and regulations that apply in your country or state. There may be restrictions on riding on public roads, bike lanes or trails. There may also be requirements for helmets, age restrictions, driver's license requirements or bicycle light regulations.
- When installing an accessory on your bike, such as a cargo trailer or child trailer, make sure the accessory is compatible and follow the manufacturer's and retailer's instructions.
OPERATING INSTRUCTIONS

RIsk of Fire - No User Serviceable Parts
Ebike Charging, Usage, and Storage Guidelines
Initial Usage and Battery Connection
Before initial use, ensure to fully charge the battery. Connect the charger to an appropriate outlet before attaching it to your Himiway C5 battery. Follow the reverse order when disconnecting: first disconnect the charger from the bike, then from the outlet.
Ebike and Battery Storage
Do not leave the battery charging unattended for extended periods for its safety and longevity and leave the ebike outside. Always store indoors the battery and the bike separately, both during charging and when not in use.
Battery Removal and Insertion
Removal
- Switch off the e-bike power.
- Unlock the battery using the key provided and the battery knobs at the same time.
- Firmly hold the sides of the battery and carefully slide it out.
Insertion
- Align the battery with its compartment on the bike.
- Press the battery into the compartment until it is fully seated.
- Secure the battery by locking it with the key.
Ebike and Battery Operating Conditions
Remember that prolonged exposure to UV rays, rain, and the elements can harm the battery and ebike riding system; thus, always store indoors when not in use. For optimum results keep the battery and your ebike:
- In a cool, dry place, away from direct sunlight.
- Safe operating and storage temperature: 0-45°C (32°F-113°F)
- Recommended charging temperature range: 0-40°C (32°F-104°F)
Remember, deviations from these temperature ranges may negatively affect the battery's performance and lifespan.
Note that Himiway C5 bikes operate ideally at elevations up to 2000 meters above sea level. Riding at higher altitudes might considerably impact performance.
Modification and Repair Warning
Do not attempt to modify or repair your Himiway Ebike unless such actions are explicitly instructed in this user manual. Unauthorized modifications or repairs could lead to functionality issues, pose safety risks, and may void your warranty. If any concerns or unexpected issues arise, you are always welcome to consult with Himiway's customer service for further guidance before making any adjustments that aren't covered in this manual.
Charger Use
Only use the Himiway's recommended charger to charge the eBike. Using non-recommended chargers can lead to inconsistency in charging, reduced battery life, or even potential fire hazards. Ensure the charger model corresponds specifically to your eBike model before initiating charging.
Safety Checklist
| Safety Check | Basic Steps |
| Brakes |
|
| Wheels and Tires |
|
| Chain |
|
| Cranks and Pedals |
|
| Derailleurs |
|
| Motor Drive |
|
| Battery Pack |
|
Safety Precautions
The following safety notes provide additional information on the safe operation of your Himiway bike and should be closely reviewed. Improper operation, or failure to confirm correct installation, compatibility, and maintenance of any component or accessory may result in serious injury or death.
Before Riding
- All users must read and understand this manual before first use. Additional manuals for components used on your bicycle may be provided and should also be read before use.
- Ensure you understand all instructions and safety notes/warnings.
- Follow the safety checklist above before first use and at regular intervals to ensure correct tightening and setup of your bicycle.
- Ensure the bike fits you properly before first use. Check local rules and regulations before riding.
- It is your responsibility to familiarize yourself with the laws and requirements of operation of this product in the area(s) where you ride.
- Pads should be replaced if its friction components become contaminated or have less than 1mm thickness or total thickness.
While Riding
- Always wear an approved bicycle helmet whenever using this product and ensure that all helmet manufacturer instructions are used for fit and care of your helmet. Failure to wear a helmet when riding may result in serious injury or death.
- Acceleration can be unexpectedly strong in pedal assist mode (Pedal Assist level 1-5), as when you pedal the motor assist will suddenly engage. Therefore, please pay careful attention when riding. We suggest you use Pedal Only Mode (Pedal Assist level 0) when you need to ride at a slow speed to cross roads, at intersections, or when pedestrian traffic is present, in order to avoid accidents caused by sudden acceleration.
- Make sure you securely close the release lever of the front wheel, checking the wheel balance in Pedal Only Mode. If you notice the riding feels imbalanced, or the rotation of the front wheel makes noise, it likely means the bolts were not completely tightened or didn't align horizontally in the center.
- Off-road riding requires close attention and specific skills, and presents variable conditions and hazards which accompany the conditions.
- Wear appropriate safety gear and do not ride alone in remote areas.
- Shift gears regularly to stay in a optimal cadence range and downshift before coming to a stop. Reduce pedal force before initiating a gear shift to reduce drive train wear.
- Always turn the light up while riding at the night and always check all reflectors fixed well on the bicycle.
Himiway E-Bike Use and Care
The following table of contents provides general guidance on Himiway e-bike variable power assist settings and their effects on both range and performance. This content will apply broadly to most riders, but multiple factors will affect individual results including rider fitness and weight, terrain, proper maintenance, etc. While Himiway hopes and believes you will thoroughly enjoy your e-bike, no guarantees of universal performance characteristics for all owners can be given.
Battery Light Settings
The raised touch button on the battery case is the switch for the battery case's lights. Press and hold this spot for more than 5 seconds to turn on. Once on, a light touch will change the light mode. Press and hold for more than 5 seconds to turn off.

Basic Display Settings
Button Definition

*Go look on our website:
https://himiwaybike.com ![]() Help Center
Help Center ![]() Tools and Instructions
Tools and Instructions
*For video tutorial, search Display Settings on Himiway YouTube Channel.
Power On/Off
Press and hold the " ![]() " button for 2S to power on/off the instrument.
" button for 2S to power on/off the instrument.
Menu Settings
Press and hold the " M " to enter the setup UI. M
Gear Up
Click on "  " to turn the gear from low to high. Press and hold the button to turn on the headlight.
Gear Down
Click on " " to lower the gear from high to low. Press and hold the button into walking mode.
Function Display on the main UI

Power On/Off
Press and hold the " ![]() " for 2S to power the display. Press and hold the "
" for 2S to power the display. Press and hold the " ![]() " for 2S to power off. The display does not consume the battery power and the leak current is less than 1uA in the power-off status. When the E-bike is not in any operation for over 5 minutes, the display will automatically shut down.
" for 2S to power off. The display does not consume the battery power and the leak current is less than 1uA in the power-off status. When the E-bike is not in any operation for over 5 minutes, the display will automatically shut down.
Display UIs (User Interfaces)
After the display is powered on, it will show by default the real-time speed and total mileage. Click on " M " to switch the information of real-time speed (mph), AVG (average speed) (mph), MAX (maximum speed) (mph), TRIP (single trip mileage) (Miles), and ODO (total trip mileage). (As figures below)
")
Walking Mode
Press and hold " " for 2S and the E-bike will enter the walking mode with a constant speed of 3.7 mph. Meanwhile, the screen will show a "Walking Mode"sign. Release " " and the E-bike will stop power output immediately and return to the previous state. The walking mode function can only be used when the user is pushing the bike. Please do not trigger this function in the riding status.

Headlight On/Off
Press and hold "  " for 2S to turn on the headlight. Press and hold " " for 2S again to turn off the headlight.

Assist Level Selection
Click on " " or "  " to change the assist level. The default gears of the display instrument are Gear 0-5, with Gear 0 with no power output, Gear 1 with the minimum power output and Gear 5 with the maximum power output. The default assist Level is Gear 1 when the display is powered on.

Battery Level Display
When the battery is fully charged, all five segments of the LCD are illuminated. When the battery is under voltage, the displayed battery outer frame flashes indicating the need for immediate charging.

Motor power indication (uploaded power with protocol support or real-time operating current and voltage)
Motor output power can be known through the display. See the indication shown in the following figure.

Error Code Display
When an error occurs in the controller, the display will show an error code. Please check the Attached Table 1 for the error code definition.
When an error code is demonstrated, please make troubleshoot in a timely manner, or else the E-bike potentially causes danger.

General Settings
Press and hold power button to powered on the E-bike. While the bike is stationary in the power-on state, press and hold the " " and " " buttons simultaneously for more than 2S to enter the general settings. Now the display is in the general settings status.
All the settings need to be operate when the E-bike is stationary
Reset the Single Trip Mileage
TC means resetting the single trip mileage. Press " " or " " to choose Y/N. Choose Y to reset the single trip mileage and choose N not to reset the single trip mileage. Click on " M " to confirm the option and enter backlight brightness.

Backlight Brightness
bL refers to backlight. 1, 2, 3, 4, 5 can be used to show different levels of the backlight brightness. 1 means the lowest brightness while 5 means the highest brightness. The default brightness level is 5. Click on " " or " " to change the brightness level. Click on " M " to confirm the option and enter the auto headlight setting. Press and hold " M " to confirm the option and exit the general settings.

Auto Headlight
Prefers auto headlight, 1 refers on and 2 refers off.
Switch auto headlight by pressing " " or " " buttons.
Click on " M " button to confirm the option and enter the imperial / metric unit conversion setting. Press and hold " M " to confirm the setting and exit the general settings. Auto headlight is off by default.

Imperial and Metric Unit Conversion
U is for unit, 1 for imperial units and 2 for metric units. Convert the speed and mileage units by pressing " " or " " buttons. Click on " M " button to confirm the option and enter the system voltage selection. Press and hold " M " to confirm the setting and exit the general settings. The default unit of the display is imperial.

Auto Power off Time
The default auto power off time of the display is 5min. This value can be changed to set the auto off time.
The time can be choose from 0 to 40, which set by pressing " " or " " buttons. Long press " M " to exit the setting. 0 means no auto power off.

Exit Setup
Clicking on the " M " button ( within 2S ) in the setting status is to confirm the input and to save the current setting. Press and hold " M " (for more than 2S ) is to confirm the current setting and to exit the current setting status. Press and hold "" ( for more than 2S ) is to cancel the current operation and exit the setting without saving the current setting.
If no operation is occurred within one minute, the Hi-Play will exit the setting page automatically.
Error Code Definition Table
| Error Code | Definition |
| 21 | Abnormal current |
| 22 | Abnormal handlebar steering |
| 23 | Missing motor phase |
| 24 | Abnormal hall signal of the motor |
| 25 | Abnormal braking |
| 30 | Abnormal communication |
Battery Charging
Charging Procedure for On-bike Charging
Step 1: Check the battery power indicator on your display.
Step 2: Assemble the charger as shown in Figure 1 by inserting the plug (Plug 1) into the transformer.

Figure 1
Step 3: Remove the rubber cover on the charging socket and insert the DC plug (Plug 2) of the charger into the battery charging socket (fig. 2).

Figure 2
Step 4: Connect the power plug (110V-240V plug) to the power socket.
NOTICE:
- This order helps extend the battery life and effectively reduces battery damage caused by improper charging.
- The USB port located above Plug 2 of the battery can be used to charge other devices.
NOTICE:
Please keep your key and its spare in a safe place. Once lost, they are difficult to copy. The key number correlates to the number on the keyhole (fig. 4). If you have lost the keys, you can give us the key number to get new keys.

Step 2: Ensure the key is rotated to a 90-degree position and held there; then, push the battery towards the right side as shown in (fig.5).

Figure 5
Once the battery has shifted, remove it by pulling it downwards (fig.6).

Figure 6
Step 3: Check the battery status (fig. 8):

Figure 8
| Light Status | Charging Status |
| Red(on charger) | Charging |
| Green(on charger) | Fully charged |
| Yellow(on battery) | 40%-60% power |
| Red(on battery) | <40% power |
NOTICE: Please write down the serial number found on the battery beneath the barcode (fig. 7) on the inside front cover of this manual to facilitate failure reporting. Products that have the serial number and/or barcode removed, defaced, damaged, altered, or made illegible will not be covered by the warranty.

Figure 7
Step 4: Safest way to charge your battery-
First, assemble the charger by inserting the plug (Plug 1) into the transformer.
Then insert the DC plug (Plug 2) into the battery charging socket. Last, insert the power plug (Plug 3: 110V-240V plug) to the power socket. This order helps extend the battery life and effectively reduces battery damage caused by improper charging.

The charger works on 110V-240V 60 Hz standard home AC power outlets. Do not open the charger to select voltage input as the charger can automatically detect and account for incoming voltage.
| Project | Unit | Minimum | Max |
| Battery Input Voltage | V | 28 | 55 |
| Standby current | mA | 0.1 |
After Charging
- Please unplug the main power supply first by removing the plug from the power socket, then remove the DC port from the battery. You can then check the battery status on the display screen
- Hold the battery with one hand and turn the release switch with the other hand to install the battery. Lock the battery when finished to prevent theft.
NOTICE: If your battery displays abnormal charging behavior, such as:
- Longer-than-expected charge time
- Strange smell, smoke, or liquid emanating from battery and/or charger
- Overheating battery and/or charger
Please stop charging and contact Himiway Bike immediately.
Charging Tips

- The battery can be recharged on or off the bike.
- A new battery may take longer to be fully charged when depleted.
- The charger will automatically stop charging once the battery pack is fully charged.
- You can recharge the battery after short rides as it does not have a memory effect.
Precautions
- While charging, please keep your battery away from direct sunlight, liquid, dirt or debris, and metal objects. Do not allow the battery to be charged in environments under 14°Fahrenheit (-10°Celsius) and over 104°Fahrenheit (40°Celsius).
- Do not cover the charger when charging.
- Keep the battery away from children while charging.
- Make sure to only use an approved Himiway Bike charger purchased directly from Himiway Bike for your specific bike serial number.
Before Riding
Ensure that the battery has been properly secured to the bike before each use by grasping the battery pack and pulling upwards, testing the security of the pack.
Battery Maintenance (48V 20AH Samsung/LG Lithium-ion battery)
- Do not fully drain your battery. Turn off the power when the battery charge is low.
- Fully charge the battery after each use, no matter how much power is used. This will prolong the battery life. If battery power is not used for a long time, store the battery with a full charge and charge it once a month.
- The Himiway Bike can be safely ridden in light rain. However, riding through very heavy downpours or through flooded streets is not recommended, as the crank and/or motor can get wet, which may cause damage.
- Keep the battery away from open flame and other high-temperature heat sources. Do not expose the battery to direct sunlight or recharge immediately after use in high-temperature weather.
NOTICE: It is not recommended to make any modifications to the battery or the motor. If the battery is tampered with, and there are any problems with the altered battery or motor, it will not be covered under Himiway's warranty.
Charger Care information
Please refer to the instruction manual in the charger box.
Adjustment of the front fork
By adding compression, riders can firm up the suspension to stay higher in its travel and offer a more supported ride. Less compression offers a plusher or softer suspension feel.
Rebound Adjustment Knob

Figure 1
- Rotate clockwise (+ direction) to increase damping. This will result in a slower rebound rate.
![]()
- Rotate counterclockwise (- direction) to decrease damping. This will result in a faster rebound rate.
Compression Adjustment Knob

Figure 2
- Rotate clockwise (+ direction) to increase damping. This will result in a slower compression rate.
![]()
- Rotate counterclockwise (- direction) to decrease damping. This will result in a faster compression rate.
Please find more adjustment information on Owners' Resources.
Riding Modes
Pedal-assist
Pedal-Assist is an operating mode on e-bikes designed to engage the motor to assist, but not replace, your own pedaling effort. When you are operating your bike in the pedal assist mode, you can adjust the setting according to your preference. Himiway has five pedal assist settings - ranging from 1 to 5.
- Higher pedal settings (L4/5) would be most helpful for those who want to ride faster with minimum effort. These settings are perfect for people who want to arrive fresh and timely at work, without being sweaty and exhausted.
- Lower pedal settings (L1/2) are popular for Himiway riders to use after work, or when leisurely exercise is preferred. These are best to use on the way home from work, to refresh yourself and relieve stress accumulated throughout the entire workday. Moreover, lower settings can extend usable range for longer rides, maximizing enjoyment while minimizing physical stress and fatigue.
Throttle-only
The throttle mode is similar to how a motorcycle or scooter operates, alleviating the need to pedal or providing an additional boost simply by twisting the throttle. Himiway Ebike can reach speeds of up to 25 miles/h with throttle mode, which not only allows you to travel faster, but also reassures riders with extra power whenever needed, depending on traffic conditions and rider energy levels. If you are an adventurer who chases after speed and distance without compromising comfort or safety, the throttle-assisted Himiway would be your perfect companion.
Pedal-only
In this mode, the Himiway will perform like a normal bike, as you'll be riding without any assistance from the motor. This mode is especially useful if you run out of battery, or are looking for more intensive resistance training.
We suggest that you select a lower assistance level when you first ride your Himiway Bike. After becoming more comfortable with the riding characteristics of our e-bike, and more familiar with the varying range requirements of your most common destinations and commuting routes, you can then make any needed adjustments to pedal assist settings, as well as throttle use frequency, riding position, etc.
NOTICE: Shift gears regularly for optimal cadence and downshift before stopping the bike. Before shifting gears, reduce the force of your pedal strokes to avoid premature wear.
Riding Limitations
Following are some limitations needing riders' careful attention to ensure the geared hub motor does not overheat or become damaged from excessive loading:
- Do not attempt to ride up hills steeper than 15% grade.
- Use the pedals to assist the motor when climbing hills and accelerating from a stop.
- Avoid sudden starts and stops.
- Generally accelerate at a moderate pace, rather than aggressively.
MOVING AND STORAGE INSTRUCTIONS
Follow these basic parking, storage, and transport tips to ensure your bike is well cared for, both on and off the road:
- When walking with the bike, turn off the power to avoid accidental acceleration, or use Walk Mode.
- Though our bikes are water resistant (IPX4 Water Resistance), please do not park your bike outdoors in cold or inclement weather for extended periods.
- When parking, switch the power and any lights off to conserve battery, remove the key from the bike, and ensure the battery is secured and locked to the frame.
- In public places, help keep your Himiway Bike safe and secure from theft by always locking it up.
- Make sure to not park, store or transport your Himiway Bike on a rack that is not designed for the size and weight of the bike. When storing or carrying your bike on a rack for transport, remove the battery to reduce the weight and make lifting or loading easier.
If the e-bike will not be used for extended periods, charge the battery to about 50 -60% of its capacity, turn off all systems and disconnect the battery from the bike. This can help in extending the battery's lifespan.
For long-term storage, we recommend storing the e-bike in a cool, dry place with a stable temperature.
Carrying Loads & Cargo
Total Payload Capacity of Himiway C5: 330 lb.
Weight: 88 lb.
Cargo Safe Operation Tips
The following list provides important tips for the safe operation of the Himiway Ebike when used for carrying cargo:
- Make sure to load the cargo as low as possible to lower the center of gravity and improve stability.
- Ensure your loads are properly secured and periodically check that nothing has loosened.
- Plan your route accordingly when cargo is loaded on the Himiway Ebike, considering hill climbing ability, steering, and braking. Also account for moderately reduced range when carrying extra cargo weight (or an additional passenger).
- Try to get a feel for the cargo load in a flat and open private area before riding on public roads.
- Make sure to not use the front brake by itself, with or without cargo. Always apply the rear brake first followed by the front brake. Failure of the front fork or loss of control is possible when the front brake is operated independently, especially at higher speeds.
- The kickstand is not designed to hold the bike upright with cargo by itself, always manually hold the bike upright when loading or carrying cargo.
Different materials and components may respond differently to stress and wear. If a component's service life is exceeded, it can suddenly fail and there is a risk of injury. Any form of cracks, scratches or color changes on highly stressed components indicate that the component life has expired and the part should be replaced.
Safety and Care Instructions
To ensure safe riding conditions and maximize e-bike longevity, you must follow the guidelines outlined below:
- To clean the e-bike, wipe the frame with a damp cloth soaked in a mild, non-abrasive, non-corrosive detergent mixture. Wipe or spray all unpainted parts with anti-rust treatment after being used in coastal areas or areas with salty air or water.
- Never use a pressure washer when cleaning your bike.
- Never immerse the bike or any components in water, as the electrical system may be damaged. If the hub and bottom bracket bearings have been submerged in water, they should be removed and re-greased (this will prevent accelerated bearing deterioration).
- Periodically check wiring and connectors to ensure there is no damage, and the connections are secure.
- Store under shelter, avoiding extended exposure to cold or inclement weather. If exposed to rain or excess moisture, dry your bicycle afterward and apply anti-rust treatment to the chain and any other unpainted steel surfaces.
- Regularly clean and lubricate all moving parts, tighten components and adjust as required.
- Your cables, spokes, and chain will stretch after an initial break in period of 80-160 km, and additionally bolted connections can loosen with time and usage. Therefore, we suggest you contact a certified bicycle mechanic every two months to ensure your bike is safe and problem-free for years of use.
- If the paint has become scratched, or the metal chipped, use touch-up paint to prevent rust (clear nail polish can also be used as a preventative measure).
- Damage from corrosion is not covered under warranty, therefore special care should be given to protect and extend the life of your bike.
Maintenance
Battery Maintenance (48V 15AH Samsung/LG Lithium-ion battery)
- Don't fully drain your battery. Turn off the power when the battery charge is low.
- Fully charge the battery after each use, no matter how much power is used. This will prolong the battery life. If the battery is not used for a long time, store the battery with a full charge and charge it once a month.
- The Himiway Bike can be safely ridden in light rain. However, riding through very heavy downpours or through flooded streets is not recommended, as the crank and/or motor can get wet, which may cause problems.
- Keep the battery away from open flame or a high-temperature heat source. Do not expose the battery to direct sunlight or recharge immediately after use in high-temperature weather.
Motor Maintenance (750W geared hub motor)
- Please check your motor frequently and tighten any loose screws or nuts, to prevent the vehicle from breaking down due to disconnected wires.
- The geared hub motors are not waterproof, so avoid riding through water deeper than the lower edge of the geared hub motor to avoid motor failure.
Chain Maintenance
- We recommend cleaning the chain after each ride, especially in rainy and humid environments. Use a dry cloth to wipe the chain and its accessories clean. Use a brush to remove sand and dirt stuck in the chain, along with use warm soapy water if needed. Do not use strong acidic or alkaline cleaning agents (such as rust remover), because these chemicals can damage the chain.
- Apply lubricating oil after cleaning to avoid rust. First, make sure the chain is dry, and then apply the lubricating oil into the bearings.
- To prevent unnecessary chain wear, try to maintain a vertical chain position when shifting gears (do not use the smallest gear with the smallest flywheel, or the largest gear with the largest flywheel, etc.).
Front Fork Maintenance
- Always use a clean, oil-free lint-free cloth with plain or soapy water to clean your bike. To prevent water from flowing into the front fork, you can turn the bike upside down. Dry with a lint-free towel after washing. Pay specific attention to the inner tube and the dust seal to reduce wear and prevent thinning of the inner tube, which can lead to significant damage if the aluminum is exposed to air.
- We recommend using a front fork dust cover to protect the inner tube of your front fork. This prevents dust from entering as well as hard objects from hitting the inner tube.
Brake Maintenance
- Pad replacement:
- The brake pads should be replaced if they have become contaminated or are less than 1mm thick, or if the total thickness of the pad is less than 2.5mm.
- Before riding:
- Check the pads for wear or contamination.
- Check the hose for cracking, wear or deformation. Replace if necessary.
- Check if the brake system is operating correctly.
- After riding:
- Check the pads for wear or contamination.
- Check the hose for cracking, wear or deformation. Replace if necessary.
- Check if the brake system is operating correctly.
![warning]() NOTICE: Do not touch the brake discs after heavy use.
NOTICE: Do not touch the brake discs after heavy use.
- At regular intervals:
- Check the oil level in the reservoir.
- Lubricate the brake lever pivot with grease.
- Check to make sure that all the bolts are tightened to the correct torque specifications.
- Bleed The System
- You should always bleed the system after you have shortened or replaced the hose or have opened the system to the air at any time. Additionally, if the brake action feels spongy, you may improve performance by re-bleeding the system.
Tools and equipment required:
- 2mm Allen wrench
- 4mm Allen wrench
- 7mm wrench
- T15 Torx® wrench
- 20cc syringe
- Piece of tubing
- Tektro brake fluid
- Piston holder
- A clean, empty bottle or plastic bag
- A cleaning towel

Cleanliness is a very important part of any maintenance of the Tektro hydraulic disc brake. If the pads or rotor become contaminated with oil or if the hydraulics become contaminated with impurities, braking performance will be greatly impaired. Use only Tektro brake fluid with the Tektro hydraulic disc brake. Other brake fluids may not be compatible and may damage the system.
Step By Step Guide (See 4a - 4e)
Step 1: Place the bike in a stand. Position lever so that it sits parallel to the ground. (See 4a)

Step 2: Remove disc brake pads to avoid contamination during the bleed procedure. -Insert a disc brake piston setting tool or other non-sharp tool and push the pistons back into the caliper.
Step 3: Insert Tektro bleed block into caliper. Bleed block ensures that pistons will not move inward during bleed procedure.
Step 4: Using a T15 Torx, unscrew the bolt located at the caliper bleed port. (See 4b)

Step 5: Attach a section of plastic tubing with knurled silver bleed fitting to your syringe (supplied with bleed kit). Fill Syringe halfway with Tektro Mineral Oil. Hold the Syringe vertically with the tip up and tap out any air bubbles. Install the knurled silver bleed fitting (supplied with the bleed kit) into the caliper bleed port.
Step 6: Using a T15 Torx, remove the Reser/oir bleed plug. Set aside.
Step 7: Install the knurled silver bleed fitting (supplied with the bleed kit) into the reservoir bleed port. Firmly attach a long plastic tube over the bleed fitting, placing the other end into a clean, dry empty bottle or plastic bag. (See 4c)

Step 8: Start filling the brake with new mineral oil by slowly pushing the syringe. Air bubbles may come out of the reservoir. Continue pushing fluid until you no longer see bubbles coming out of the tube.(See 4d)

Step 9: Remove the plastic bag or collection bottle, section of tube, and knuried bleed fitting from the brake lever reservoir. Re-install the T-15 reservoir bleed plug. Tighten to 2-4Nm.

Step 10: With the bleed plug installled at the reservoir, you may now remove the syringe and knurled bleed fitting from the caliper. Re-install the T-15 caliper bleed plug. Tighten to 2-4Nm.
Step 11: Wipe off any excess oil from the lever and caliper body.
Step 12: Remove 2-Piston Bleed Block and reintstall the brake pads.
Adjust Lever Reach (See 4f - 4g)
- 4f. Tool free reach adjustment type-by the reach adjustment knob on the lever.
![]()
- 4g. By tightening the 2 mm reach-adjuster bolt on the lever.
![]()


TEKTRO had implemented 2 key improvements this year for better performance, 2.3mm thickness rotors and 5.0mm brake pads.
If there is lasered "5.0mm Pad" and (or) "2.3mm rotor only" or "E.2.3" on the caliper of your hydraulic disc brakes, please make sure to replace your brake pads and rotors according to the original setup of each model. You can find more information about 2.3mm rotors and 5.0mm pads on TEKTRO website. (See 4i).

Rotor replacement:
- 2.3mm thickness rotor should be replaced if worn to 1.9mm thickness.
- 1.8mm thickness rotor should be replaced if worn to 1.5mm thickness.
(Brake Maintenance is quoted from https://www.tektro.com/ , for further information and instructions please go to https://www.tektro.coload.php)
Warranty
Himiway Bikes periodically updates our official Warranty Policy. Therefore, please review the latest policy on our website: https://himiwaybike.com/pages/warranty
After-sales Mail: customers@himiwaybike.com
Suggestion Box: mike@himiwaybike.com
* Himiway has the right, without notice to the consumer, to substitute components of at least equal quality for advertised Himiway e-bike components if those advertised components are unavailable.
About Manual
This manual contains details of the product, information on its operation and maintenance, and other helpful tips for owners. Read it carefully and familiarize yourself with the Himiway Bike before using it to ensure safe use, reduce risk of damage and premature wear, and prevent accidents. Be sure to retain this manual as your convenient Himiway Bike information source.
This manual contains many Warnings and Cautions concerning safe operation, and consequences if proper setup, operation and maintenance guidelines are not followed. All information in this manual should be carefully reviewed.
The safety grade color of "CAUTION" is orange, and if not avoided, may result in moderate or serious injury.
The safety grade color of "WARNING" is red, and if not avoided will likely result in serious injury or death.
Users should also pay special attention to information marked in this manual beginning with "NOTICE"
Because it is impossible to anticipate every situation or condition which can occur while riding, this manual makes no representations about the safe use of our bicycles under all conditions. There are risks associated with the use of any bicycle which cannot be predicted or avoided, and which are the sole responsibility of the rider. You should keep this manual, along with any other documents that were included with your bicycle, for future reference, however all content in this manual is subject to change or withdrawal without notice. Visit himiwaybike.com to download the latest version. Assembly and first adjustment of your Himiway Bike requires special tools and skills, and it is recommended that this be performed by a trained bicycle mechanic if possible.
*The recommended minimum rider age is 16 and over, and the maximum rider age is 70 and under. Any rider who cannot sit comfortably on a e-bike should not attempt to ride it.
Take down your serial numbers! -
- Bike frame number
- Battery serial number
- Motor serial number
IMPORTANT SAFETY NOTICE
READ THIS MANUAL BEFORE OPERATION
Before operation of your new Himiway e-bike, it is crucial for your safety and per the manufacturer's requirement, that you thoroughly read and understand this instruction manual.
This manual contains vital information on the operation, maintenance, storage and the comprehensive safety procedures for your e-bike. Failure to follow instructions and heed warnings in this manual may lead to serious & life-threatening accidents, including but not limited to falls, collisions, electrical shock, or even fire.
Ensure to consult this manual, familiarize yourself with the features and mechanisms of your particular Himiway e-bike model, and strictly adhere to all safety advice before and during the use of your Himiway e-bike.
For any questions, ambiguities, or further assistance, please contact Himiway customer service. Prioritize your safety and the longevity of your Himiway e-bike - take the time to read this manual in detail.
Important Safety Notice
When using this product, basic precautions should always be followed, including the following:
- Read all the instructions before using the product.
- To reduce the risk of injury, close supervision is necessary when the product is used near children.
- Do not put fingers or hands into the product.
- Do not use this product if the flexible power cord or output cable is frayed, has broken insulation, or any other signs of damage.
- For all equipment, the instructions shall indicate "This equipment is not intended to be used at ambient temperatures less than 45°C (113°F) or above ambient temperatures of -10°C (14°F)." The blanks are to be filled in with the manufacturer's specified ambient temperature ratings.
- For all equipment, the instructions shall indicate "The battery is intended to be charged when the ambient temperature is between 0°C (32°F) and 40°C (104°F). Never charge the battery when ambient temperatures are outside this range." The blanks are to be filled in with the manufacturer's specified.
Safety Information
Avertissement - Risque d'incendie
Battery Care and Charging: Improper use, charging, and maintenance of the bike's Lithium Ion battery can lead to a risk of fire. Never use a charger other than the one provided with your Himiway e-bike. Always charge the battery in a well-ventilated area away from flammable materials.
Overheating: Overheating can cause the battery and/or motor to become a fire hazard. Avoid riding your Himiway e-bike in extremely hot conditions. Stop and allow the bike to cool if it shows signs of overheating.
Modifications: Making unauthorized changes to the e-bike, including the battery or electronics, can pose a risk of fire. Please refrain from making
RISK OF ELECTRIC SHOCK
Water Exposure: Exposure to water can damage the electric elements of your e -bike and may lead to electric shock. Avoid riding in deep water or in heavy rain.
Maintenance & Repairs: Never attempt to repair, manipulate or remove the battery, motor, or any other electrical component on your own. Always consult a professional or contact Himiway customer service.
RISK OF INJURY:
Road Safety: Riding an e-bike, comes with inherent risks. Always adhere to traffic laws, and be aware of your surroundings to avoid collisions and accidents.
Health and Physical Limitations: If you have any health conditions that may be affected by a sudden change in speed or from physical activity, please consult a doctor before use. Those recovering from injury or with mobility issues should take extra caution.
Loading: Overloading the bike surpassing the stated payload limit, especially the Himiway Big Dog and Himiway Rhino, can make the bike unstable and increase the risk of damage and accidents.
Please thoroughly read and understand this safety information. Using your Himiway e-bike responsibly, adhering to the above warnings and instructions, will allow for a safer, more enjoyable riding experience. Remember, your safety is our primary concern.
SAVE THESE INSTRUCTIONS
Documents / Resources
References
![himiwaybike.com]() Himiway Electric Bike | Long Range Expert
Himiway Electric Bike | Long Range ExpertTEKTRO BRAKE SYSTEMS
![himiwaybike.com]() Warranty | Warranty Info | Himiway Bikes
Warranty | Warranty Info | Himiway Bikes![himiwaybike.com]() Himiway Electric Bike | Long Range Expert
Himiway Electric Bike | Long Range Expert

Download manual
Here you can download full pdf version of manual, it may contain additional safety instructions, warranty information, FCC rules, etc.
Advertisement


Need help?
Do you have a question about the C5 and is the answer not in the manual?
Questions and answers