Advertisement
- 1 Read This First
- 2 Confirm the Packed Items
- 3 Parts Description
- 4 Ventilation System
- 5 Opening and Closing the Face Cover
- 6 Chin Curtain
- 7 Breath Guard
- 8 CNS-3C Shield/Visor
- 9 Applying Silicone Oil
- 10 Defogger Ventilation System
- 11 Service Tool
- 12 QSV-2 Sun Visor
- 13 Reflective Stickers
- 14 Anti-fog sheet
- 15 Replacing Interior Parts
- 16 Removing and Installing Interior Parts
- 17 When Installing the Dedicated Intercom for NEOTEC 3
- 18 Parts List
- 19 NEOTEC 3 Optional Parts
- 20 Documents / Resources
Read This First
This product is a motorcycle helmet.
Do not use it for any purposes other than riding a motorcycle. If you use the helmet for any other purpose, it may not provide sufficient protection in case of an accident.
No helmet can protect the wearer against all foreseeable high speed and low speed impacts.
For maximum head protection, the helmet must fit property and the retention system must be securely fastened under the chin. The helmet should allow sufficient peripheral vision when secure on your head. If your helmet is too large, it may slide on your head while riding causing your helmet to obstruct your vision or come off in an accident resulting in personal injury or death. To learn to properly wear and secure your helmet, see the booklet "Use Your Helmet Properly" that is packed with your helmet.
The contents of this manual are subject to change without notice.
The illustrations in this manual may differ from the actual product.
The copyrights for this manual belong to SHOEI CO., LTD. Reproduction or copying of this manual without written permission is strictly prohibited.
Confirm the Packed Items
After opening the product box, please confirm that all parts and accessories are included.

- Helmet
- Anti-fog sheet
- Breath Guard
- Helmet Bag
- Instruction Manual
- "How to use your helmet properly"
- Warning Label (E-3 tag: for ECE R22 Products)
- SHOEI logo stickers (2)
- Silicon Oil
- Anti-fog sheet pin
- Service Tool
- Reflective Stickers (for France and Chile)
 We recommend that you save the box and its cushioning material in case you need to ship the product or its parts for repair. If you dispose of these materials, please follow the proper laws and regulations.
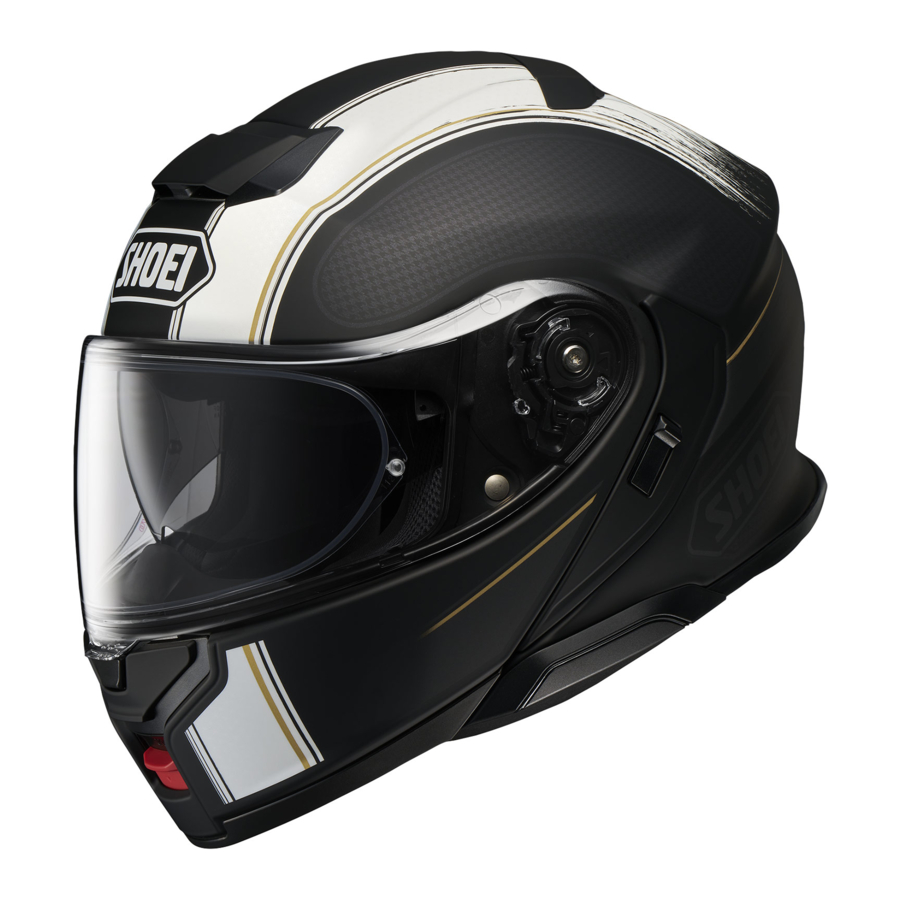
Parts Description

The terms "right" and "left" in this manual are from the point of view of a rider who is wearing the helmet.
- Face Cover Button
- Face Cover
- Lower Air Intake
- Defogger Ventilation System
- Shield/Visor Lock Button
- CNS-3C Shield/Visor
- QSV-2 Sun Visor
- Impact Absorbing Liner
- Upper Air Intake
- Shell
- Shield/Visor Base
- Sun Visor Lever
- Top Air Outlet
- Battery Space Cover
- Intercom Base Cover
- Chinstrap
- Chin Curtain
Ventilation System
With no breath guard

With breath guard

Opening the vents on the helmet can cause an increase in noise levels.

 Note: There is no manual opening/dosing mechanism for the vents.
Opening and Closing the Face Cover

The face cover can be opened and closed with a single touch. To open the face cover, pull down the button in the bottom center of the face cover and release the lock. Lift and rotate the face cover until you hear a dick when the first stopper engages. The face cover can be secured in opened position by continuing to rotate the face cover until it clicks in the second stopper.
To close the face cover, gently rotate it downward until you hear a click when the face cover lock engages.

- The face cover stopper is not a locking mechanism and does not completely hold the open status. Riding with the face cover open may create wind drag, causing the face cover to close. This may obstruct your view and can be very dangerous. Always have the face cover closed and locked while riding your motorcycle.
- Do not remove the face cover from the helmet. In case of need to adjust the face cover or the shield/visor, consult your local SHOEI dealer nearby.
- Do not hold the button while closing the face cover. This can cause the face cover lock to fail to engage. A face cover that is not locked may open unexpectedly during riding and lead to an accident. After closing the face cover, be sure to check that it is locked.
- When carrying the helmet, be sure to close the face cover and check that it is locked. Carrying the helmet with the face cover unlocked can cause sudden opening of the face cover and the helmet may be dropped or become damaged.
- Do not open or close the face cover by grasping the chin curtain. The chin curtain may come off.
Chin Curtain
Installing the chin curtain restricts the inflow of wind into the chin area. It also reduces the wind noise. The chin curtain is detachable. Follow the procedure below to install and remove the chin curtain.

Removing the Chin Curtain
The chin curtain is inserted into the plate at the bottom edge of the face cover and fastened with two pins. Refer to the drawing. Lift up the face cover plate near its right and left pins, and remove the pins that pass through the chin curtain plate. Pull out the chin curtain. Remove the chin curtain on both the right and left sides.
Installing the Chin Curtain
As shown in the drawing, lift up the face cover plate (at the bottom edge of the face cover) and insert the chin curtain plate in the space created. There are pins on the interior side of the face cover plate. Insert them through the holes of the chin curtain plate. Attach the chin curtain on both the right and left sides.
- With the chin curtain is installed, the sound from nearby vehides will be reduced. Please be aware of this while riding.
- Do not pull the chin curtain with the pins in place. If you do, the chin curtain or face cover plate may become damaged.
- Do not carry or hold the helmet by the chin curtain. The chin curtain may come off, and the helmet may drop.
Breath Guard
Installing the breath guard changes the airflow from the lower air intake. This directs air around your mouth and also reduces fogging of the shield/visor caused by breathing. Follow the procedure below to install and remove the breath guard.

Installing the Breath Guard
As shown in the drawing, insert the breath guard in the space between the defogger ventilation system and the impact absorbing liner.
Removing the Breath Guard
Pull the breath guard from the space between the defogger ventilation system and the impact absorbing liner. When you pull out the breath guard, the back side of the window beading may come off. If this happens, grab the window beading between the thumb and the forefinger and return it to its location.
Do not carry or hold the helmet by the breath guard. The breath guard may come off, causing the helmet to drop.
CNS-3C Shield/Visor
Before using the shield/visor for the first time after purchase, remove the protective film from the shield/visor.
If you pull the CNS-3C shield/visor completely down, it will be locked.
It is recommended that the shield/visor remains in this position during touring (Drawing 1).

By riding at a low speed with the shield/visor lock released and the shield/visor slightly opened as shown in Drawing 2, air inside the helmet can be circulated.

Riding at a high speed with the shield/visor slightly opened as shown in Drawing 2 may cause the shield/ visor to open unexpectedly, which is extremely dangerous. Do not use the slightly open position when riding at high speeds.
Opening the CNS-3C Shield/Visor
Press the shield/visor lock button to release the lock and open the shield/visor by holding the shield tab.

Removing the CNS-3C Shield/Visor
- Open the shield/visor to the fully opened position (Drawing 1).

- While pulling the trigger down, lift and turn the shield/ visor upward by holding the bottom edge to release hook A (Drawing 2). When hook A is released, hook B is also released at the same time.

- Pull the shield/visor down lightly and then remove hook C from the hook rail (Drawing 3).

- Follow the same procedure to remove the other side.


Installing the CNS-3C Shield/Visor
- Adjust the shield/visor to fully opened position (Drawing 4) and insert hook B into the gear (Drawing 5).

- Press hook A and C as per Drawing 6 to fix hooks into the hook rail.

- Follow the same procedure to install the other side.
- Confirm that the shield/visor hook and gear fit properly into the shield/visor base.


If the hook and gear are not securely fastened in the shield/visor base, the shield/visor may come loose while riding and an accident may unexpectedly occur. After installing the CNS-3C shield/visor, open and close the shield/visor a few times to confirm that the hook and gear fit securely. With the shield/visor completely dosed, confirm that the shield/visor tab is clasped by the hook.
Read the instructions and warnings in the own er's manual carefully before using this shield/ visor. It is your responsibility to ensure that your use of this shield/visor complies with any state or local laws.
- Light transmittance ratio of Spectra (mirrored) and Dark Smoke shield/visor is less than requirement of EGE R22/06. Therefore, they are not homologated. However, when they are used in riding in circuit for a long time under strong sunlight, they may ease fatigue of your eyes better compared with homologated shield/visor.
- Tinted or mirrored shields/visors reduce light transmittance and may impair a rider's vision in certain circumstances, increasing the likelihood of a crash resulting in injury or death.
- Never use a tinted or mirrored shield/visor at night, in tunnels, in rain or fog, or in other low visibility conditions. These shields/visors are intended for daytime use only.
- Do not use a tinted or mirrored shield/visor together with the helmet's internal sun visor, sunglasses or any other product that reduces light transmittance. This may obstruct your view and can be very dangerous.
- When mist retardant anti-fog sheet is attached to these shields/visors, light transmittance ratio decreases maximum by 10%.
If the tinted or mirrored shield/visor is used with the sun visor together in the USA, requirement of light transmission ratio specified in VESC-8* is not satisfied. Don't use tinted or mirrored shield/visor to your helmet in a manner not satisfying VESC-8*. Otherwise, your vision restricted by tinted or mirrored shield/visor may cause an accident and serious injury or death.
VESC-8: Vehicle Equipment Safety Commission regulation No. 8 for motorcyclist eye protection This standard is widely referenced and applied by the 36 states in USA with motorcyclist eye protection use law.

Important Notice about Handling the CNS-3C Shield/Visor
- Dirt and scratches on the shield/visor may obstruct your view while riding and can be very dangerous! If the CNS-3C shield/visor gets dirty or scratched, stop using it immediately. Remove the shield/visor and dean or replace it.
- The CNS-3C shield/visor should be cleaned with a solution of mild, neutral soap and water. Rinse well with pure water then wipe dry with a soft doth. Do not use any of the following cleaning materials: hot water over 40°C; salt water; any acidic or alkali detergent; benzine, thinner, gasoline, or other organic solvents; glass cleaner; or any cleaner containing organic solvents. If any of these cleaners are used, the shield's/visor's chemical nature may be altered and safety may be hindered.
- Do not ride with a shield/visor that is fogged. This may obstruct your view and can be very dangerous. If the CNS-3C shield/visor is fogged, open the lower air intake to circulate air within the helmet and remove the fog from the shield/ visor. Use of the anti-fog sheet is also effective in stopping fog.
- Always use SHOEl's genuine anti-fog sheet for the applicable shield/visor. For fitting the anti-fog sheet, please read instructions enclosed in it.
- Remove the protective film before using the shield/ visor for the first time.
- Do not place any sticker or tape in the shield's/ visor's field of vision.
- If the shield/visor becomes difficult to open or dose, or it makes a rubbing sound, apply silicone oil onto the window beading. Refer to "Using the Silicone Oil" for details of the application points.
Applying Silicone Oil
Apply the silicone oil after wiping off any dust and dirt. Also wipe off any excess silicone oil after application. Regular maintenance is recommended to ensure continuing comfort when using the helmet.
Applying the Silicone Oil on the Window Beading
To maintain adhesion between the shield/visor and window beading, apply a small amount of the supplied silicone oil along the dotted line. If silicone oil adheres to the shield/visor, it may impair visibility. Ensure you wipe off any excess oil.

Applying the Silicone Oil on the Gears
If the shield/visor or face cover becomes difficult to open or close, or it makes a rubbing sound, apply a small amount of the enclosed silicone oil on the part shown in the drawing.

Defogger Ventilation System
The defogger filter can be removed for cleaning.
Removing the Defogger Filter
Insert the service tool into the gap between the rib of the defogger filter and the shell and then lever the defogger upward (Drawing 1 ). Once the part is slightly raised, pull it out by hand (Drawing 2).

Installing the Defogger Filter
Position the defogger filter as shown in the drawing and then push it into place (Drawing 3). A To clean the part, gently scrub it with a soft brush while rinsing with water. Dry the part well before reinstalling it in the helmet.

Service Tool
Service tool is the tool to be used in following cases.
- Removing the Defogger Filter (Refer to "Defogger Ventilation System.")
- Removing sun visor (Refer to "Removing the QSV-2 Sun Visor.")
- Removing intercom base cover (Refer to "When Installing the Dedicated Intercom for NEOTEC 3".)
- Adjusting anti-fog sheet (Refer to the Drawing.)


When adjusting the anti-fog sheet, read the instruction manual that comes packed with it.
QSV-2 Sun Visor
The QSV-2 sun visor can be opened and dosed by sliding the sun visor lever on the left side of the shell. To open the sun visor, pull the lever down until it stops in the position shown in the drawing. If the sun visor is not fully open, it may slip down and dose unexpectedly during riding due to vibration or other phenomena and your view may be obstructed.

Removing the QSV-2 Sun Visor
- Open the face cover. See "Opening and Closing the Face Cover."
- Slide up the sun visor lever and close the QSV-2 sun visor (Drawing 1 ).
![]()
- Hold the sun visor with one hand and insert the service tool between the sun visor and the sun visor holder. Then, detach the rounded protrusion and rotate the sun visor in the direction of the arrow to remove it (Drawing 2).
![]()
- Also remove the opposite side in the same manner.


Installing the QSV-2 Sun Visor
- Slide up the sun visor lever and lower the sun visor holder (Drawing 3).
![]()
- Insert convex part 1 of the QSV-2 sun visor into the holder. While rotating the sun visor upward, push protrusion 2 of the sun visor into the hole in the holder until it snaps into place (Drawing 4).
![]()
- Also attach the opposite side in the same manner.
- When there are fingerprints on the sun visor, wipe them off with a soft, dry cloth.


If the sun visor is not installed properly, it may drop unexpectedly during riding and obstruct the rider's vision. After installing the QSV-2 sun raise and lower the visor several times to confirm that the protruding section of the sun visor is fit securely in the holder's opening. Confirm that there is no space between the sun visor and the holder.
Important Notice about Handling the QSV-2 Sun Visor
![warning]() Be sure to use the lever to open or close the sun visor. Never raise or lower the sun visor directly with your hands. This may damage the sun visor's raising and lowering mechanism.
Be sure to use the lever to open or close the sun visor. Never raise or lower the sun visor directly with your hands. This may damage the sun visor's raising and lowering mechanism.
![]()
- The QSV-2 sun visor is designed to provide shade only and cannot function as a shield. Do not ride with the shield open and using only the sun visor.
- Do not use a tinted or mirrored shield/visor together with the helmet's internal sun visor, sunglasses or any other product that reduces light transmittance. This may obstruct your view and can be very dangerous,
- Raise the sun visor while riding at night, through a tunnel, or any other low-light condition.
- Dirt and scratches on the sun visor may obstruct your view while riding and can be very dangerous! If the QSV-2 sun visor gets dirty or scratched, stop using it immediately. Remove the sun visor and clean or replace it.
- To clean the QSV-2 sun visor, wipe it with a soft, dry cloth. Do not use any of the following cleaning materials: hot water over 40°C; salt water; any acidic or alkali detergent; benzine, thinner, gasoline, or other organic solvents; glass cleaner; or any cleaner containing organic solvents. If any of these cleaners are used, the sun visor's chemical nature may be altered and safety may be hindered.
- The QSV-2 sun visor has undergone anti-fogging treatment, but may develop fog in low temperatures or high humidity. In this case, open the lower air intake to circulate air or raise the sun visor.
- Under certain storage conditions, humidity may cause the outer surface of the sun visor to become white. If this happens, take a soft, dry doth like one for cleaning eyeglasses and wipe the sun visor to restore it to its original condition.
- Don't attach any stickers or tap on the QSV-2 sun visor. They may obstruct your view.
- If the sun visor is not installed properly, it may drop unexpectedly during riding and obstruct the rider's vision. After installing the QSV-2 sun visor, raise and lower the sun visor several times to confirm that the protruding section of the sun visor is fit securely in the holder's opening. Confirm that there is no space between the sun visor and the holder.

Reflective Stickers

Reflective stickers may be required for the helmet depending on the country or area. If using the helmet in such a country or area, apply reflective stickers on the position shown in the drawing. Before applying the stickers, clean the helmet to remove any oil or dirt from the surface of the helmet.
Anti-fog sheet
Before using the anti-fog sheet, read the instruction manual endosed in the package.
- Daytime use only. Never use anti-fog sheet at night or in any other low visibility condition.
- The anti-fog sheet is made of a material that is easier to scratch than the outer shield/visor. It should be treated with great care.
- The anti-fog sheet may obstruct the rider's view in some riding positions.
- Remove the protective film before using the anti-fog sheet.
- The anti-fog sheet demonstrates high effectiveness in stopping fog by absorbing moisture. However, if the helmet is used continuously with the lower vent in the closed position in low-temperature, high-humidity conditions, the sheet can become saturated with water vapor causing streaks and fog to appear. If streaks or fog appears, it may obstruct your view and be very dangerous! In this case, open the lower air intake and/or open the shield/visor to circulate air within the helmet to remove the streaks and fog from the helmet.
- Purchase SHOEI DRYLENS 301 or PINLOCK" EVO lens DKS301 for CNS- 3C shield/visor for replacement of anti fog sheet.
Replacing Interior Parts

Center pad, right and left cheek pads, right and left chinstrap covers, and right and left ear pads can be removed for washing. You can also adjust the fit of your helmet by switching to the optional pads. Look at the list and drawing of interior parts and check whether the parts are installed or removed. Be sure to always fix the center pad, cheek pads, and chinstrap covers prior to riding. If necessary, use the following table to order the proper interior parts to adjust the fit of your helmet.
- Pad Sizes (For ECE R22 Products / For DOT Products)
| Helmet Size | XS | S | M | L | XL | XXL | |
| Center Pad | Optional (firm fit) | XS13 | S13 | M13 | L13 | XL13 | XL9 |
| Standard | XS9 | S9 | M9 | L9 | XL9 | XL5 | |
| Optional (loose fit) | xss | S5 | MS | LS | XLS | - | |
| Cheek Pad | Optional (firm fit) | 39 | 39 | 39 | 39 | 39 | 35 |
| Standard | 35 | 35 | 35 | 35 | 35 | 31 | |
| Optional (loose fit) | 31 | 31 | 31 | 31 | 31 | - | |
- Pad Sizes (for Brazil)
| Helmet Size | S | M | L | XL | XXL | |
| Center Pad | Optional (firm fit) | S13 | M13 | L13 | XL13 | XL9 |
| Standard | S9 | M9 | L9 | XL9 | XLS | |
| Optional (loose fit) | S5 | MS | LS | XLS | - | |
| Cheek Pad | Optional (firm fit) | 39 | 39 | 39 | 39 | 35 |
| Standard | 35 | 35 | 35 | 35 | 31 | |
| Optional (loose fit) | 31 | 31 | 31 | 31 | - | |
- The same cheek pads can be used with all helmet sizes. For the M size helmet example, choose cheek pad size 31 if you want a looser fit and size 39 for a firmer fit (both are optional parts).
- Center pads varies by model size. Confirm the size of your helmet prior to making a purchase.
Removing and Installing Interior Parts
Use the following procedures to remove or install the interior parts. Open the face cover completely when removing or installing the interior parts.
Removing Interior Parts
- Removing the Cheek Pads
Draw the chinstrap from slit of noise isolator (Drawing 1 ). Unfasten the three snaps to remove the cheek pad from the cheek pad base (Drawing 2).

Pull the plate notch (a) of the cheek pad out of the cheek pad bracket (A). After this, remove the plate from first the front and then the rear while drawing the cheek pad to the front of the helmet (Drawing 3).

Finally, pull the plate notch (b) out of the cheek pad bracket (B) (Drawing 4). Do not pull it hard. Be sure to pull the front notch (a) out first. If you pull out the rear notch (b) before pulling out notch (a), the plate may be damaged.


- Removing the Ear Pads
The ear pads are designed to reduce wind noise. Unfasten the 4 clasps on the plate from the cheek base, as shown in Drawing 5. Remove the ear pad. Remove the other ear pad in the same manner.

- Removing the Center Pad
Remove the center pad by unsnapping 2 snaps at the rear of the helmet first (Drawing 6), and pull the front portion of the center pad from center part as per Drawing 7.


- Removing the Chinstrap Covers
Remove the cheek pad then unfasten the chinstrap cover snap. Remove the cover from the chinstrap (Drawing 8). Remove the other chinstrap cover in the same manner.


Installing Interior Parts
- Installing the Chinstrap Covers
The chinstrap covers can be used on both the left and right sides. While referring to Drawing 9, pass each chinstrap cover through the chinstrap and insert the snap until it clicks into place.

- Installing the Center Pad
Slide and insert the front plate into the gaps of the bracket from one side (Drawing 10) to another (Drawing 11). Snap the two snaps into place in the rear of the center pad (Drawing 12).

- Installing the Ear Pads
The ear pads are interchangeable for right and left sides. Place ear pad section (A) between the center pad and the impact absorbing liner as per Drawing 13. Insert the 4 clasps on the plate in the notches of the cheek base. Fix the ear pad in place. Install the other ear pad in the same manner.


With the ear pads installed, the sound from nearby vehicles will be reduced. Please be aware of this while riding.
- Installing the Cheek Pads
Before installing the cheek pads, make sure that the three snaps are positioned properly shown in Drawing 14.

They may not be fastened if they are not positioned properly. Identify a right and a left pad. Insert the notch (b) into a boss of a cheek pad bracket (B) at the rear of the helmet (Drawing 15) and slide it toward the back of the helmet.

Then, do frontward and insert the notch (a) into a boss of a cheek pad bracket (A) as per Drawing 16.

Be sure to slide the plate toward the back of the helmet when you insert the rear section (Drawing 15), otherwise the notch (a) may not fit to the boss.
After the plates are inserted, pass the chinstrap through the hollow section of the cheek pad (Drawing 17).

Fasten the snaps in 1 to 3 order by pressing the head of the snaps firmly from the pad side until they click in place.
Press the comer of the pad as shown in the Drawing 18 and fit the cheek pad plate securely into the boss of the cheek pad base.

Lastly, insert the chinstrap into the slit of noise isolator as per Drawing 19. Install the other cheek pad in the same manner.
![]()


Important Notice about Handling Interior Parts
- When attaching or detaching a snap, you should hold it near the fastened area and treat it carefully. Fasten the snap firmly until you hear it dick.
- You can dean the inner parts by hand washing them or by washing them in a washing machine after placing them in a laundry net. Please treat them carefully when washing. Use lukewarm water. Gently squeeze the parts with a dry towel and dry them in the shade. To prevent damage to the plastic areas of the interior parts, do not wring them strongly and do not fold or bend the plastic areas. Take special care if you are using a washing machine. Do not dry the interior parts with a clothes dryer, as heat can damage the material. The impact absorbing liner (polystyrene foam section) should be wet with a soft doth dipped in a solution of mild neutral soap and water and then wiped. Allow time for the impact absorbing liner to dry in the shade. Do not dry the impact absorbing liner in the sunlight or use any type of mechanical dryer, as the impact absorbing liner is extremely sensitive to heat. If the impact absorbing liner is exposed to high heat of any kind, contact your dealer or SHOEI directly for a safety evaluation. To prevent damage, do not use any of the following cleaning materials: hot water over 40°C; salt water; any acidic or alkali detergent; benzine, thinner, gasoline, or other organic solvents; glass cleaner; or any cleaner containing organic solvents.
When Installing the Dedicated Intercom for NEOTEC 3
When installing the dedicated intercom for NEOTEC 3, it is necessary to remove the intercom base covers from the left and right sides and the battery space cover at the rear of the helmet. When installing or removing the intercom main unit, refer to the instruction manual of the dedicated intercom NEOTEC 3 you use.
Removing Intercom Base Cover
Insert the service tool under the tab of the intercom base cover and lever the tab upward to remove the cover.

Installing the Intercom Base Cover
- Insert the tab on the front of the intercom base cover into the slit in the intercom base (Drawing 1 ).

- Push the tab on the rear of the intercom base cover until it clicks into place (Drawing 2).


Removing the Battery Space Cover
To remove the battery space cover, pull the cover toward the front while pushing the battery space tab in the direction of the arrow. After removing the battery space cover, you will find a filter in the battery space. Remove the filter.

Put the removed battery space cover and filter somewhere safe so they are not lost.
Installing the Battery Space Cover
Place the filter in the battery space (Drawing 1 ). Insert the tabs (4 positions) of the battery space cover into the securing holes in the helmet and press the cover until the battery space tab clicks into place (Drawing 2).

- When using the intercom, the sound from nearby vehicles can be impaired depending on the volume settings of the intercom and its connecting devices. Be sure to adjust your volume accordingly so that your hearing is not impaired.
- When the intercom is not installed, be sure to use the helmet with each of the intercom base covers and the battery space cover attached.
- When using the intercom base and battery space, be sure to install the dedicated intercom for NEOTEC 3. For information about recommended intercoms, please visit the SHOEI official website (www.shoei.com).
- Read the safety precautions of the intercom you use carefully before using it. For information about handling the intercom, please refer to the instruction manual of the intercom you use.
Other cautions
- Before use, check that the shield/visor hooks and gears are fit firmly.
- Be sure to always wear the center pad, cheek pads, and chinstrap covers when using the helmet.
- When cleaning and caring for the helmet and shield/visor, do not use any of the following cleaning materials: hot water over 40°C; salt water; any acidic or alkali detergent; benzine, thinner, gasoline, or other organic solvents; glass cleaner; or any cleaner containing organic solvents. If any of these cleaners are used, the helmet's chemical nature may be altered and safety may be hindered.
- If insects become stuck to the helmet during riding and are left in place, the helmet surface may be corroded. They should be removed promptly.
- Be sure to use SHOEI genuine parts when replacing the shield/visor, sun visor, or inner parts.
Parts List
These optional parts are available for repair or replacement. To replace the parts, read the instruction manual that comes packed with the parts.
- CNS-3C ShieldNisor
- QSV-2 Sun Visor
- Anti-fog Sheet
- Chin Curtain
- Breath Guard
- Upper Air Intake
- Top Air Outlet
- Center Pad
- Cheek Pads (left and right set)
- Chinstrap Covers (left and right set)
- Ear Pads (left and right set)
- Intercom Base Covers (left and right set)
- Battery Case Cover (filter included)
NEOTEC 3 Optional Parts
Pads for Fitting Adjustment (Optional)
When riding for long periods, you may feel some tightness in the front, back, left or right areas of your helmet. In this case, you can change the fit by inserting the optional adjustment pad into the top part of the center pad. Insert the adjustment pad through the opening in the top part as shown in the drawing.
")
Note 1. After inserting the pad, check that the pad is properly fits into the four corners.
Note 2. This is a common size of pads for fitting adjustment.
*For further information, please consult your local SHOEI distributor or dealer.
shoei.com/worldwide/sales.html

SHOEI CO., LTD.
HEAD OFFICE
1-31-7 Taite, Taito-ku, Tokyo 110-0016, JAPAN
Tel: +81 3 5688 5170
Fax: +81 3 3837 8245
Documents / Resources
References
Download manual
Here you can download full pdf version of manual, it may contain additional safety instructions, warranty information, FCC rules, etc.
Advertisement


Need help?
Do you have a question about the Neotec 3 and is the answer not in the manual?
Questions and answers