Advertisement
- 1 Read This First
- 2 Confirm the Packed Items
- 3 Parts List
- 4 Parts Description
- 5 Breath Guard
- 6 Applying Silicone Oil
- 7 Chin Curtain
- 8 Ear Pads
- 9 V-460 Visor / Peak
- 10 CNS-2 Shield / Visor
- 11 Important Notice about Handling the CNS-2 Shield / Visor
- 12 PINLOCKEVO lens
- 13 Replacing Interior Parts
- 14 Removing Interior Parts
- 15 Installing Interior Parts
- 16 Important Notice about Handling Interior Parts
- 17 E.Q.R.S. (Emergency Quick Release System)
- 18 Documents / Resources
Read This First
Please read this manual carefully before use and keep it for future reference. Your SHOEI dealer can provide a replacement if this manual is lost.
This product is a motorcycle helmet.
Do not use it for any purposes other than riding a motorcycle. If you use the helmet for any other purpose, it may not provide sufficient protection in case of an accident.
No helmet can protect the wearer against all foreseeable high speed and low speed impacts.
For maximum head protection, the helmet must fit properly and the retention system must be securely fastened under the chin. The helmet should allow sufficient peripheral vision when secure on your head. If your helmet is too large, it may slip or move on your head while riding. This could cause your helmet to come Off in an accident or obstruct your vision while riding resulting in personal injury or death. To learn to properly wear and secure your helmet, see the booklet "How to Use Your Helmet Properly" that is packed with your helmet.
The contents of this manual are subject to change without notice
The illustrations in this manual may differ from the actual product.

The terms "right" and "left" in this manual are from the point of view of a rider who is wearing the helmet.
Confirm the Packed Items
After opening the product box, please confirm that all parts and accessories are included

- Helmet
- PINLOCK8 EVO lens
- Breath Guard
- Chin Curtain
- Helmet Bag
- Instruction Manual
- "How to use your helmet properly"
- Warning label (E-3 tag: for ECE R22 Products)
- SHOEI logo stickers (2)
- Silicone Oil
 We recommend that you save the box and its cushioning material in case you need to ship the product or its parts for repair. If you dispose of these materials, please follow the proper laws and regulations.
Parts List
These optional parts are available for repair or replacement.
To replace the parts, read the instruction manual that comes packed with the parts.
- CNS-2 Shield / Visor
- CNS-2 Shield / Visor Base Plate (right and left)
- CNS-2 Shield / Visor Base Plate & Screws Set
- Q.R.S.A screw
- PINLOCK®EVO lens for CNS-2
- V-460 Visor / Peak
- V-460 Visor / Peak screw
- V-460 Visor / Peak Top Base
- V-460 Visor / Peak Side Base (right and left)
- V-460 Visor / Peak Cover
- V-460 Visor / Peak Vent
- X-Spirit / ELEVEN Front Air Intake
- HORNET ADV /X2 Top Air Outlet
- TYPE-H Center Pad
- TYPE-H Cheek Pad (right and left)
- Chinstrap Covers (right and eft)
- Ear Pad C (right and left)
- Breath Guard H
- Chin Curtain D
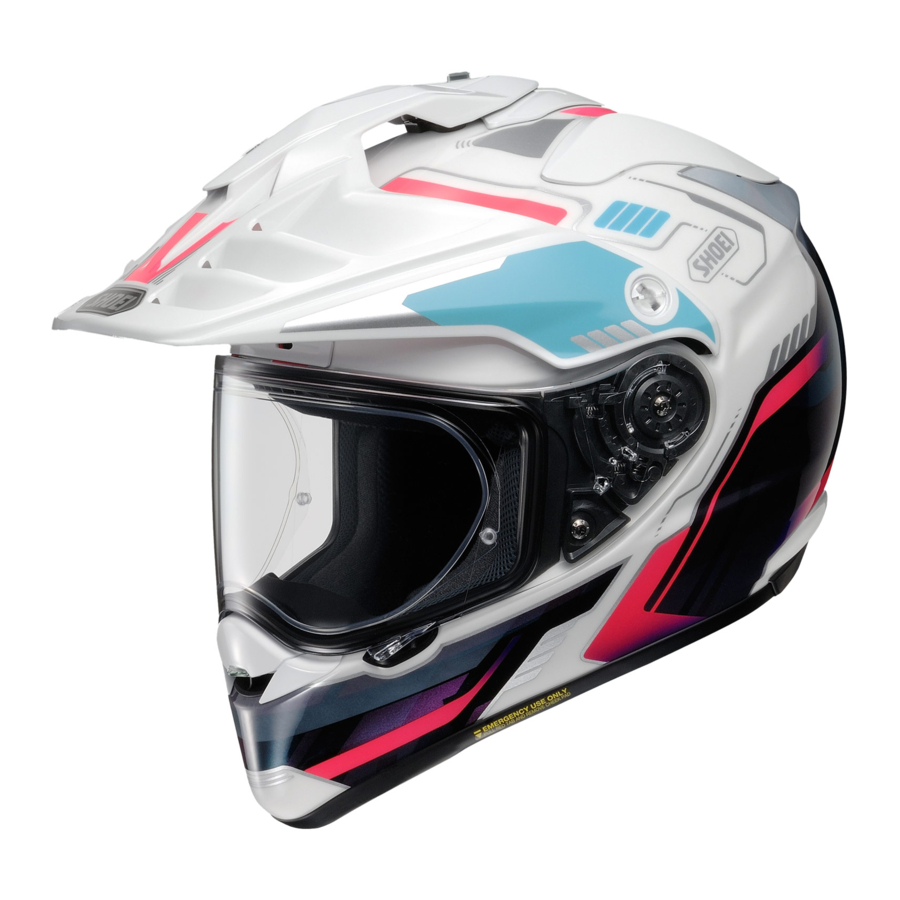
Parts Description

- Lower Air Intake
- Defogger Ventilation System
- CNS-2 Shield / Visor
- Front Air Intake
- V-460 Visor / Peak Vent
- V-460 Visor / Peak
- Shell
- Shield / Visor Base
- Impact Absorbing Liner
- Top Air Outlet
- Neck Outlet
- Chinstrap
Defogger Ventilation System

Top Air Outlet

Front Air Intake

V-460 Visor / Peak Vent

Lower Air Intake

Neck Outlet

Opening the vents on the helmet can cause an Increase In noise levels
Breath Guard
The breath guard reduces fogging of the shield / visor caused by breathing.
To install the breath guard, use the fol owing procedure.
Installing the Breath Guard
As shown in the drawing, firmly insert the breath guard in the space between the defogger ventilation and the impact absorbing liner.
Removing the Breath Guard
Pull the breath guard from the space between the defogger ventilation and the impact absorbing Iiner.

Do not carry or hold the helmet by the breath guard. The breath guard may come off, causing the helmet to drop.
Applying Silicone Oil
For better sealing of the shield /visor, apply the enclosed silicone oil on the window beading. First, remove any dirt or dust, then apply a small amount of oil to the designated part as per drawing. Wipe away any excess Oil If silicone Oil stains the shield / visor, It may obstruct your view. Check for adequate lubrication regularly.

Chin Curtain
The chin curtain reduces the influx of air turbulence and wind noise into the helmet's chin area. The chin curtain can be removed by using the following procedure
Installing the Chin Curtain
To fix the chin curtain, adjust a center of plate to a center of helmet's front end and insert it in a gap (A) between shell and liner, and then, insert plates of both sides.

Removing the Chin Curtain
To remove, pull out plate of a center portion of the chin curtain, and then, pull out plate of both sides.

- With the chin curtain is installed, the sound from nearby vehicles will be reduced Please be aware of this while riding
- Do not carry or hold the helmet by the chin curtain. The chin curtain may come off, and the helmet may drop.
Ear Pads
The ear pads are designed to reduce wind noise. The ear pads can be removed To remove or install the ear pads, refer to the "Removing Interior Parts" and "Installing Interior Parts" sections.
With the ear pads are installed, the sound from nearby vehicles will be reduced. Please be aware of this while riding
V-460 Visor / Peak
Close a shield before removing / fitting the visor / peak
- Removing V-460 Visor / Peak
Remove both screws by rotating 90 degrees to the left (Drawing 1 and 2)

Pushing a part B of the visor / peak base (Drawing 3),
![]()
slide the visor / peak forward to pull out from the visor / peak base (Drawing 4)
![]()
- Fitting V-460 Visor/ Peak
Insert the plate of the visor/peak into a gap C of the visor/peak base until it clicks (Drawing 5)

Adjust the holes on both sides of the visor/peak to the holes of both visor/peak bases (Drawing 6 and 7),

and insert screws and rotate 90 degrees to the right (Drawing 8 and 9)


CNS-2 Shield / Visor
Before using the shield / visor for the first time after purchase, remove the protective film from the shield / visor.
If you pull the CNS-2 Shield / Visor completely down, the shield/ visor tab will clasp the hook. We recommend that you use the shield / visor in this position while riding your motorcycle.

Remove the visor / peak before removing/fitting CNS-2 shield.
Removing the CNS.2 Shield /Visor
- Move the CNS-2 Shield / Visor to the fully open position (Drawing 1)

- Whie pulling the trigger down, lift the shield/ visor and release hooks (A), (B) and (C) as per drawing 2 and 3

- Follow the same procedure to remove the other side.


Installing the CNS-2 Shield / Visor
- Place a shield/ visor in full open position and insert shield/ visor hook (C) into the hook rail (Drawing 4)

- Press the shield / visor as indicated in the Drawing 5 The trigger will rise as the shield / visor clicks, and hook (A) and (B) will fit into the hook rail.

- Follow the same procedure to install the other side
- Confirm that the shield / visor hook and gear fit properly into the shield / visor base


If the hook and gear are not securely fastened in the shield / visor base, the shield / visor may come loose while riding and an accident may unexpectedly occur. After installing the CNS-2 Shield / Visor, open and close the shield / visor a few times to confirm that the hook and gear fit securely. With the shield / visor completely closed, confirm that the shield / visor tab is clasped by the hook.
Important Notice about Handling the CNS-2 Shield / Visor
- Dirt and scratches on the shield/ visor may obstruct your view while riding and can be very dangerous! If the CNS-2 shield / visor gets dirty or scratched, stop using it immediately. Remove the shield / visor and clean or replace it.
- The CNS-2 shield / visor should be cleaned with a solution of mild, neutral soap and water. Rinse well with pure water then wipe dry with a soft cloth. Do not use any of the following cleaning materials: hot water over 40ºC; salt water; any acidic or alkali detergent; benzine, thinner, gasoline, or other organic solvents; glass cleaner; or any cleaner containing organic solvents. If any of these cleaners are used, the shield's/ visor's chemical nature may be altered and safety may be hindered
- Do not ride with a shield / visor that is fogged. This may obstruct your view and can be very dangerous. If the CNS-2 shield/ visor is fogged, open the lower air intake and / or open the shield/ visor to circulate air within the helmet and remove the fog from the shield/ visor. Use of the PINLOCK®EVO lens is also effective in stopping fog
- Always use SHOE's genuine PINLOCKS®EVO lens for CNS-2. For fitting PINLOCKS®EVO lens, please read instructions enclosed in it.
- Remove the protective film before using the shield / visor for the first time.
- After cleaning or replacing the base plates, close the shield / visor and make sure that it touches the window beading in all around. If there is a gap between the shield / visor and the window beading, adjust a position of the base plate and eliminate the gap, because it may cause roll-in of wind or noise.
- For tightening screws, apply No.2 size Phillips head screwdriver vertically and rotate it carefully. If improper sized screwdriver or electric screwdriver is used, a screw head may be broken. Use a genuine screw made of aluminum for replacement. If a screw is tightened too much, it may be broken. (Recommended torque: 80 CN-m or about 8 kgf-cm)
- Do not place any sticker or tape in the shield's/ visor's field of vision.
![]()

PINLOCK®EVO lens
If you are using the EVO lens, read the instruction manual that comes packed with it.
- Daytime use only. Never use PINLOCK®EVO lens at night. If the PINLOCK®EVO lens is used with a clear shield / visor, its light transmission ratio will be approximately 80% This value does not meet the light transmission standards in the US. (VESC-8, 85%), Australia (AS1609, 85%), or Europe (ECE R22, 80%), so this accessory is for "daytime use only" in these jurisdictions.
- The PINLOCK®EVO lens is made of a material that is easier to scratch than the outer shield / visor. It should be treated with great care.
- Remove the protective film before using the PINLOCK®EVO lens.
- The PINLOCK®EVO lens demonstrates high effectiveness in stopping fog by absorbing moisture. However, if the helmet is used continuously with the lower vent in the closed position in low temperature, high-humidity conditions, the lens can become saturated with water vapor causing streaks and fog to appear. If streaks or fog appears, it may obstruct your view and be very dangerous! In this case, open the lower air intake and / or open the shield / visor to circulate air within the helmet to remove the streaks and fog from the helmet.
- Purchase DKS302 for CNS-2 for replacement of PINLOCK®EVO lens.
Replacing Interior Parts

The center pad, the right and left cheek pads and chinstrap covers, and the ear pads can be removed for washing. You can also adjust the fit of your helmet by switching to the optional pads Look at the list and drawing of interior parts and check whether the parts are installed or removed. Be sure to always fix the center pad, cheek pads, and chinstrap covers prior to riding. If necessary, use the following table to order the proper interior parts to adjust the fit of your helmet.
Pad Sizes
| (OP) | XS | S | M | L | XL | XXL | ||
| TYPE-H Center Pad | Optional (firm fit) | - | S17 | S13 | M13 | L13 | XL13 | XL9 |
| Standard | S17 | S13 | S9 | M9 | L9 | XL9 | XL5 | |
| Optional (loose fit) | S13 | S9 | S5 | M5 | L5 | XL5 | - | |
| TYPE-H Cheek pad | Optional (firm fit) | - | 43 | 39 | 35 | |||
| Standard | 43 | 39 | 35 | 31 | ||||
| Optional (loose fit) | 39 | 35 | 31 | - | ||||
- The same cheek pads can be used with all helmet sizes. For the M size helmet example, choose cheek pad size 31 if you want a looser fit and size 39 for a firmer fit (both are optional parts).
- Center pads will vary by model size. Confirm the size of your helmet prior to making a purchase.
* Model name and specification vary depending upon country or area.
Removing Interior Parts
- Removing the Cheek Pads
When the chin curtain is installed, remove it first Unfasten the 3 snaps to remove the pad from the cheek pad base (Drawing 1).

Pull the notch (a) from the cheek pad bracket (A) as shown in the Drawing 2

Next, pull the notch (b) from the cheek pad bracket (B) as shown in the Drawing 3.

Do not pull it hard. Be sure to pull the front notch (a) out first. If you pull out the rear notch (b) before pulling out notch (a), the plate may be damaged. - Removing the Ear Pads
Unfasten the 4 clasps on the plate from the cheek pad base (Drawing 4).

Remove the ear pad. Remove the other ear pad in the same manner. - Removing the Center Pad
Remove the center pad by unsnapping 2 points at the rear of the helmet first (Drawing 5).

Pull the front portion of the center pad from the holding plate as per Drawing 6.

- Removing the Chinstrap Covers
Remove the cheek pad then unfasten the chinstrap cover snap. Remove the cover from the chinstrap (Drawing 7).

Remove the other chinstrap cover in the same manner.


Installing Interior Parts
- Installing the Chinstrap Covers
A chinstrap cover is interchangeable right and left Pass the chinstrap through a chinstrap cover and snap each other until you hear it clicks (Drawing 8).

- Installing the Center Pad
Slide and insert front plate into a gap of bracket from one side to another as indicated in Drawing 9 and 10.

Snap the two snaps into place in the rear of the center pad as per Drawing 11.


- Installing the Ear Pads
Ear pads are interchangeable right and left. Place a portion (A) between a center pad and an impact absorption liner, adjust 4 clasps to notches of a cheek pad base and press them from above a pad (Drawing 12).

Do the other side in the same manner.

- Installing the Cheek Pads
Before installing the cheek pads, make sure that the 3 hooks are positioned as per Drawing 13.

They may not be hooked if they are not positioned properly. Identify a right pad and a left pad. Insert a groove (b) of a rear portion of plate into a boss of a cheek pad bracket (B) as per Drawing 14.

Then, do frontward and insert a groove (a) of a plate into a cheek pad bracket (A) as per Drawing 15.

Make sure to insert a plate deeply. After the plate is inserted, pass the chinstrap through the hollow section of the cheek pad (Drawing 16).

Fasten the snaps in![]() to
to ![]() order, by pressing the head of the snaps firmly from the pad side until they click in place Lastly, press the corner (A) of the pad as shown in the Drawing 17 and fit the cheek pad plate securely into the boss of the cheek pad base. Install the other cheek pad in the same manner.
order, by pressing the head of the snaps firmly from the pad side until they click in place Lastly, press the corner (A) of the pad as shown in the Drawing 17 and fit the cheek pad plate securely into the boss of the cheek pad base. Install the other cheek pad in the same manner.


 to
to  order, by pressing the head of the snaps firmly from the pad side until they click in place Lastly, press the corner (A) of the pad as shown in the Drawing 17 and fit the cheek pad plate securely into the boss of the cheek pad base. Install the other cheek pad in the same manner.
Important Notice about Handling Interior Parts
- When fastening or u.nfastening the snaps, you should hold near the snaps and treat carefully Fasten the snaps firmly until they click in place
- You can clean the inner parts by hand washing them or by washing them in a washing machine after placing them in a laundry net. Please treat them carefully when washing. Use lukewarm water. Gently squeeze the parts with a dry towel and dry them in the shade. To prevent damage to the plastic areas of the interior parts, do not wring them strongly and do not fold or bend the plastic areas. Take special care if you are using a washing machine DO not dry the interior parts with a clothes dryer, blow dryer, or any other type of mechanical dryer, as heat can damage the material. The impact absorbing liner (polystyrene foam section) should be wet with a soft cloth dipped in a solution of mild neutral soap and water and then wiped. Allow time for the impact absorbing liner to dry in the shade. Do not dry the impact absorbing liner in the sunlight or use any type of mechanical dryer, as the impact absorbing liner is extremely sensitive to heat. If the impact absorbing liner is exposed to high heat of any kind, contact your dealer or SHOEI directly for a safety evaluation. To prevent damage, do not use any of the following cleaning materials: hot water over 40ºC; salt water; any acidic or alkali detergent; benzine, thinner, gasoline, or other organic solvents; glass cleaner; or any cleaner containing organic solvents.
E.Q.R.S. (Emergency Quick Release System)
E.Q.R.S (Emergency Quick Release System) is a mechanism for emergency personnel to remove the cheek pads To remove a cheek pad in an emergency, cut or undo a chinstrap first. While holding the helmet firmly so that the rider's head may not move, take emergency tab (Drawing 1) and pull it to a direction indicated in the Drawing 2.

(If the chin curtain is installed, it must be removed before using the emergency tab.)
Pulling the emergency tab will release snaps and allow a cheek pad to be pulled out through the bottom of the helmet while it is still on the rider's head. Repeat the same procedure to remove the other side. Be sure to hold the helmet firmly and pay full attention not to move the rider's head while removing the cheek pads.
- Make sure to hold the helmet firmly by your hand when pulling out cheek pads.
- Never pull the emergency tab while riding.
- Use genuine SHOEI cheek pads only and never use non-SHOEI parts.
- If a chin curtain is installed in the helmet, remove the chin curtain before handling the emergency tab.
- Do not use Emergency Quick Release System when removing a cheek pad for maintenance.
Never peel these stickers from a helmet:

- Before use, check that the shield / visor hooks and gears are fit firmly. Also, make sure that both visor / peak screws are securely tightened and the visor / peak cover is firmly fitted. Otherwise they may come off during your ride.
- Be sure to always wear the center pad, cheek pads, and chinstrap covers when using the helmet.
- When cleaning and caring for the helmet and shield / visor, do not use any of the following cleaning materials: hot water over 40ºC; salt water; any acidic or alkali detergent; benzine, thinner, gasoline, or other organic solvents; glass cleaner; or any cleaner containing organic solvents. If any of these cleaners are used, the helmet's chemical nature may be altered and safety may be hindered.
- If insects become stuck to the helmet during riding and are left in place, the helmet surface may be corroded. They should be removed promptly
- Be sure to use SHOEI genuine parts when replacing the outer shield / visor, peak/ visor, or inner parts.
*For further information, please consult your local SHOEI dealer.
Documents / Resources
References
Download manual
Here you can download full pdf version of manual, it may contain additional safety instructions, warranty information, FCC rules, etc.
Advertisement


Need help?
Do you have a question about the HORNET ADV and is the answer not in the manual?
Questions and answers