Advertisement
- 1 Product Overview
- 2 Product Specifications
- 3 Package Contents
- 4 Appearance
- 5 Touch Screen Function
- 6 User Interface Overview
- 7 Function Overview
- 8 Voice Control Function
- 9 Play on APP (About Wi-Fi and APP)
- 10 How to Play Video on Computer
- 11 Installation
- 12 Trouble Shooting
- 13 Customer Service Center
- 14 Precautions
- 15 Documents / Resources
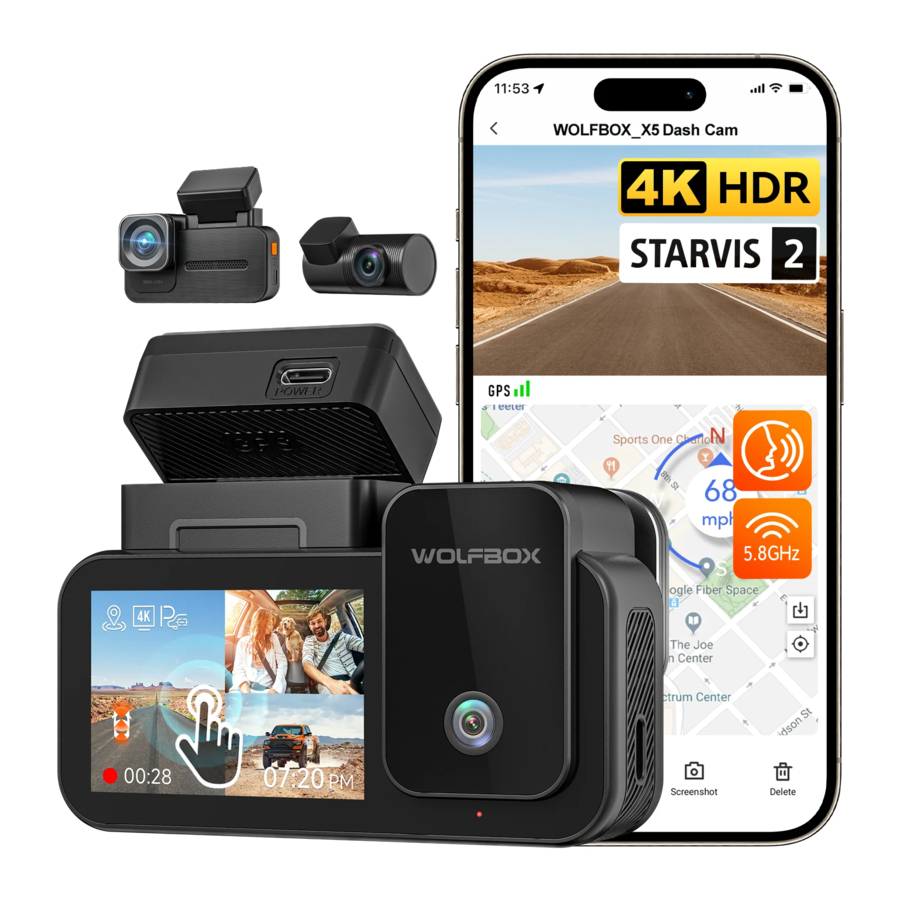
Product Overview
- This product provides a high-quality image and captures irrefutable evidence in the event of an accident, and records the beauty along the way for you.
- WOLFBOX is a professional automotive supplies manufacturing company. We have worked in the field of dash cams for more than ten years. We have a team of experienced and imaginative engineers who are committed to building a reliable and trustworthy automotive supplies brand.
Product Specifications
| RAM | DDR3 8GB | Display Type | IPS |
| Video Format | MP4 | Image Format | JPG |
| Front Camera | 4K | Inside Camera | 1080P |
| Rear Camera | 2.5K(1440P) | Rear Lens FPS | 30 fps |
| Display Size | 2.35'' | Power Interface | USB Type-C |
| GPS | internal | Wi-Fi Connection | Supported |
| Voice Control | Supported | Operating Temperature | -4°F ~158°F |
| Full Touch Screen | Supported | ||
Package Contents

Appearance

*If your camera cannot be powered on, please check whether the connection between the GPS Mount and the main unit is loose.
Please make sure that the two are fully fastened and aligned.
Touch Screen Function

Quick Setting Mode

Swipe down to enter the quick setting mode you can conveniently adjust the volume, turn on or off the recording and wifi.
User Interface Overview
Recording Mode

| Icon | Description |
 | G-Sensor sensitivity |
 | Loop recording in 1 min/3 mins/5 mins per file |
 | Recording resolution |
 | Whether to connect the hardwired kit and set up parking monitoring |
 | Voice control |
 | GPS status |
 | Wi-Fi status |
 | Camera system sound status |
 | Voice recording statusd |
 | Whether the rear camera is connected |
 | Recording status and recording time |
 | Emergency recording is on |
 | Date and time of the camera |
Playback Mode
When you power on the dash cam, it will start recording automatically. Swipe your finger from the bottom of the screen to the top or select to enter playback mode.

Click/select to access the specific playback folder.

- Current folder name
- Index of the current file in the total files
- 3 File name
- File type
- Video duration
- Time of video recording
Function Overview
Swipe from right to left to access the function menu, where you can modify various settings and parameters for the machine.
| Function | Option | Description |
 Resolution | 4K+1080P+2.5K /4K+1080P+1080P /... | Video resolution selection. |
 Loop Recording | 1 Minute /3 Minutes /5 Minutes | Set the duration for loop recording of video files. |
 Clock Setting | / | Adjust the current time displayed on the device. |
 Time Style | 12 Hours/24 Hours | Set the time display system. |
 Time Zone | / | Adjust the time zone based on geographical location. |
 Sound Record | ON/OFF | Set whether to record sound. |
 WI-FI | ON/OFF | Set the status of the device's WIFI connection. |
 Parking Mode | ON /G-Trigger Recording /12H Time-lapse recording /24H Time-lapse recording | Monitor the vehicle's status after the engine is turned off. |
 G-Sensor | OFF /Low /Medium /High | Set the sensitivity of the G-sensor. |
 GPS | / | Display recorded GPS data. |
 Screen Saver | OFF /10 Seconds /30 Seconds /2 Minutes | Set the activation time for the screen saver. |
 Voice Control | ON /OFF /Voice Command | Set the switch for voice control functionality. |
 Fatigue Reminder | OFF /1 Hour /2 Hours /4 Hours | Set the time for fatigue reminder. |
 Mirror Flip | ON/OFF | Adjust the left-right flip of the rear camera image. |
 Rear cam Flip | ON/OFF | Adjust the up-down flip of the rear camera image. |
 Internal Recording | ON/OFF | Set the switch for the built-in camera. |
 Flicker | 50 Hz/60 Hz | Set the screen refresh rate. |
 Click Tone | ON/OFF | Set the switch for key tones. |
 Volume Setting | OFF/Low/Medium /High | Set the sound level of the device. |
 Digital Watermark | ON/OFF | Set the switch for digital watermark. |
 Format | / | Format the SD card and delete videos and photos stored on it. |
 Format Reminder | OFF /Each 15 days /Each 25 days | Set the reminder for formatting the SD card. |
 DST | ON/OFF | Set the reminder for formatting the SD card. |
 Speed Unit | KM/H / MPH | Set the switch for daylight saving time. |
 Language | English/Français/ Deutsch/Italiano/ Español/... | Set the language for the device. |
 Card Speed | / | Test the SD card's read and write speeds to ensure they meet the machine's requirements. |
 Reset Setup | / | Restore all settings to factory defaults. |
 APP | / | Provide QR code for downloading the app. |
 Product Information | / | Display device information. |
 Help Center | / | After-sales contact information. |
Note:
Parking Mode requires a hardware kit (purchased separately) in order to activate.
With the hardware kit connected and Parking Mode enabled, the dash cam will enter Lapse Recording mode when the car turns off. This mode captures video at 1 frame per second until the set duration ends or the car battery voltage drops below 12V.
Voice Control Function
Fast control through simple voice commands.
When the recording interface displays a white icon  , it means that the Voice Control function is activated.
You can enable/disable the voice control function through the "Voice Control" in the menu or by clicking on the icon on the screen.
| lock the video | |
| take picture | |
| turn on audio | turn off audio |
| turn on screen | turn off screen |
| turn on WIFI | turn off WIFI |
| turn on recording | turn off recording |
| show front camera | show rear camera |
Note:
You can access specific voice commands by tapping on the 'Voice Command' submenu within the 'Voice Control' section.
Play on APP (About Wi-Fi and APP)
The Wi-Fi feature has been designed so you can pair your dash camera wirelessly with your smartphone and access your recordings instantly from the dash cam. Here you can view, download and share your videos easily with your friends and family.
The app "WOLFBOX" is a free app that allows you to operate this WLAN built-in drive recorder from your smartphone.
How to connect Wi-Fi?
- Download the "WOLFBOX " app
Go to the following address to download the " WOLFBOX" app: https://wolfbox.com/app/
You may also use your smartphone to scan the QR code to go to the download page.
![]()
- Enable Wi-Fi
Go to Settings to turn on Wi-Fi. Go to Settings to turn on the Wi-Fi. Then, the device screen will display the Wi-Fi name and password. - Connect Wi-Fi
To connect your iPhone or Android phone to the X5's WiFi network, go to Settings > Wi-Fi and select X5 Wi-Fi. Then, enter the default password: 12345678. - Open the "WOLFBOX" app
Once your mobile phone is connected to the X5's Wi-Fi network, open the WOLFBOX app. The camera will sync automatically, and you should see the live video feed on your phone.

Edit and share Your Videos in the App

In the app, you can view and edit downloaded local albums and share them with others.
How to Play Video on Computer
We recommend the application "GPS Media Player" to watch and play dash cam videos, and view Google Maps.
You can download it for free on Mac or Windows from the following link: https://wolfbox.com/gps-player/

- Video play window (Front)
- Video play window (Inside)
- Video play window (Rear)
- Map and track display
- Play control panel
- Speed and driving state indication
- Play list
Note:
If the video files of Front, Middle, and Rear road tracks are recorded synchronously and loaded into the playing list at the same time, they can be played separately in split left and right screens. When you find the desired video file, hold down the left mouse button and drag the desired files to the video play window to play it.
Installation
Before installing your dash cam, please test its functionality with all accessories and change the default settings to your preference.

Front camera installation
Peel off the electrostatic sticker on the cellophane and transfer it to where you want to stick it. Attach the front camera to the electrostatic sticker and press to make it firmer.

Wire Layout In The Vehicle

- The car charger is connected to the cigar socket.
- Connect the other end of the car charger to the dash cam.
- Use the crowbar to run the power cable along the front windshield and the roof, and hide the cable down the A-pillar, so as not to block the driver's sight and cause danger.


Mount The Rear Camera

- Use a clean cloth to wipe the rear windshield where the rear camera needs to be installed.
- Peel off the electrostatic sticker, transfer it to the place you want to stick it.
- Drain the air bubbles on the electrostatic sticker.
- Peel off the adhesive on the rear camera and stick it on the electrostatic sticker.
Power ON/OFF
- Short press the power button to turn on, long press the power button to turn off.
- When using the car charger, if the cigarette lighter port is ACC, the dash cam will automatically turn on when the car is started.
Trouble Shooting
Why is there no GPS signal?
- Clean and reconnect the probe on the main unit and bracket. Check for any interference in your car, like metal film on the windshield, radio antenna, or radar detector.
- Move your car to an open area.
- If the GPS icon is
![]() , it means the GPS signal is good.
, it means the GPS signal is good.
If the GPS icon is![]() , it means there is no GPS signal.
, it means there is no GPS signal.
 , it means the GPS signal is good.
 , it means there is no GPS signal.
How to turn off the on/off music of dash cam?
Please go to Settings >Key Sound > Off.
When the click tone is turned off, the power on and off music will also be turned off.
Why does my dash cam prompt card error or please format Memory Card every once in a while?
Please follow the steps below to check:
- Please go to Settings > Format Reminder to check whether the regular format reminder is enabled.
- Format the Memory Card.
- Restore factory settings and restart the dash cam.
- Update the firmware.
Dash cam repeated restart/no boot?
- Make sure you are using the original car charger.
- Unplug the Memory Card and car charger in turn, and reinstall them. Check whether the short circuit is caused by accessories.
- Reset the machine through the small hole at the bottom of the driving recorder.
- If none of the above can solve the problem, please try to power on the USB cable to confirm whether the host can be used normally.
- Please go to the official website to update the firmware.
- If it is not resolved, please contact your dedicated customer service for a replacement.
Why can't I connect to Wi-Fi?
- Check the working distance of Wi-Fi, about 15ft.
- Check the SSID and password of the Wi-Fi, or whether there are other devices connected to the Wi-Fi..
- Turn off mobile data, security software, and VPN on your phone.
- If the issue persists, please contact customer support for assistance.
Why is the time setting incorrect?
The dash cam features built-in GPS. It automatically adjusts time based on your location and time zone, eliminating the need for manual time changes. And you can adjust the time through Settings > Time Zone/DST.
Customer Service Center
If you have any problems with the function or installation, please contact us with any questions.
Help Center

WhatsApp


WOLFBOX
For more information:
 service@wolfbox.com
 https://wolfbox.com/contact-us
 www.wolfbox.com
Precautions
- For further inquiries, please contact our customer service via email atservice@wolfbox.com.
- Please use original accessories to avoid compatibility issues and insufficient current supply from non-compatible accessories. For example, 2-in-1 or 3-in-1 cigar sockets will not provide enough current to the device.
- Please do not tamper or splice the rear camera wire for the purpose of extension, as the rear image/feed to the display may be lost. The length of the included cable for the rear camera is 20 feet, and is suitable for most types of cars.
- If you wish to use a micro SD card with a capacity > 32GB, Please change the micro SD card [Class10 (10MB/s) required] format to FAT 32 on PC.

- Keep small accessories out of the reach of children. If this product is damaged or malfunctions, stop using it immediately and contact WOLFBOX support. Continued use may cause fire, electric shock or vehicle failure.
- This product is intended to be used as reference material in the event of an accident. We do not guarantee its effectiveness or admission as complete evidence.
- Please note that this product may infringe on privacy and other rights depending on how it is used. We are not responsible for any cases where this product infringes on privacy or other rights.
- This product is for DC12V/24V vehicles only.
- When intending to use this device as a USB flash drive, please ensure that you connect the device's right-side Type-C port to the computer's Type-C port [USB 3.0 required]. Ensure an accurate connection to avoid any potential risks of abnormal rebooting.
- The specifications and appearance of this product are subject to change without notice for improvement.
Documents / Resources
References
Download manual
Here you can download full pdf version of manual, it may contain additional safety instructions, warranty information, FCC rules, etc.
Advertisement


Need help?
Do you have a question about the X5 and is the answer not in the manual?
Questions and answers