Wolfbox G840S User Manual
Mirror dash cam
Hide thumbs
Also See for G840S:
- User manual (22 pages) ,
- User manual (69 pages) ,
- User manual (24 pages)
Advertisement
Advertisement
Table of Contents

Subscribe to Our Youtube Channel
Related Manuals for Wolfbox G840S


Summary of Contents for Wolfbox G840S
- Page 1 Mirror Dash Cam G840S User Manual...
- Page 3 IC warning: This device contains licence-exempt transmitter(s)/receiver(s)/ that comply with Innovation Science and Economic Development Canada's licence-exempt RSS(s). Operation is subject to the following two conditions: 1. This device not cause interference. 2. This device must accept any interference, including interference that may cause undesired operation of the device.
- Page 4 1. Cet appareil ne peut pas causer d'interférences et. 2. Cet dispositif doit accepter toute interférence, y compris peut provoquer le fonctionnement indésirable de l'appareil. Exposition aux rayonnements: Cet équipement est conforme aux radiations du Canada limites d'exposition pour un environnement incontrôlé noncé d'exposition RF Pour maintenir le respect des guides d'exposition RF d'IC, cquipment doit être.installé...
-
Page 5: Table Of Contents
………………………………………… Product Overview …………………………………… ………………………………………………… Precautions …………………………………………………… Warnings …………………………………………… Getting started ………………………………………… Package Contents ………………………………………………… Appearance ………………………………… About the Micro-SD card ………………………………………………… Installation ……………………………………………… Power On/Off ……………………………………………… Menu Settings …………………………………… Video Playback on PC …………………………………………… Troubleshooting... -
Page 6: Product Overview
Product Overview Thank you for choosing WOLFBOX G840S 4K Mirror Dash Cam. This product can provide you with irrefutable evidence in the event of an accident, and the ultra-clear picture can also record the scenery you encounter while driving. WOLFBOX is a professional automotive supplies manufacturing company. We have worked in field of dash cam for more than 10 years. -
Page 7: Precautions
"Time Zone" setting to make the time correct. If you choose to restore factory settings, you need to reset the time zone to adjust the time. If you have any questions or want accessories, Please CONTACT US (service@wolfbox.com), we will solve it for you and send you the accessories. - Page 8 Please read this manual the first time you open the package and familiarize with the equipment. Plug in the camera before installing it and verify its functionality, especially if you hire a professional to install it. Use the accessories provided in the box to ensure compatibility. When the power supply is plugged into a power splitter the camera will not have enough current to power on.
-
Page 9: Warnings
If this product is damaged or malfunctions, stop using it immediately and consult your dealer. Continued use may cause fire, electric shock or vehicle failure. Please install the device in a position that does not affect the driver's field of vision. WOLFBOX always puts the driver's safety first. - Page 10 If the lens needs to be cleaned, we recommend gently wiping it with a soft damp cloth to avoid scratching the lens and affecting the clarity of the video. This product is for DC12V/24V vehicles only. The specifications and appearance of this product are subject to change without notice. Please keep the device away from water, water vapor, and various liquids at all times to avoid equipment failure and potential safety hazards.
-
Page 11: Getting Started
The company is not responsible for errors in the user's installation area. Getting Started Please read this manual carefully before using the device. 00:08 08:39 10/07 Fri. Before the G840S starts running, please check the SD card and format it to ensure the smooth operation of the mirror dash cam. -
Page 12: Package Contents
If the dash cam cannot be turned on after powering, please keep the power on and press the hole marked "R" (on the back of the mirror unit) to reset the dash cam. Please CONTACT US if it still doesn't work. PACKAGE CONTENTS Tip: In addition to the original accessories in the package, we also provide separate Hardwire-Kit (used for parking... -
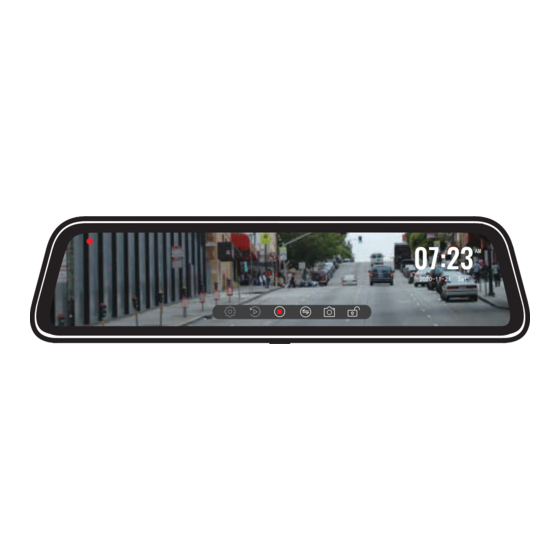
Page 13: Appearance
Appearance Name Description Front lens, record the front image of the lens The machine can be fixed with 2 straps Fasteners When the machine failure cannot be Reset hole eliminated, you can try to restart the machine by clicking here Port for charging Port used to connect the rear lens AV-IN... - Page 14 00:08 08:39 10/07 Fri. Recording status: During normal recording, it is red, turns Rear view/Front view switchable: Switch between front yellow while emergency recording view & rear view one moment 08:39 Emergency Lock: Lock videos as event files so it won't be Click on it, the clock setting appears on the screen overwritten by loop recording 10/07...
-
Page 15: About The Micro-Sd Card
mirror flip of Upside down of Resolution Movie Clip Time Reversing line Format SD-Card rear image rear image G-Sensor Language Screen saver Parking Mode Volumn setting Flicker sensitivity G-Sensor Parking Mode Language Screen saver Volumn setting Flicker sensitivity Default booting Daylight Saving Clock Settings Time style... - Page 16 Use a Micro SD card with Class 10 or higher(32GB-128GB). For stable use, it is recommended to format the micro SD card regularly. Recommend: Once a month. This product will check the Micro SD card at startup and will announce if it is not inserted or damaged, that can prevent missed shots.
-
Page 17: Installation
Please note the insertion direction of the SD card. Installation Please check the functionality of dash cam with its all accessories before installation. When you use the dash cam for the first time, the dash cam comes with factory default settings and you do not need to set it manually. - Page 18 Host installation Step 1: Fix the host on the rear-view mirror by hand, be sure to separate the silicone brackets on both sides of the rear-view mirror Step 2: Buckle the product in the rearview mirror by silicone button...
- Page 19 Step 3: Adjust the front lens to the right position Rear camera installation...
- Page 20 Rear camera installation We recommend install the rear camera above the license plate. 1. Fix camera with 3M adhesive Find a best location tear off the 3M adhesive on the rear camera, fix the rear camera near by the car license plate lamp. (if you need to adjust the angle, please attach the rear camera bracket to the rear camera and tighten it with screws first).
- Page 21 3. Install the cable Look for lights near the license plate that have gaps to allow wires to pass through. Run the rear camera cable through the gap into the trunk of your car. 4. Connect the rear cameras power cable to the extension cable. After snaking your rear camera's extension cable, connect the power cable to your rear camera's extension cord.
- Page 22 5. Route your rear camera's power cable to the front of the car. If you'd like, use a trim removal tool to pop out the headlining panel directly above your windshield. Then, run your cable through the exposed chamber. 6. Power on the dash cam with box included car charger, don't charge it with your own chargers.
- Page 23 If you need a license plate bracket, we also provide this accessory (Asin: B09J7VXQ2T), you can search by yourself or CONTACT US. Glare due to high beams is unavoidable. We have an upgraded WDR rear camera (Asin: B09KRM9QQ5) that can effectively improve this problem. About the WDR rear camera: it has the function of automatically adjusting the brightness.
- Page 24 How to install the mirror dash cam 1. Route your rear camera's power cable to the front of the car. If you'd like, use a trim removal tool to pop out the "headlining panel directly above your windshield. Then, run you cable through the exposed chamber.
- Page 25 4. Installation method (Note: GPS model is facing up, placed on the instrument panel). �� CAUTION: Connect the cigar plug cord connector in the correct orientation. Connecting in the wrong direction may cause malfunction or damage. If you cannot connect successfully, check the connection part carefully before connecting.
- Page 26 How to install the GPS GPS front and back Installation location...
- Page 27 Considering the use effect and installation convenience, we usually recommended customers to install it at the position specified in the picture. Of course, you can also try to install it in other locations for testing, and choose the location you think is most suitable. Installing step 1.
- Page 28 2. Once the GPS is installed, the GPS icon on the home screen will show. After the GPS signal has been received, it will show direction and speed. 00:08 08:39 10/07 Fri. Q: Why is my GPS not working? /How to use GPS ? A: If you cannot receive the signal after inserting the GPS, please follow the steps below.
- Page 29 Hardwire Kit Installation Dedicated Hardware Kit ASIN: B09X1L1GMX or B0BBLCCQ2B Muti-size Hardware Kit ASIN: B09X9F8GMT Step: 1. Stop the engine. 2. Open the fuse box. 3. Use a power detector to detect the constant power and ACC power (emergency power). *note: Use an ACC power supply of 15A to 25A.
- Page 30 Yellow cable (BATT/B+) The yellow cable should be connected to the fuse of the constant power supply in the car fuse box. If you are looking for a constant power supply in the fuse box: Use a voltage tester to check the fuse to ensure it still have electricity even if the car engine is off.
-
Page 31: Power On/Off
NOTE: If you can't install it, please CONTACT US, you can send us a photo of your fuse box, and we have professional technicians who can help you wire it. Power ON/OFF If you turn on the engine (ACC on) while the cigar power adapter is connected, the power will be turned on automatically and the opening screen will be displayed. - Page 32 Swip the left/right screen up and down to adjust the angle of view. 00:08 08:39 10/07 Fri. Swipe left or right to switch between front and rear cameras. 00:08 08:39 10/07 Fri. Click the top of the screen and slide to adjust the brightness. 00:08 08:39 10/07...
- Page 33 Video playback interface CH1-20201014-095920 CH1-20201014-095820 CH1-20201014-095736 Overview Overview Delete Normal Video: Select it to view recorded videos Locked Video: Select it to check locked videos Lock the video View videos on fullscreen Photos: Select it to check photos Front/Rear Video Switch:Click it to switch to front/rear video Function interface After powering ON the camera, press the button to enter the setup process.
- Page 34 00:08 08:39 10/07 Fri. Resolution 4K+1080P 2.5K+1080P 1080P+1080P Resolution: 2160P/1440P/1080P The front camera supports 2160P/1440P/1080P, and rear camera supports 1080P. Movie Clip Time 1minute 2minutes 3minutes...
- Page 35 Movie clip time: 1min/2min/3min Select the recording duration for each video. 00:08 08:39 10/07 Fri. Sound Record: ON/OFF In order to be able to record more comprehensive evidence, we recommend that you turn on this switch. Movie Clip Time: 1minutes/2minutes/3minutes Q: Why is every video recording so short?
- Page 36 A: We set the recording interval of each video to 1min/2min/3min. This is for the convenience of finding the locked video later. The main function of the recorder is to record, especially to record emergency video. If each video is too long and the G-Sensor triggers emergency recording when a collision occurs, the video will be locked and cannot be covered by the loop recording, and customers will be difficult to find the video in the subsequent search.
- Page 37 NOTE: In the time-lapse recording mode, the car will not trigger the G-Sensor when it is vibrated, and the emergency recording video will not appear in the locked folder. Principle When the hardwire kit is correctly connected and the Parking mode lapse Recording mode is turned on, the acc is out of power when the car is turned off (bat is always charged), and the dash cam detects that the acc is out of power and will stop normal recording and enter the "Lapse Recording mode".
- Page 38 If you need the introduction and installation video of the hardwire kit, please CONTACT US. If you want to lock some videos during timelapse mode, please set the G-Sensor Sensitivity. Screen Saver Off/1min/2min/3min. If you want it to automatically turn off the screen or use it as a rearview mirror, you can set the screen saver mode.
- Page 39 NOTE: Recommended to adjust to medium/low. Default booting display Split screen/Front Camera/Rear Camera. Choose the default camera image to display when powering on. Volume setting Set the volume of the dash cam. Volumn setting Middle High...
- Page 40 Clock settings Set the time and date manually. Time Style 12/24 time style. Speed unit MPH/KMH Select the unit you need. Daylight Saving time ON/OFF Time zone(Available after installing GPS ) Time zone UTC -12:00 UTC -11:00 UTC -10:00 UTC -09:30...
- Page 41 After plugging in the GPS, you need to set the time zone to get the correct time. After a factory reset, the time zone also needs to be reset.
- Page 42 Mirror flip of rear image: ON/OFF Upside down of rear image: ON/OFF If you are installing rear camera in a forward direction (fixing the bracket downwards), please turn on "Upside down of rear image" and turn off "Mirror flip of rear image" to adjust the view. Format SD card Clean all the data.
- Page 43 Reset setup This is used to restore factory settings. Reversing line (Auxiliary function) If your car does not have a reversing system and you need a backup reversing system as an aid, you need to connect the red cable of the rear cam to the positive pole of your reversing lamp.
- Page 44 You can adjust the viewing angle and the positions of the four corners of the reversing line in the "Reversing line" option of the settings The reversing line has three colors of red, yellow and green. When the object behind the car reaches the red distance, it means you can stop reversing.
- Page 45 Over Speed Remind Over speed remind 20 KM/H 25 KM/H 30 KM/H Please install the GPS first. To track the Location, Speed, status, Signal Strength, please go to info on the Menu Setting. Product information Check your version number here. Product information G-Sensor Parking Mode...
-
Page 46: Video Playback On Pc
If you need to track GPS information, please download the dedicated player, the download link as follows: Mac/Win Version Download: https://wolfbox.com/gps-player/ You can also get the link in the SD card. 1. Please insert the GPS and SD card into the dash cam, after restarting the machine, take out the SD card and use a card reader to view it in the computer. -
Page 47: Troubleshooting
1. Click File in the upper left corner 2. Click "Open" to select the file 3. Start playing Trouble Shootings Please feel free to contact our customer support at service@wolfbox.com. Most email are typically replied within 10 hours. All questions are answered within 24 Hours. - Page 48 Why the front lens image is tilted? Please rotate the front lens to adjust the front image. Why doesn't the rear camera work? Why can't the rear camerabe detected? 1. Please confirm whether the rear cable is installed correctly, pay attention to whether the 4pin connection position is loose and whether the position of the host and the rear camera mouth is loose.
- Page 49 3. If the connection is correct, please use a tester to measure whether the voltage is output from the reversing light when in reverse gear. Why dash cam does not work/cannot be turned on/freezes/restarts repeatedly? 1. Unplug the GPS, card, and rear camera cable, reset after power on again, and try to see if it can be turned on.
- Page 52 Check us out here! We have professional customer service! E-mail: service@wolfbox.com Phone: +1 888 296 8399...
Need help?
Do you have a question about the G840S and is the answer not in the manual?
Questions and answers