Advertisement
Quick Links
Store
Store
Your
Your
Patio Well
Patio Well
www.patiowell.com
www.patiowell.com
ASSEMBLY INSTRUCTIONS
ASSEMBLY INSTRUCTIONS
METAL
METAL
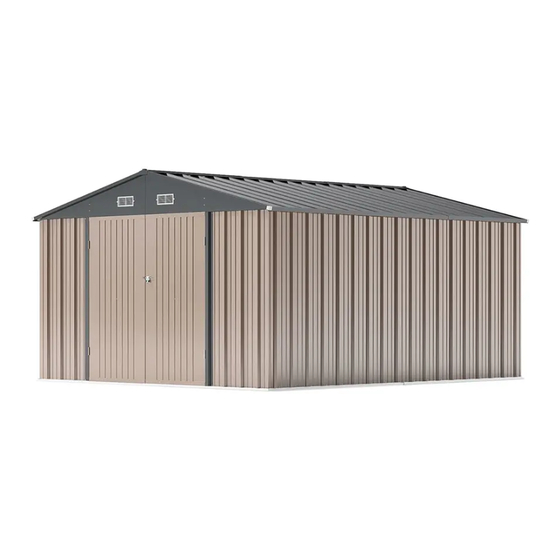
GARDEN SHED
GARDEN SHED
SKU: T-PS23-0289C
SKU: T-PS23-0406
Metal Garden House
Metal Garden House
Installation Tutorial
Installation Tutorial
https://www.patiowell.com/
https://www.patiowell.com/
pages/video-T-PS23-0289C
pages/video-T-PS23-0406E
saleservice@patiowell.com
saleservice@patiowell.com
Advertisement

Summary of Contents for Patiowell T-PS23-0289C
- Page 1 ASSEMBLY INSTRUCTIONS ASSEMBLY INSTRUCTIONS METAL METAL GARDEN SHED GARDEN SHED SKU: T-PS23-0406 SKU: T-PS23-0289C Store Store Your Your Patio Well Metal Garden House Metal Garden House Patio Well Installation Tutorial Installation Tutorial https://www.patiowell.com/ https://www.patiowell.com/ pages/video-T-PS23-0406E pages/video-T-PS23-0289C www.patiowell.com www.patiowell.com saleservice@patiowell.com saleservice@patiowell.com...
- Page 2 SITE PREPARATION Level the ground surface. Recommendation: Construct a wooden or concrete base as a foundation.
- Page 3 Requires two people and takes 2-3 hours for Installation. Recommended to wear gloves to avoid scratches. Please read the manual carefully before installation. DO NOT RETURN YOUR UNIT TO THE STORE Contact us first saleservice@patiowell.com...
- Page 4 FOUNDATION BK1 X1 BK1L X1 BK2 X1 BK2R X1 BE5 X2 BE6 X2 BE7 X2 PLATES W1A X21 WS2A X4 W3A X2 WS3A X5 PK2 X2 PK1 X2 PK3 X4 PK4 X10...
- Page 5 PLATES PK9 X2 A5 X2 A6 X2 DLA X1 DLB X1 DRA X1...
- Page 6 STRIPS DX2 X4 ULA X1 UR1 X1 L16 X4 UKIL UK2 X1 UK2R X1 M21 X2 M22 X2 UE9 X2...
- Page 7 STRIPS M16 X4 M17 X4 M18 X4 16 X2 C4L X2 C5 X4 C4R X2 GR1 X4 20 X4 GS1 X1 17 X1 GR X1...
- Page 8 STANDARD DG X1 DF X1 DC X2 DH X4 C2 X4 GF X4 GC X4 V1 X152 V2 X462 SCREW inch inch F1(X590) M4*10 F2(X78) M4*10 inch inch F3(X32) M5*12 F4(X5) M6*10 For GC inch F5(X4) M4*16...
- Page 9 WS3A WS2A WS3A UK2R WS2A WS3A WS2A UKIL WS3A WS3A WS2A BK2R BK1L...
- Page 10 STEP 1 BK1L BK1L F1 X2 STEP 2 BK2R BK2R F1 X2...
- Page 11 STEP 3 BK2R BK1L F1 X16 STEP 4 BK1L F1 X 6...
- Page 12 STEP 5 WS 2A WS 2A WS 2A WS 2A BK1L F1 X16 V2 X16 STEP 6 WS3A WS3A BK1L F1 X12 V2 X12...
- Page 13 STEP 7 UK2R UK2R UK2R UK2R WS2A BK1L F1 X10 V2 X6 STEP 8 UK1L UK1L UK1L UK1L F1 X4...
- Page 14 STEP 9 UK1L UK1L F1 X6 V2 X6 STEP 10 BK1L F1 X36 V2 X20...
- Page 15 STEP 11 BK1L F1 X112 V2 X112 STEP 12 WS3A F1 X44 V2 X44...
- Page 16 STEP 13 WS3A WS3A F1 X4 V2 X4 STEP 14 F1 X44 V2 X44...
- Page 17 STEP 15 F1 X8 V2 X4 STEP 16 F2 X20 V2 X16...
- Page 18 STEP 17 Note: M17 is pressed into M16 M18 is pressed into M17 STEP 18 F2 X18...
- Page 19 STEP 19 F2 X16 STEP 20 F1 X28 V2 X28...
- Page 20 STEP 21 Tighten all screws F2 X12 STEP 22 F1 X147 V2 X147...
- Page 21 STEP 23 F1 X1 V2 X1 STEP 24 F1 X2 V2 X2...
- Page 22 STEP 25 Installation tips : You need to gently lift the 17 and then screw it. F1 X21 V2 X21 STEP 26 F1 X2 V2 X2...
- Page 23 STEP 27 Installation tips : You need to gently lift the 16 and then screw it. F1 X6 STEP 28 F1 X2 F5 X4 V2 X2...
- Page 24 STEP 29 STEP 30 The other door operates the same way V2 X 2 F2 X 2...
- Page 25 STEP 31 The other door operates the same way F1 X 4...
- Page 26 STEP 32 inside F1 X 4 F3 X8...
- Page 27 STEP 33 inside F1 X 4 F3 X8...
- Page 28 STEP 34 F1 X 8...
- Page 29 STEP 35 outside F1 X 8 V2 X 8 F4 X 2 STEP 36 outside F1 X8 V2 X8 F4 X3...
- Page 30 STEP 37 F1 X6 V2 X6 F3 X8...
- Page 31 STEP 38 F3 X16...
- Page 32 STEP 39 V1 X 128 FINISH...
- Page 33 CARE & SAFETY • In case of fire, do not attempt to extinguish any burning polypropylene with water Unsuitable for storage of flammable or corrosive substances. • It is of utmost importance to assemble all of the parts according to the directions. Do not skip any step.


Need help?
Do you have a question about the T-PS23-0289C and is the answer not in the manual?
Questions and answers