
Subscribe to Our Youtube Channel
Related Manuals for Patiowell T-PS22-0080-BK


Summary of Contents for Patiowell T-PS22-0080-BK
- Page 1 ASSEMBLY INSTRUCTIONS METAL STORAGE SHED SKU: T-PS22-0080-BK Be careful to wear gloves to prevent E-mail: cuts. hofficeservice@gmail.com...
-
Page 2: Site Preparation
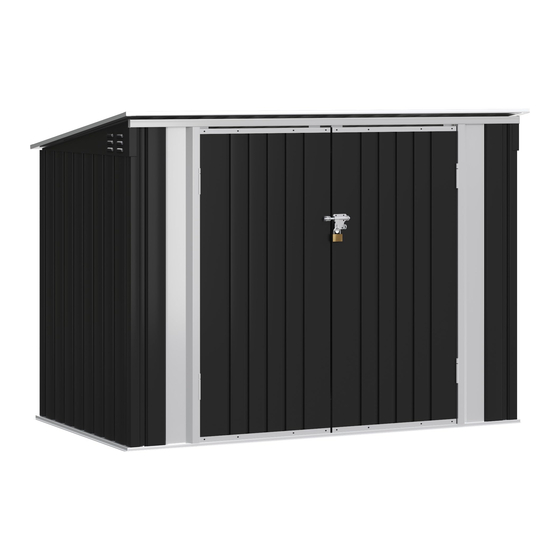
SITE PREPARATION Level the ground surface. Recommendation: Construct a wooden or concrete base as a foundation. The external dimensions of the product : 46’’ 52.3’’ 69.3’’ 39.3’’... -
Page 3: Before Starting Assembly
BEFORE STARTING ASSEMBLY Remove all of the pieces from the package and spread them out on the ground. Before installation, please check the type and quantity of parts first. It is recommended to use a clean work surface to spread the parts out and for pre-assembly steps. - Page 4 ROOF PARTS P5 X2 P6 X1 P7 X1 P8 X1 21L X1 21R X1 8 X1 15 X1 16 X1 18 X2 B1 X2 G3 X2 DK X3 DJ X4...
- Page 5 WALL PARTS P2 X2 P3 X6 P4 X1 P4B X1 JM5 X4 JM6 X4 9 X1 P4A X1 29L X1 29R X1 15R X1 1 X2 15L X1 Please see page 27. 3 X1 V2 X185 S1 X50 4 X1 10 X1 11L X1 11R X1...
-
Page 6: Door Parts
DOOR PARTS 20U X2 20D X2 DC X2 DG X1 DLA X1 DRA X1 DH X4 DF X1 DX2 X4 M8 X2 SCREW inch inch F1(X235) M4*10 F2(X10) M4*10 inch F3(X32) M5*12... - Page 8 CONTENTS Bottom frame 09-10 (page) Wall 11-19 (page) Door 19-22 (page) Roof 23-26 (page)
- Page 9 STEP 1 F1 X2 V2 X2 STEP 2 F1 X2 V2 X2...
- Page 10 STEP 3 F1 X4 V2 X4 STEP 4 F1 X16 V2 X16...
- Page 11 STEP 5 F1 X6 V2 X6 STEP 6 F1 X4 V2 X4...
- Page 12 STEP 7 F1 X6 V2 X6 STEP 8 Note: When fitting 12 is installed, the hole is on the upper side and the side is upward. F1 X6 V2 X6...
- Page 13 STEP 9 11L or 11R STEP 10 Note: When fitting 11R and 11L are installed, the hole position is upward and the side is upward. F1 X8 V2 X8...
- Page 14 STEP 11 F1 X20 V2 X20 STEP 12 F1 X16 V2 X16...
- Page 15 STEP 13 F1 X4 V2 X4 STEP 14 F1 X16...
- Page 16 STEP 15 Note: 29R and 29L are on the inside of P4A and P4B respectively F1 X8 V2 X8 STEP 16 F1 X4 V2 X4...
- Page 17 STEP 17 F2 X6 V2 X6 STEP 18 Note: The pin hole is on the left door, and the pin hole on 10 should pay attention to the installation position and incline to the left side. F1 X6 V2 X6...
- Page 18 STEP 19 F2 V2 F2 X2 V2 X2 STEP 20 F1 X8 V2 X8...
- Page 19 STEP 21 Note: This position is not in the center, a little to the left. F1 X3 F2 X2 V2 X3 STEP 22...
- Page 20 STEP 23 F1 X12 F3 X16...
- Page 21 STEP 24 F1 X22 STEP 25 F1 X8...
- Page 22 STEP 26 F3 X16...
- Page 23 STEP 27 DETAIL DISPLAY...
- Page 24 STEP 28 F1 X33 V2 X33 STEP 29 F1 X10 V2 X10...
- Page 25 STEP 30 F1 X9 STEP 31 Note: Tighten the bolts with a wrench according to the position shown in the figure. M8 X2...
- Page 26 STEP 32 STEP 33 Note: The chains for the garbage can lid.
- Page 27 STEP 34 Put it on the screw tip to prevent injury. S1 X50 FINISH...
-
Page 28: Care And Safety
CARE & SAFETY • Unsuitable for storage of flammable or corrosive substances. • It is of utmost importance to assemble all of the parts according to the directions. Do not skip any step. • Please consult your local authorities if any permits are required to erect shed. •...
Need help?
Do you have a question about the T-PS22-0080-BK and is the answer not in the manual?
Questions and answers
How do I close the top. Won’t close. I know I’m missing something simple
To close the top of the Patiowell T-PS22-0080-BK, follow these steps:
1. In STEP 32, attach the chains (DJ X4) for the garbage can lid.
2. In STEP 34, install part S1 V2 F1 on the screw tip to prevent injury.
These steps suggest the top is closed using a lid connected by chains, and safety parts are added to exposed screws.
This answer is automatically generated