
Related Manuals for Patiowell T-PS22-0096


Summary of Contents for Patiowell T-PS22-0096
- Page 1 ASSEMBLY INSTRUCTIONS METAL GARDEN SHED SKU: T-PS22-0096 YOUR Metal Garden House LIFE BUILDER Installation Tutorial https://patiowell.com/pages/ video-t-ps22-0096-8 www.patiowell.com saleservice@patiowell.com...
-
Page 2: Site Preparation
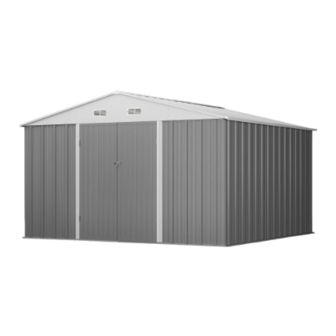
SITE PREPARATION Level the ground surface. Recommendation: Construct a wooden or concrete base as a foundation. The external dimensions of the product : 80.2’’ 118’’ 120.8’’... -
Page 3: Before Starting Assembly
Requires two people and takes 2-3 hours for Installation. Recommended to wear gloves to avoid scratches. Please read the manual carefully before installation. DO NOT RETURN YOUR UNIT TO THE STORE Contact us first saleservice@patiowell.com... - Page 4 FOUNDATION 1 X2 2 X2 BS1L X1 BS1 X1 BS2L X1 BS2 X1 PLATES P1 X2 W1A X22 WS2A X4 P2 X2 P3 X4 P3A X4 21L X2 21R X2 P4 X2 P5 X2...
- Page 5 PLATES DLA X1 DLB X1 DRA X1 STRIPS DX2 X4 UL1 X1 UR1 X1 7 X1 8 X1 9 X4 10L X1 10R X1...
- Page 6 STRIPS 13 X4 14 X4 15 X2 16 X2 17 X2 18 X2 19 X2 20 X4 GS X2 B1 X4 B2 X2 B3 X2...
- Page 7 STANDARD DG X1 DF X1 DC X2 DH X4 C2 X4 GF X4 GR X2 GC X4 S1 X120 V2 X418 SCREW inch inch F1(X503) M4*10 F2(X54) M4*10 inch inch F3(X32) M5*12 F4(X5) M6*10 For GC inch F5(X4) M4*16...
- Page 8 WS2A WS2A WS2A WS2A BS2L BS1L...
- Page 9 CONTENTS Bottom frame 10-12 (page) Wall 12-20 (page) Roof 21-30 (page) Door 31-36 (page)
- Page 10 For this step only, To ensure a better understanding and installation experience, please Scan The QR Code next to it to watch a video tutorial that will assist you in completing the installation. https://www.patiowell.com/pages/ video-t-ps22-0096-8?step1 STEP 1 BS1L BS1L F1 X2...
- Page 11 STEP 2 BS2L BS2L BS2L F1 X2 STEP 3 BS2L BS2L BS2L BS1L F1 X12...
- Page 12 STEP 4 F1 X4 STEP 5 Tips: Align the gasket with the hole, and then use the electric drill to drill the V2 into the hole.
- Page 13 STEP 6 WS2A WS2A WS2A WS2A WS2A BS1L F1 X16 V2 X16 STEP 7 BS1L F1 X16 V2 X16...
- Page 14 ATTENTION For this step only, To ensure a better understanding and installation experience, please Scan The QR Code next to it to watch a video tutorial that will assist you in completing the installation. https://www.patiowell.com/pages/ video-t-ps22-0096-8?step2 STEP 8...
- Page 15 STEP 9 × √ Note: Connector must fit. STEP 10 The hole position on No. 9 pole is replaced by slot. BS1L F1 X20 V2 X20...
- Page 16 STEP 11 F1 X4 STEP 12 BS1L F1 X6 V2 X6...
- Page 17 STEP 13 F1 X4 STEP 14 BS1L F1 X6 V2 X6...
- Page 18 For this step only, To ensure a better understanding and installation experience, please Scan The QR Code next to it to watch a video tutorial that will assist you in completing the installation. https://www.patiowell.com/pages/ video-t-ps22-0096-8?step3 STEP 15 BS1L In order to facilitate the...
- Page 19 STEP 16 BS1L F1 X40 V2 X40 STEP 17 F1 X48 V2 X48...
- Page 20 STEP 18 BS1L BS1L F1 X12 V2 X12 STEP 19 BS1L Tips: Insert UL1 and UR1 between the top beam and bottom frame respectively, and then push them to the F1 X8 V2 X8 corresponding position.
- Page 21 For this step only, To ensure a better understanding and installation experience, please Scan The QR Code next to it to watch a video tutorial that will assist you in completing the installation. https://www.patiowell.com/pages/ video-t-ps22-0096-8?step4 STEP 20 F2 X20 V2 X16...
- Page 22 STEP 21 Four screws in the middle can be installed first to facilitate fixation. BS1L BS1L F1 X32 V2 X32...
- Page 23 For this step only, To ensure a better understanding and installation experience, please Scan The QR Code next to it to watch a video tutorial that will assist you in completing the installation. https://www.patiowell.com/pages/ video-t-ps22-0096-8?step5 STEP 22 Note: 14 is pressed into 13.
- Page 24 STEP 23 Don't tighten these two screws too tightly. Don't tighten these two screws too tightly. F2 X12 STEP 24 F2 X4...
- Page 25 STEP 25 F2 X8 STEP 26 Tighten all screws. F2 X8...
- Page 26 For this step only, To ensure a better understanding and installation experience, please Scan The QR Code next to it to watch a video tutorial that will assist you in completing the installation. https://www.patiowell.com/pages/ video-t-ps22-0096-8?step6 STEP 27 Note: Do not install F1 and V2 in the holes near the outer side of P1,P2.
- Page 27 STEP 28 F1 X57 V2 X57 STEP 29 F1 X1 V2 X1...
- Page 28 STEP 30 F1 X2 V2 X2 STEP 31 Installation tips : You need to gently lift the 19 and then screw it. F1 X33 V2 X33...
- Page 29 For this step only, To ensure a better understanding and installation experience, please Scan The QR Code next to it to watch a video tutorial that will assist you in completing the installation. https://www.patiowell.com/pages/ video-t-ps22-0096-8?step7 STEP 32 Note: Do not install F1 and V2 in the holes near the outer side of P1,P2.
- Page 30 STEP 33 F1 X6 V2 X6 STEP 34 F1 X6 V2 X6 F5 X4...
- Page 31 ATTENTION For this step only, To ensure a better understanding and installation experience, please Scan The QR Code next to it to watch a video tutorial that will assist you in completing the installation. https://www.patiowell.com/pages/ video-t-ps22-0096-8?step8 STEP 35...
- Page 32 STEP 36 F2 X2 STEP 37 F1 X4...
- Page 33 STEP 38 inside F1 X4 F3 X8 STEP 39 inside F1 X4 F3 X8...
- Page 34 STEP 40 F1 X8...
- Page 35 STEP 41 outside F1 X8 V2 X8 F4 X2 STEP 42 outside F1 X8 V2 X8 F4 X3...
- Page 36 For this step only, To ensure a better understanding and installation experience, please Scan The QR Code next to it to watch a video tutorial that will assist you in completing the installation. https://www.patiowell.com/pages/ video-t-ps22-0096-8?step9 STEP 43 side F3 X16...
- Page 37 STEP 44 S1 X120...
-
Page 38: Care And Safety
CARE & SAFETY • In case of fire, do not attempt to extinguish any burning polypropylene with water Unsuitable for storage of flammable or corrosive substances. • It is of utmost importance to assemble all of the parts according to the directions. Do not skip any step.
Need help?
Do you have a question about the T-PS22-0096 and is the answer not in the manual?
Questions and answers