Precor FTS Glide Manual
- Assembly and maintenance manual (24 pages) ,
- Assembly and maintenance manual (24 pages) ,
- Assembly and maintenance manual (9 pages)
Advertisement
- 1 Before you begin
- 2 Important safety guidelines for owners
- 3 Use the FTS Glide
- 4 Important safety information for users
- 5 Maintenance guide
- 6 Assembly guide
- 7 Assemble the pulleys
- 8 Stem selector adjustments
- 9 Attach the shrouds
- 10 Documents / Resources
Before you begin
This unit is part of the Precor Strength line of quality strength training equipment, which helps you target specific muscle groups to achieve better muscle tone and overall body conditioning. To maximize your use of the equipment, please read this guide thoroughly.
Important safety guidelines for owners
Follow these guidelines to maintain proper working condition of the equipment:

Do not modify the equipment or any of its parts, or permanently remove any part from the equipment. Do not use accessory attachments that are not recommended by Precor, as such attachments might cause injuries.
- Regular maintenance must be performed by qualified technicians.
- Ensure trainers, facility personnel, and maintenance technicians understand how to use the equipment, know important safety guidelines, and can recognize potential problems such as a cracked weld.
- Strength training requires significant focus by the facility and its staff to maintain the quality of the fitness environment. If possible, the facility should provide direct supervision of the fitness equipment at all times by people knowledgeable about the safe operation of the equipment and trained to recognize potential problems.
- If any facility personnel witness unsafe use of the equipment, staff should address the user directly, demonstrate the proper technique, and review with the users the Important Safety Information for Users. Precor recommends posting a copy of the Important Safety Information for Users near the equipment in a prominent location.
- Make sure the equipment is stable and placed on a solid surface.
- This equipment is designed for a variety of exercises and has cable lengths that may exceed the minimum dimensions of this equipment. Provide sufficient space for use, access, and passage around the equipment.
- Check the equipment thoroughly based on the recommended inspection schedules outlined in this manual, including daily, weekly, monthly and annual checks. Place an "out-of-order" sign on the equipment during maintenance of the equipment or the surrounding area.
- Users should never be allowed to operate the equipment until it has been inspected and works properly. If a piece of equipment needs service, keep it out of use until it is repaired.
- Make sure all staff know not to allow anyone to use the equipment until it is working properly.
- When working with the weight stacks, do not attempt to free any jammed assemblies alone as this may cause injury. With the help of another person, carefully return the weight stack to the proper position with the top plate resting on the first weight.
- Do not allow the equipment to be used if the top plate or weight stack is pinned in a raised position. With the help of another person, carefully return the equipment to the proper position with the top plate resting on the first weight. Inspect the cable to make sure that it is seated in all of the pulleys.
- Do not place the equipment outdoors or on wet surfaces.
Safety approval
Precor commercial strength equipment is designed and tested according to EN 957-1/2 standards.
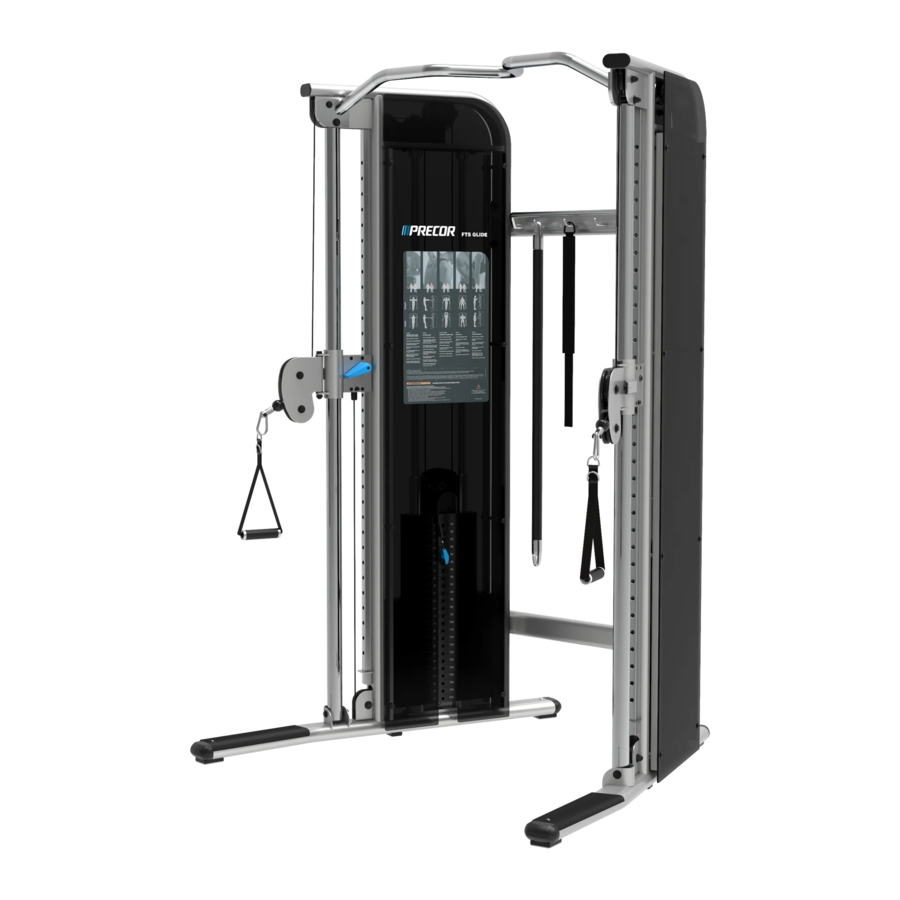
Use the FTS Glide
Refer to the instructional placards (Figure 1) on the equipment, for specific exercises and the muscle groups targeted.

Figure 1
Important safety information for users
Before beginning any fitness program, you should obtain a complete physical examination from your physician.
When using exercise equipment, you should always take basic precautions, including the following:
- If you do not understand how to operate a piece of equipment, ask someone from the facility such as a trainer to demonstrate how to use it and explain any safety instructions.
- Do not allow children on or near the equipment. Do not leave children unsupervised around the equipment. Do not allow those unfamiliar with the operation of this unit on or near it.
- Use the equipment only for its intended purpose. Do not use accessory attachments that are not recommended by the manufacturer, as such attachments may cause injuries.
- Wear proper exercise clothing and shoes for your workout—no loose clothing.
- Do not overexert yourself or work to exhaustion. Use reasonable judgment when working with weights. Avoid using excessive weight, which may cause injury.
- If you feel pain or abnormal symptoms, stop exercising immediately and consult your physician.
- Keep head, limbs, fingers, and hair clear of all moving parts while the equipment is in use. Keep hands clear of racking pegs.
- Never drop or insert objects into any opening in the equipment.
- Always check the equipment before using it. If you spot a potential problem, contact someone in the facility immediately. Do not use the equipment until the facility has verified that the equipment is working properly. Do not attempt to fix broken or jammed equipment.
- Do not use the equipment outdoors or on wet surfaces.
- Do not use the equipment if an "out of order" sign has been placed on it.
- Read all posted instructions, including all safety instructions and warnings.
- Use the equipment only for its intended use. Obtain proper instruction.
- Make sure the selector pin is fully engaged.
- If weights, pulleys, or other parts become jammed, do not attempt to free them. Weights may fall unexpectedly. Notify the facility staff.
- Do not remove labels from the equipment. Replace labels it they become damaged or lost.
General Guidelines
Start your exercise program conservatively. Start with a weight for each exercise that is easily performed for the full range of your motion. Focus on good posture and engaging your abdominal, back and gluteal muscles to stabilize your body during all exercises. Pay attention to how your body feels during and after training, and adapt your program accordingly. If an exercise feels too easy, increase your training load or change your training position. If an exercise feels uncomfortable, modify your exercise by changing the training load or movement pathway. For best results, consult with a certified fitness professional.
Always warm up your muscles before exercising. Perform light cardiovascular exercise or calisthenics for several minutes, followed by active or dynamic stretching, to prepare your body.
- One REPETITION is one complete movement from the starting position, through the full range of motion, and back to the starting position.
- One SET is a series of continuous repetitions, ideally 8-15 repetitions. As a general rule, the lower the number of repetitions performed (8-10), the heavier the weight used. While heavy resistance increases muscular strength, the full range of movement is necessary to achieve maximum muscle development and efficiency.
Rest just long enough between each set of repetitions to catch your breath. Work up to 3 or 4 sets for each isolated exercise. When you can perform the desired number of repetitions at a given weight, increase the resistance.
Program Suggestions
There are many ways to structure your training program. Two of the most popular formats involve split workouts (training different areas of the body on different days in order to provide adequate work and rest periods for different muscle groups) and circuit workouts (training different areas of the body back-to-back in quick succession for total body conditioning and higher calorie burn).
Split Workout Suggestions
Exercises isolating the same muscle or area of the body (arms, upper body, back, etc.) should be grouped together and performed together, followed by a day of rest for these muscle groups. At the end of a training session, exercisers should stretch the muscles trained to increase flexibility and reduce soreness.
- Exercise the entire body every other day, up to three times a week. One to two days of rest enable the body to recover from the previous workout.
- Alternate your daily workouts. One day isolate the upper body exercises, and the next day perform the lower body exercises.
Circuit Training Workout Suggestions
Perform 8-10 different exercises back-to-back with minimal rest. The order of the exercises is important. Make sure to alternate exercises that challenge opposing muscles groups to allow for adequate rest time of each muscle. For example, pair a chest press (pectoral muscles) with a low row (back muscles). Complete the entire circuit 2-3 times for best results.
Maintenance guide
You are responsible for the proper maintenance of the unit as discussed in this manual. For other service issues, contact Customer Support (refer to Obtaining Service). Perform the following maintenance tasks as appropriate.
Daily maintenance
Inspect the unit daily. Look and listen for frayed or worn parts, loose fasteners, cable tension issues, unusual noises, and any other indications that the equipment may be in need of service.
Weekly maintenance
In addition to daily maintenance, complete the following:
Lubricate guide rods
Guide rods should be lubricated every six months. Precor recommends you use a Teflon® spray.
The lubricant can stain clothes. Wear proper attire when lubricating the guide rods.
Clean equipment
To clean the FTS Glide, Precor recommends mixing a few drops of mild dish washing liquid in a gallon of water and using it to wipe the equipment with a soft cloth.
Clean the shrouds with a product specifically labeled as safe for acrylics. Use a clean, nonabrasive cloth and light pressure to avoid scratching the acrylic surface.
The acrylic shrouds on the FTS Glide are easily scratched or damaged through improper cleaning techniques. To avoid problems, dust the shrouds often with a clean, lint-free cloth and light pressure. Avoid rubbing dirt or grit into the surface. If you use glass cleaner or a similar product, make sure the label states that it is safe to use on Plexiglas® or acrylic products.

DO NOT use ketones, aromatics, esters, window cleaning sprays, alcohol, kitchen scouring compounds, or solvents (such as acetone, benzene, gasoline, carbon tetrachloride, or thinners). Do not use ammonia-based cleaning solutions because the ammonia destroys the plastic coating.
To remove light scratches on the smooth side only, use a buffing compound, such as those used in plastic headlamp restoration kits. Lightly buff the acrylic sheet using a clean buffer until the scratches disappear.
Inspect cable handles
Check the cable-to-handle attachment area very closely. Look for frayed cable ends, broken thimbles, bent cables, worn spring clips, worn handles, and any other unusual wear.
Inspect pulleys
Precor uses precision ball bearing idler pulleys to guide the cable smoothly. Inspect each pulley for damage, including hairline cracks, chips, or missing sections. Worn surfaces in the pulleys can cause severe damage to the cables and must be replaced at the first sign of wear or damage.
Be certain that the wheels turn freely as the equipment is used. Inspect each pulley for excessive side-to-side play, which indicates worn bearings or loose mounting bolts. If excessive play is discovered, remove the pulley to inspect the bearings and replace the entire pulley if necessary.
Inspect weight stack and selector pin
Weight stacks are made of precision machined plates that are designed as a single mechanism to stack precisely. Use only Precor-supplied add-on weights and weight selector pins.
On a weekly basis, inspect weight stacks and selector pins. Wipe each plate with a damp cloth as needed. Inspect all plates for sharp burrs or damage. Wipe dirt and dust off the guide rods.
Make sure the equipment uses only the original Precor selector pin. In addition, make sure the selector pin can be fully inserted and retained in each weight plate.
Monthly maintenance
In addition to the daily and weekly maintenance, complete the following:
Inspect all fasteners
Fasteners can loosen with normal use. Inspect all nuts, bolts, screws, and other fasteners to make sure they are tight and installed correctly. If a fastener is loose but in good condition, tighten it. If you are concerned about the integrity of the fastener, place an "out of order sign" on the equipment, remove the fastener and replace with a new fastener. You can order new fasteners from Precor Customer Support.
Inspect frames and movement arms
Inspect frames and movement arms monthly for proper function and integrity. Check for cracks, chipped paint, or rust. Touch up dings and chips in the paint as needed. Replace any component at first signs of wear. You can order touch-up paint from Precor by calling Customer Support (refer to Obtaining Service).
Inspect frames for cracks, particularly at the joints. If any cracks are found, take the equipment out of service immediately and have a qualified maintenance technician repair it. Refer to Important safety guidelines for owners and Obtaining service sections.
Obtaining service
You should not attempt to service the strength equipment, except for the maintenance tasks described in this manual. If any items are missing, contact your dealer. If you need more information regarding customer support numbers or a list of Precor authorized service centers, visit www.precor.com.
Precor recommends implementing a thorough maintenance program that incorporates regular safety inspections by qualified maintenance technicians as outlined in this manual. This manual covers the general maintenance procedures that you can perform in the fitness facility. If the equipment requires additional service, contact Precor Customer Support.
Assembly guide
Precor recommends at least two people for this installation.
Approximate assembly time is one hour. Allow more time if this is your first time assembling it. Before you begin, we recommend you:
- Follow the steps in the order listed in this assembly guide.
- Thoroughly read the assembly instructions prior to assembly.
- Unpack and assemble the unit near the place where you plan to use it.
- This equipment is designed for a variety of exercises and has cable lengths that may exceed its minimum dimensions. Provide sufficient space for use, access, and passage around the equipment.
- Locate the equipment at least 40 inches (1 meter) away from walls or furniture on either side of the equipment, and 40 inches (1 meter) away from objects behind or in front of the equipment.
- Assemble the equipment on a solid, flat surface, so that it remains level and stable.
- Insert, align, and thread all fasteners with your fingers. This helps prevent cross-threading. Do not fully tighten fasteners until instructed to do so.
Before you fully tighten a fastener, check that its head is flush with the surface of the product. If not, cross-threading may have occurred. Do not attempt to rework the assembly as more damage to the equipment will occur. Instead, contact Customer Support as described in Obtaining Service.
| Equipment Dimensions | 52" L x 58" W x 85" H (132 cm x 147 cm x 216 cm) |
| Workout Area | 53" L x 85" W x 97" H (135 cm x 216 cm x 247 cm) |
| Weight Stacks | 200 lb (90.7 kg) each side |
| Equipment Weight | 675 lb (306 kg) |

Figure 2
Required tools
- Standard set of metric hex keys
- Wire cutter (to cut plastic tie wraps)
- Two 9⁄16-inch wrenches (use box-end, open-end, or adjustable wrenches)
- Standard set of SAE hex keys
- Step ladder
Hardware kit

Attach the crossbars
- Place the main uprights on the floor where you plan to assemble the FTS Glide. Position them so that the cam is facing up (Figure 3).
![]()
Figure 3 - Position the upper and lower cross braces against one of the main uprights as shown in the following figure. The upper cross brace has two holes in it as shown by the arrows (Figure 4).
![]()
Figure 4 - Attach them using four 2-5/8-inch hex head screws, eight washers, and four lock nuts. Partially tighten the fasteners (Figure 4).
![]()
To keep each cross brace aligned properly and the fasteners intact, do not lean on or apply pressure to either cross brace. - To attach the second main upright to the cross braces, lift and stabilize the two main uprights. Have your assistant hold the main uprights steady while you align the upper and lower cross braces and secure them using four 2-5/8-inch hex head screws, eight washers, and four lock nuts. Partially tighten the fasteners to allow for adjustments (Figure 5).

Figure 5


Make sure the assembly is stable and balanced before your assistant lets go of the main uprights.
Assemble the pulleys
- Install a handle on each pulley assembly using one socket head screw (Figure 6). Fully tighten using the 4 mm hex key.
![]()
Figure 6
![warning]() Note To adjust the outside pulley location, lift the handle and slide the pulley assembly to the desired location.
Note To adjust the outside pulley location, lift the handle and slide the pulley assembly to the desired location. - Lift the handles on the pulley assemblies to unlock them from the track and then slide them to the bases of the main uprights (Figure 7).
![]()
Figure 7 - Remove the two bolts, large spacer, small spacer, two washers, and two lock nuts from each upright (Figure 8). Ask your assistant to hold each pulley as you remove the fasteners. Set the pulleys and fasteners aside.

Figure 8
![]()
Have your assistant hold the pulley while you remove the fasteners. The pulley may fall out of the upper bracket and cause injury to you or damage to the equipment. - Have your assistant align the pull-up bar with the main uprights and hold it in place while you reinsert the pulleys and fasteners (Figure 9). Partially tighten the four lock nuts. You may need a stepladder to install the pull-up bar.

Figure 9
![]()
Be sure to replace the larger spacers on the inside of each upright and the smaller spacers on the outside. If placed incorrectly, the cable will not route and move properly. - Lift the large handles on the pulley assemblies to unlock them and slide them to the top of the main uprights.
- Use two 9/16-inch wrenches to tighten the fasteners completely on the lower and upper cross braces (Figure 10). Tighten the fasteners completely on the pull-up bar.
![]()
Figure 10 - Attach the two handles or an ankle strap to the end of the cable using a spring clip (Figure 11).
![]()
Figure 11

 Note To adjust the outside pulley location, lift the handle and slide the pulley assembly to the desired location.


Assemble the weight stack
Once assembled, each weight stack weighs 200 pounds. The weight plates make up 190 pounds and the top weight assembly provides the final ten pounds. Figure 12 identifies the components of the weight stack.

Figure 12
- Main upright
- Bumper
- Guide rod bracket
- Guide rod
- Top weight assembly
- Selector stem
Perform the following steps on each main upright. Complete the assembly steps for one side before moving the other main upright.
- Have your assistant lift the top weight assembly to remove cable tension (Figure 13).
![]()
Figure 13 - Use the 6 mm hex key to remove the two button head screws, three washers, and one lock nut that secure the guide rod bracket to the main upright (Figure 14).

Figure 14 - Remove the guide rod bracket and bumpers and set them aside (Figure 15).

Figure 15 - Have your assistant slide the top weight assembly and selector stem off the guide rods. Ask your assistant to hold the top weight assembly and guide rods while you install the weights (Figure 16).
![]()
Figure 16 - Add the fourteen 10 lbs weights and the ten 5 lbs weights (Figure 17).
![]()
Figure 17
Make sure that the curve on the weight plate faces inside. Hold your finger over the plastic bushing in each weight to prevent the bushing from popping out of place (Figure 18).

Figure 18
![]()
The weights are heavy. Handle the weights carefully to avoid dropping them or injuring yourself. Pick up and place one weight at a time on the guide rods. Do not angle the guide rods so far that they dislodge the base bumpers and come out of the base frame. - Hold the guide rods while your assistance replaces the selector stem and top weight assembly (Figure 19).
![]()
Figure 19
![]()
During reassembly, do not lower the guide rod bracket more than three inches along the guide rods. Have your assistant hold the guide rods firmly because they can be pulled out of the base bumpers.
![warning]() Note It is difficult to replace the guide rods in an assembled weight stack. If the guide rods become dislodged, you will need to disassemble the weight stack to make sure that the guide rods are seated properly in the base frame.
Note It is difficult to replace the guide rods in an assembled weight stack. If the guide rods become dislodged, you will need to disassemble the weight stack to make sure that the guide rods are seated properly in the base frame. - Ask your assistant to hold the guide rods while you check the cables to make sure they are centered between the guide rods. Remove any twists in the cables.


Adjust cable tension
- Lift the top weight assembly about a foot above the weight stack and secure the selector stem with the weight pin (Figure 20).
![]()
Figure 20 - While your assistant continues to hold the guide rods, realign the bumpers with the cutouts in the upper frame crosspiece. Replace the guide rod bracket using two button head screws, three washers, and one lock nut (Figure 21). Fully tighten.

Figure 21 - Remove the weight pin and gently lower the top weight assembly onto the weight stack.
- To remove slack in the cable, use two 9/16-inch wrenches to loosen the bolt that holds the cam washer (shaded in the following figure). Rotate the cam washer to remove any slack in the cable (Figure 22).
![]()
Figure 22
Check the top weight assembly to make sure it remains well-seated on the weight stack and then fully tighten the cam washer fasteners.
![]()
Before attaching the weight labels, wash your hands to remove dirt and grease.


Apply weight labels and lubricate rods
- Use a solution of one part isopropyl alcohol and four parts water to thoroughly clean the front of the weight plates (outlined area in Figure 23).
Allow to completely dry.
![]()
Figure 23 - Peel the weight label off the weight label strip (Figure 24).
![]()
Figure 24 - Peel the backing off the weight label to expose the adhesive and place a label on each weight plate. The recommended location of the label is shown in Figure 25.
![]()
Figure 25 - To lubricate the guide rods, apply lubricant included with the unit to a clean cloth and spread evenly on each guide rod (Figure 26). Use one tube of lubricant per guide rod.
![]()
Figure 26
![]()
The lubricant can stain clothes. Wear proper attire.


Bolt equipment to floor
As floor materials vary, it is important that you consult a qualified building contractor to advise you on proper bolting.
Precor highly recommends that the FTS Glide be bolted down at each floor anchoring point with a structural joint that has a pull out strength of at least 600 pounds of force (2,669 Newtons). Bolting is made possible by removing the rubber cap near the weight stacks on the base frame, exposing the 12 mm holes to accommodate the bolts (Figure 27).

Figure 27
Standards occasionally change or are updated. Precor recommends that you keep apprised of your local industry standards.
Precor shall not be held liable for failure to properly bolt the FTS Glide to the floor.
Attaching localized labels (optional)
The FTS Glide ships with English language warning labels attached to the equipment. A localized language labels kit is included with the equipment. To replace the English labels, select the appropriate language labels, remove the adhesive backs and place over the English labels.
Adjust the cable selector and stem
When the equipment is completely assembled, you need to check the cables for proper tension. Obvious signs that a cable problem exists include:
- Top weight assembly does not rest squarely on the top weight of the weight stack.
- Cable rubs the inside edges of the pulleys.
- Excess slack exists in the cable.
- Weight pin cannot be easily inserted or removed from each hole in the weight stack.
- Selector stem rubs inside the weight stack.
![]()
Take the time to adjust the cables. If the cables do not have the proper tension, you could void the Precor Limited Warranty.
If you experience any of these cable issues, remove the weight pin from the weight stack to decrease cable resistance and then make the proper cable adjustments.
Cable adjustments
Check the cables on both weight stacks to make sure they have proper tension. They should be straight and taut without slack. If adjustments are required, use the cam washer to make cable adjustments.
To remove slack in the cable:
- Use two 9/16-inch wrenches to loosen the bolt that holds the cam washer (Figure 28) and rotate the cam washer until the slack is removed.
![]()
Figure 28 - Check the top weight assembly to make sure it remains properly seated on the weight stack and then fully tighten the cam washer fasteners.
- Check the selector stem alignment by inserting the weight pin into every hole on the weight stack. The weight pin should slide easily in and out of each weight plate and selector stem.

Stem selector adjustments
If the selector stem consistently strikes the inside of the weight stack, or is misaligned with the weight stack hole, you need to re-center the selector stem. You may need to remove the back shroud to perform the procedure. To adjust the selector stem:
- Remove the weight pin from the weight stack (Figure 29).
![]()
Figure 29 - Pull up the selector stem and place something such as a piece of cardboard over the opening in the weight stack to cover it (Figure 30). Rest the selector stem on the cover.
![]()
Figure 30 - Use the 8 mm hex key to loosen the socket head bolt located on the back of the top weight assembly (Figure 31).
![]()
Figure 31
![]()
Do not remove the socket head bolt. - Remove the cover from the opening in the weight stack and lower the selector stem so that the top cap assembly rests on the weight stack.
- Insert the weight pin into the weight plate hole (at the bottom of the weight stack) to lock the selector stem.
- Fully tighten the socket head bolt in the center of the top weight assembly.
- Check the adjustment by inserting the weight pin into every weight plate hole. The weight pin should slide easily in and out of each weight plate and selector stem.
- Replace shroud if necessary.


Attach the shrouds
To complete assembly of the FTS Glide, you need to attach the shroud covers to the weight stack frames. Please refer to the Shroud Assembly Guide located in the shipping box with your shrouds.
Do not operate the FTS Glide without the shrouds installed.
Documents / Resources
References
Download manual
Here you can download full pdf version of manual, it may contain additional safety instructions, warranty information, FCC rules, etc.
Advertisement


Need help?
Do you have a question about the FTS Glide and is the answer not in the manual?
Questions and answers