Advertisement
Quick Links
FOR AGES:
WEIGHT LIMIT:
13+
CUSTOMER SERVICE
GQBrands.com • CustomerService@GQBrands.com • 1-866-498-5269 • 4401 Samuell Blvd, Ste 150, Mesquite, TX 75149
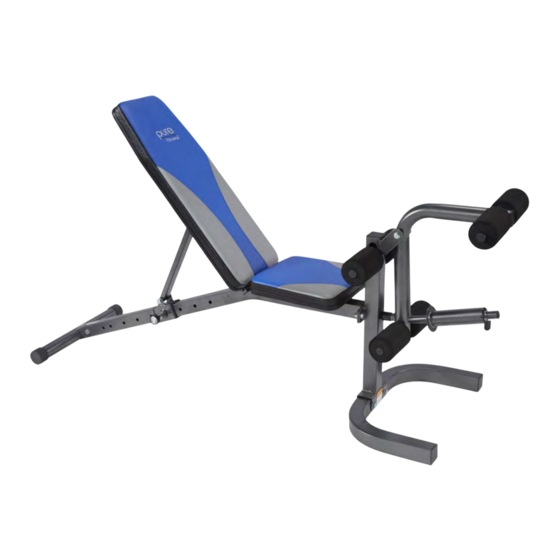
FID WEIGHT BENCH
MODEL# 839FID
PRODUCT MANUAL - VERSION 5.20.01
TO BUILD:
400
Lbs
181 Kgs
TOOLS NEEDED:
1
X
Advertisement

Subscribe to Our Youtube Channel
Related Manuals for Pure Fitness 839FID


Summary of Contents for Pure Fitness 839FID
- Page 1 FID WEIGHT BENCH MODEL# 839FID PRODUCT MANUAL - VERSION 5.20.01 FOR AGES: WEIGHT LIMIT: TO BUILD: TOOLS NEEDED: 181 Kgs CUSTOMER SERVICE GQBrands.com • CustomerService@GQBrands.com • 1-866-498-5269 • 4401 Samuell Blvd, Ste 150, Mesquite, TX 75149...
- Page 2 CUSTOMER SERVICE INFORMATION Thank you for purchasing: To register you product please visit: www.globalqualitybrands.com/product-registration FID WEIGHT BENCH or Scan code: MODEL# 8639FID If you have an issue with your item, do not return. Please report items that are damaged or missing parts to the manufacturer GQ Brands within three days of delivery.
- Page 3 WARNINGS ADULT ASSEMBLY REQUIRED CHOKING HAZARD - Small Parts NOT for children under 3 years of age. Please read these warnings and the information in this manual in its entirety. Failure to comply with the following instructions may increase the risk of serious injury and/or death: •...
- Page 4 PARTS LIST VIEW Main Frame Front Leg Base Slide Collar 2” Square End Cap M10 Washer M10 x 15 Bolt Pop Pin Back Base Leg Cap 10 - 1” Square End Cap 11 - 12 - 13 - Support Cannulation M10 x 75mm M10 Nut 15 -...
- Page 5 PARTS LIST 17 - 18 - 19 - 20 - M10 x 70mm 1” Round Bumper Spring Clip 1” Round Bumper 23 - 22 - 24 - 21 - M8 Washer M8 x25mm Leg LIft Tube Rod Foam Roller 25 - 26 - 27 - 28 -...
- Page 6 ASSEMBLY INSTRUCTIONS STEP 1: Parts: Part 2 (x1) - Front Leg Base Part 30 (x1) - Front Leg Support (30) Align the Front Leg Base so the bottom bracket openings match with the opening of the Front Leg Base. The wings from the Base and the legs of the Support must face in the same direction STEP 2: Parts:...
- Page 7 ASSEMBLY INSTRUCTIONS STEP 3: Parts: Part 3 (x3) - Square End Cap A. If all 3 Square end Caps ( Part 3) are not alread installed, push in their respective openings. STEP 4: Parts: Part 1 (x1) - Main Frame Part 6 (x1) - Slide Collar from the bottom of the Main Frame (Part 1), slide the Slide Collar (Part 6) to an...
- Page 8 ASSEMBLY INSTRUCTIONS STEP 5: Parts: Part 7 (x1) - Pop Pin Part 6 (x1) - Slide Collar Once you have aligned the SLide Collar to an opening of your choice, Grab the Pop Pin (Part 7) and twist to secure the Pop Pin to the opening STEP 6: To adjust the Slide Collar position in the...
- Page 9 ASSEMBLY INSTRUCTIONS STEP 7: Align the openings of the Main Frame to the openings of the Front Leg Support bar. Make sure that the bottom half of the Main Frame is aiming at the floor to make sure both bars align properly. STEP 8: Parts: Part 4 (x4) - M10 Washer...
- Page 10 ASSEMBLY INSTRUCTIONS STEP 9: Parts: Part 8 (x1) - Back Base locate the opening at the bottom of the Main Frame, and push the Back Base (Part 8) so all 3 openings align properly for the INstalatio of Step 10 STEP 10: Parts: Part 5 (x3) - M10 x 15mm Bolt...
- Page 11 ASSEMBLY INSTRUCTIONS STEP 11: Parts: Part 9 (x2) - Leg Caps Once the Back Base is installed onto the Main Frame. Place a Leg Cap (Part 9) on each side of the Base to prevent the base from sliding. STEP 12: Parts: Part 4 (x2) - M8 Washers Part 11 (x1) - Support Cannulation...
- Page 12 ASSEMBLY INSTRUCTIONS STEP 13: Parts: Part 4 (x2) - M10 Washer (14) Part 13 (x1) -M10 Nut Part 14 (x2) -Back Rest Support Part 15 (x1) - M10 x 150mm (14) Align the openings from the Back Rest Support (Part 14) to their respective tubes. Middle openings to the upper part of the Support Cannulation, and bottom openings to the Main Frame.
- Page 13 ASSEMBLY INSTRUCTIONS STEP 14: Parts: Part 16 (x1) - Leg Lift Part 19 (x1) - Spring Clip Part 20 (x1) - Round Bumper Part 27 (x2) - 2” Round Cap (27) Part 31 (x1) - Leg Lift Weight Tube To install the Leg Lift (Part 16) to the Front Leg Support, all additional parts must be installed.
- Page 14 ASSEMBLY INSTRUCTIONS STEP 16: Parts: Part 23 (x8) - M8 Washer Part 24 (x8) - M8 x 25mm Part 25 (x1) - Seat Cushion Part 26 (x1) - Back Cushion Align the openings from the back of the (26) Seat Cushion (Part 25) to the openings of the Main Frame.
- Page 15 ASSEMBLY INSTRUCTIONS NOTE: 2 Knee There are two heights to place the Leg Lift Heights Tube Rod (Part 21) You may switch the position of the tube depending on the your height and comfort while working out on the bench. STEP 16: Parts: Part 20 (x6) - M8 Washer...
- Page 16 ASSEMBLY INSTRUCTIONS STEP 17: (22) Parts: (22) Part 22 (x6) - Foam Roller Place all x6 Foam Rollers on the Lef Lift Tube Rods. (22) (22) (22) (22) GQBrands.com CustomerService@GQBrands.com 1-866-498-5269...
- Page 17 PINCH POINTS & WARNINGS LOCATION MODEL# 8639FID...
- Page 18 FREQUENTLY ASKED QUESTIONS • Question: "Is there any maintenance I • Question: "Something was missing from • Question: “How should I clean my Bench?” need to do for my Bench?" the packaging," "I need to purchase a replacement part" or "I discovered a Answer: you should clean this equipment a solution of warm water and non- Answer: Before each use, you should...
Need help?
Do you have a question about the 839FID and is the answer not in the manual?
Questions and answers