Table of Contents
Advertisement
Quick Links
See also:
Owner's Manual
FOR AGES:
13+
WEIGHT LIMIT:
220
Lbs
100 Kgs
ADULT(S) NEEDED:
TOOLS NEEDED:
WARNING/ADVERTENCIA
• Do not allow more than one person one this
product at any time.
• Adult assembly required
• The contents of this package are not suitable
for children under 3 years of age.
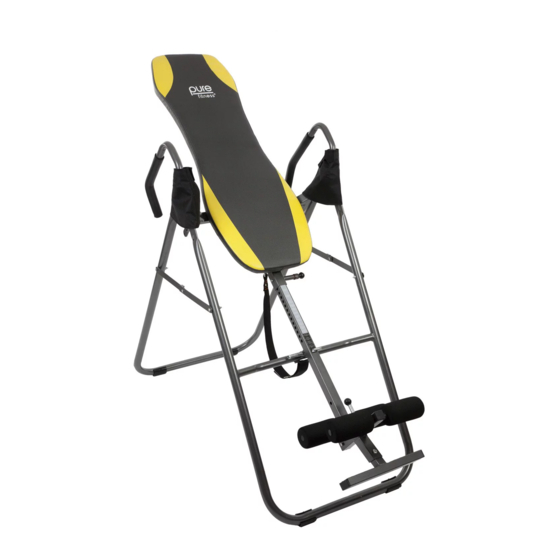
INVERSION TABLE
MODEL# 8514IT
PRODUCT MANUAL - VERSION 02.16.02
• Contains small parts which may cause choking.
• Please read all the instructions before using
this product.
• Consult a physician before beginning any
exercise program or strenuous activity.
CUSTOMER SERVICE
GQBrands.com
CustomerService@GQBrands.com
1-866-498-5269
4009 Distribution Dr, Suite 240
Garland, TX 75041
Advertisement
Table of Contents

Summary of Contents for Pure Fitness 8514IT
- Page 1 INVERSION TABLE MODEL# 8514IT PRODUCT MANUAL - VERSION 02.16.02 FOR AGES: WEIGHT LIMIT: 100 Kgs ADULT(S) NEEDED: TOOLS NEEDED: WARNING/ADVERTENCIA CUSTOMER SERVICE • Do not allow more than one person one this • Contains small parts which may cause choking.
-
Page 2: Customer Service Information
CUSTOMER SERVICE INFORMATION Thank you for purchasing: INVERSION TABLE MODEL# 8514IT At Global Quality Brands®, we want all of our customers to be To order these parts, or if you have any other questions or concerns completely satisfied with their purchase. Please take time to review... -
Page 3: Limited Warranty
TO USE. ALL MERCHANDISE IS SOLD ON THIS CONDITION, WHICH NO products are not covered by the product warranty. No other warranty REPRESENTATIVE OF GQ BRANDS® CAN WAIVE OR CHANGE. beyond that specifically set forth above is authorized by GQBrands®. MODEL# 8514IT... -
Page 4: Important Message
WARNINGS IMPORTANT MESSAGE WARNING - PLEASE READ ADULT ASSEMBLY REQUIRED CHOKING HAZARD - Small Parts NOT for children under 3 years of age. WARNING: While every attempt is made to ensure the highest degree of protection in all equipment, we cannot guarantee freedom from injury. The user assumes all risks of injury due to use. - Page 5 Until you of breath, faintness or other unusual are certain you have achieved the proper discomfort while exercising, stop and obtain setting on this bar, you must use a spotter. medical assistance and/or consult your physician before continuing. MODEL# 8514IT...
-
Page 6: Parts List
PARTS LIST NOTE: For your convenience, many of the parts on this list For a closer look at all the parts of this product, please already come pre-assembled. take a look at the exploded view on Page 8 Part # Description Part# Description... - Page 7 PARTS LIST M10*35 M10*30 M6*10 M8*35 M8*45 M6*42 MODEL# 8514IT...
-
Page 8: Exploded View
EXPLODED VIEW GQBrands.com CustomerService@GQBrands.com 1-866-498-5269... - Page 9 Connect Sheets knobs into the hooks of the frame, from the front side. NOTE: The Base Frame will be a little tight, simply attach one Sheet and nudge the other side until they align and you are able to attach. MODEL# 8514IT...
- Page 10 ASSEMBLY INSTRUCTIONS STEP 3: Locate: 1x Handlebar-Left (6L) 1x Handlebar-Right (6R) 2x Hexagonal Bolt M10*35 (13) 2x Hexagonal Bolt M10*30 (14) 4x Lock Nut M10 (16) 4x Flat Washer M10 (15) 2x Position Metal Sheet (12) 2x Screw M6*10 (17) From the inside, place on the top opening of the right side of the Base Frame,the Position Metal Sheet (Part 12) and a...
- Page 11 Pull on the Short Plug to insert trough an opening. Remove the Zip Tie by using a household knife or scissor. Close the opening by pushing the Square Inner Cap (Part 46) all the way until all the ridges are inside. MODEL# 8514IT...
- Page 12 ASSEMBLY INSTRUCTIONS STEP 5: Locate: 1x Foam Roller Tube (20) 1x Washer M6 (33) 1x Hexagonal M6*42 (32) 1x Lock Nut M6 (21) 4x Foam Roller (49) Locate the opening at the bottom of the Body Height Adjustment Tube to insert the Foam Roller Tube.
- Page 13 Pull the Plug located on the Backrest Support Frame, slide the Body Height Adjustment Tube and push the Plug into a desired height listed on the Tube. Use the Lock Pin (Part 23) to make sure the Tube stays in place. MODEL# 8514IT...
- Page 14 ASSEMBLY INSTRUCTIONS STEP 8: Locate: 1x L-Shaped Hook (44) 1x Flat Washer M8 (25) 1x Lock Nut M8 (45) 1x Cushion Plate (31) NOTE: If the Cushion Plate (Part 31) is not already installed, plug securely before attaching L-Shaped Hook Locate the opening the right below the Cushion Plate.
- Page 15 When the Inversion table is not in use, us the L-Shaped Hook to make sure the Backrest Pad remains locked Pull the Hook towards you and twist the L-Shaped Hook (Safety Lock) to insert the short leg into the opening of the Adjustment Tube. MODEL# 8514IT...
-
Page 16: Frequently Asked Questions
FREQUENTLY ASKED QUESTIONS • Question: “What is the best way or Answer: You should always double check solution to fix an issue that I am currently and make sure all your bolts are tight and secure, and that the lock knobs are having with my product?”...


Need help?
Do you have a question about the 8514IT and is the answer not in the manual?
Questions and answers