Advertisement
Quick Links
Advertisement

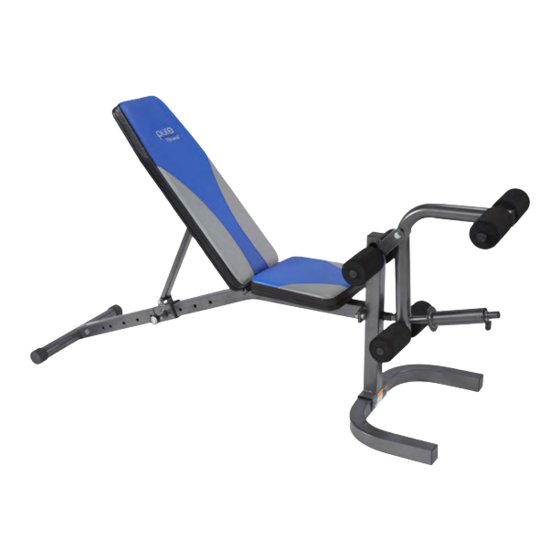
Summary of Contents for Pure Fitness 8639FID
- Page 1 FID WEIGHT BENCH MODEL# 8639FID PRODUCT MANUAL - VERSION 2.21.01 FOR AGES: WEIGHT LIMIT: TO BUILD: TOOLS NEEDED: 181 Kgs CUSTOMER SERVICE GQBrands.com • CustomerService@GQBrands.com • 1-866-498-5269 • 4401 Samuell Blvd, Ste 150, Mesquite, TX 75149...
-
Page 2: Customer Service Information
Most up to date manuals, FID WEIGHT BENCH warnings and product information can be found at: https://www.globalqualitybrands.com/warnings MODEL# 8639FID To register you product please visit: If you have an issue with your item, do not return. Please report www.globalqualitybrands.com/product-registration or items that are damaged or missing parts to the manufacturer GQ Brands within three days of delivery. - Page 3 • DO NOT stand or kneel on the seat, backrest or any other component of this item. MODEL# 8639FID...
- Page 4 PARTS LIST VIEW Main Frame Front Leg Base 2” Square End Cap M10 Washer M10 x 20mm Bolt Slide Collar Leg Cap Pop Pin Back Base 10 - 1” Square End Cap May already be attached to Slide Collar 11 - 12 - 13 - Support Cannulation...
-
Page 5: Parts List
M8 Washer M8 x16mm Leg LIft Tube Rod Foam Roller 25 - 26 - 27 - 28 - Seat Cushion Back Cushion 2” Round Cap M8 x 35mm 31 - 30 - Leg Lift Weight Tube Front Leg Support MODEL# 8639FID... - Page 6 Youtube Assembly Video: ASSEMBLY INSTRUCTIONS https://youtu.be/JKnjuPJWH5M STEP 1: Parts: Part 2 (x1) - Front Leg Base Part 30 (x1) - Front Leg Support (30) Align the Front Leg Base so the bottom bracket openings match with the opening of the Front Leg Base. The wings from the Base and the legs of the Support must face in the same direction STEP 2:...
- Page 7 STEP 4: Once you have aligned the Slide Collar to an opening of your choice, adjust the Pop Pin (Part 7) and twist to tighten secure the Pop Pin to the opening selected. MODEL# 8639FID...
- Page 8 ASSEMBLY INSTRUCTIONS STEP 5: To change or adjust the Slide Collar position in the Main Frame, pull the Pop Pin handle towards you and keep it pulled as you slide the collar to a preferred opening. Once you are ready to secure the Slide Collar, release the Pop Pin and secure to that opening.
- Page 9 Part 5 (x2) - M10 x 20mm Bolt (13) Secure the Main Frame and the Front Leg Support Bar by using a M10 x 20mm bolt (Part 5), M10 washers (Part 4), and a M10 Nut (Part 13) on both openings. (13) MODEL# 8639FID...
- Page 10 ASSEMBLY INSTRUCTIONS STEP 8: Parts: Part 8 (x1) - Back Base Locate the opening at the bottom of the Main Frame, and push the Back Base (Part 8) so all 3 openings align properly for the installation in Step STEP 9: Parts: Part 24 (x3) - M8 x16mm Bolt Part 23 (x3) -M8 Washers...
- Page 11 Slide Collar. This is the shorter side of the Cannulation (13) Once all openings are aligned, slide the M10 x 75mm (Part 12) bolt with a washer (part 4) and secure with another M10 Washer and M10 Nut (Part 13) (12) MODEL# 8639FID...
- Page 12 ASSEMBLY INSTRUCTIONS STEP 12: Parts: Part 14 (x2) -Back Rest Support (14) (14) Align the openings from the Back Rest Support (Part 14) to their respective tubes. Middle openings to the upper part of the Support Cannulation, and bottom openings to the Main Frame.
- Page 13 Front Leg Support. Align to the middle openings from the Leg Lift. (13) (4) (15) Secure to the Support Frame by using the M10 x 85mm bolt (Part 15), with M10 Washers (Part 4), and tighten with M10 Nut (Part 13) MODEL# 8639FID...
- Page 14 ASSEMBLY INSTRUCTIONS STEP 15: Parts: Part 23 (x8) - M8 Washer Part 25 (x1) - Seat Cushion Part 26 (x1) - Back Cushion Part 28 (x8) - M8 x 35mm Bolt (26) lign the openings from the back of the Seat Cushion (Part 25) to the openings of the Main Frame.
- Page 15 ASSEMBLY INSTRUCTIONS 2 Knee NOTE: Heights There are two heights to place the Leg Lift Tube Rod (Part 21). You may switch the position of the tube depending on your height and comfort while working out on the bench. MODEL# 8639FID...
- Page 16 ASSEMBLY INSTRUCTIONS STEP 16: (22) Parts: (22) art 22 (x6) - Foam Roller Part 21 (x3) Leg Lift Tube Rod Place all Tube Rods (Part 21) through (22) holes show on diagram. Then place x2 Foam Rollers on each of the Leg Lift Tube Rods like diagram shown.
-
Page 17: Frequently Asked Questions
These must be purchased separately. Thank You Coupon! As a way of saying thank you for purchasing one of our products, here is a 10% OFF coupon for your next purchase at www.PureFun.net Use Code: GQBRANDS10 at Checkout MODEL# 8639FID...


Need help?
Do you have a question about the 8639FID and is the answer not in the manual?
Questions and answers