Advertisement
Quick Links
Advertisement

Related Manuals for Shini SHD-U-EC


Summary of Contents for Shini SHD-U-EC
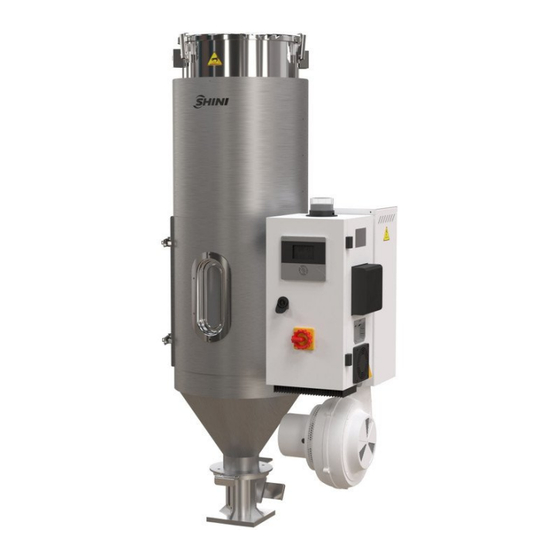
- Page 1 SHD-U-EC Self-adaption Energy-saving Hopper Dryer Date: July 2024 Version: Ver. F...
- Page 2 Contents General Description ..................5 1.1 Safety Regulations .................. 7 1.1.1 Safety Signs and Labels ..............7 1.1.2 Signs and Labels ................8 1.2 Exemption Clause ................... 8 Structure Characteristics and Working Principle ........9 2.1 Working Principle ..................9 2.1.1 Working Principle Illustration ............
- Page 3 4.5.2 Recipe list ..................27 4.5.3 Trouble Table ................28 Troubleshooting ..................30 Maintenance and Repair ................31 6.1 Blower ....................31 6.2 Maintenance Schedule ................. 32 6.2.1 General Machine Information ............32 6.2.2 Installation & Inspection .............. 32 6.2.3 Daily Checking ................32 6.2.4 Weekly Checking .................
- Page 4 Picture 2-9: Connection of Air Pipe..............13 Picture 2-10: Clean up the HAR/AIF/ADC ............14 Picture 2-11: "Euro" Blower Inlet Filter .............. 14 Picture 2-12: Working Principle ................. 15 Picture 2-13: "Euro" Air Filter ................15 Picture 3-1: Install Directly on a Molding Machine ..........16 Picture 3-2: To be used with Hopper Loaders ...........
- Page 5 1. General Description Read this manual carefully before operation to prevent damage of the machine or personal injuries. SHD-U series hopper dryer adopt hot air down-blowing design and stainless steel hopper. It has “hot air down-blowing” and “cyclone exhausting” function, and double-layer insulated hopper, which is especially suitable for use with honeycomb dehumidifiers to dry engineering plastics.
- Page 6 Chapter 6, which contains service instructions intended for service engineers. Other chapters contain instructions for the daily operator. Any modifications of the machine must be approved by SHINI in order to avoid personal injury and damage to machine. We shall not be liable for any damage caused by unauthorized change of the machine.
- Page 7 1.1 Safety Regulations Note! Electrical installation should be done by qualified electrician only. Before connecting to the power supply, make sure whether the power switch specification and load protection rated current are appropriate and safe. Be noted to turn the main power switch to “OFF” position before connecting the machine to the power supply.
- Page 8 The following statements clarify the responsibilities and regulations born by any buyer or user who purchases products and accessories from Shini (including employees and agents). Shini is exempted from liability for any costs, fees, claims and losses caused by reasons below: 1) Any careless or man-made installations, operation and maintenances upon machines without referring to the Manual prior to machine using.
- Page 9 Structure Characteristics and Working Principle 2.1 Working Principle In material processing, the self-adaption energy-saving hopper dryer through the drying blower to blow the high-temperature air with a constant temperature into a double-layer insulated hopper. After drying the materials, it will take the moisture of materials in the hopper away, thus achieving the purpose of removing the material contained moisture.
- Page 10 Optional safety ladder ML is optional for SHD-1500U and above models. 2.2.2 Floor Stand Euro floor stand helps to move the drying hopper out of the injection moulding workshop, which is suitable for plant with insufficient height, easy to move and can be easily worked with other machines.
- Page 11 Replace the standard base below the hopper dryer with a magnetic base during assembly. Notes: Add “U” at the end of the stainless steel model. 2.2.4 HAR-U "Euro" Hot Air Recycler HAR-U "Euro" hot air recycler has energy saving and dust-collecting function,its design is for working with "Euro"...
- Page 12 Moisture discharge port 排湿口 Picture 2-6: "Euro" Hot Air Recycler 2.2.4.2 Installation Steps 1) Mount HAR/AIF/ADC on the drying hopper. a) Mount the hot air recycler (3) on proper place of the drying hopper at first. b) Find corresponding installation hole on the aluminum ring right behind the drying hopper (1).
- Page 13 Picture 2-8: Installation of the Flange at the Blower Inlet 3) Connection of Air Pipe a) Mount the air pipe with according size as following picture, which are HAR,AIF,ADC. Picture 2-9: Connection of Air Pipe 2.2.4.3 Clean up the HAR/AIF/ADC 1) Loosen the spring clip (1), and take out the dust collecting barrel (4) of the hot air recycler.
- Page 14 Picture 2-10: Clean up the HAR/AIF/ADC 2.2.5 AIF-U “Euro” Blower Inlet Filter AIF-U "Euro" blower inlet filter has filtering and dust-collecting function.Its design is for working with "Euro" dryer and can be installed at the backup air inlet of the blower.
- Page 15 (A),customer can unscrew the lockup screw (B) according to practical requirement to adjust the coming air in the dryer. Picture 2-12: Working Principle 2.2.6 ADC-U”Euro” Air Filter ADC-U “Euro” air filter can avoid 100% dust with good exhaust effect. This machine features simple structure, easier installation and greatly improves the production efficiency.
- Page 16 3. Installation and Debugging This series of models can only be used in workplace with good ventilation. 3.1 Machine Location 3.1.1 Install directly on a molding machine Picture 3-1: Install Directly on a Molding Machine 3.1.2 To be used with Hopper Loaders Picture 3-2: To be used with Hopper Loaders 3.2 Power Connection 1) Make sure voltage and frequency of the power source comply with those...
- Page 17 3) Use independent power cable and ON / OFF switch. The cable's size should not smaller than those applied in the control box. 4) The power cable connection terminals should be tightened securely. 5) The machine requires a 3-phase 4-wire power source, connect the power lead (L1, L2, L3) to the live wires, and the earth (PE) to the ground.
- Page 18 4. Application and Operation 4.1 Control Panel PV:Actual valve Blower speed of drying output temperature percentage SV:Set valve heater output of drying percentage temperature Enter Menu ON/OFF Down Picture 4-1: Control Panel Table 4-1: Control Panel ICONS Name Represents the percentage of the current electric heating operating power, with a maximum value of "100"...
- Page 19 Heat Lit: The unit is in Heat preservation mode Preservation Off: The unit is not in Heat preservation mode Mode icon Self-setting Lit: PID parameter self-tuning is on icon Off: PID parameter self-tuning is off Steady yellow: Stop/In stopping Status Steady green: In operation indicator Flickering red: Fault alarm...
- Page 20 on, the timing function is enabled, and the temperature lock is enabled), the "main operation interface" will be displayed as follows: Picture 4-3: Home screen 4.2.2.1 Quickly modify the set temperature under the main interface If the user parameter [lock temperature] is set to "no", the set temperature can be directly modified under the main interface, the operation is as follows: Note: You can also modify the set temperature in the user parameter.
- Page 21 Picture 4-5: Self-adaption Mode Setting 4.2.2.3 The timing time is displayed on the main screen Picture 4-6: Timer On/Off Time Display Note: If there is no timed startup, the time is displayed 00:00 4.2.2.4 ECO Mode/Insulation Mode After the first start-up and the drying time, when the actual exhaust air temperature>exhaust air set temperature, and the anti-excessive drying time (default 30 minutes) is over, the unit will enter the ECO mode.
- Page 22 Picture 4-7: Fault screen 4.2.3.1 Fault query/reset interface When the fault occurs, the alarm interface will automatically pop up. The fault query and reset operation are as follows: Picture 4-8: Fault Inquiry and Reset Interface 4.2.4 Delayed shutdown and standby interface 4.2.4.1 Delay stop interface Picture 4-9:Delay Shut Down Interface Note: In the case of delayed shutdown, the main interface and the delayed...
- Page 23 Note: Enter the standby interface after the delayed shutdown ends. 4.3 User Menu Press <Menu> key in the main interface to enter the user menu, the user menu parameters are as follows: Table 4-2: User Menu Parameter Table Serial No. Parameter Items Parameter Function Remarks...
- Page 24 4.5 Parameter Table 4.5.1 User Parameter Setting Table Table 4-3: User Parameter Setting Table Serial No. Items Initial Value Set Range Units Remarks User parameters (public) : On the home screen, press the "Menu" key to enter the menu. Select User Settings in the menu bar and press the "Set"...
- Page 25 modified from the home screen. Yes: The set temperature can’t be quickly modified on the home screen. This parameter is displayed only Self-tuning Disabled Disable/use when the machine is running Chinese Multiple languages Chinese /English Recipe Control mode Recipe Mode mode/Adapt ive mode Shutdown time parameters (public) :...
- Page 26 00:00 to Sunday shutdown time: 00:00 23:59 Boot time parameters (public) : Press the "Menu" key from the home screen to enter the menu. Select User Settings in the menu bar and press the "Set" key to access. Select the boot time and press the "Set" key to enter. Press the "Up"...
- Page 27 Even parity Data length Stop bit 1 ~ 2 4.5.2 Recipe list Table 4-4: Recipe List Drying temperature Exhaust air Groups Ingredients Drying time (min) (℃) temperature (° C) PETG PMMA 27(33)
- Page 28 PEEK Note: Under the condition that the moisture content of materials meets the standard, decrease the exhaust air temperature appropriately can improve the energy-saving effect. 4.5.3 Trouble Table This controller has various alarm functions. When a failure occurs, the alarm interface displays the current fault.
- Page 29 The machine continues to run when the alarm is given. After the fault is removed, No battery. the machine automatically resets. The alarm is detected only when the reservation timing function is enabled. Stop heating, delay stop blower, trip output 5 seconds. After troubleshooting, Pipe overheat manually reset.
- Page 30 5. Troubleshooting Table 5-1: Common Faults and Troubleshooting Fault Possible Reasons Solution 1. Controller malfunction or large 1. Replace the controller error 2. Contactor coil congregated 2. Check and replace Overheat alarm (oH) 3. Thermocouple error 3. Check and replace 4.
- Page 31 Maintenance and Repair SHD-20U~750U-EC 1. Check whether the alarm light works normally. Period: daily. 2. Check whether the main power switch and timer switch work normally. Period: daily. Heating box cover 3. Check whether the heater switch is Heating pipe normal.
- Page 32 the inlet) to remove the surface dust. 2) Remove the foreign objects from the blower blades regularly to prevent blower damage. 6.2 Maintenance Schedule 6.2.1 General Machine Information Model Manufacture date Ф Voltage Frequency Power 6.2.2 Installation & Inspection Check if the pipe joint is tightly locked by clips or not. Check that the material clearance door is firmly closed.
- Page 33 Check that the pipe heater is working properly. Check the performance of blower. Check the functions of electrical components. 6.2.6 Half-yearly Checking Check if there are damages of heat-resistant hose or not. Check the process heater. Check the blower. 33(33)
Need help?
Do you have a question about the SHD-U-EC and is the answer not in the manual?
Questions and answers