
Related Manuals for Fromm FS 2000


Summary of Contents for Fromm FS 2000
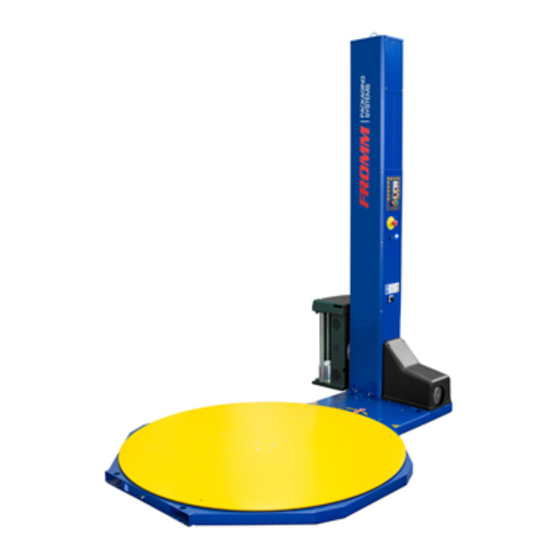
- Page 1 Rotary Table Rotating Arm FS 2000 Display Operator Panel Translation of the original instructions Fromm Holding AG Hinterbergstrasse 26 6312 Steinhausen Switzerland Rev.1 18/07/2023...
- Page 3 3.3.6 Cycle .................... 21 3.3.7 Operational cycles ..............24 3.3.8 Programs list ................28 3.4 MANUAL CONTROLS ................30 3.5 OPTIONS GRID ..................35 3.5.1 Pallet presser activation ............. 40 3.5.2 Automatic film cut (option) ............44 3.5.3 Comfort position ................. 47 3.5.4 Soft start ..................49 3.5.5 Sheet feeder cycle ..............51 Fromm...
- Page 4 Table of contents 3.5.6 Adjustment of number of reinforcement wraps at height..53 3.5.7 Winding height adjustment ............55 3.5.8 Step cycle ..................57 3.5.9 Winding start height ..............59 3.5.10 Wrapping end height ..............60 3.5.11 Arya Option ................. 61 3.5.12 Arya system parameters ............63 3.5.13 Film creasing ................67 3.5.14 Strip cutting ................. 72 3.5.15 Number of additional wraps for each layer ......75 3.5.16 Number of final low wraps ............
- Page 5 To check the version of the software in your possession, contact the After-Sales Service with the serial number of the machine or take note of the abbreviation that appears on the electronic card at the time of power up. Fromm...
- Page 6 Display Operator Panel | ROTARY TABLE - ROTATING ARM GENERAL DESCRIPTION The operator panel software is designed and built to manage and control the functions of the machine on which it is installed. The system consists of a colour display, of the “touch screen” type with an active matrix.
- Page 7 Below are the main elements that are repeatedly recalled within the software pages. Text field Displays the name of the program currently in use. Press to save the set value and to return to the “HOME” or “GRID” page. Fromm...
- Page 8 Display Operator Panel | ROTARY TABLE - ROTATING ARM Icons The icons shown on the various pages of the software can have three possible versions to identify the status of the function they represent; see example below. Coloured icon The function or option is present on the machine and is active with the corresponding value adjusted.
- Page 9 4) Key for confirming of typed value 5) Maximum value that can be set (if any) 6) Minimum value that can be set (if any) To exit the keypad, simply press the key (7) that saves the value entered and return to the previous page. Fromm...
- Page 10 Display Operator Panel | ROTARY TABLE - ROTATING ARM To enter a value: A) Press the editable field on which to change the value. B) To change the value, use the keypad. C) To confirm the value entered, press key (4). INFORMATION If a value not between the minimum (6) and maximum (5) is entered, the software blocks entry of the value.
- Page 11 Self-diagnosis to check the wear status of the machine. Press for 3 seconds to reset the functions activated by the software; in case of alarms for emergencies it is also necessary to intervene with the physical RESET button on the machine. Fromm...
- Page 12 Display Operator Panel | ROTARY TABLE - ROTATING ARM Keys Press to access the relevant function. The functions displayed can be chosen by the user (see relative page). Changes to these functions only occur on the cycle in progress and do not overwrite the stored program.
- Page 13 RESTRICTED AREA ACCESS Path: SMART PROGRAM ENTER PSW Numeric keypad Type in the password to access the reserved area. Press to confirm. Fromm...
- Page 14 Display Operator Panel | ROTARY TABLE - ROTATING ARM HOME SMART Path: Text field Displays the name of the program currently in use. The text field is invoked on all subsequent pages of the software. Press to access the “MANUAL CONTROLS” pages (see para. “” pag. 30).
- Page 15 The text field below shows the value currently set in the wrapping program. V03-V04 | TROLLEY UP / DOWN SPEED Icon Press to access the “TROLLEY UP /DOWN SPEED ADJUSTMENT” page (see para. “” pag. 16). The text field below shows the value currently set in the wrapping program (m/min). Fromm...
- Page 16 Display Operator Panel | ROTARY TABLE - ROTATING ARM Film tension adjustment Path: SMART HOME The tension of the film corresponds to the pulling force exerted on the pallet. Cursor +/- or keys Adjusts the tension value of the film to a single value. Valid for all phases of the wrapping cycle.
- Page 17 The text field next to it shows the value set. Cursor +/- or keys Adjusts the film tension value during the trolley descent phase. The text field next to it shows the value set. Press to save the set values and to return to the “HOME”. Fromm...
- Page 18 Display Operator Panel | ROTARY TABLE - ROTATING ARM Film pre-stretch Path: SMART HOME Pre-stretch is the percentage of lengthening of the film. Cursor +/- or keys Adjusts the pre-stretch value of the film into a single value. Valid for all phases of the wrapping cycle. The text field below shows the value set.
- Page 19 The text field next to it shows the value set. Cursor +/- or keys Adjusts the film pre-stretch value during the trolley descent phase. The text field next to it shows the value set. Press to save the set values and to return to the “HOME”. Fromm...
- Page 20 Display Operator Panel | ROTARY TABLE - ROTATING ARM Trolley up / down speed Path: SMART HOME Cursor +/- or keys Adjusts the trolley ascent / descent speed to a single value. Valid for all phases of the wrapping cycle. The text field below shows the value set.
- Page 21 Cursor +/- or keys Adjusts the trolley descent speed. The text field below shows the value set. Press to save the set values and to return to the “HOME”. Fromm...
- Page 22 Display Operator Panel | ROTARY TABLE - ROTATING ARM Adjusting the number of low - high wraps Path: SMART HOME +/- Keys Sets the number of wrapping turns at the top of the load to be wrapped. The text field shows the value set. +/- Keys Sets the number of wrapping turns at the bottom of the load to be wrapped.
- Page 23 / descent of the trolley increases the overlap. At constant ascent / descent speed: increasing the rotation speed increases the overlap while decreasing the rotation speed decreases the overlap. Fromm...
- Page 24 Display Operator Panel | ROTARY TABLE - ROTATING ARM Rotation speed adjustment Path: SMART HOME Cursor +/- or keys Adjusts the rotation speed. The text field below shows the value set. Press to save the set values and to return to the “HOME”. Rev.1 18/07/2023...
- Page 25 Press to activate the manual cycle and to access the “OPERATIONAL CYCLES” page (see para. “” pag. 24). F01 V01 | FULL CYCLE Icon Press to activate the full cycle. The wrapping takes place both during the ascent phase of the trolley and during the descent phase. Fromm...
- Page 26 Display Operator Panel | ROTARY TABLE - ROTATING ARM F01 V02 | PARTIAL CYCLE * Icon Press to activate the partial cycle. The wrapping takes place only during the ascent phase or only during the descent phase of the trolley. F01 V06 | ECO CYCLE Icon Press to activate the eco cycle.
- Page 27 INFORMATION (*) The partial downward cycle can only be used if pallets of the same height are being wrapped. Fromm...
- Page 28 Display Operator Panel | ROTARY TABLE - ROTATING ARM Operational cycles Path: SMART HOME CYCLE Once the wrapping cycle has been started, manual action is taken to raise and lower the trolley using the buttons. Press and hold to manually adjust the trolley ascent. Press and hold to manually adjust the trolley descent.
- Page 29 (1) (trolley in the ascent phase) or (2) (trolley in the descent phase), to stop the movement of the trolley and have it restart to perform local reinforcement cycles. Fromm...
- Page 30 Display Operator Panel | ROTARY TABLE - ROTATING ARM F01 = 02 - UP ONLY OR DOWN ONLY CYCLE DANGER The cycle "only ascent" or "only descent" is prescribed for maximum height of the product to be wrapped equal to 1500 mm.
- Page 31 The table starts rotating again and the pallet wrapping phase begins. Command the ascent and descent of the trolley by pressing the buttons (1 1 ) and (2). To command the stop of the table in phase, press the button (3). Fromm...
- Page 32 Display Operator Panel | ROTARY TABLE - ROTATING ARM Programs list Path: SMART HOME PROG. Press and hold the name of the active program for 3 seconds to change its name. Press and hold the name of an inactive program for 3 seconds to activate it instead of the currently active program.
- Page 33 A) Press for 3 seconds the editable field on which to change the text value. B) To change the value, use the keypad. C) To confirm the value entered, press key (9) and exit the keypad, returning to the “HOME” page. Fromm...
- Page 34 Display Operator Panel | ROTARY TABLE - ROTATING ARM MANUAL CONTROLS SMART Path: HOME Press and hold to activate table rotation. Activates rotation of the table up to the phase position. Press and hold to raise the trolley. Press and hold to lower the trolley. Attiva la discesa fino alla posizione di fase del carrello.
- Page 35 Press and hold to raise the presser. Press and hold to lower the presser. Press and hold to raise the presser to the phase position. Fromm...
- Page 36 Display Operator Panel | ROTARY TABLE - ROTATING ARM SMART Path: HOME Press to check the operation of the film cutter blade. Press to check the operation of the system to widen the film strip. Press to check the operation of the system to tighten the film strip. Press to check the operation of the system to cut the film into strip.
- Page 37 Press and hold to check the operation of the internal fan (column side) relative to the ARYA operation. Press and hold to check the operation of both fans. Press and hold to check the operation of the ARYA system film extraction rollers unwinding motor. Fromm...
- Page 38 Display Operator Panel | ROTARY TABLE - ROTATING ARM Press and hold to test the operation of the electrostatic bar. Press to confirm return to “HOME”. Rev.1 18/07/2023...
- Page 39 Pressing and holding any function grid icon for 3-5 seconds displays the function codes corresponding to those on the page. F17-F18-F19-F20 | PRE-STRETCH ADJUSTMENT Icon Press to access the “FILM PRE-STRETCH ADJUSTMENT” page (see para. “” pag. 14). The text field below shows the value currently set. Fromm...
- Page 40 Display Operator Panel | ROTARY TABLE - ROTATING ARM F21-F25-F59-F60 | PRESSER ADJUSTMENTS Icon Press to access the pages relating to the presser (see para. “” pag. 40). F26-F27-F28 | FILM CUTTING Icon Press to access the “AUTOMATIC FILM CUTTING (OPTION)” page (see para.
- Page 41 Press to access the “WRAPPING START HEIGHT” page (see para. “” pag. 59). F11 | WRAPPING END HEIGHT Icon Press to access the “WRAPPING END HEIGHT” page (see para. “” pag. 60). F40-F41-F42-F43-F44-F45-F46 | ARYA SYSTEM Icon Press to access the “ARYA OPTION” page (see para. “” pag. 61). Fromm...
- Page 42 Display Operator Panel | ROTARY TABLE - ROTATING ARM Path: SMART HOME F34-F35-F36-F37-F38-F63 | CREASING Icon Press to access the “FILM CREASING” page (see para. “” pag. 67). The text field below shows the value currently set. F65-F66-F67-F68-F69 | STRIP CUTTER Icon Press to access the “STRIP FILM CUT”...
- Page 43 F70 TO F84 | ADDITIONAL REINFORCEMENT WRAPS Icon Press to access the “ADDITIONAL REINFORCEMENT WRAPS” page (see para. “” pag. 78). RESERVED LEVEL ACCESS Icon Press to access the “SPECIALIST OPERATOR RESERVED AREA” page (see para. “” pag. 81). Fromm...
- Page 44 Display Operator Panel | ROTARY TABLE - ROTATING ARM Pallet presser activation Path: SMART HOME GRID ON / OFF Selector By turning the selector to the ON position (shown with the green colour) the presser is activated. By turning the selector to the OFF position (shown with the red colour) the presser is deactivated.
- Page 45 If the height of the product to be wrapped is significantly lower than that of the column, activating this function prevents the presser from rising to the end of the stroke at the end of the cycle in order to avoid wasting time between one wrap and another. Fromm...
- Page 46 Display Operator Panel | ROTARY TABLE - ROTATING ARM Presser up during cover or layer cycle Path: SMART HOME GRID LATTINE WITH LAYER / COVER CYCLE ACTIVATED: ON / OFF Selector Bringing the selector to the ON position (displayed with the green colour) activates the upward movement of the presser during the “cover”...
- Page 47 Press to save the set values and to return to the “HOME”. INFORMATION (*) From the icons it is not possible to activate the indicated cycle but only to display its status. It may be that the “LAYER” cycle and the “COVER” cycle are active simultaneously. Fromm...
- Page 48 Display Operator Panel | ROTARY TABLE - ROTATING ARM Automatic film cut (option) Path: SMART HOME GRID F26 | AUTOMATIC CUTTING ON / OFF Selector By turning the selector to the ON position (shown with the green colour) automatic cutting of the film is activated. By turning the selector switch to the OFF position (shown with the red colour) automatic cutting of the film is deactivated.
- Page 49 Select the icon for the number of blade strokes required to automatically cut the film. Editable field Press to change the set value of the time for which, after locking the rollers, the movement of the machine continues to pull the film before cutting, creating a tension. Fromm...
- Page 50 Display Operator Panel | ROTARY TABLE - ROTATING ARM Editable field Press to change the set value of the time for which, after cutting, the rollers are released to allow the film to exit. Press to save the set values and to return to the “HOME”. Rev.1 18/07/2023...
- Page 51 F62 | COMFORT POSITION ACTIVATION ON / OFF Selector Bringing the selector to the ON position (shown with the green colour) activates the comfort position. Bringing the selector switch to the OFF position (shown with the red colour) deactivates the comfort position. Fromm...
- Page 52 Display Operator Panel | ROTARY TABLE - ROTATING ARM Cursor +/- or keys Adjusts the height at which the trolley will position itself at the end of the cycle. The text field shows the value set. Press to save the set values and to return to the “HOME”. Rev.1 18/07/2023...
- Page 53 F29 | SOFT START CYCLE ON / OFF Selector Bringing the selector to the ON position (shown with the green colour) activates the soft start function. Turning the selector to the OFF position (shown in red) disables the soft start function. Fromm...
- Page 54 Display Operator Panel | ROTARY TABLE - ROTATING ARM Cursor +/- or keys Adjusts the time during which the table rotates at a slow speed at the beginning of the cycle. Adjustable from 0 to 30 seconds. The text field shows the value set in seconds. Press to save the set values and to return to the “HOME”.
- Page 55 The cycle restarts by pressing the “START” key. ON / OFF Selector Bringing the selector to the ON position (shown with the green colour) activates the sheet feeder cycle. Turning the selector to the OFF position (shown with the red colour) deactivates the sheet feeder cycle. Fromm...
- Page 56 Display Operator Panel | ROTARY TABLE - ROTATING ARM Cursor +/- or keys Adjust how far the trolley must descend to allow the sheet to be spread over the pallet. The text field shows the value in centimetres set. Press to save the set values and to return to the “HOME”. F22 = 01 SHEET FEEDER CYCLE DANGER The cycle "up and down with pause"...
- Page 57 The text field shows the value set. Cursor +/- or keys Adjusts the height at which to perform the reinforcement wraps of the film. The text field shows the value in centimetres set. Press to save the set values and to return to the “HOME”. Fromm...
- Page 58 Display Operator Panel | ROTARY TABLE - ROTATING ARM INFORMATION With the F35 active, the reinforcement wraps are performed with creasing. Rev.1 18/07/2023...
- Page 59 F09 corresponding to an overhang that will exceed the height of the pallet. With the selector on OFF, the automatic height reading is not active and the operator must indicate the desired wrapping height using F12. Fromm...
- Page 60 Display Operator Panel | ROTARY TABLE - ROTATING ARM ON / OFF Selector Bringing the selector to the ON position (shown with the green colour) activates the detection of the wrapping height by means of a photocell. Turning the selector to the OFF position (shown with the red colour) activates the detection of the wrapping height by manually setting the height.
- Page 61 Turning the selector to the OFF position (shown with the red colour) deactivates the step cycle. +/- Keys Adjust the number of wraps to be performed at each step. The text field shows the value set. Fromm...
- Page 62 Display Operator Panel | ROTARY TABLE - ROTATING ARM +/- Keys Adjusts the ascent at every step. The text field shows the value in centimetres set. Cursor +/- or keys Adjusts the pre-stretch value during the step cycle. The text field shows the value set. Cursor +/- or keys Adjusts the tension value during the step cycle.
- Page 63 Cursor +/- or keys Adjusts the height from the ground from which the wrapping must start. The text field shows the value in centimetres set. Press to save the set values and to return to the “HOME”. Fromm...
- Page 64 Display Operator Panel | ROTARY TABLE - ROTATING ARM Wrapping end height Path: SMART HOME GRID ON / OFF Selector Bringing the selector switch to the ON position (shown with the green colour) activates the cycle end position. Turning the selector to the OFF position (shown with the red colour) deactivates the cycle end position.
- Page 65 F40 | ARYA ACTIVATION ON / OFF Selector Turning the selector to the ON position (shown in green) activates the Arya system. Turning the selector to the OFF position (shown in red) disables the Arya system. Fromm...
- Page 66 Display Operator Panel | ROTARY TABLE - ROTATING ARM F41 | FILM ATTACHMENT HEIGHT * Cursor +/- or keys Adjust the height at which the trolley is positioned to attach the film to the pallet during blowing of the Arya system. The text field shows the value in centimetres set.
- Page 67 Arya system parameters Path: SMART HOME GRID Icons They are used to select the size of the pallet according to the work requirements. The choice made is indicated by the colouring of the relative icon. Fromm...
- Page 68 Display Operator Panel | ROTARY TABLE - ROTATING ARM SMART HOME GRID Path: Text/editable fields Based on the size of the pallet chosen in the previous screen, it is possible to view and vary the relative parameters shown on this page: F42 - F43: Adjusts the film extraction time during the attachment phase...
- Page 69 2 sets of fans (external and internal) blow air at 50% of their capacity rotation speed during phases F42 and F43 film delivery speed during time F42 film delivery speed during time F43 Function Value Fromm...
- Page 70 Display Operator Panel | ROTARY TABLE - ROTATING ARM By default the machine is set to wrap a pallet of dimensions: - 800 x 1200 mm - 1000 x 1200 mm Another variant that can affect the correct functioning of the “ARYA” system in addition to the dimensions is also the height of the product: - A small product size requires an adjustment of the F41 parameter to a greater height.
- Page 71 Film creasing Path: SMART HOME GRID Creasing of the film allows greater stabilisation of the load. Fromm...
- Page 72 Display Operator Panel | ROTARY TABLE - ROTATING ARM F34-F35-F36-F37-F38-F39 Cursor +/- or keys Adjusts, from 0 to 5, by how much to tighten the strip: 0 = 50 cm (all open) 1 = 40 cm 2 = 30 cm 3 = 20 cm 4 = 10 cm 5 = 0 cm (all closed)
- Page 73 F35 | CREASING IN THE ASCENT PHASE ON / OFF Selector Bringing the selector to the ON position (shown with the green colour) activates the upward creasing. Bringing the selector to the OFF position (shown with the red colour) deactivates the upward creasing. Fromm...
- Page 74 Display Operator Panel | ROTARY TABLE - ROTATING ARM F36 | HIGH WRAPS CREASING ON / OFF Selector Bringing the selector to the ON position (shown with the green colour) activates the high wraps with creasing at the top of the pallet.
- Page 75 If F63 is not activated, the trolley stops creasing under the top of the pallet. The text field shows the value set (value from 0 to 50). Press to save the set values and to return to the “HOME”. Fromm...
- Page 76 Display Operator Panel | ROTARY TABLE - ROTATING ARM Strip cutting Path: SMART HOME GRID The number of strips in which the film will be divided ranges from 3 to 5 depending on the option purchased. F65 | ACTIVATION OF STRIPS CUTTER OPTION ON / OFF Selector Bringing the selector to the ON position (shown with the green colour) enables cutting of the strips.
- Page 77 F68 | BLADE ACTIVATION DELAY IN THE DESCENT PHASE Cursor +/- or keys Adjusts the activation delay before the trolley descends. The text field shows the value in seconds set (minimum value 0.01 seconds, maximum value 20 seconds). Fromm...
- Page 78 Display Operator Panel | ROTARY TABLE - ROTATING ARM F69 | DEACTIVATION OF BLADES AT END OF STROKE Cursor +/- or keys At the end of the cycle, adjust the time for which the film continues to be in strips before the blades are deactivated. The text field shows the value in seconds set (minimum value 0.01 seconds, maximum value 20 seconds).
- Page 79 The page can only be accessed if the “layer” cycle is active. +/- Keys Adjusts the number of wraps of reinforcement for each layer. The text field shows the value set. Press to save the set values and to return to the “HOME”. Fromm...
- Page 80 Display Operator Panel | ROTARY TABLE - ROTATING ARM Number of final low wraps Path: SMART HOME GRID +/- Keys At the end of the cycle adjusts the number of final low wraps. The text field shows the value set. Press to save the set values and to return to the “HOME”.
- Page 81 Film thickness setting Path: SMART HOME GRID PROGRAM LATTINE F24 | FILM THICKNESS SETTING Numeric keypad If the film consumption option is activated, this thickness value of the film used must be set. Press to confirm and return to the “HOME”. Fromm...
- Page 82 Display Operator Panel | ROTARY TABLE - ROTATING ARM Additional reinforcement wraps Path: SMART HOME GRID INFORMATION There are 5 sets of reinforcement wraps applicable at different heights. F70-F73-F76-F79-F82 | ACTIVATION OF ADDITIONAL REINFORCEMENT WRAPS ON / OFF Selector Bringing the selector to the ON position (shown with the green colour) enables the additional reinforcement wraps.
- Page 83 Adjusts the pre-stretch in the up/down reinforcement wraps depending on the icon that is pressed between (10) and (11). Icon Activates the setting of the pull value in the upward reinforcement wraps using the keys/cursor (6). The text field shows the value set. Fromm...
- Page 84 Display Operator Panel | ROTARY TABLE - ROTATING ARM Icon Activates the setting of the pull value in the downward reinforcement wraps using the keys/cursor (6). The text field shows the value set. Icon Activates the pre-stretch value setting in the upward reinforcement wraps using the keys/cursor (7).
- Page 85 Specialist operator reserved area Path: SMART HOME GRID PROGRAM ENTER PSW Numeric keypad Type in the password to access the area reserved for specialist operators. Press to confirm. Fromm...
- Page 86 Display Operator Panel | ROTARY TABLE - ROTATING ARM SMART HOME GRID Path: Icon Press to access the “LANGUAGE SELECTION” page (see para. “” pag. 84). Icon Press to access the “UNIT OF MEASUREMENT” page (see para. “” pag. 85). Icon Press to access the “OPTIONS CHOICE”...
- Page 87 Icon Press to access, via password, the page with parameters reserved for qualified Technicians, authorised by the Manufacturer. WARNING Access to the page reserved for Technicians is forbidden to the machine operator. Fromm...
- Page 88 Display Operator Panel | ROTARY TABLE - ROTATING ARM Language selection Path: SMART HOME GRID Icons Press the icon for the language to be set in the software. The currently set language is highlighted with a red box. Press to confirm and return to the “HOME”. Rev.1 18/07/2023...
- Page 89 Unit of measurement Path: SMART HOME GRID Selectors Press the selector in the position at which to bring the relative cursor by selecting the desired unit of measurement from those available. Press to confirm and return to the “HOME”. Fromm...
- Page 90 Display Operator Panel | ROTARY TABLE - ROTATING ARM Options choice Path: SMART HOME GRID ON / OFF selectors Bringing the selector to the ON position (shown with the green colour) enables the corresponding function; its settings can be changed through the software pages. Bringing the selector to the OFF position (shown with the red colour) disables the corresponding function;...
- Page 91 The functions available are: F13: PULL F03-F04: TROLLEY UP / DOWN F02: TABLE ROTATION F26: FILM CUT F21: PRESSER ACTIVATION F34: CREASING F65: STRIP CUTTING F17: PRE-STRETCH F08: HEIGHT AT WHICH TO PERFORM THE REINFORCEMENT WRAPS Fromm...
- Page 92 Display Operator Panel | ROTARY TABLE - ROTATING ARM F11: CYCLE END HEIGHT F10: CYCLE START HEIGHT F22-V01: SHEET FEEDER CYCLE F29: SOFT START CYCLE F09: WRAPPING HEIGHT ADJUSTMENT F64: NUMBER OF FINAL LOW WRAPS F40: ARYA Rev.1 18/07/2023...
- Page 93 Path: SMART HOME GRID PROGRAM LATTINE Nr PLT PARZ ON/OFF N / / H323-H424 Text field Total and partial cycle meter. H020-H121 Resets the partial meter. H020-H121 Text field Displays the number of ignitions and the total ignition time. Fromm...
- Page 94 Display Operator Panel | ROTARY TABLE - ROTATING ARM H525-H626 Text field Displays the total film consumed and the number of roller rotations. H828 Text field Displays the number of rotations. H727 Text field Report the number of alarms. Press to save the set values and to return to the “HOME”. Rev.1 18/07/2023...
- Page 95 If the film consumption reading option is activated at the end of each cycle, a pop-up appears indicating how much film is used. Selector switch It is possible to express the quantity of film consumed in meters (mt) or grams (gr) by changing the cursor position. Press to confirm. Fromm...
- Page 96 Display Operator Panel | ROTARY TABLE - ROTATING ARM FUNCTIONS Set cycle: V01 ascent and descent; V02 ascent or descent; V03 manual; V05 layers; V06 eco; V07 high stability Table rotation speed: 05 ÷ 100 Trolley ascent speed: 05 ÷ 100 Trolley descent speed: 05 ÷...
- Page 97 F05 wraps with film open); if = wraps with film open); if = 0 0 , do not perform creasing , do not perform creasing at the base at the base 0: creasing in ascent disabled 1: creasing complete in ascent Fromm...
- Page 98 Display Operator Panel | ROTARY TABLE - ROTATING ARM Number of creasing wraps at the top of the product (Opt: advanced creasing) before performing creasing wraps, it rises by F63 cm; if F36 = 0, it does not perform creasing at high rotations 0: creasing in descent disabled 1: creasing complete in descent...
- Page 99 V2: additional reinforcement wraps enabled only in descent for SET 2 V3: additional reinforcement wraps enabled in ascent and descent for SET 2 Number of additional reinforcement wraps for SET 2 Height at which to perform the additional reinforcement wraps SET 2 Fromm...
- Page 100 Display Operator Panel | ROTARY TABLE - ROTATING ARM V0: additional reinforcement wraps disabled for SET 3 V1: additional reinforcement wraps enabled only in ascent for SET 3 V2: additional reinforcement wraps enabled only in descent for SET 3 V3: additional reinforcement wraps enabled in ascent and descent for SET 3 Number of additional reinforcement wraps for SET 3 Height at which to perform the additional reinforcement wraps...
- Page 101 Film elongation during additional descent reinforcement wraps Fromm...
- Page 102 Display Operator Panel | ROTARY TABLE - ROTATING ARM ALARMS If an error is triggered, the operator panel software will automatically open the alarms page. The error code is shown in field (1). Field (2) provides a brief description of how to resolve the error. Once the operator has resolved all the active errors it is possible to press the key (4).
- Page 103 If a sensor is broken or the plate is deformed, they must be replaced. Check the electrical contacts and that the signal reaches the card. If the sensor is broken or the cable is interrupted, replace it. Fromm...
- Page 104 Display Operator Panel | ROTARY TABLE - ROTATING ARM Code Description Causes Solutions Carriage ascend/descend - The sensor does not read the - Adjust the position of the sensor compared to anomaly petals because it is too far from the the petals of the phonic wheel (distance <...
- Page 105 - Make sure there are no mechanical obstacles. - Check sensor operation Creasing block during - Creasing blocked on the bottom - Check motor operation. opening sensor. - Check electrical connection - Make sure there are no mechanical obstacles. - Check sensor operation Fromm...
- Page 106 Display Operator Panel | ROTARY TABLE - ROTATING ARM Code Description Causes Solutions Top limit switch error: did - The carriage blocked during ascent. - Check motor operation. not engage during ascent - Check operation of the top sensor and replace command (creasing) if broken.
- Page 107 - Check the status of the photocells. while unloading the pallet from the rotating roller unit. The two photocells on the unloading line are both engaged. (Tables) Alarm, maximum timeout - Timeout loading pallet. - Check loading of the pallet. during pallet loading (Tables) Fromm...
- Page 108 Display Operator Panel | ROTARY TABLE - ROTATING ARM Code Description Causes Solutions Alarm, maximum - Timeout unloading pallet. - Check loading of the pallet. timeout during pallet unloading (Tables) Alarm maximum - Timeout transporting pallet. - Check the pallet transport on the roller units. timeout during transport of a pallet on the entry roller units...
- Page 109 Code Description Causes Solutions Generic momentary fault on connector JP6 (it has not been identifi ed on which channel) Short circuit or overload on the JP10 clutch output Fromm...
- Page 110 Display Operator Panel | ROTARY TABLE - ROTATING ARM Restart after an alarm or as result of torn / finished film - Wait until the machine has stopped and brought the trolley to the reel replacement level (alarm E09). - Solve the problem that triggered the alarm or replace the reel should this be finished, attach the film to the pallet again.
- Page 112 Fromm Holding AG Hinterbergstrasse 26 6312 Steinhausen Switzerland...
Need help?
Do you have a question about the FS 2000 and is the answer not in the manual?
Questions and answers